Summary: #
The First screen is the Summary screen
The Summary screen provides a quick and organized view of the patient’s details, making it easy to manage their information. It includes sections like Patient Information, Vitals, Intake/Output, Medication, Notes, Ventilation, Operations/Procedures, and Documents.
- You can add new entries, refresh the data, or expand each section for more details.
- This screen helps keep all the essential patient records in one place, making updates and management simple and efficient.
It’s designed to give you a clear and comprehensive overview at a glance.

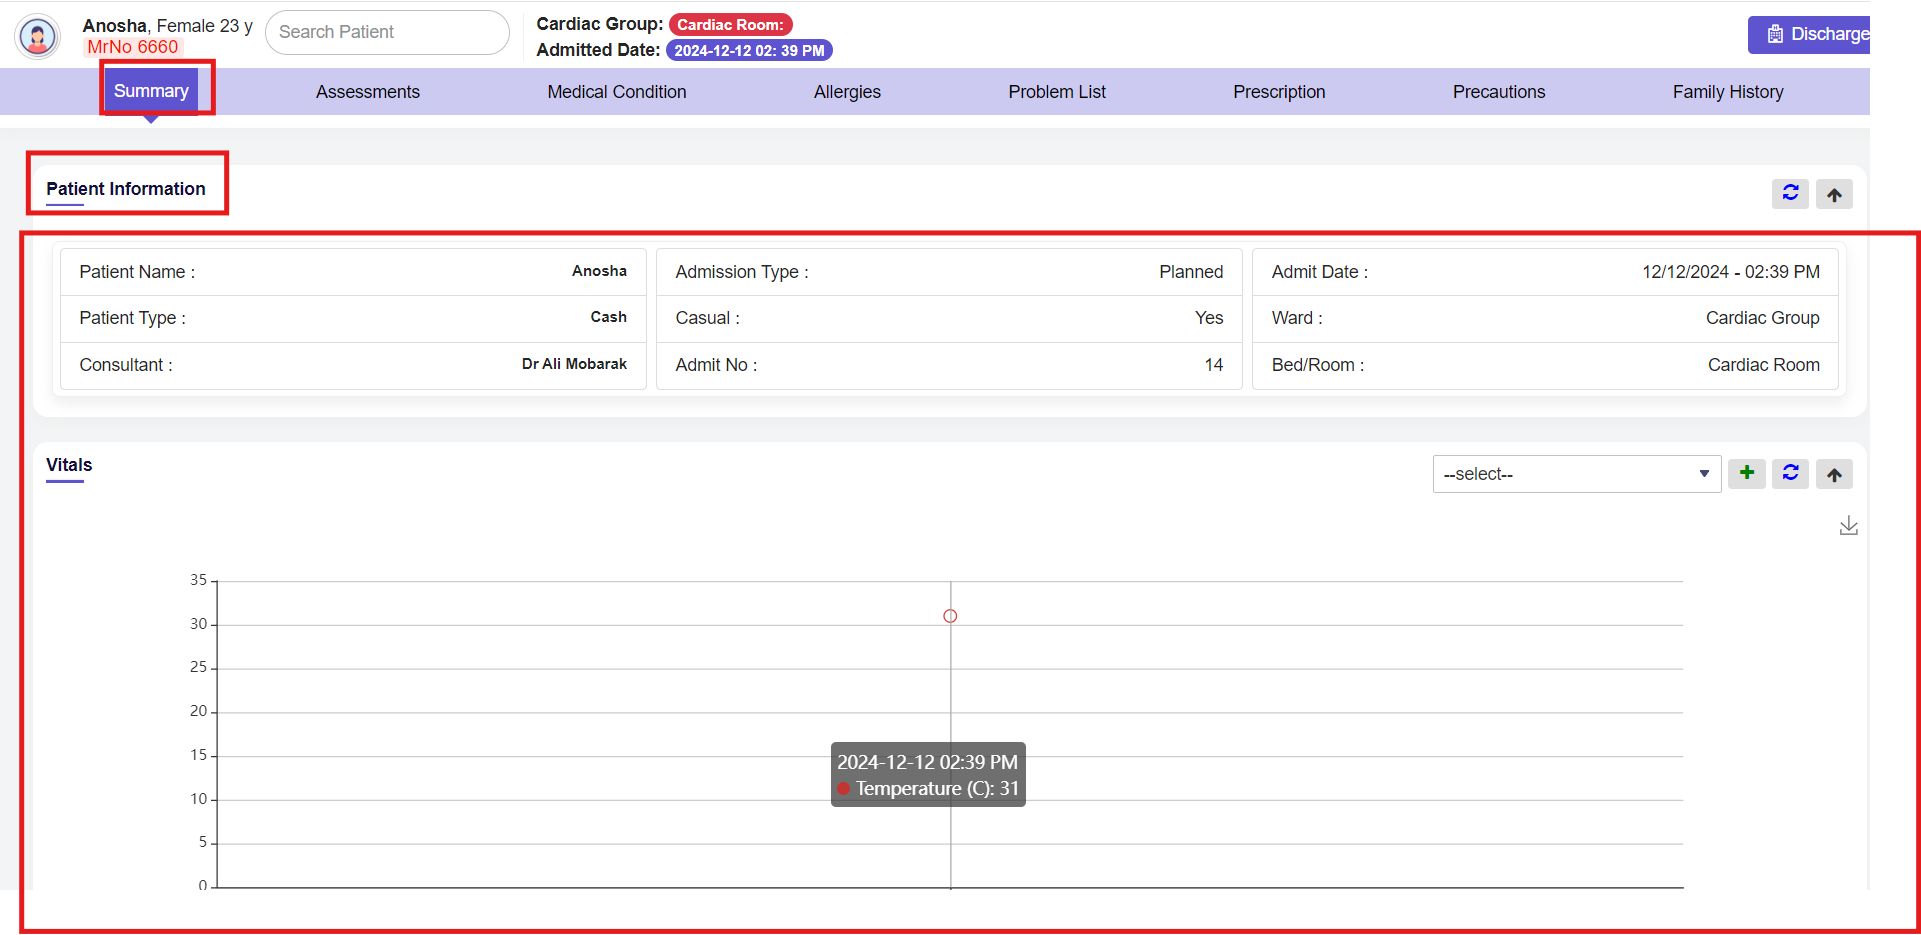
Patient Information: #
The Patient Information section displays all the key details automatically retrieved from the information entered during the patient’s admission. This feature ensures accuracy and provides a quick overview of the patient’s essential data.
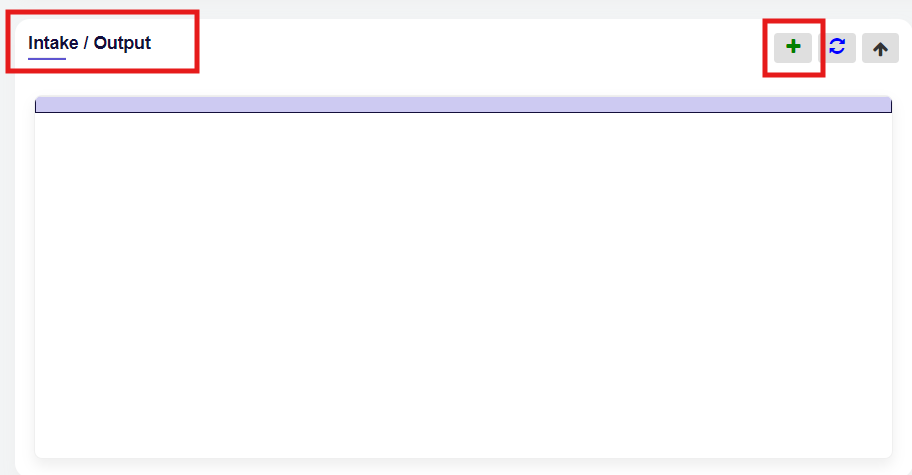
Intake/Output: #
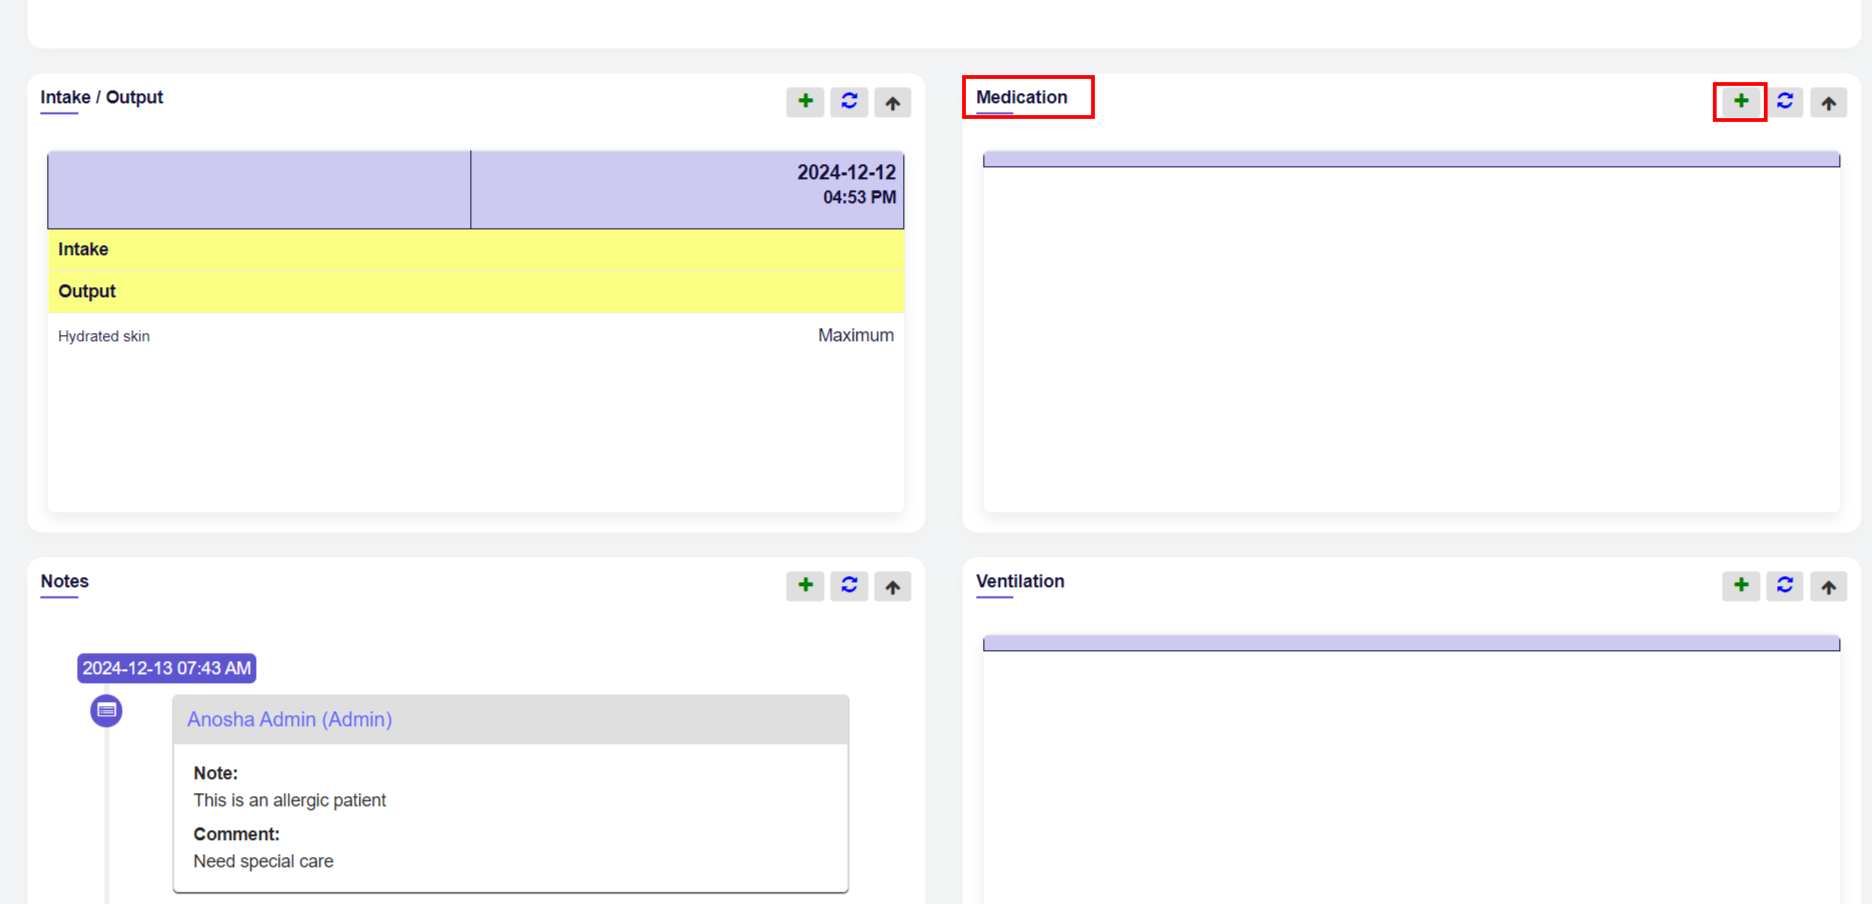
The Intake and Output section monitors the patient’s intake of substances and their corresponding output, providing crucial data for tracking the patient’s overall health and ensuring proper care.
Click on the ADD button to add new data.
When you click the ADD button, a new window will appear titled Add Input Output.

Click on INTAKE and enter data in fields one by one.
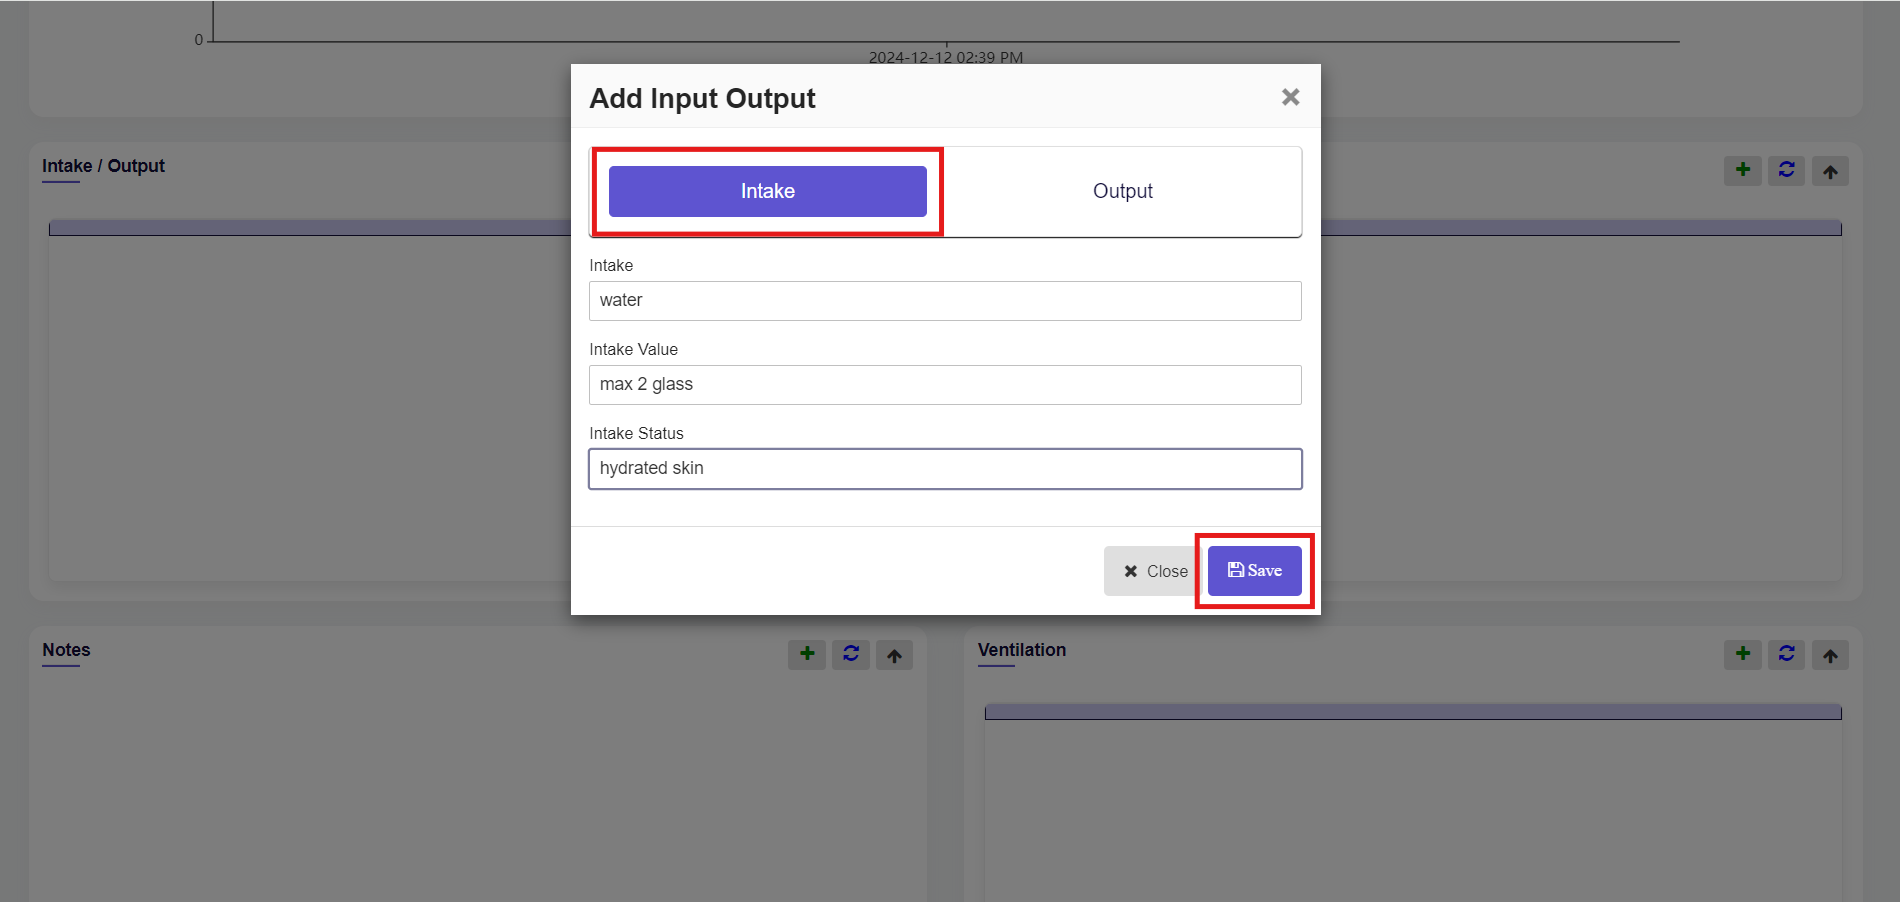
Click on OUTPUT and enter data in fields one by one.
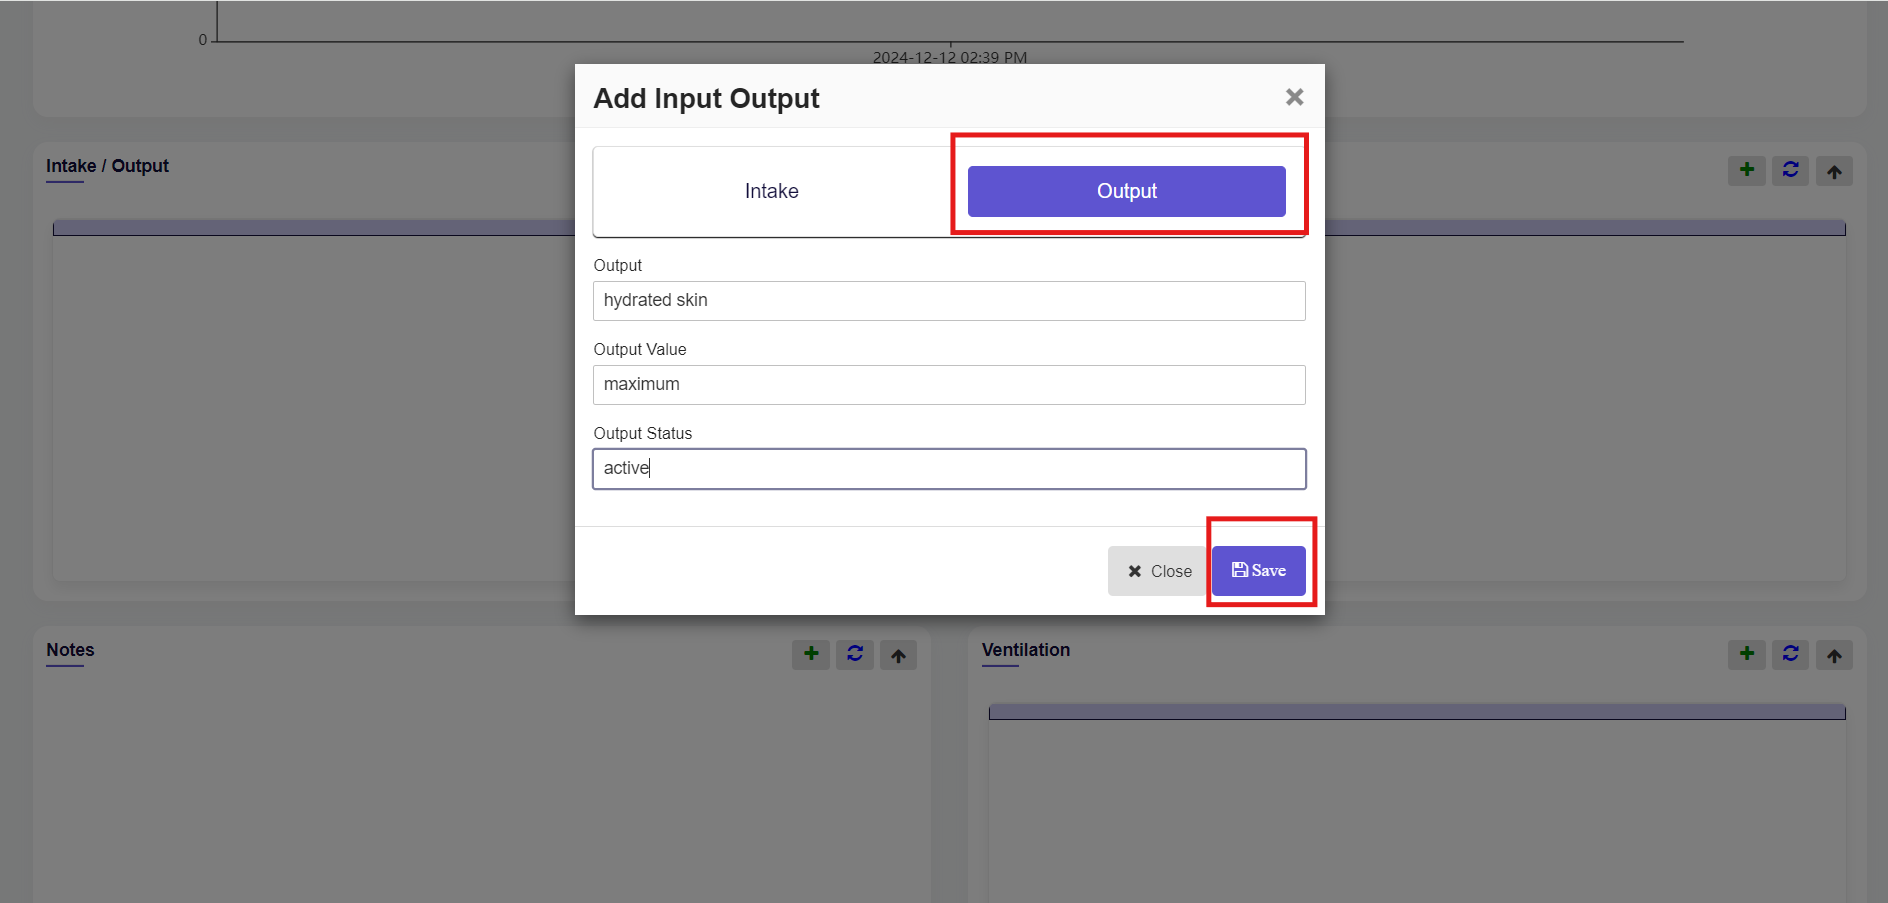
After filling in all the fields click on the save button.
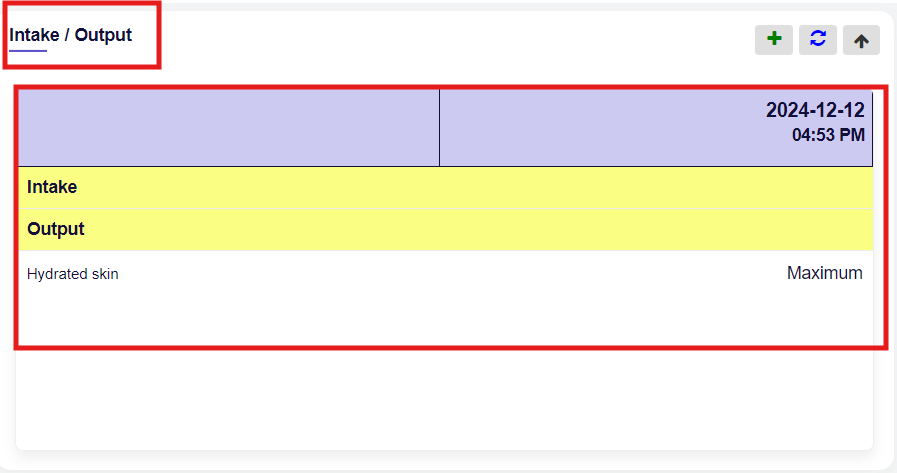
When you click on the save button data will be saved successfully.
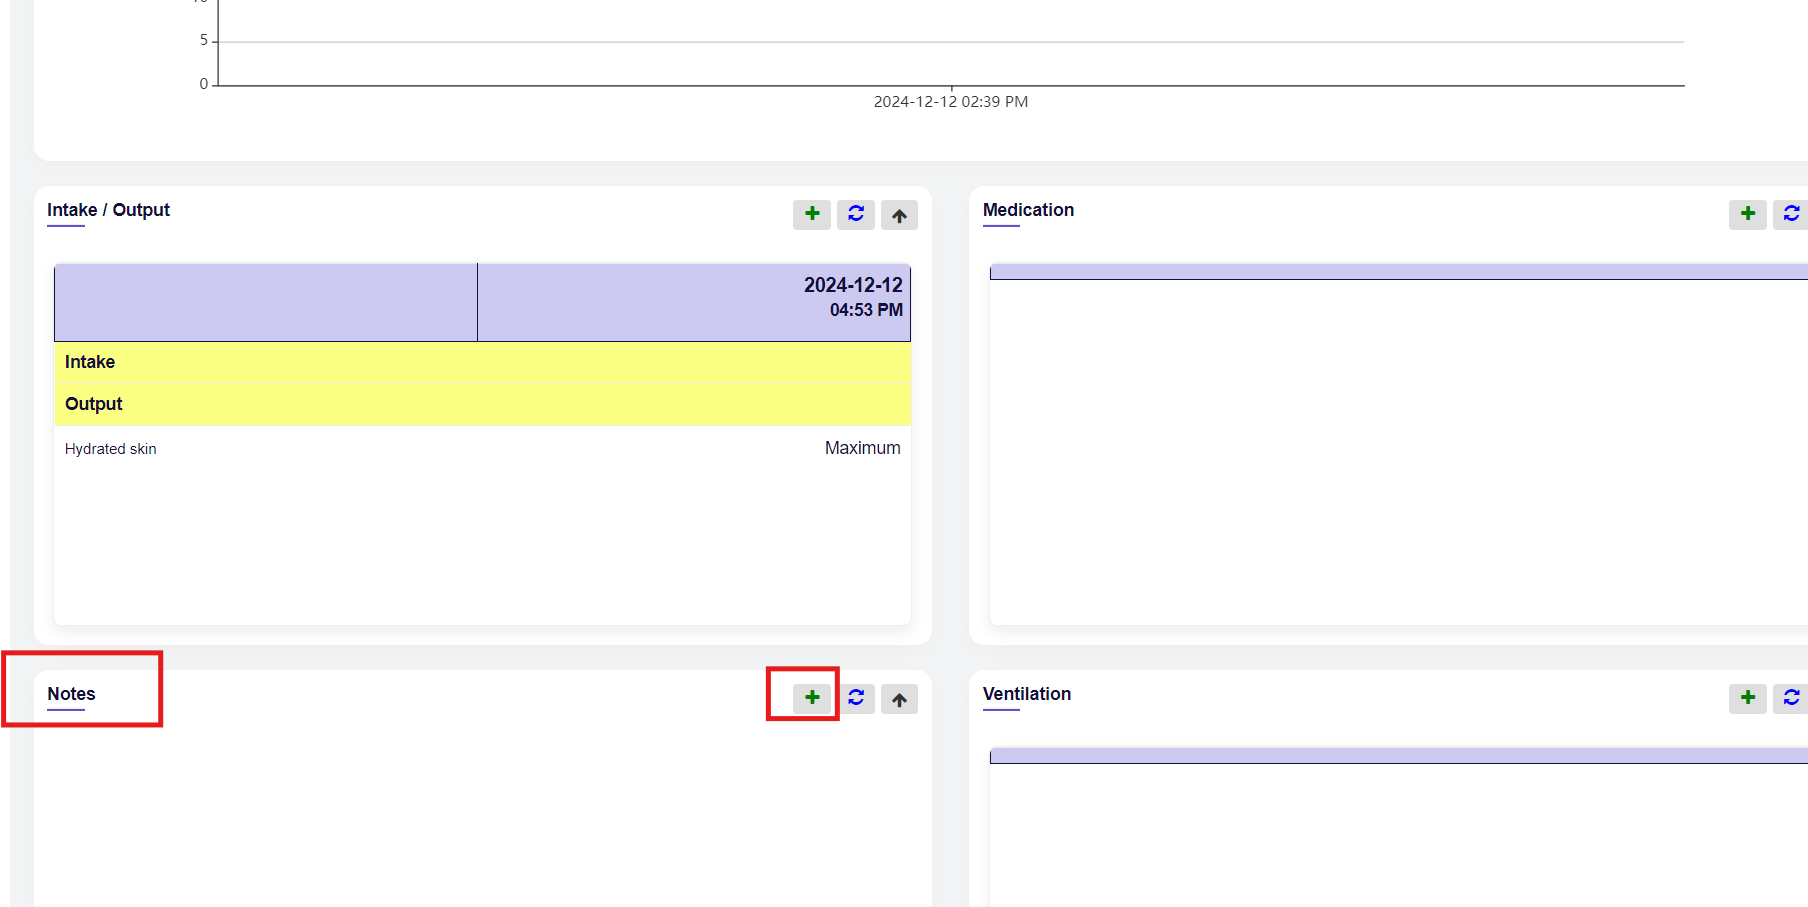
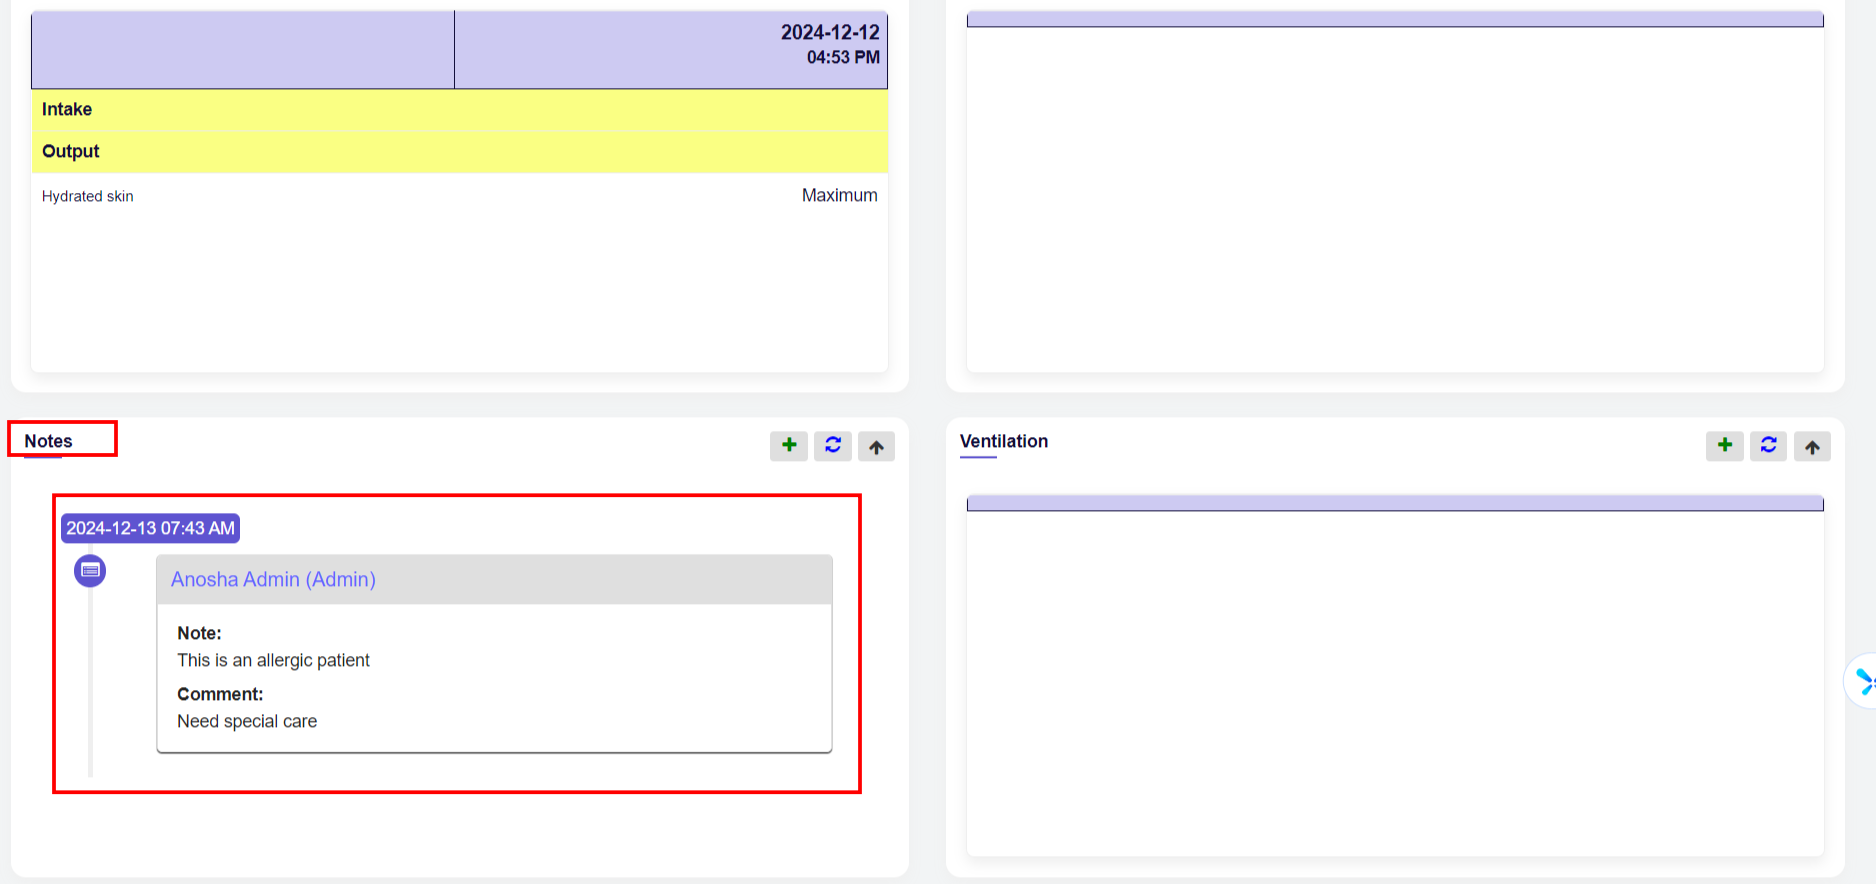
Notes: #
The next tab is Notes you can add any notes related to the patient by clicking on the ADD icon.
When you click on the ADD icon, a new window will appear containing multiple text fields. Enter the required data into each field.
After entering data click on the save button.
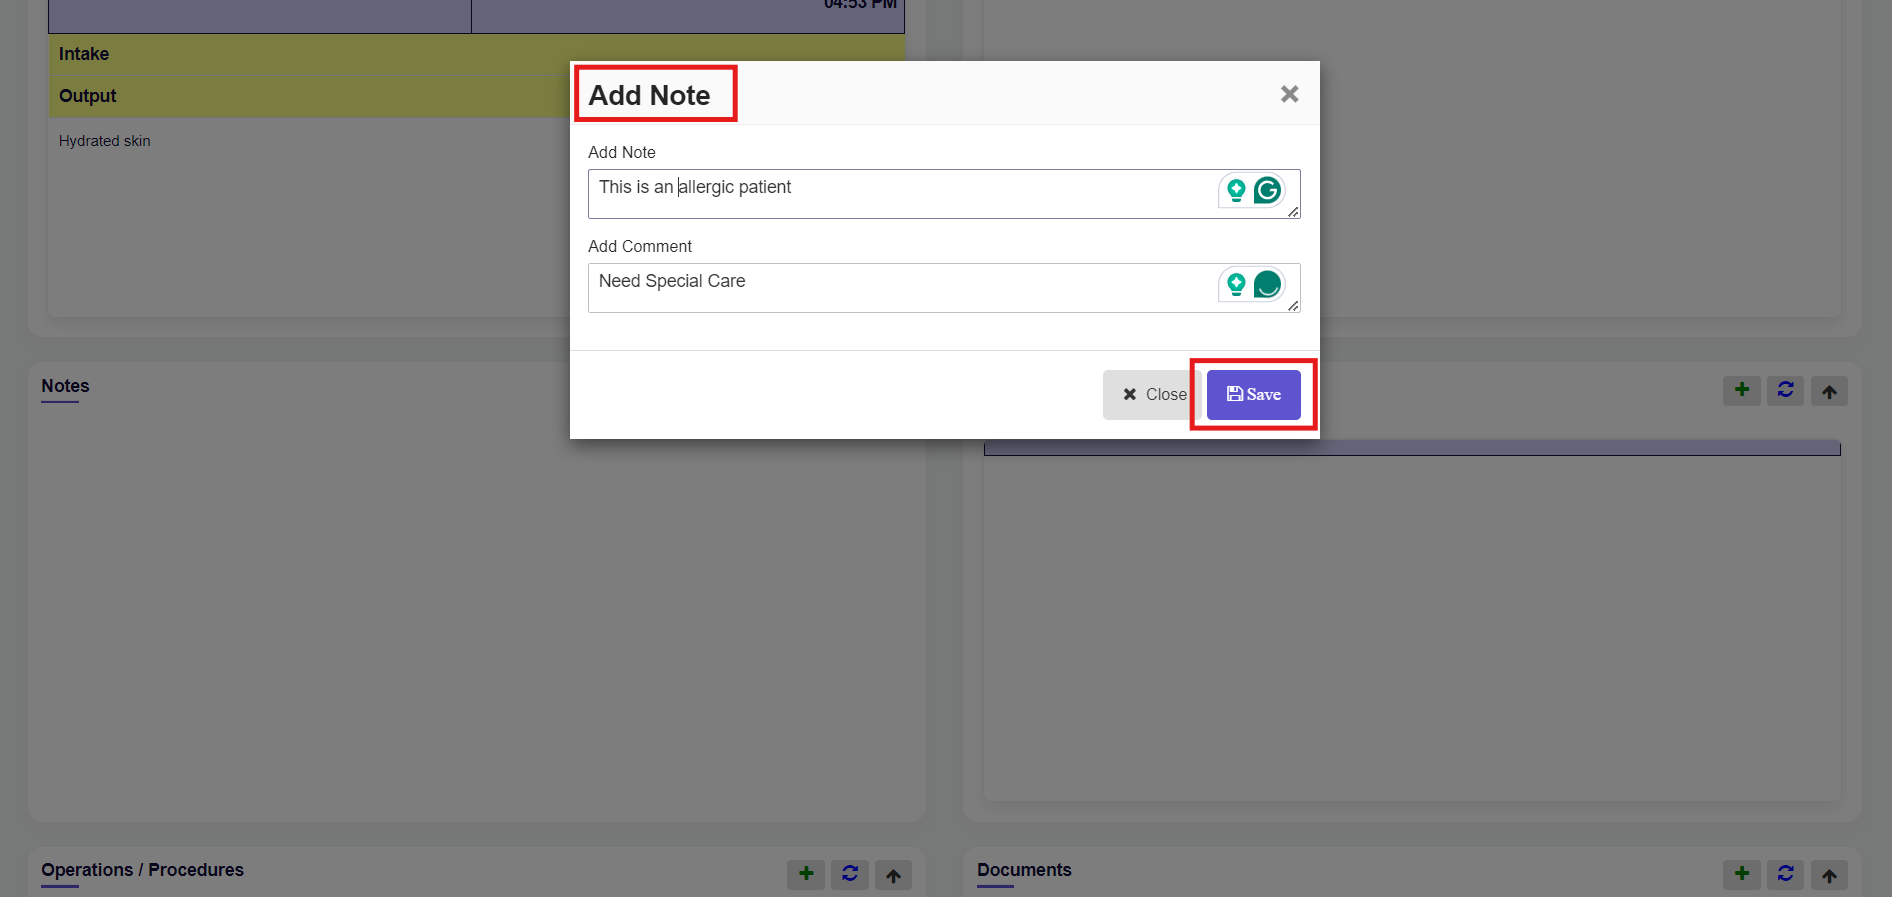
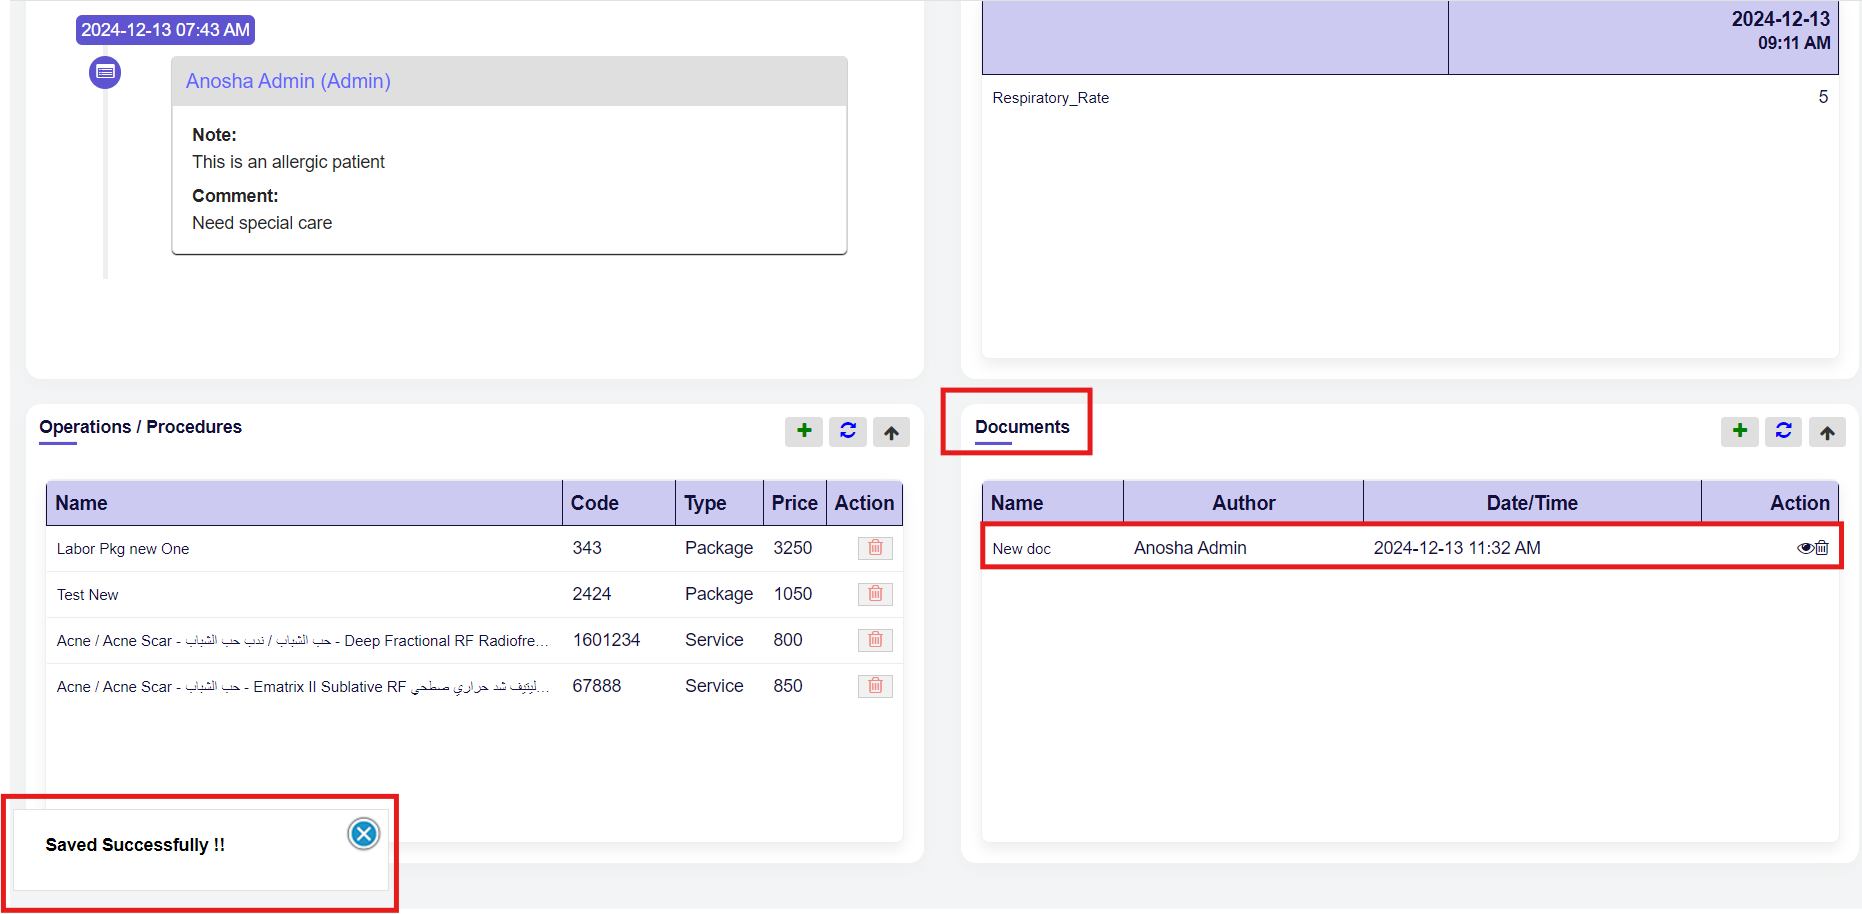
When you click on the save button (Saved Successfully) message will appear and the record of Notes will be saved.
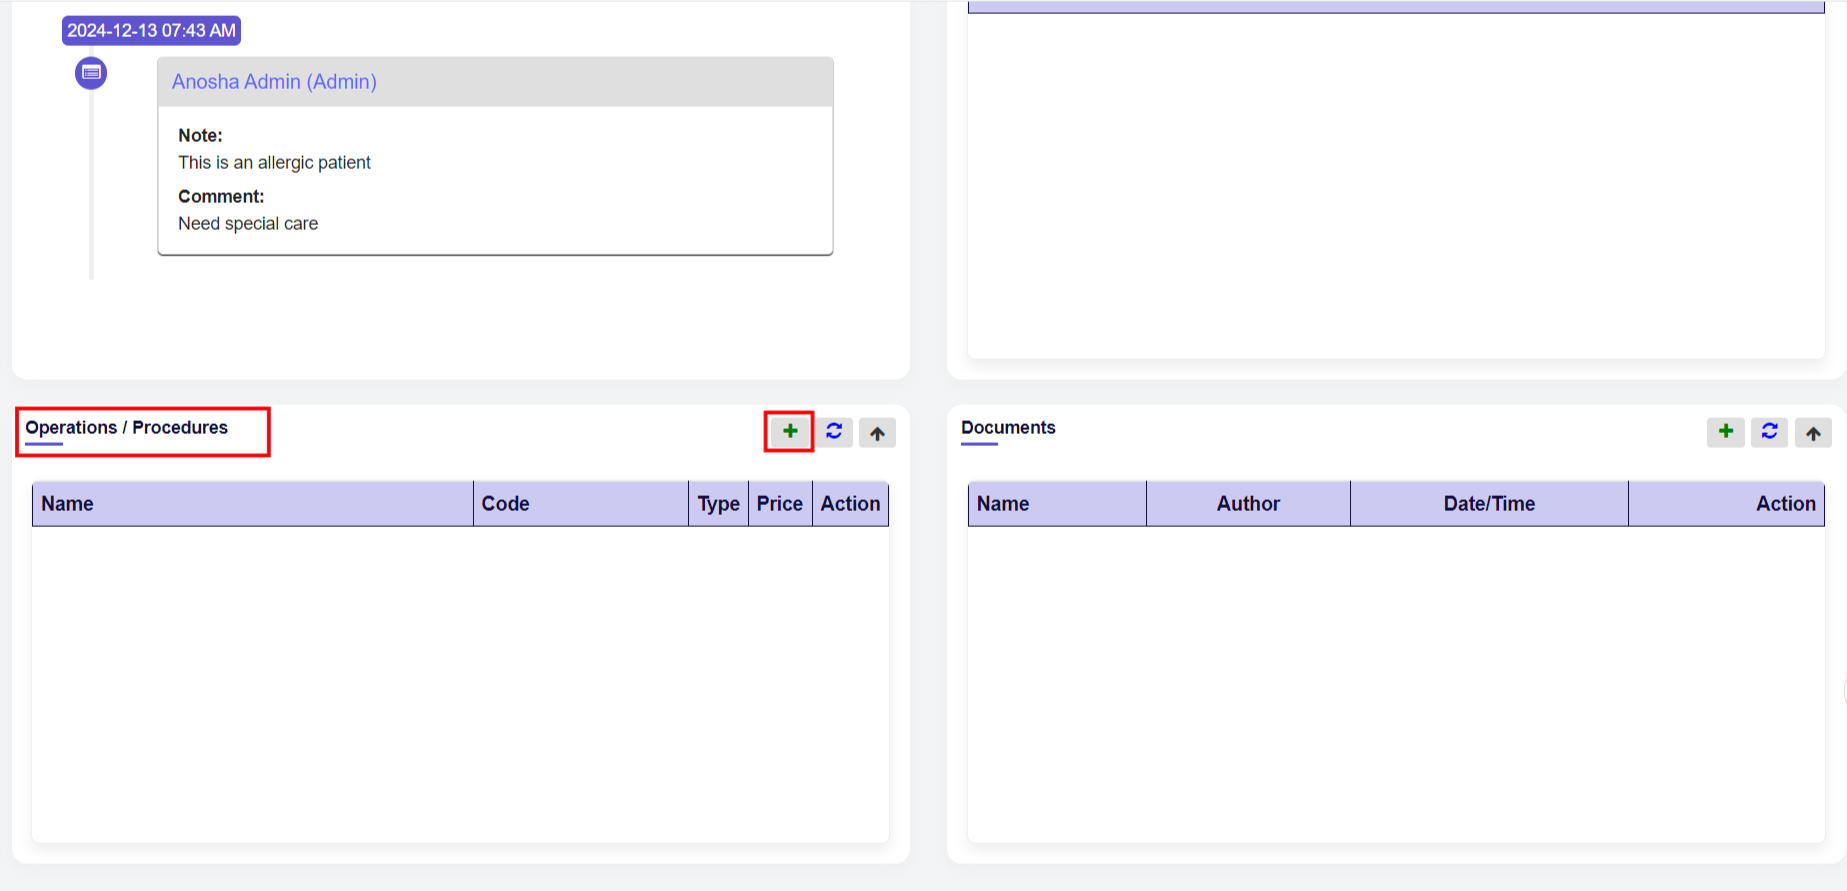
Operations and Procedures: #
The next tab is Operations and Procedures you can add Services that are required to the patient by clicking on the ADD icon.
When you click on the ADD icon, a new screen titled Bill Items will appear. This screen allows you to add services and packages for the patient as needed.
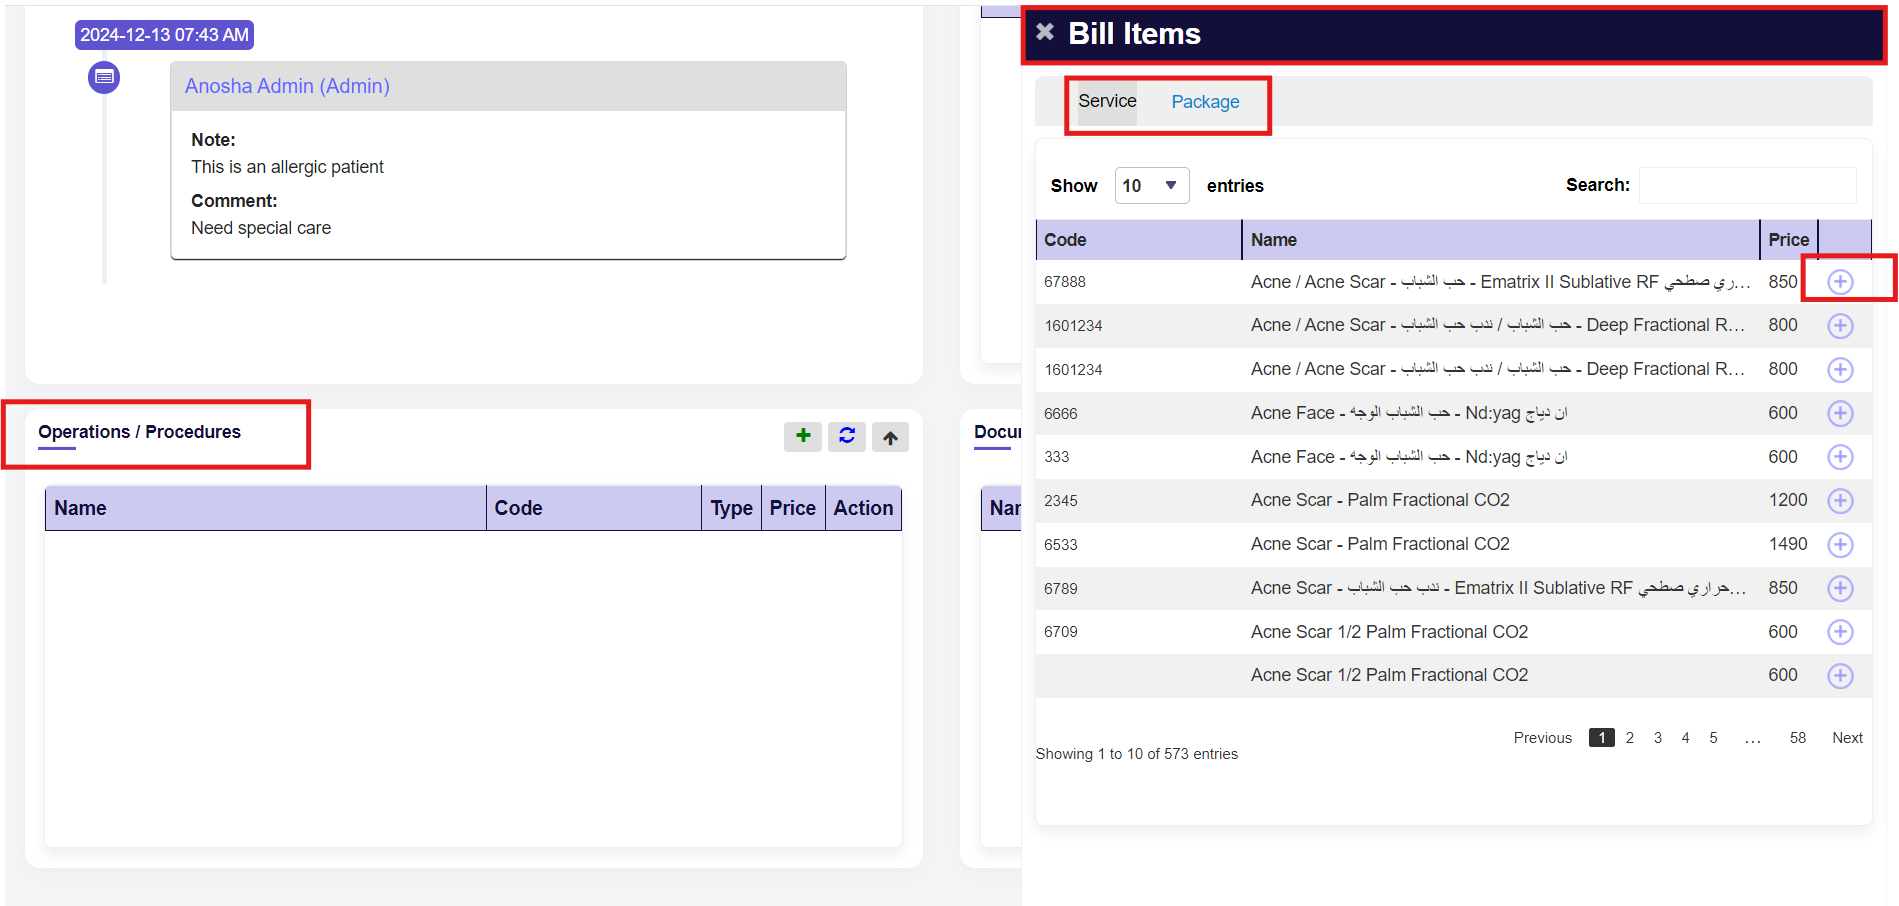
Just add the service and package by clicking on the ADD icon.
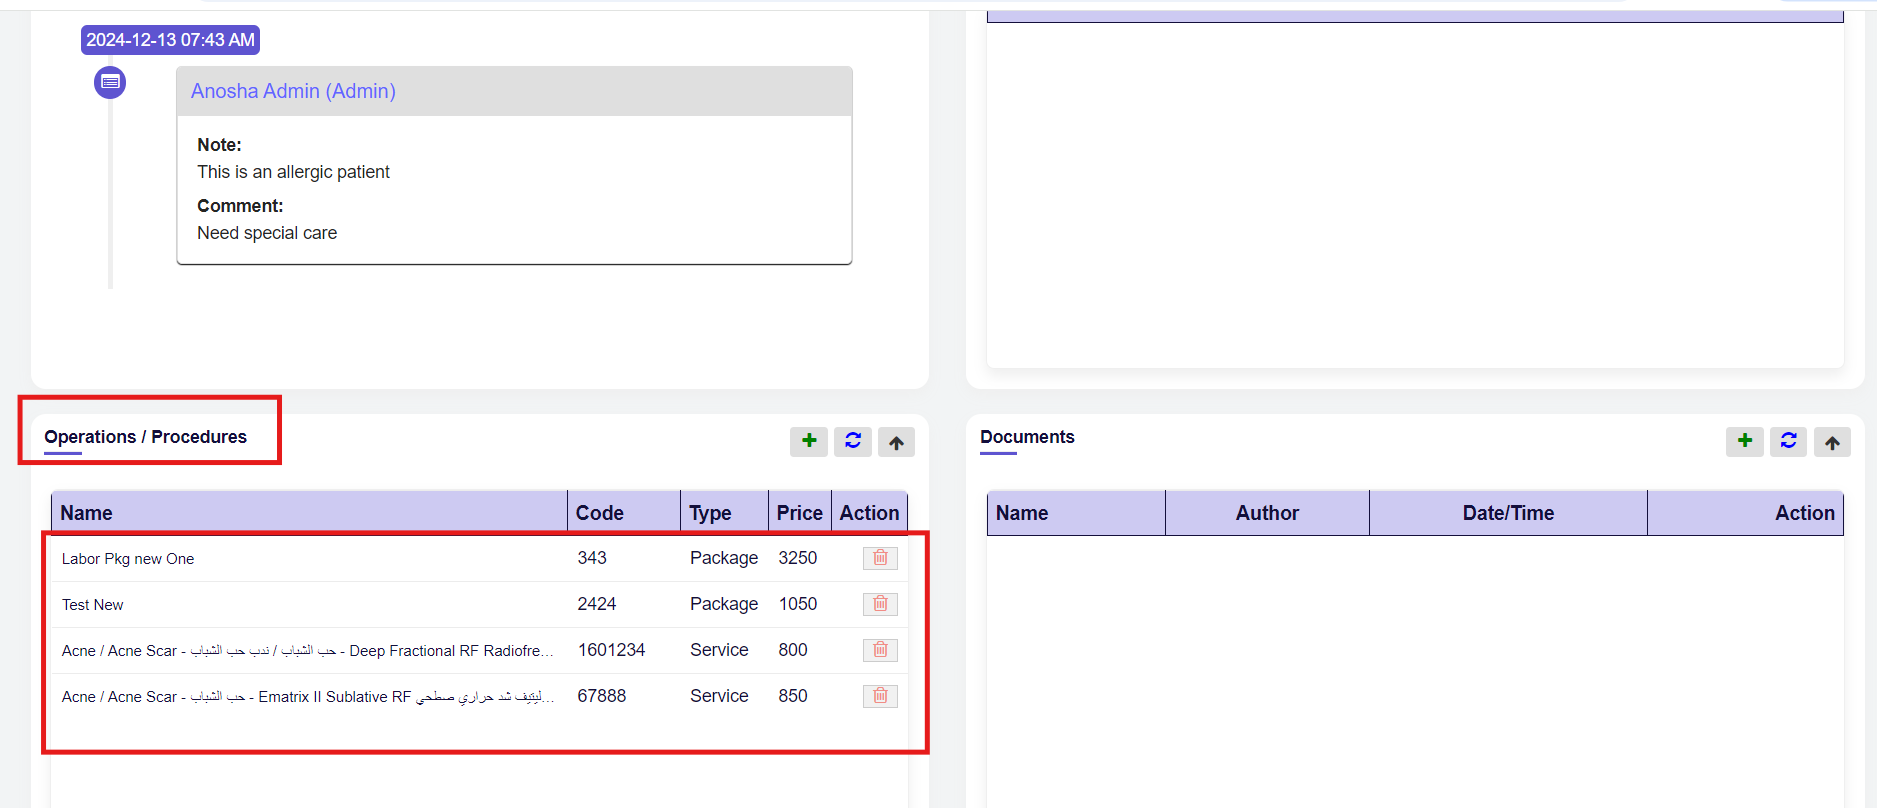
When you click the ADD icon, the selected services and packages are successfully added. The record is then saved in the Operations and Procedures section for easy tracking and reference.
Vitals: #
The next section is for vitals.
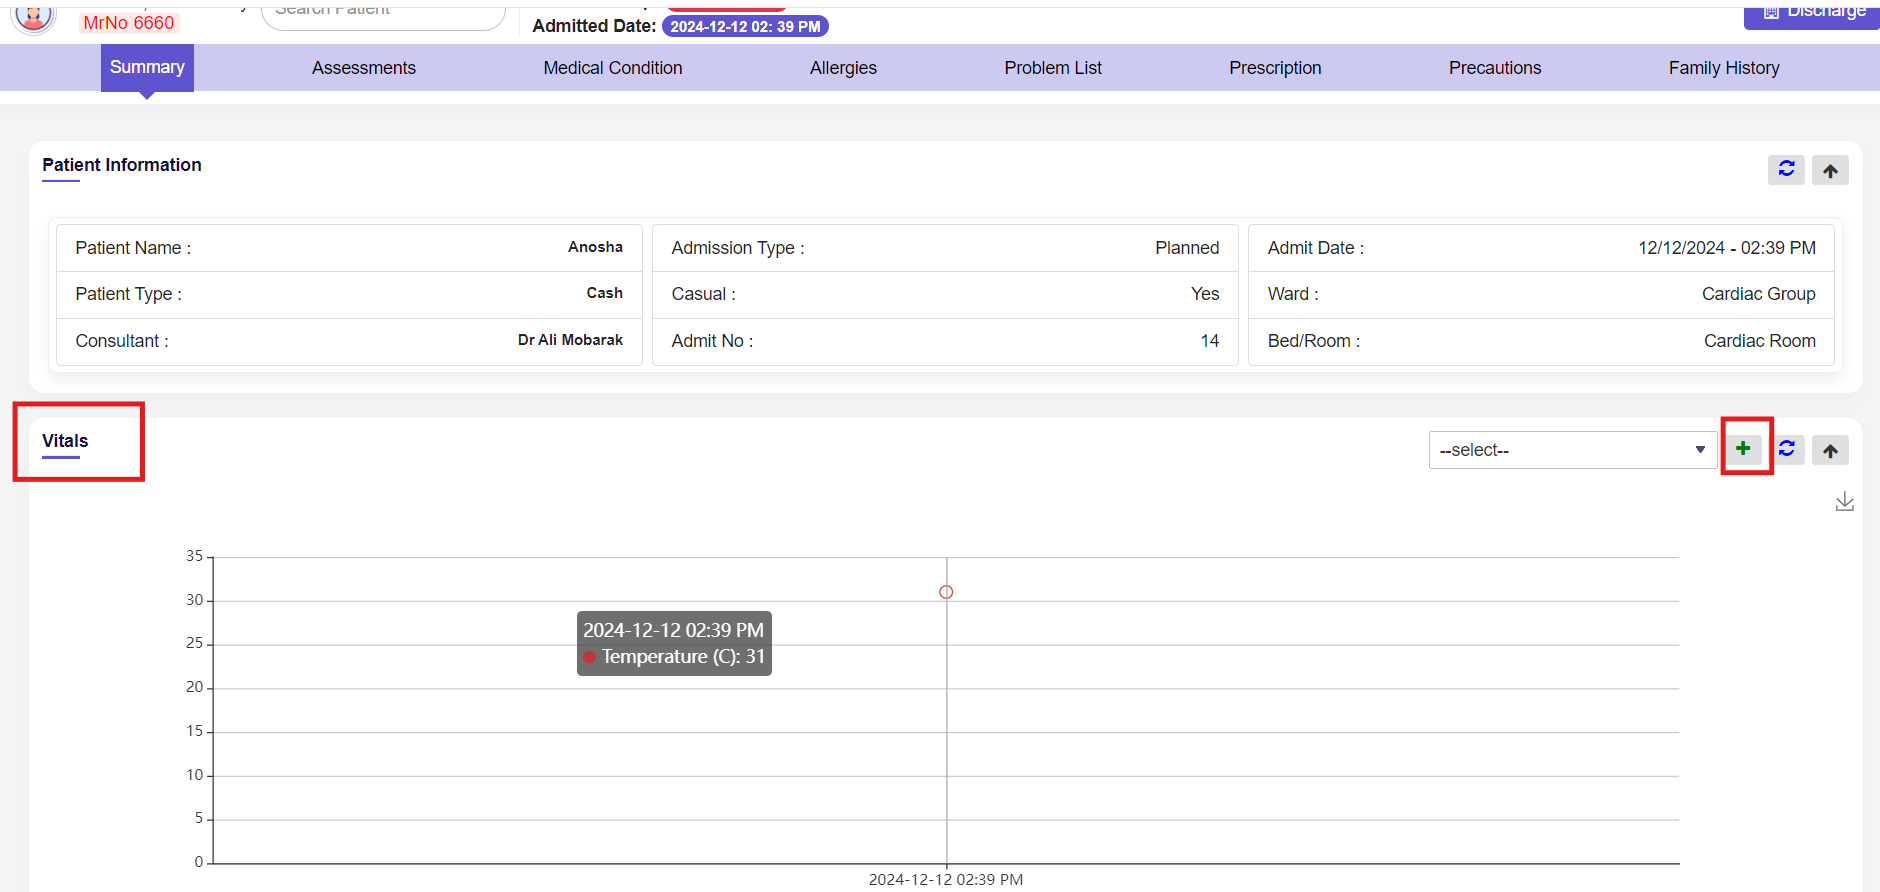
This section automatically fetches the vital records of the patient that were entered during the admission process. It contains a dropdown menu from which you can select the specific vital information you want to view. We can also add vitals from this screen by clicking on the ADD Icon.
The information related to specific vitals will be shown in the Graph.
Medication: #
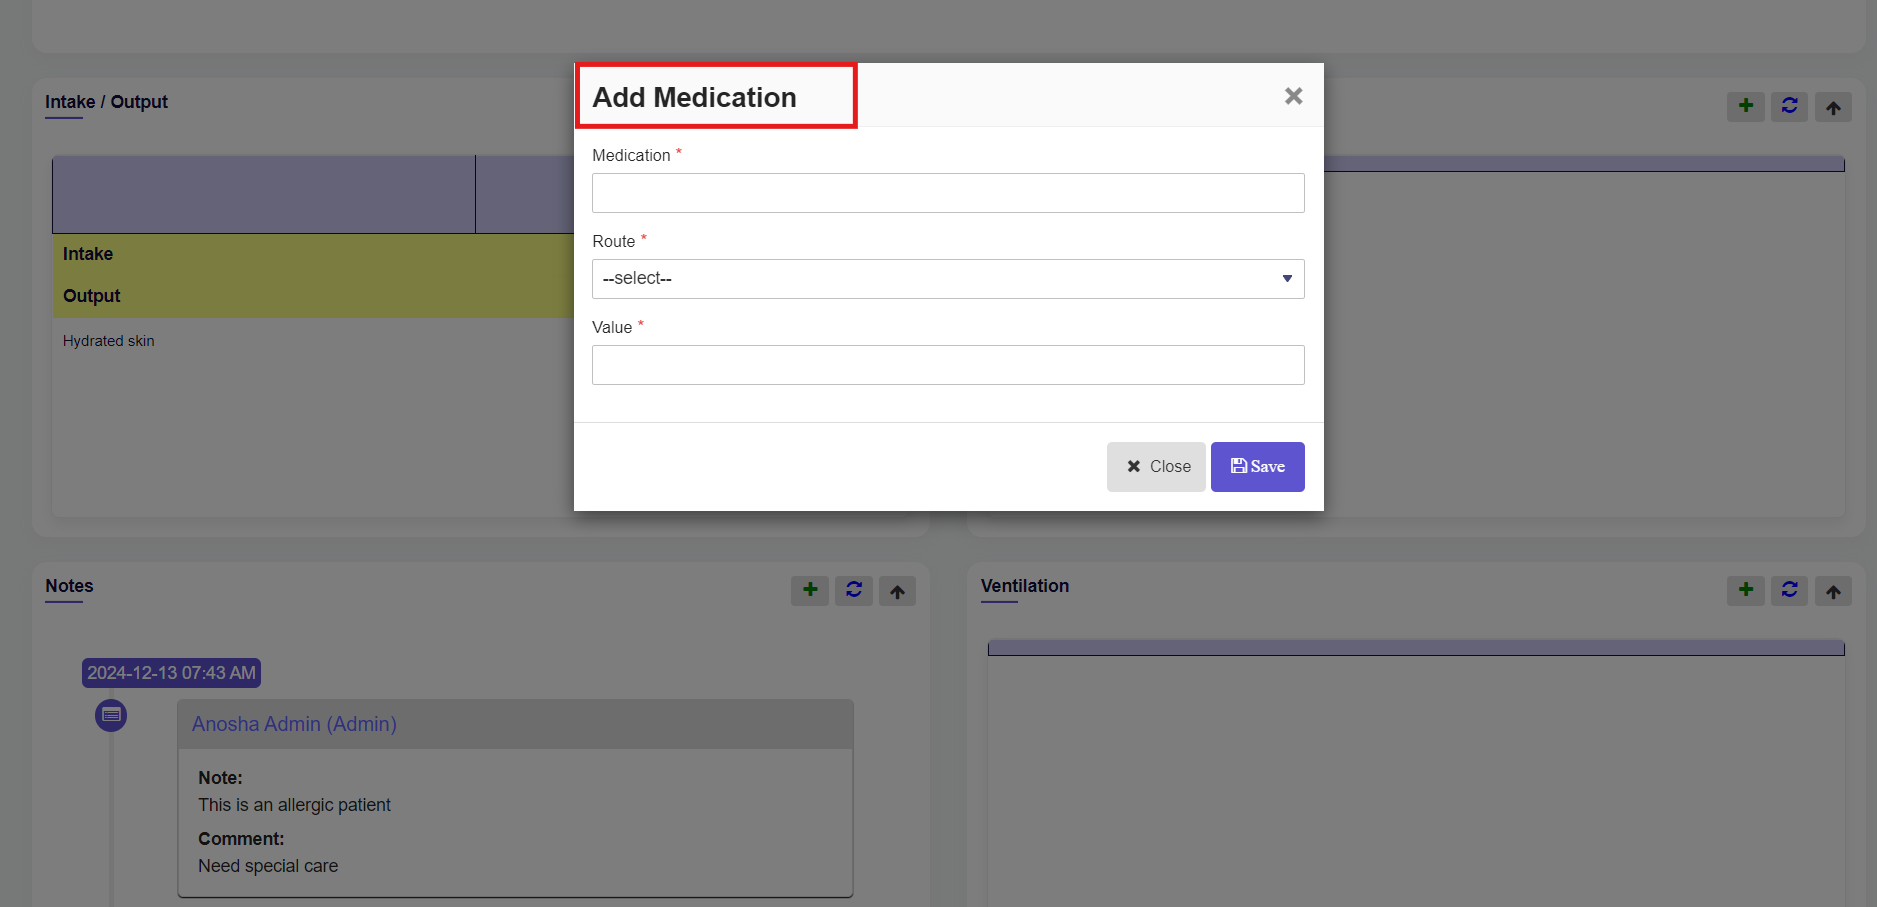
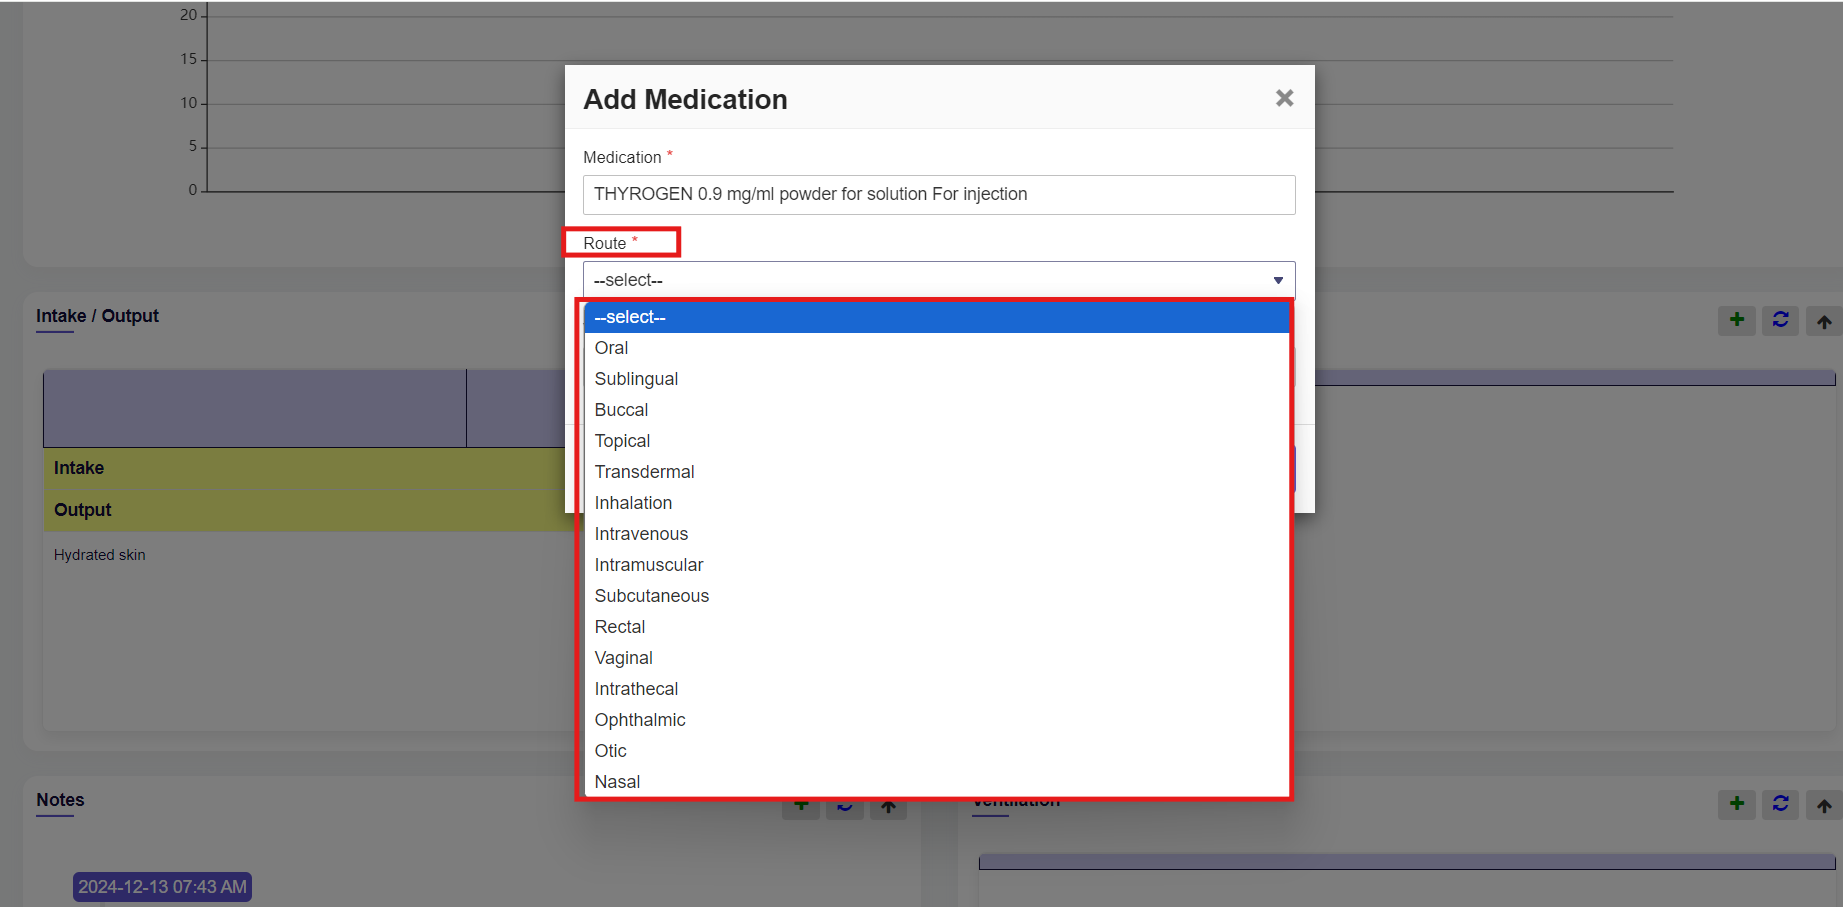
The next tab is Medication. You can add medications by clicking on the ADD icon.
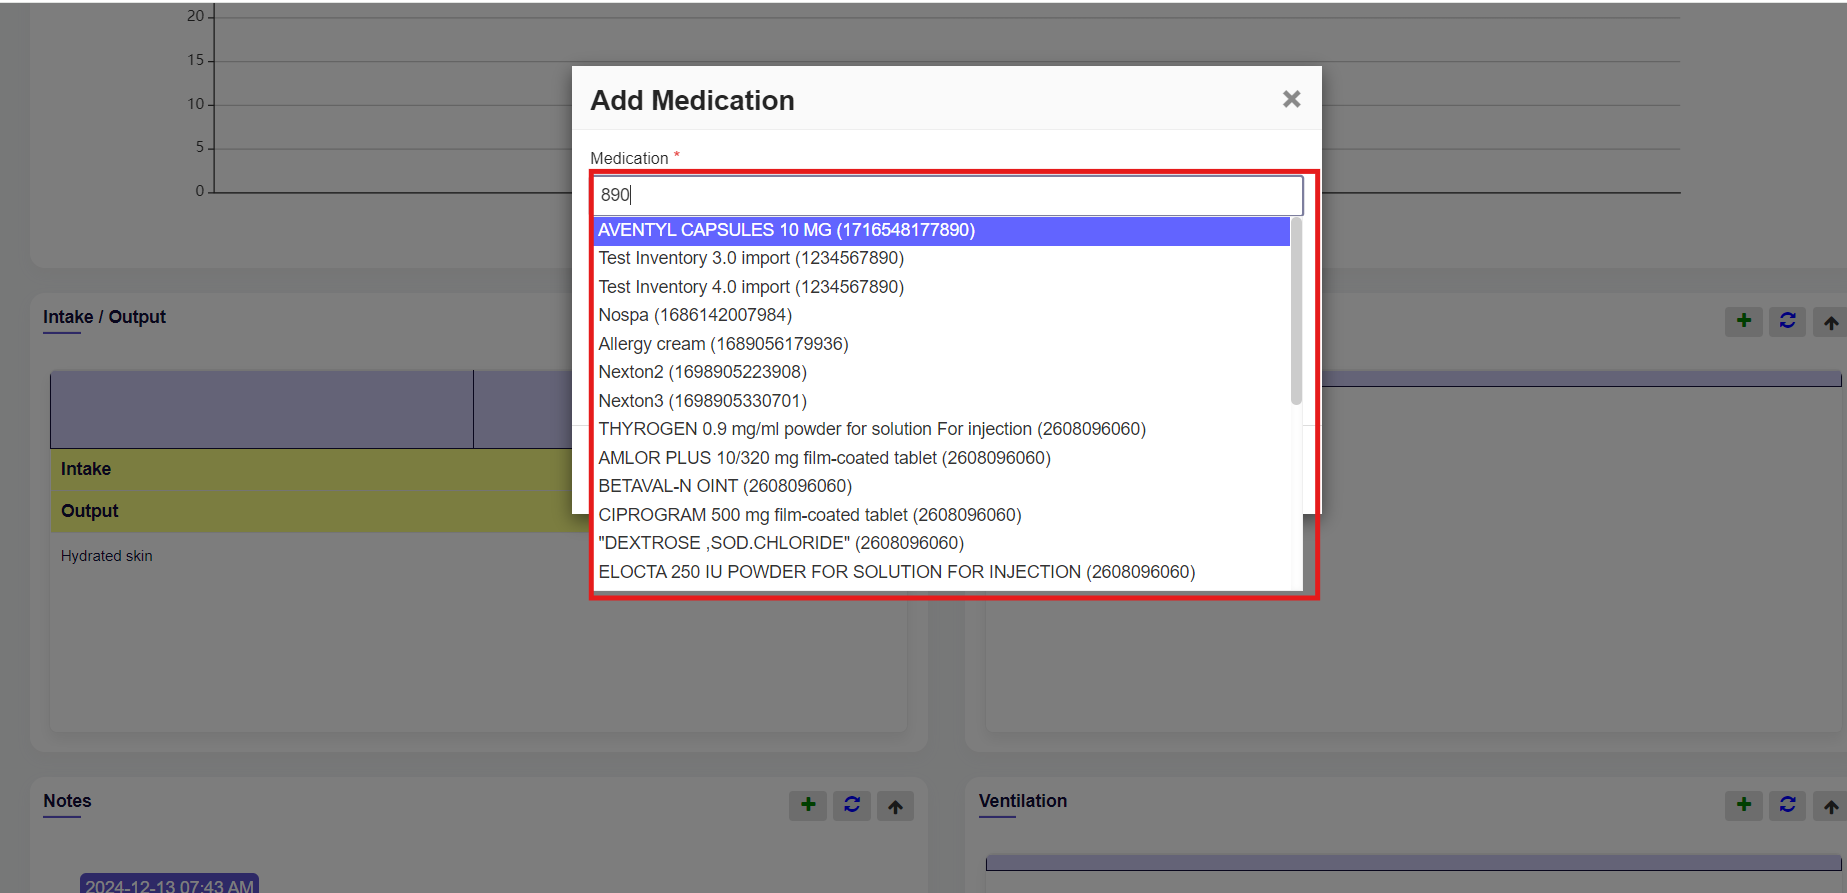
When you click on the ADD icon, a new window will appear containing multiple text fields. Enter the required data into each field.
Enter medication which is ICD-10 Code mapping you just have to enter the three-digit ICD-Code.
Select the Route from the drop-down.
The route of medication indicates how it will be taken. You can select from options like oral, intravenous, or topical, depending on how the medication needs to be absorbed by the body. Simply choose the appropriate route from the drop-down menu.
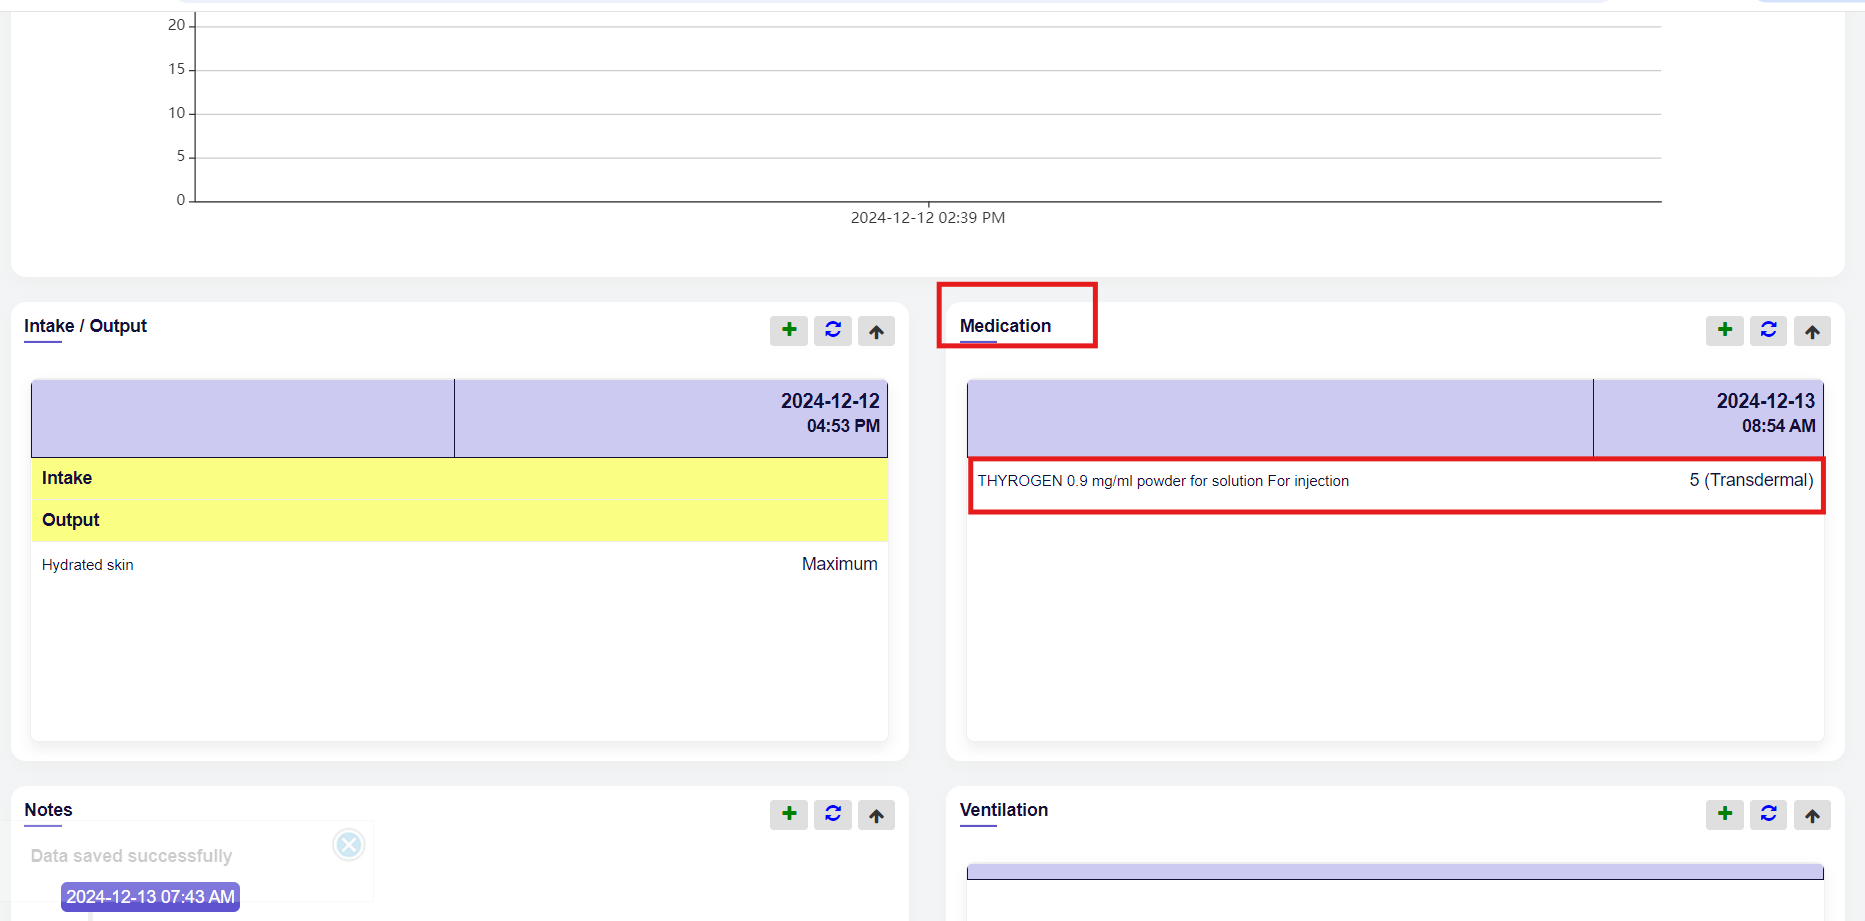
Enter the value and click on the save button.
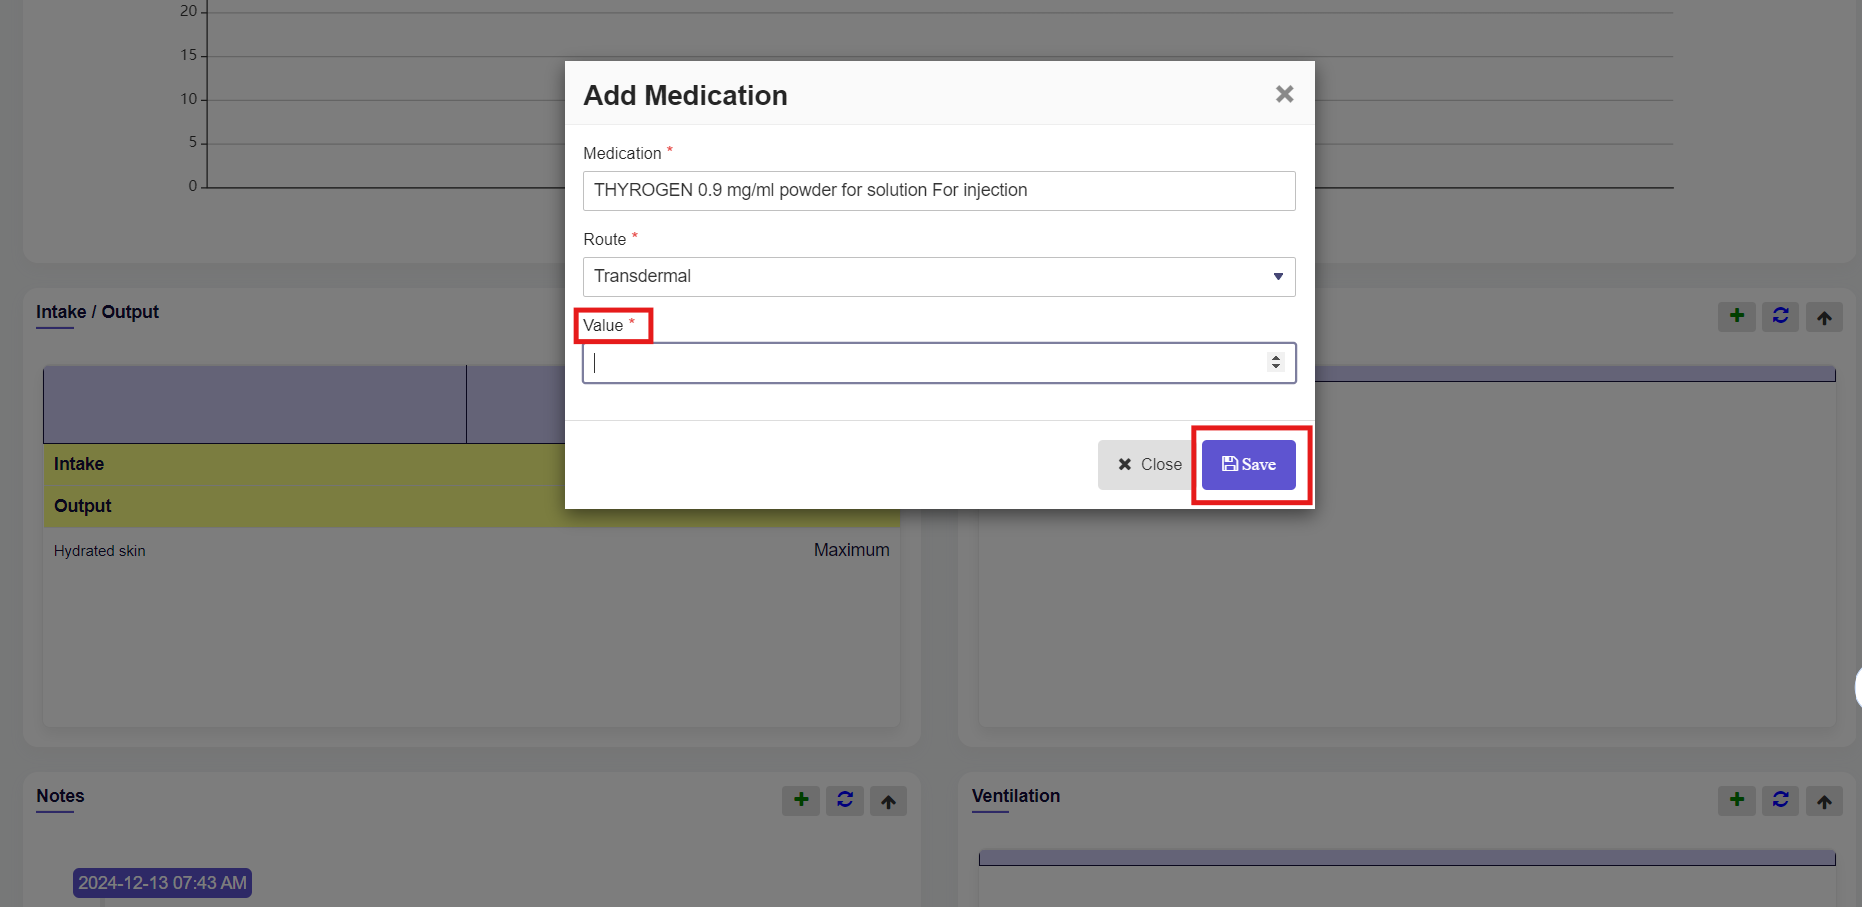
When you click on the save button (Data Saved Successfully) message will appear and the record of Medications will be saved.
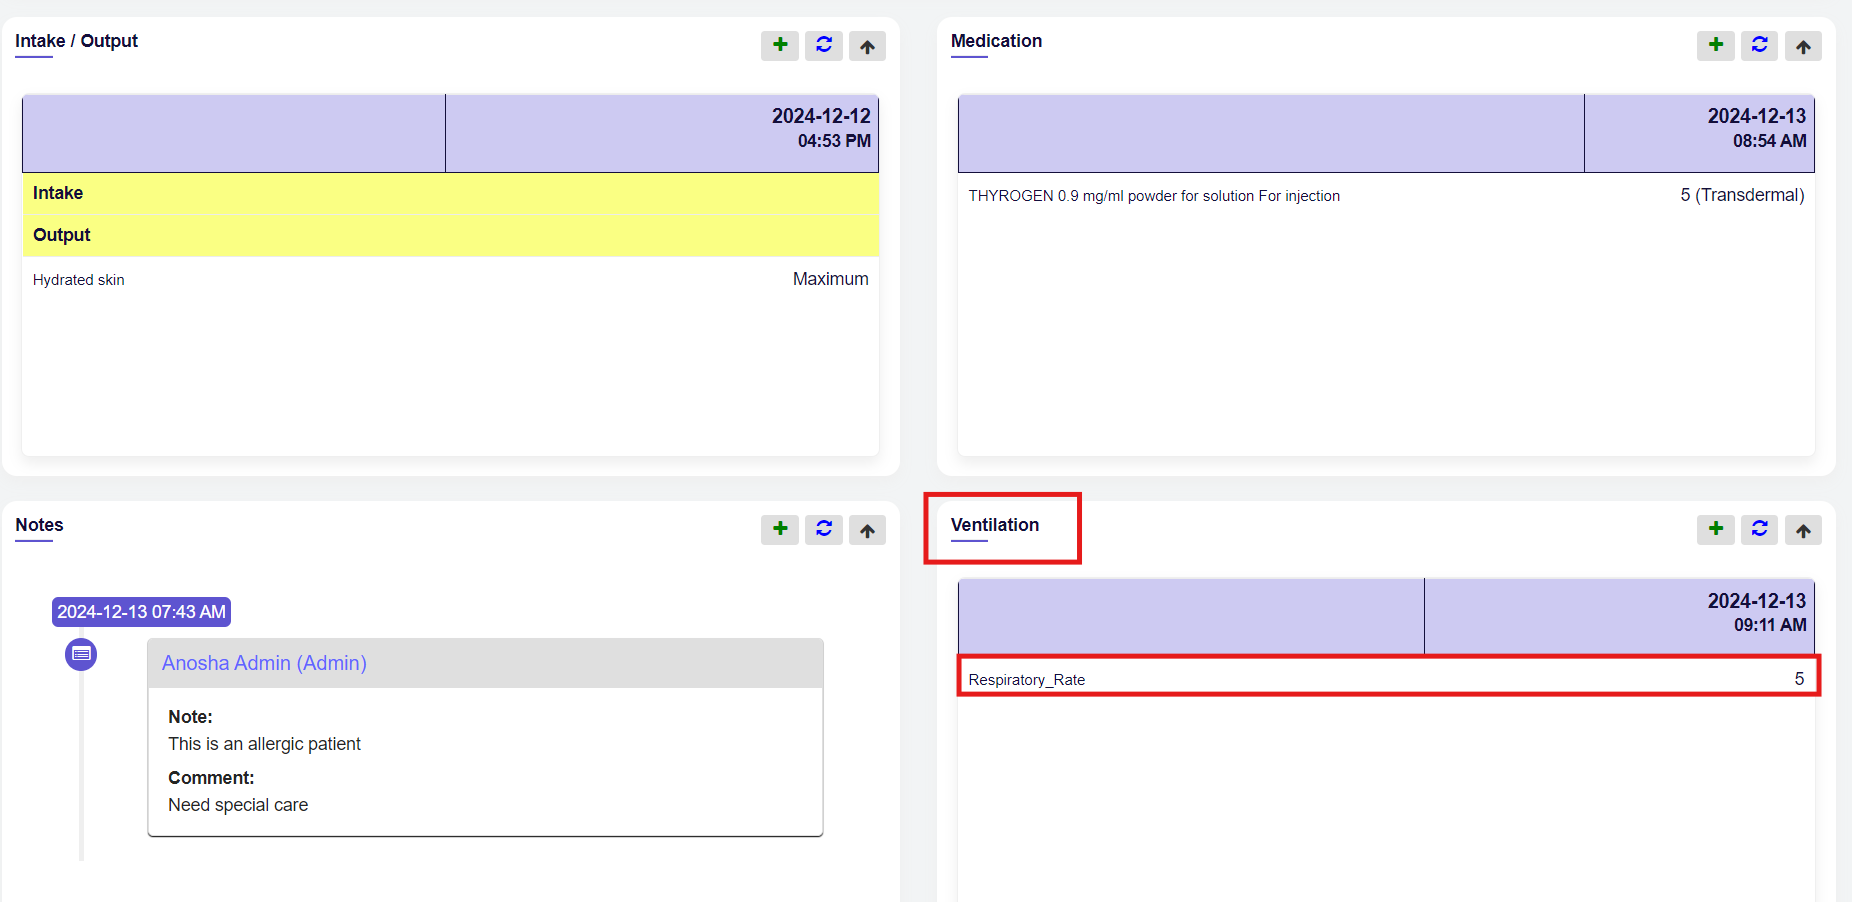
Ventilation: #
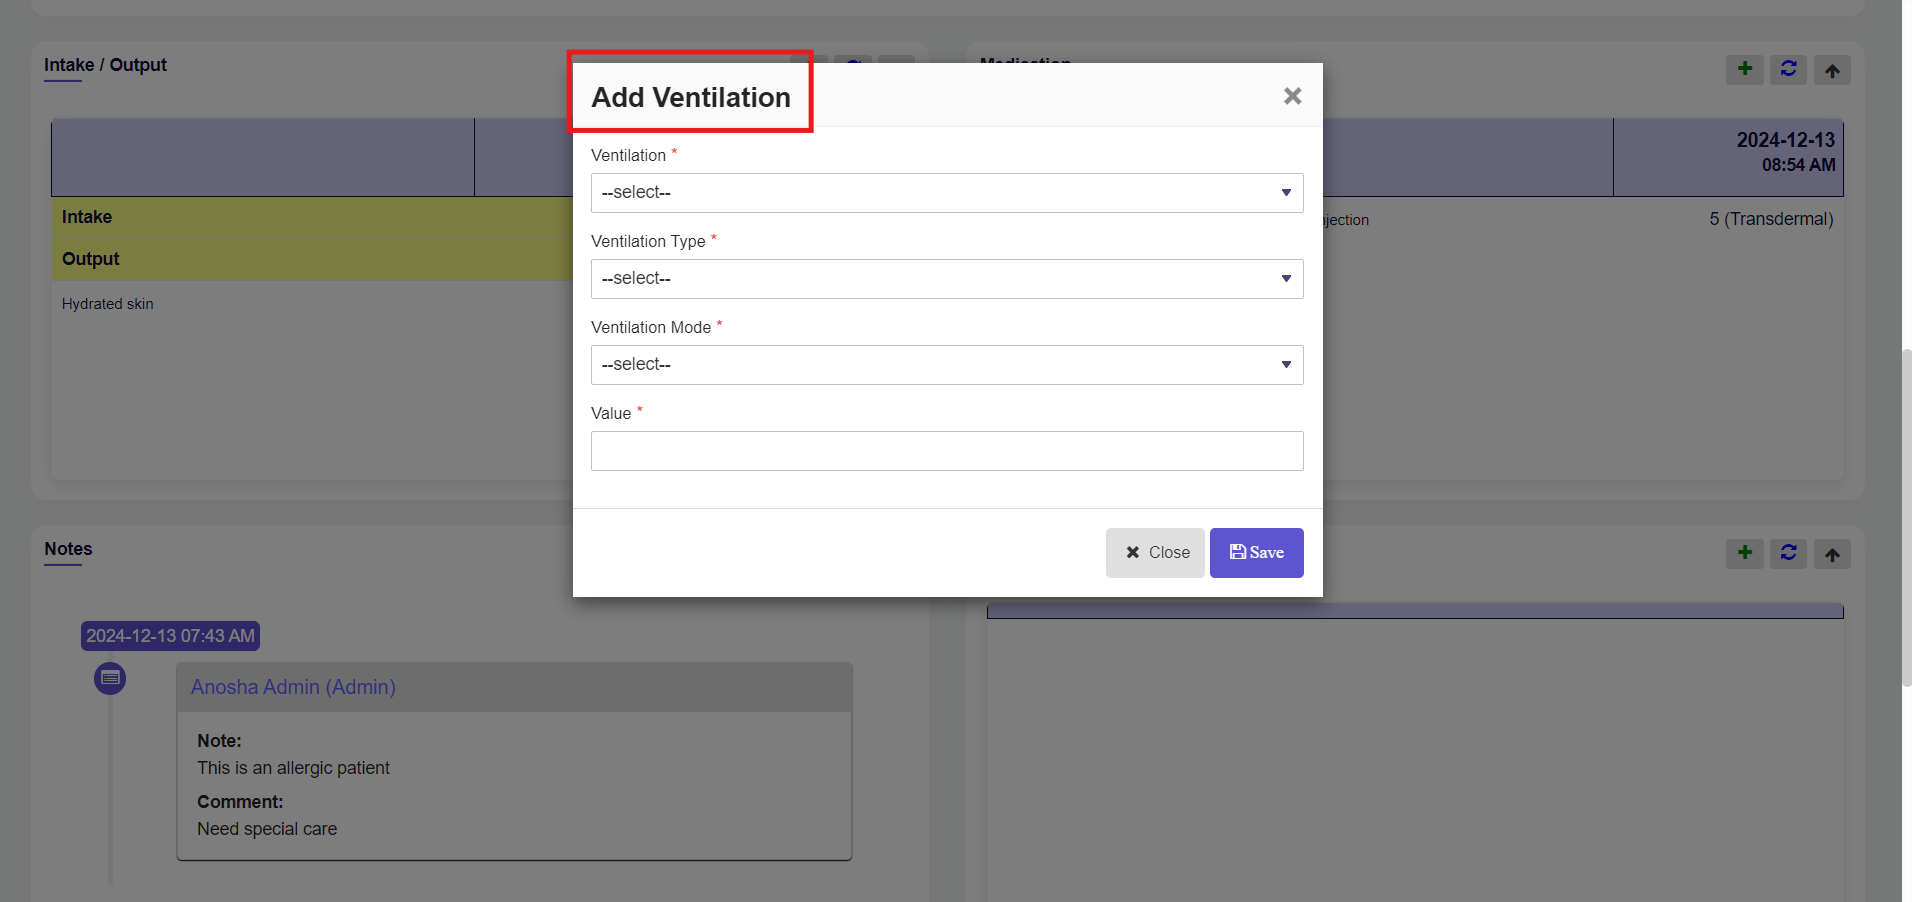
The next tab is Ventilation. You can add ventilation by clicking on the ADD icon.
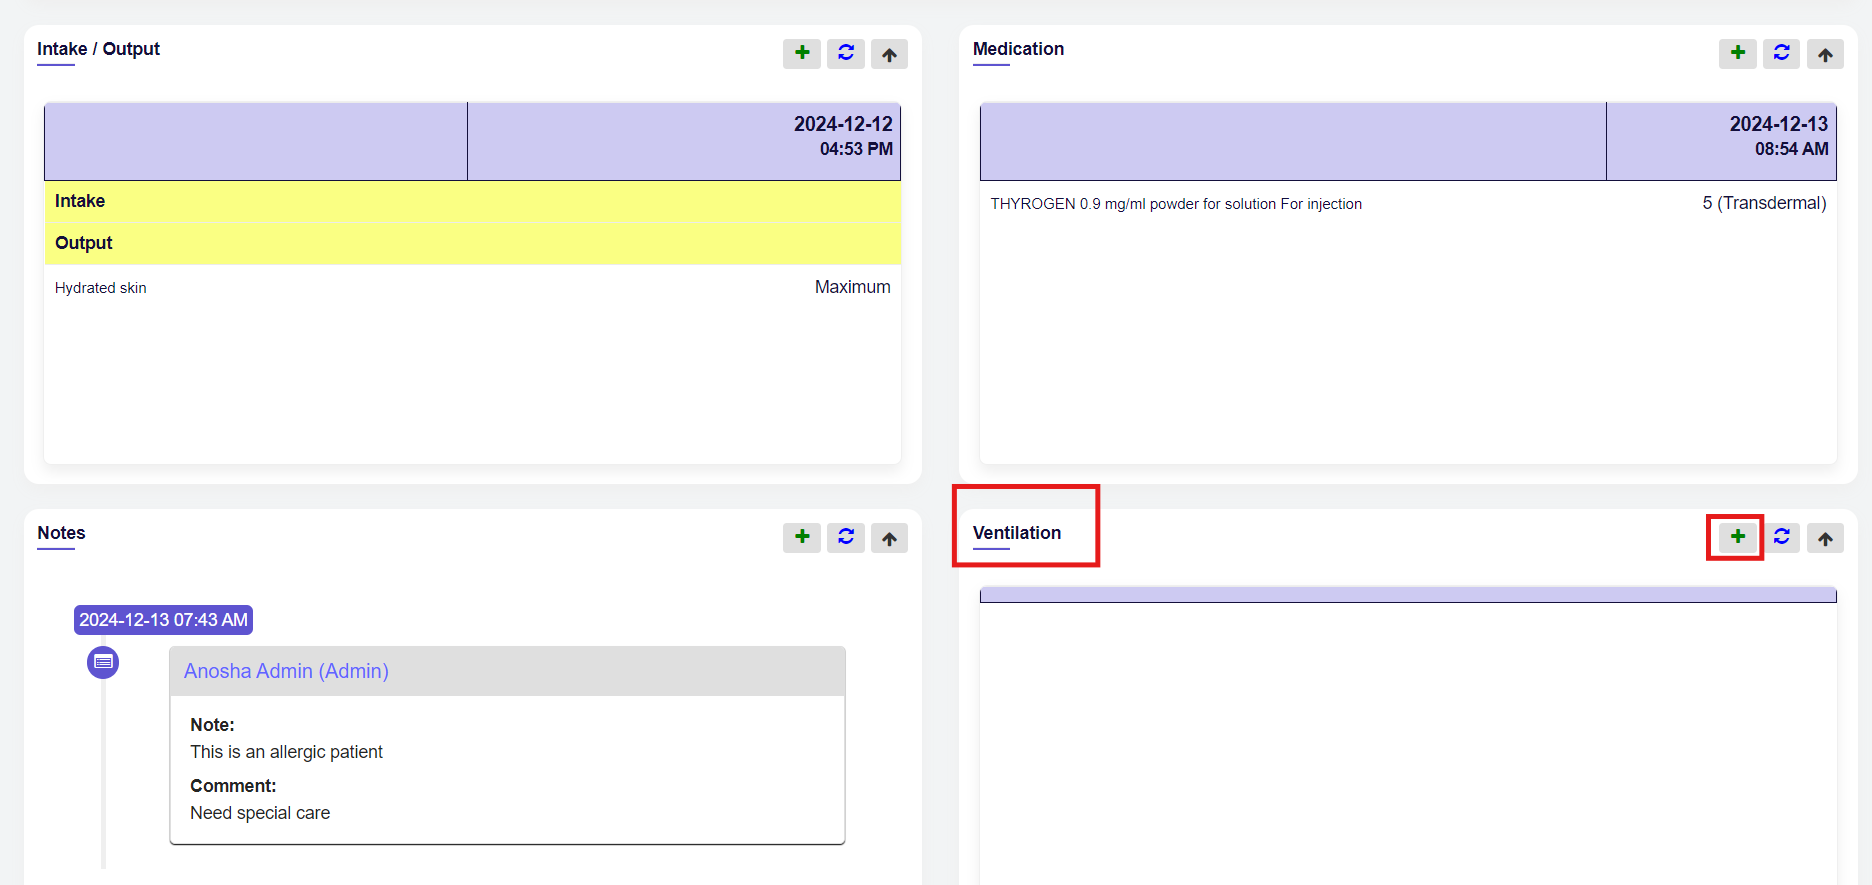
When you click on the ADD icon, a new window will appear containing multiple Drop-down fields. Choose the required data from each field.
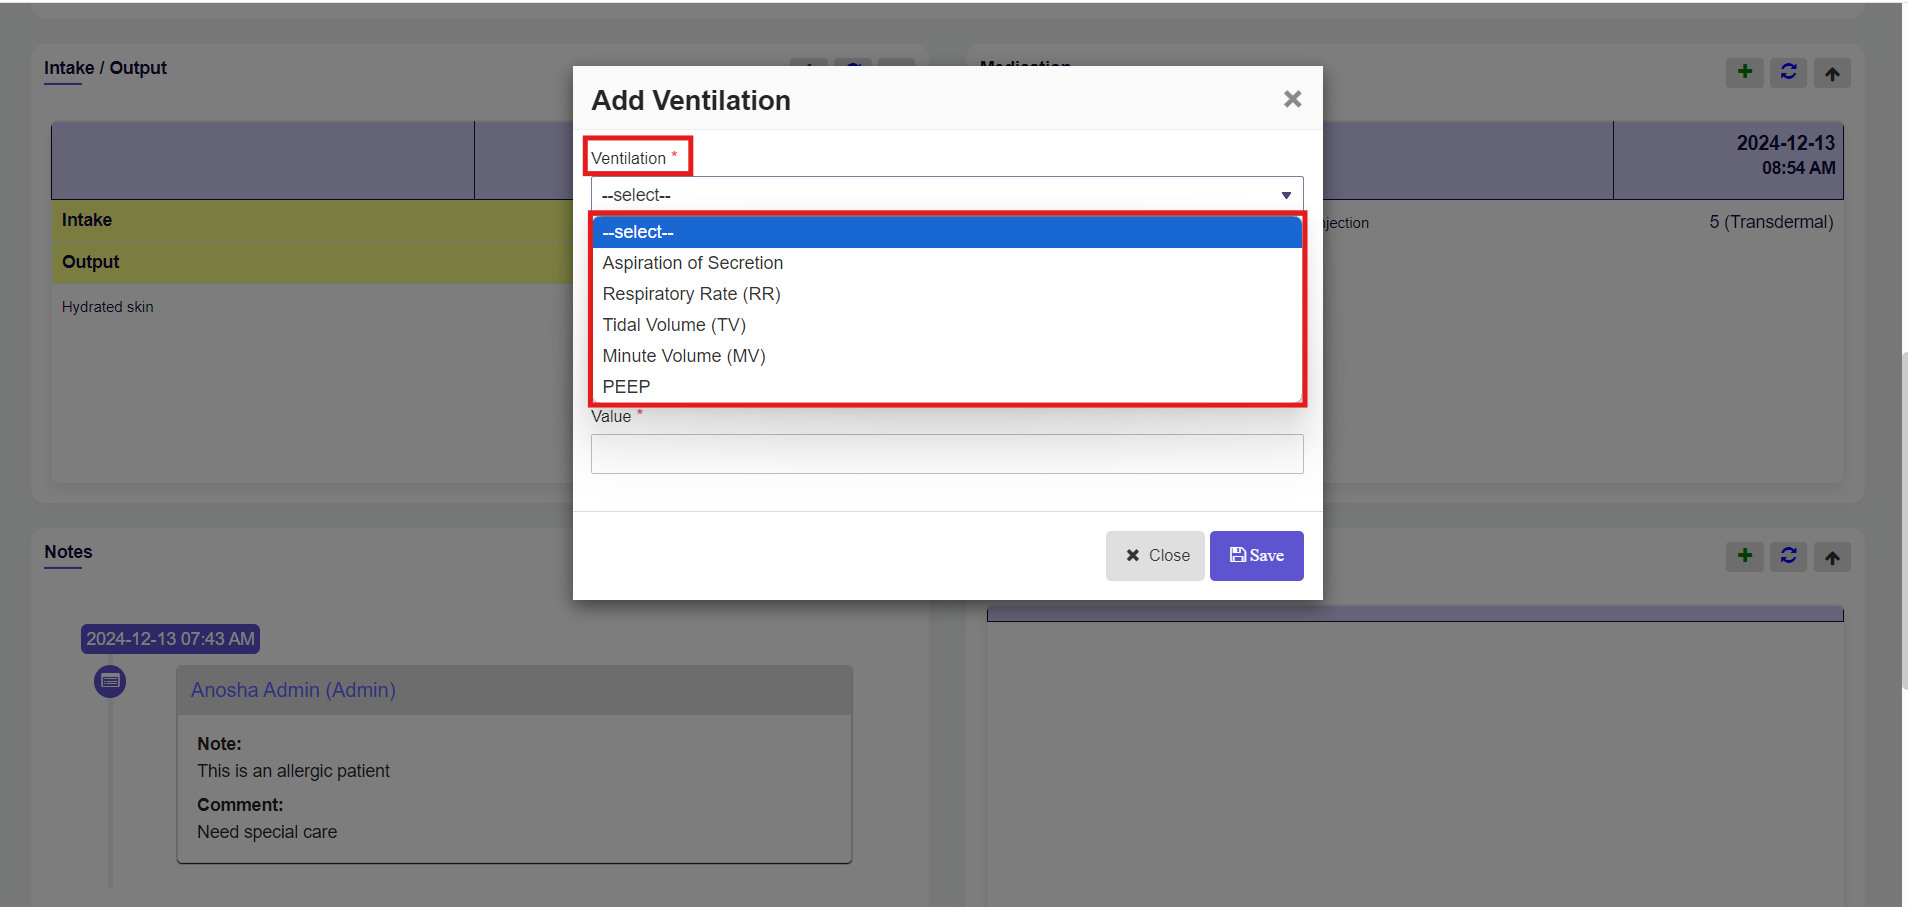
Select Ventilation from the drop-down.
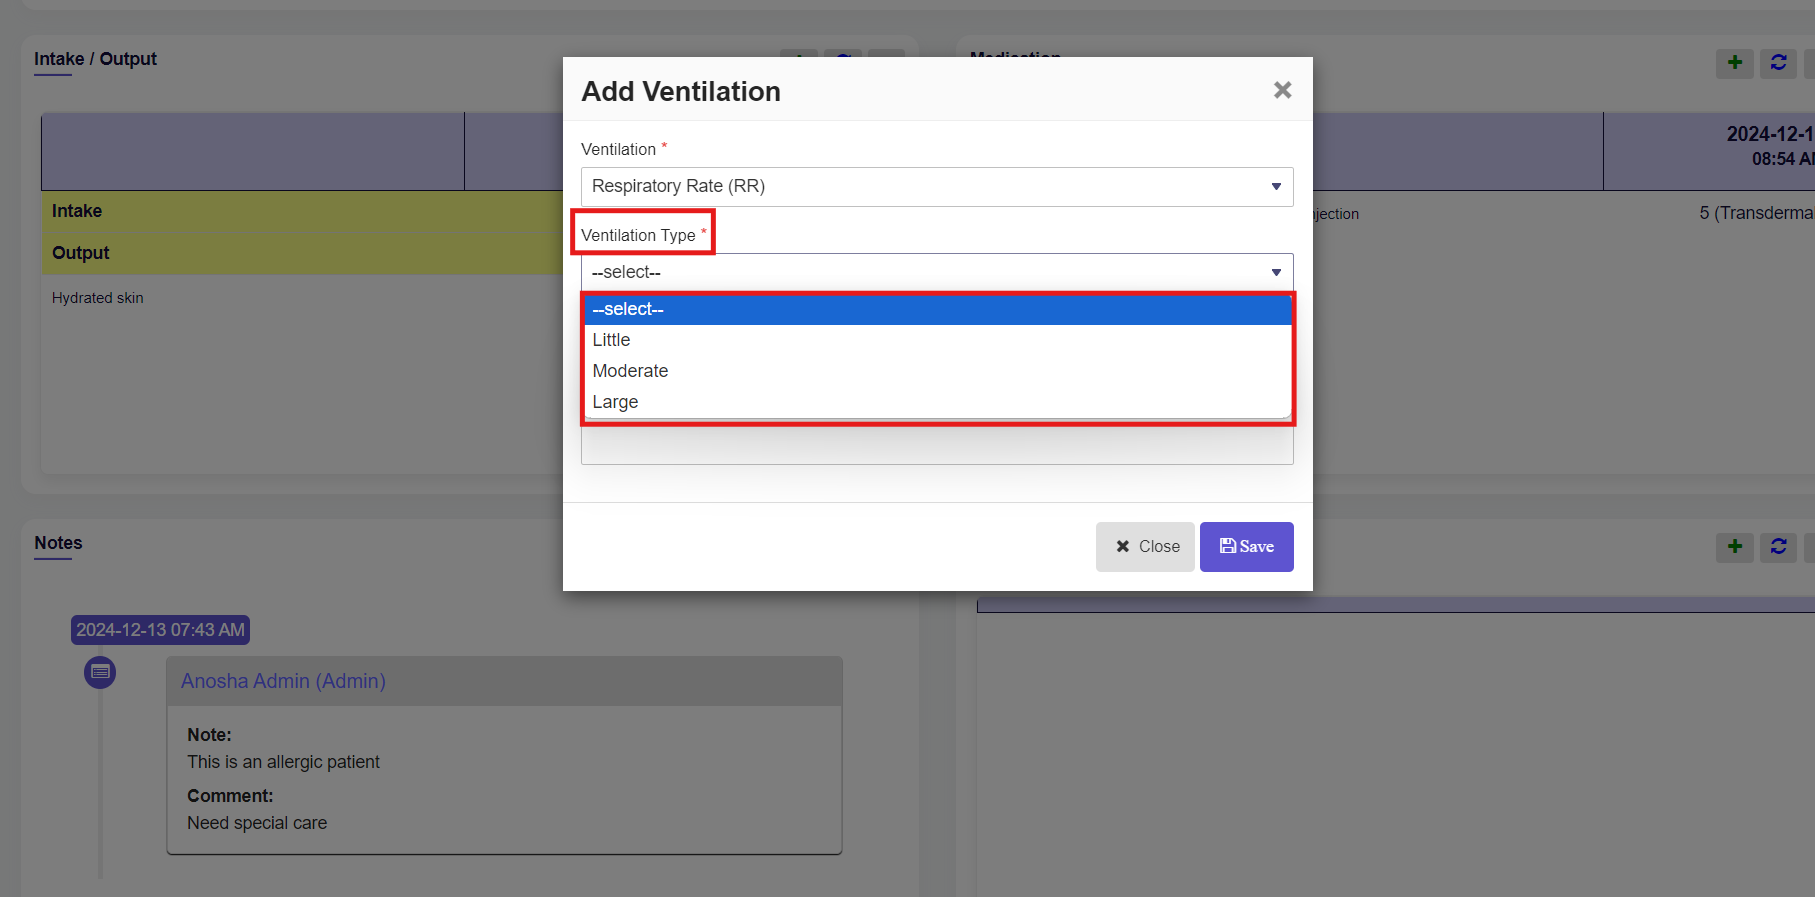
Select Ventilation Type from the drop-down.
Select Ventilation Mode.
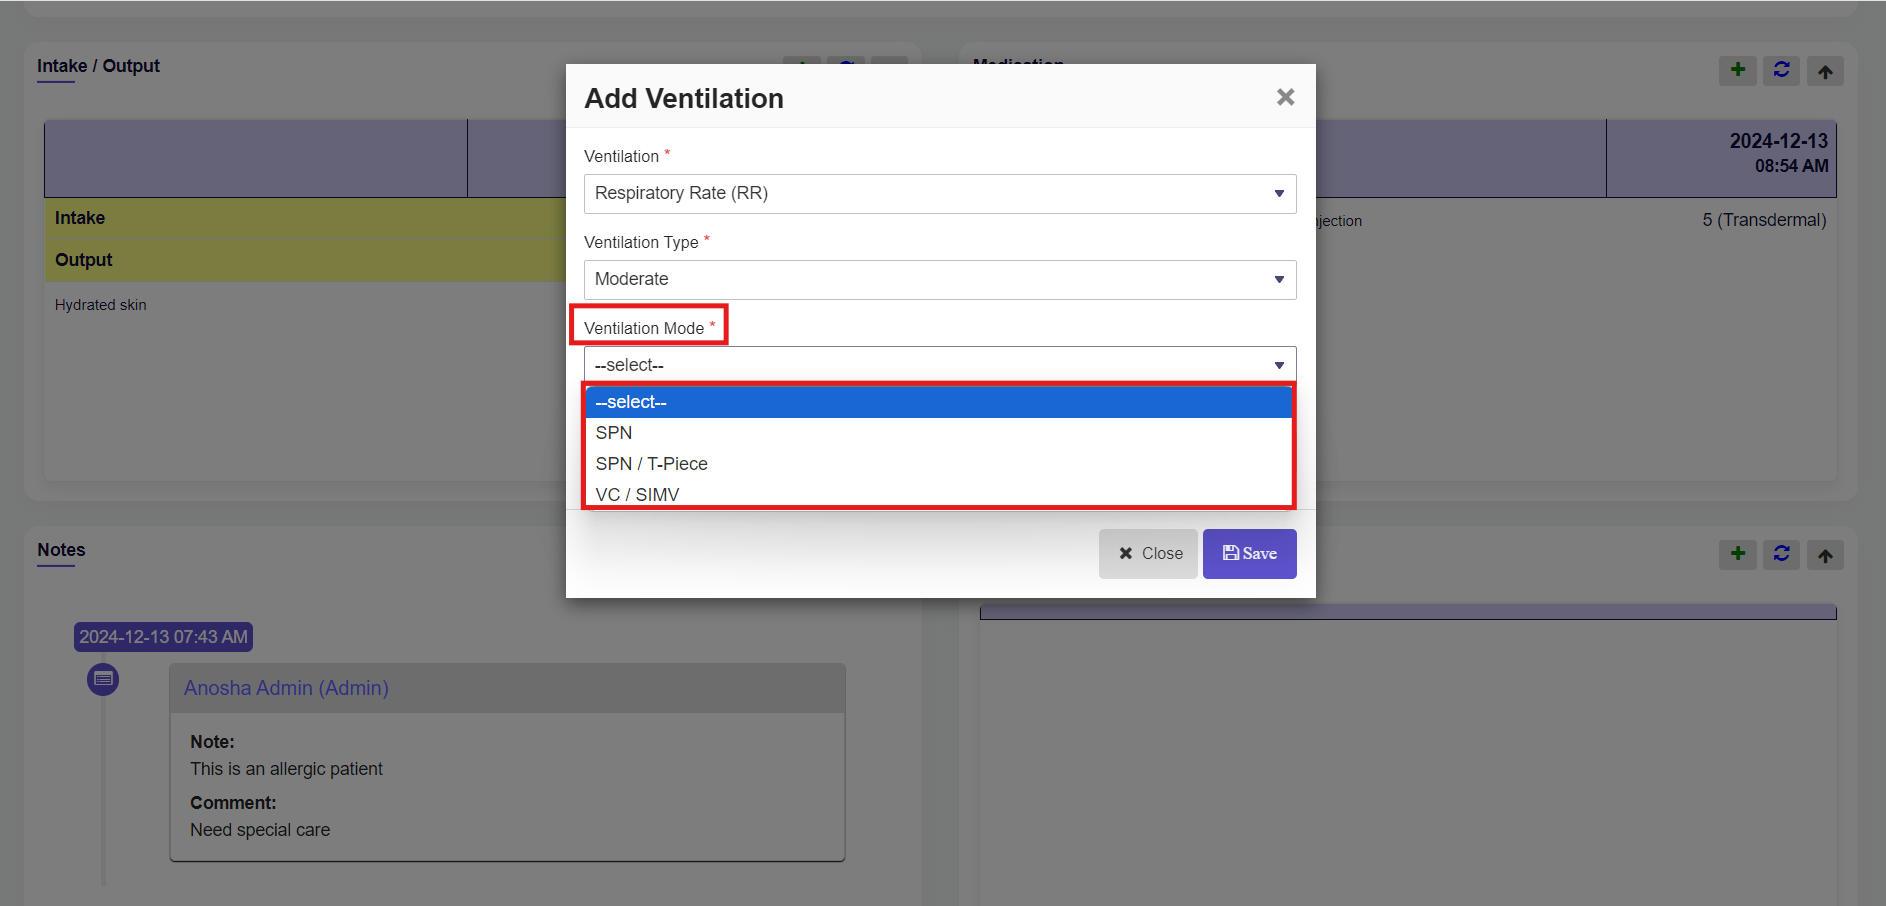
After selecting all, click on the save button.
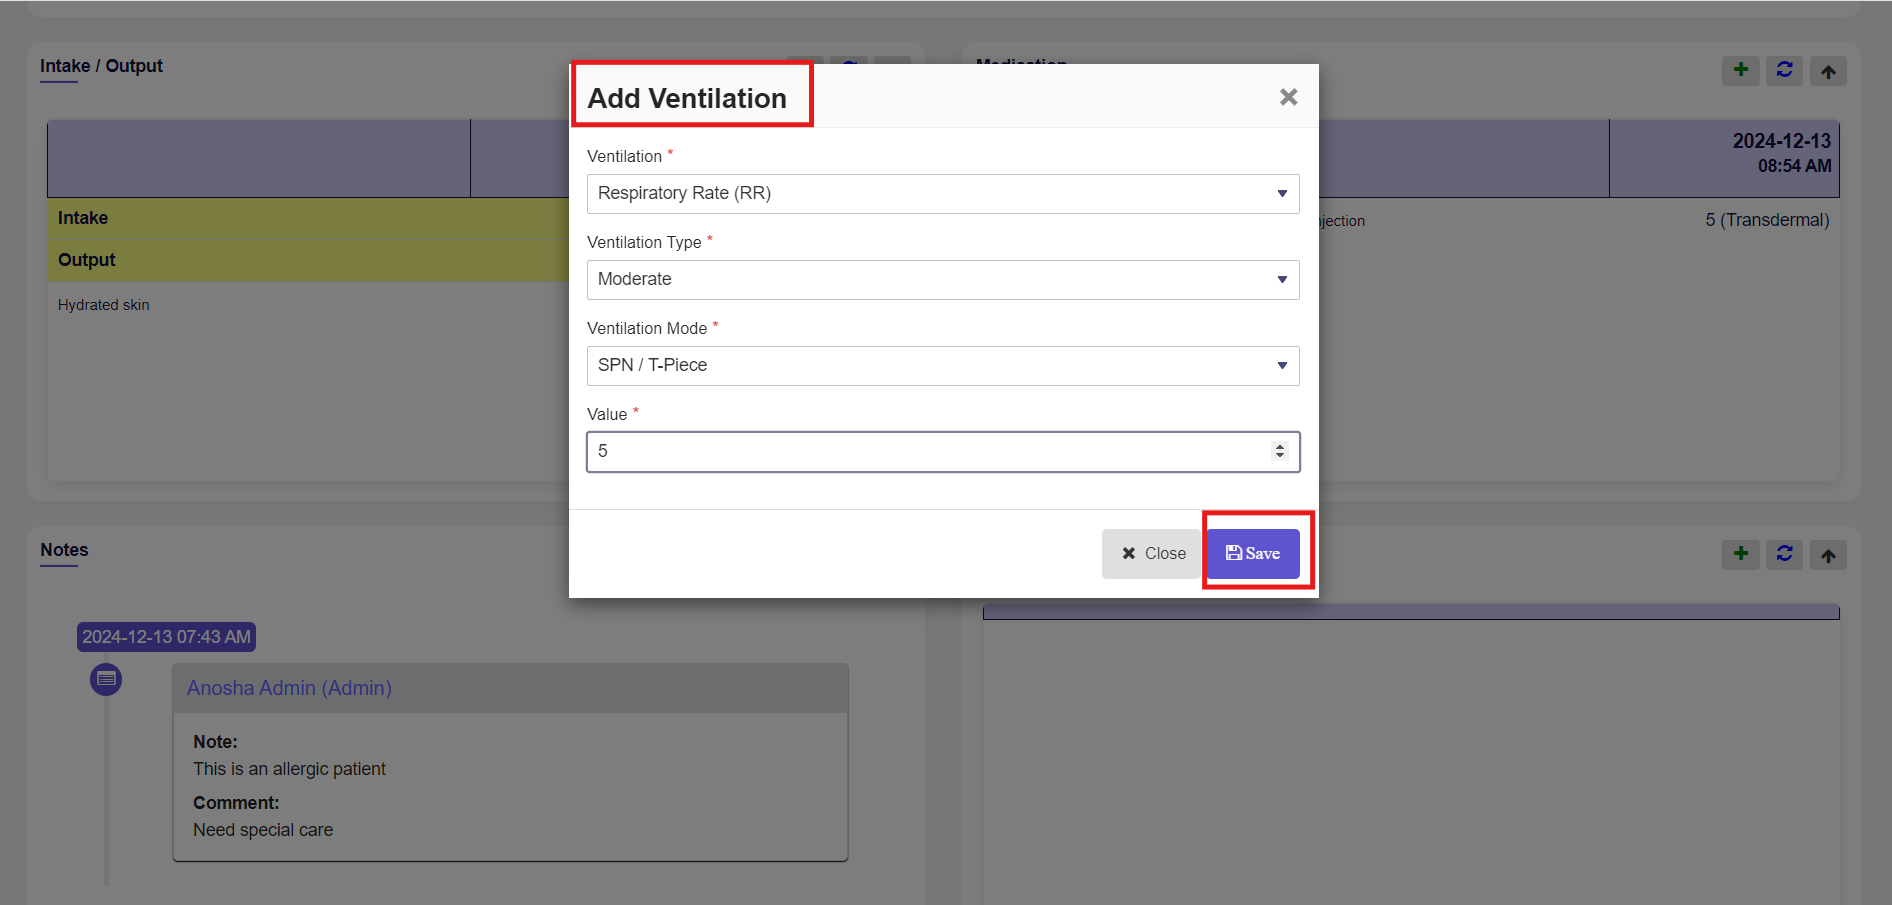
When you click on the save button (Data Saved Successfully) message will appear and the record of Ventilation will be saved.
Documents: #
The next screen is Documents, where you can upload and manage any necessary documents related to the patient’s treatment or medical history. This section allows you to attach files like reports, prescriptions, or any other relevant documentation for the patient’s records.
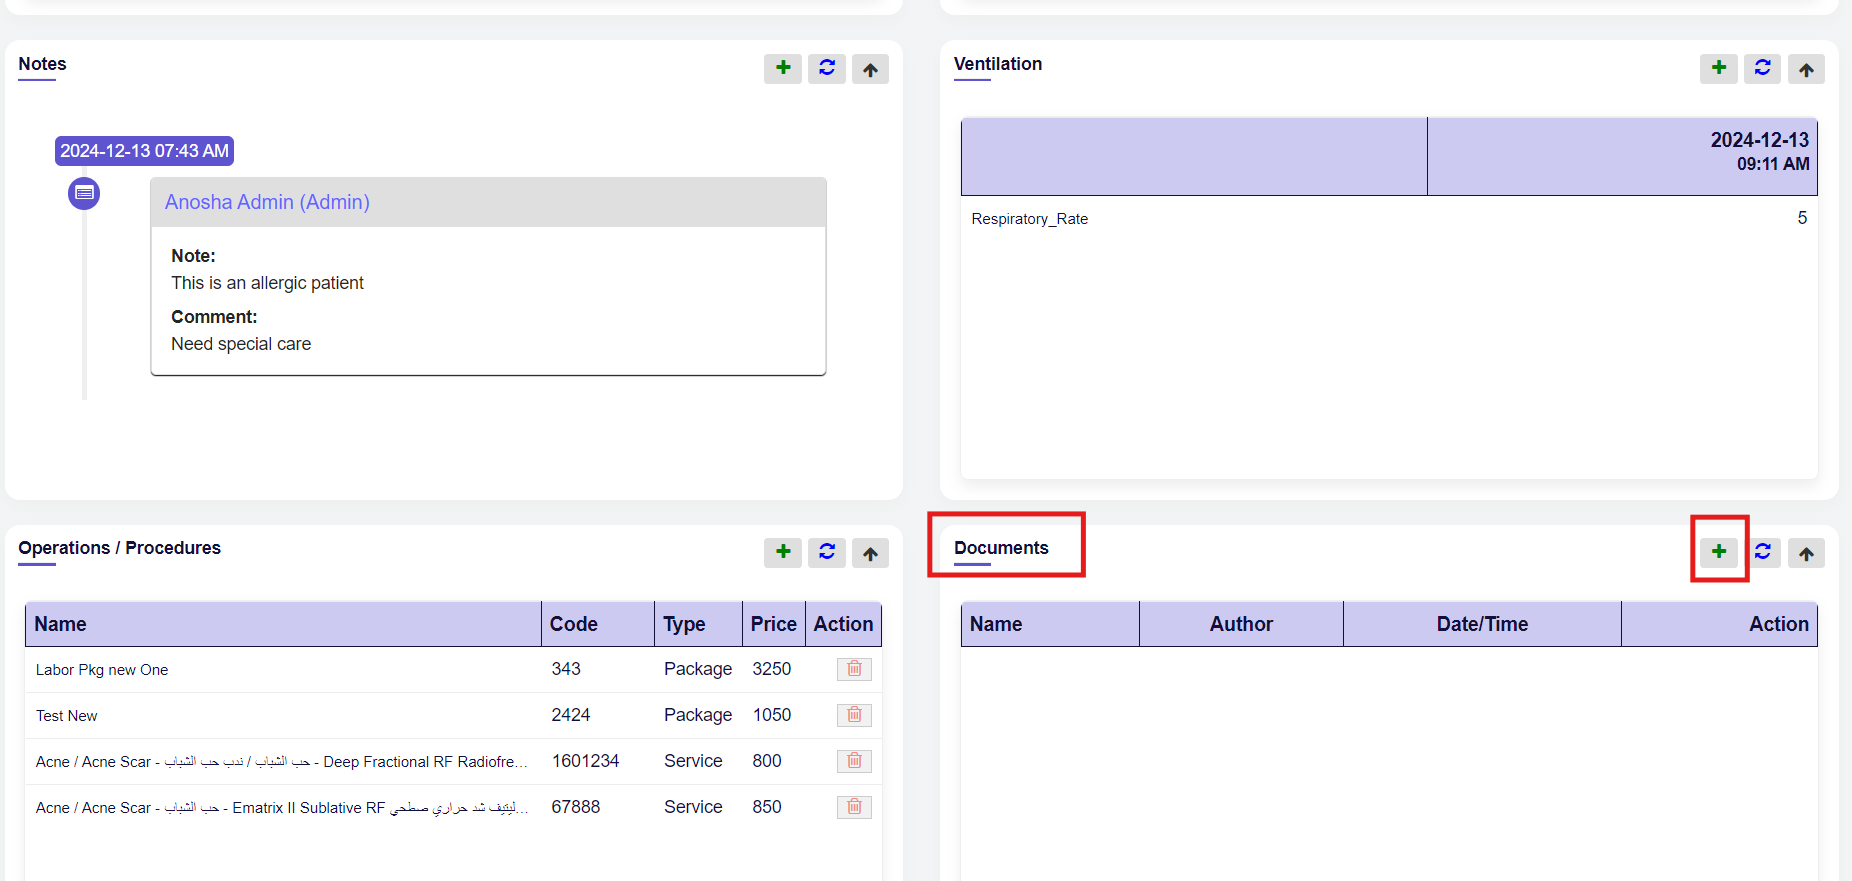
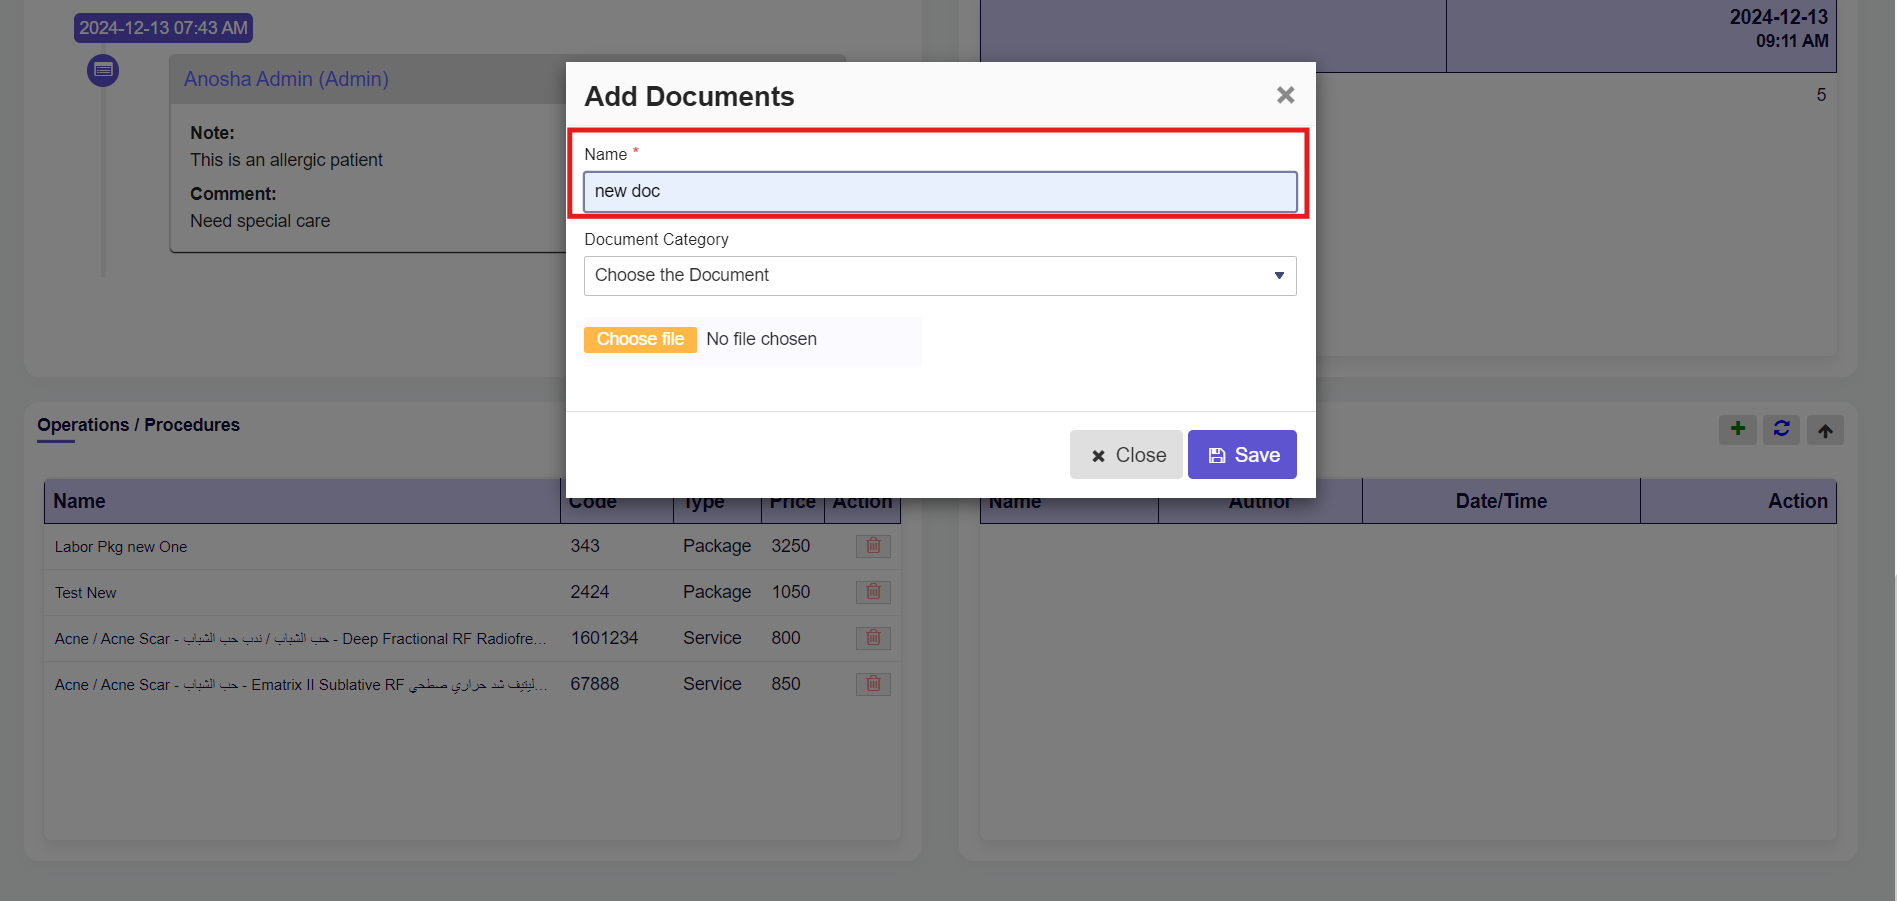
When you click on the ADD icon, a new window will appear (Add Documents)
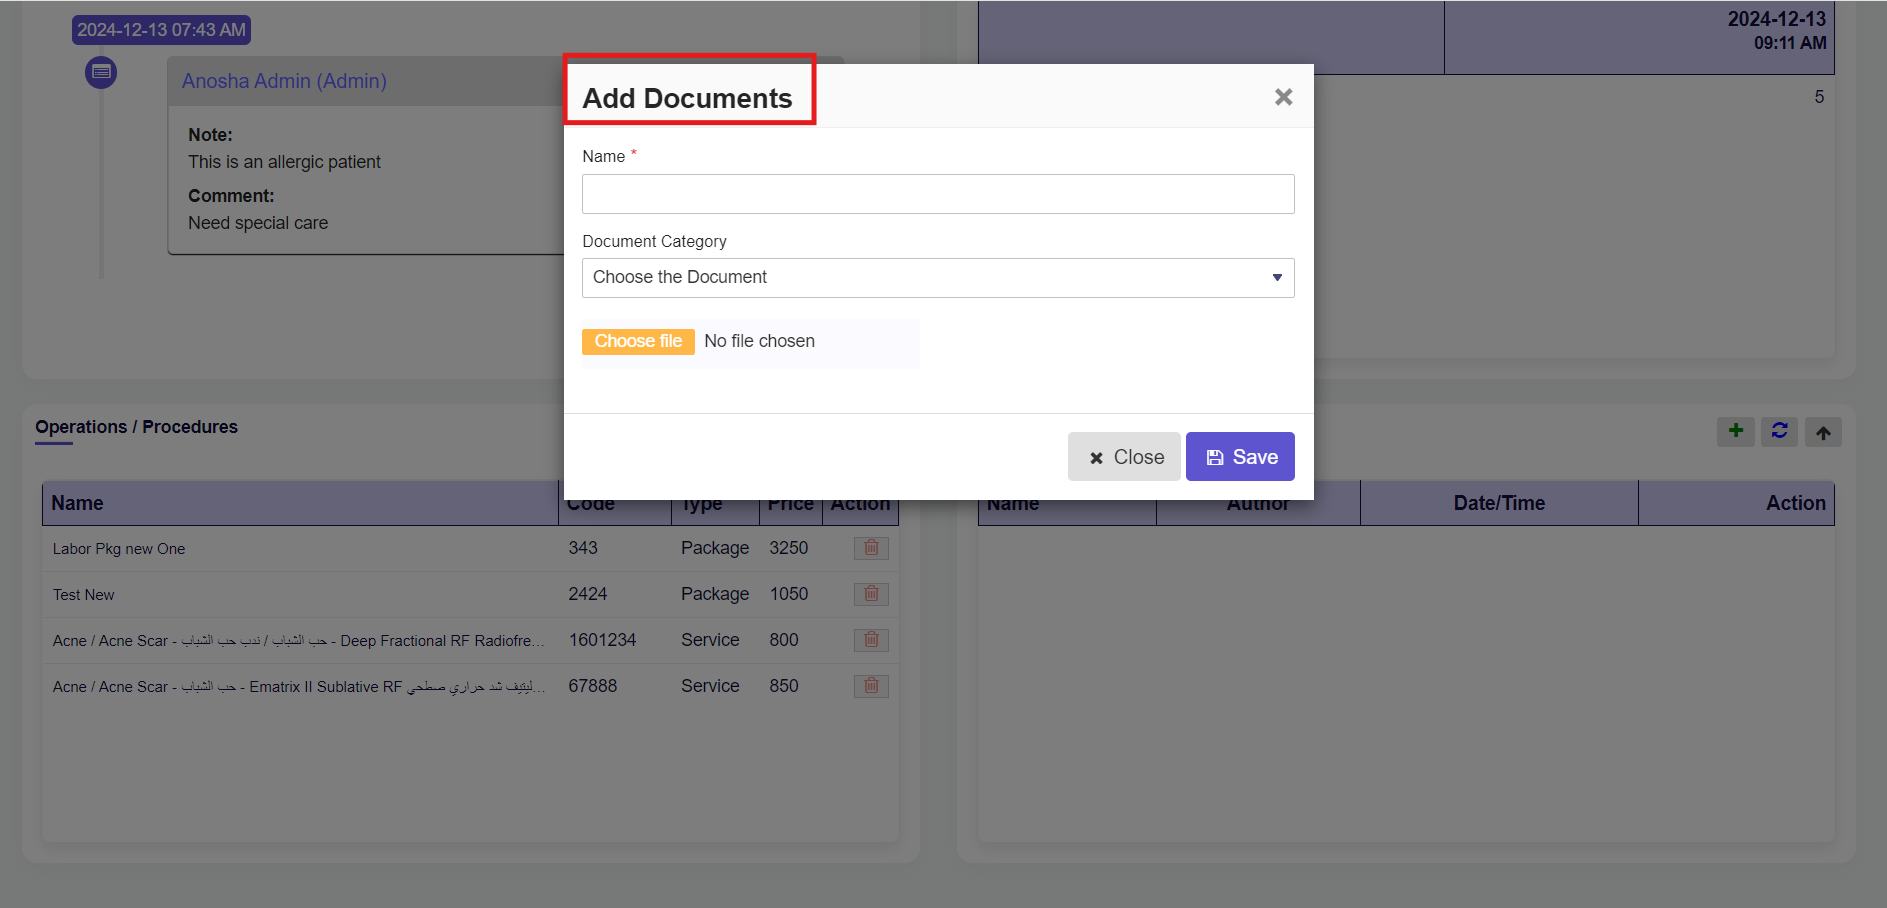
Enter the name of the Document.
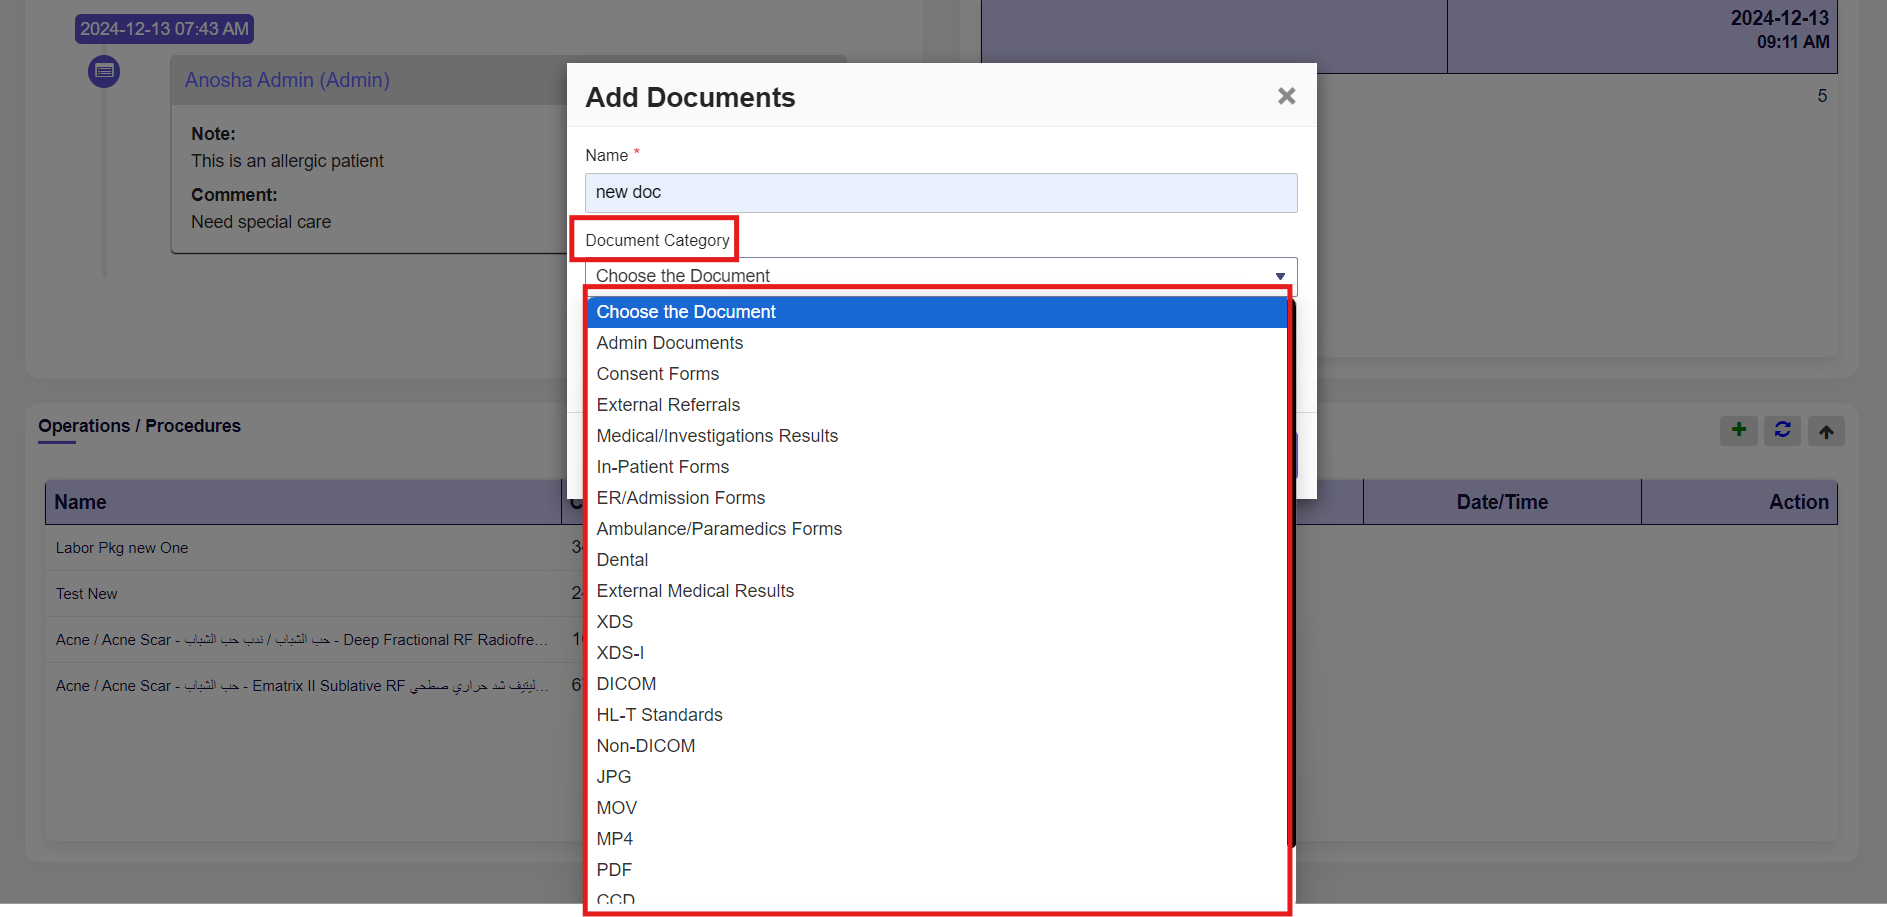
Choose the document category from the drop-down.
In this section, there is an option to choose a file, allowing you to attach any relevant documents related to the patient.
Select and upload any file.
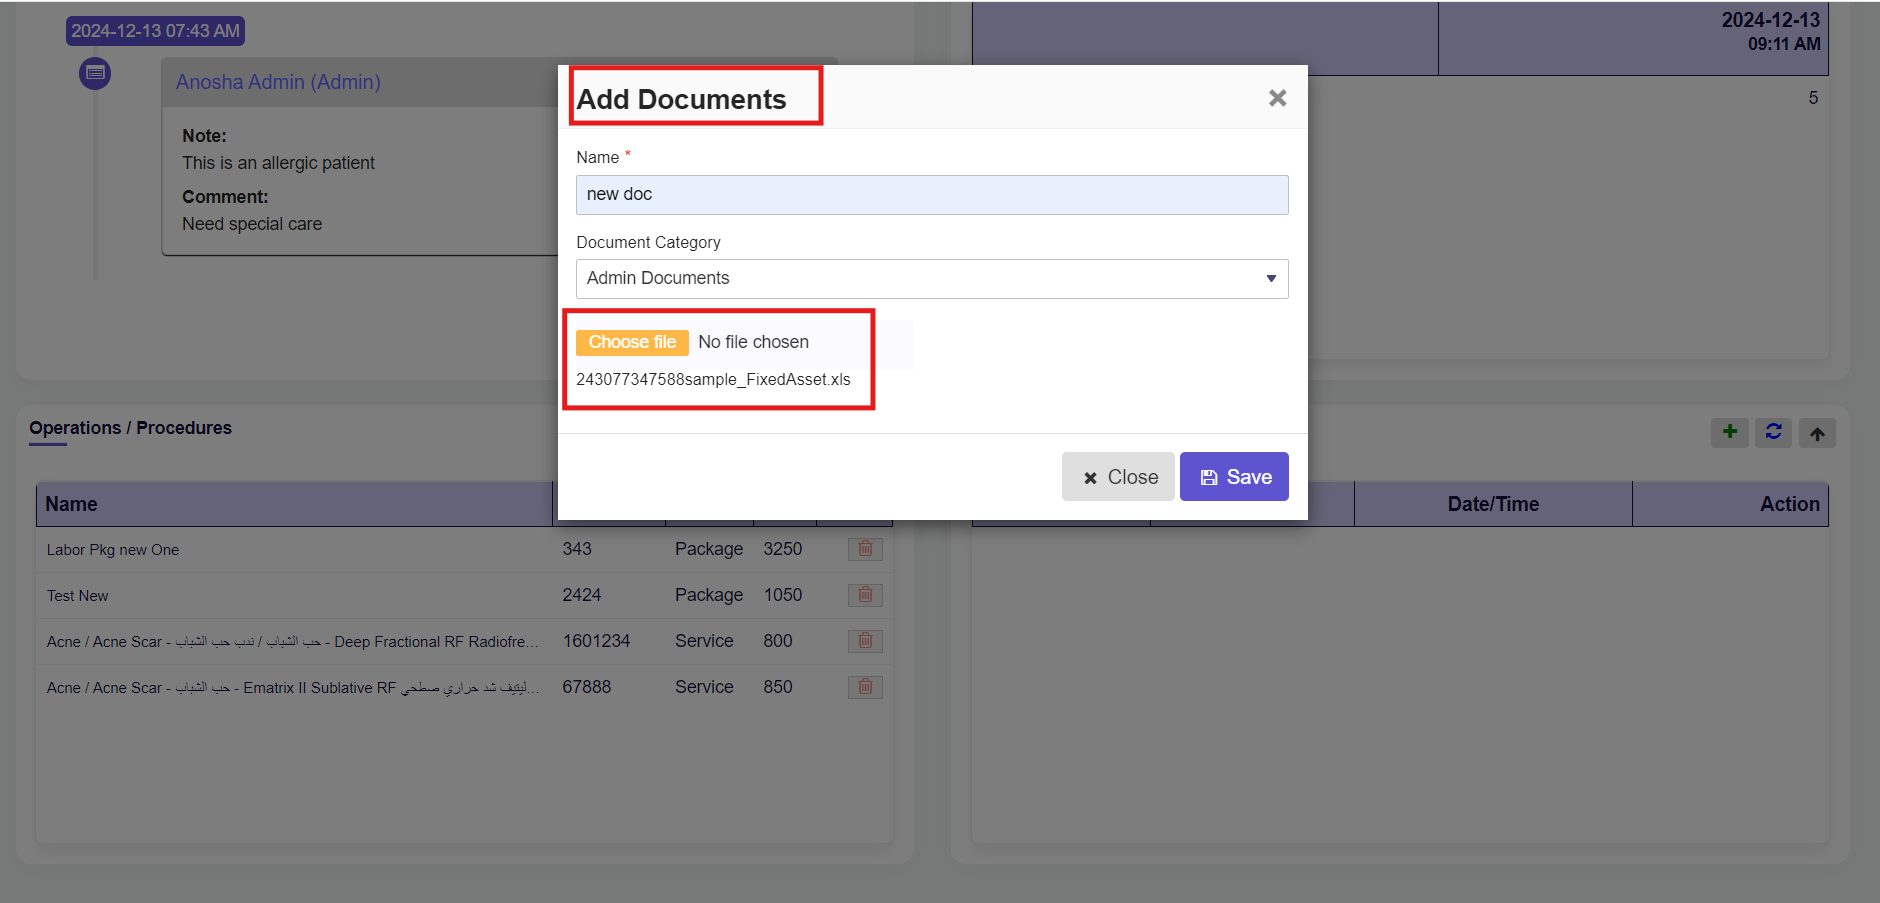
The document will be attached here now click on the save button.

When you click on the save button documents will be saved successfully.