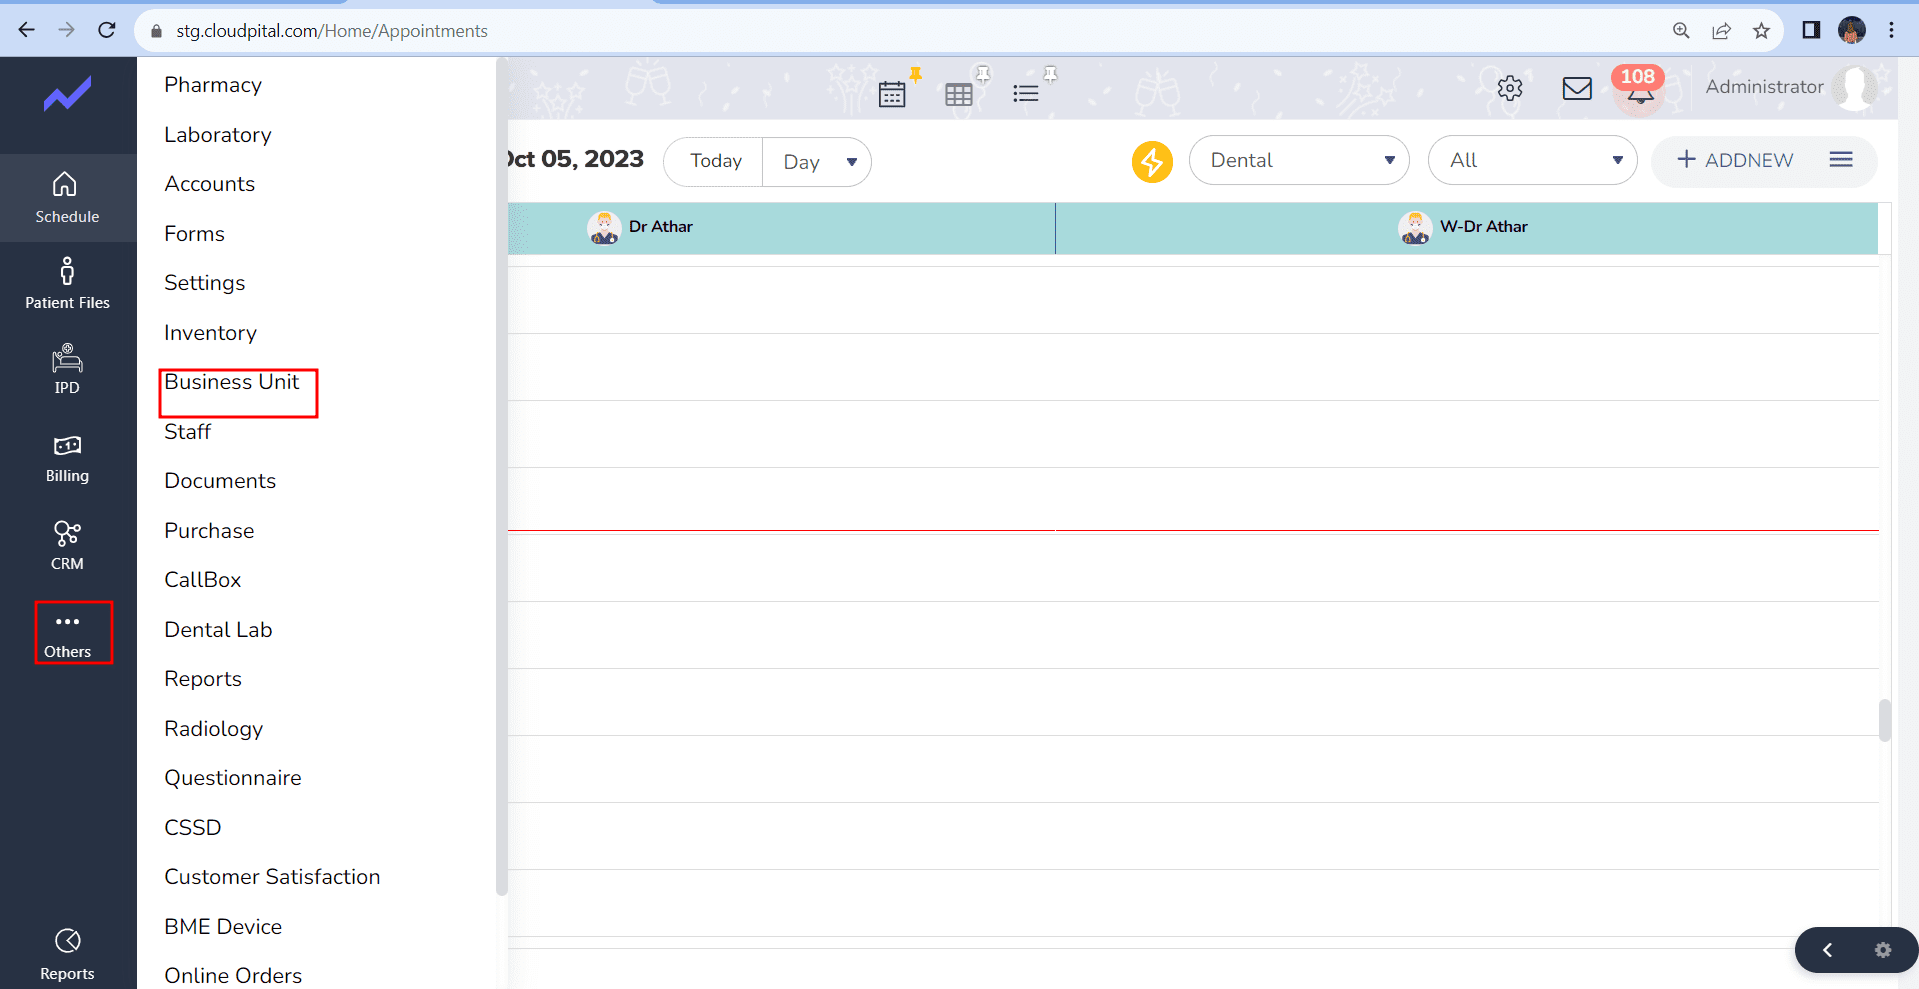
First, the admin goes to the “Others” section of the schedule screen. In this screen, they click on the “Business Unit.”
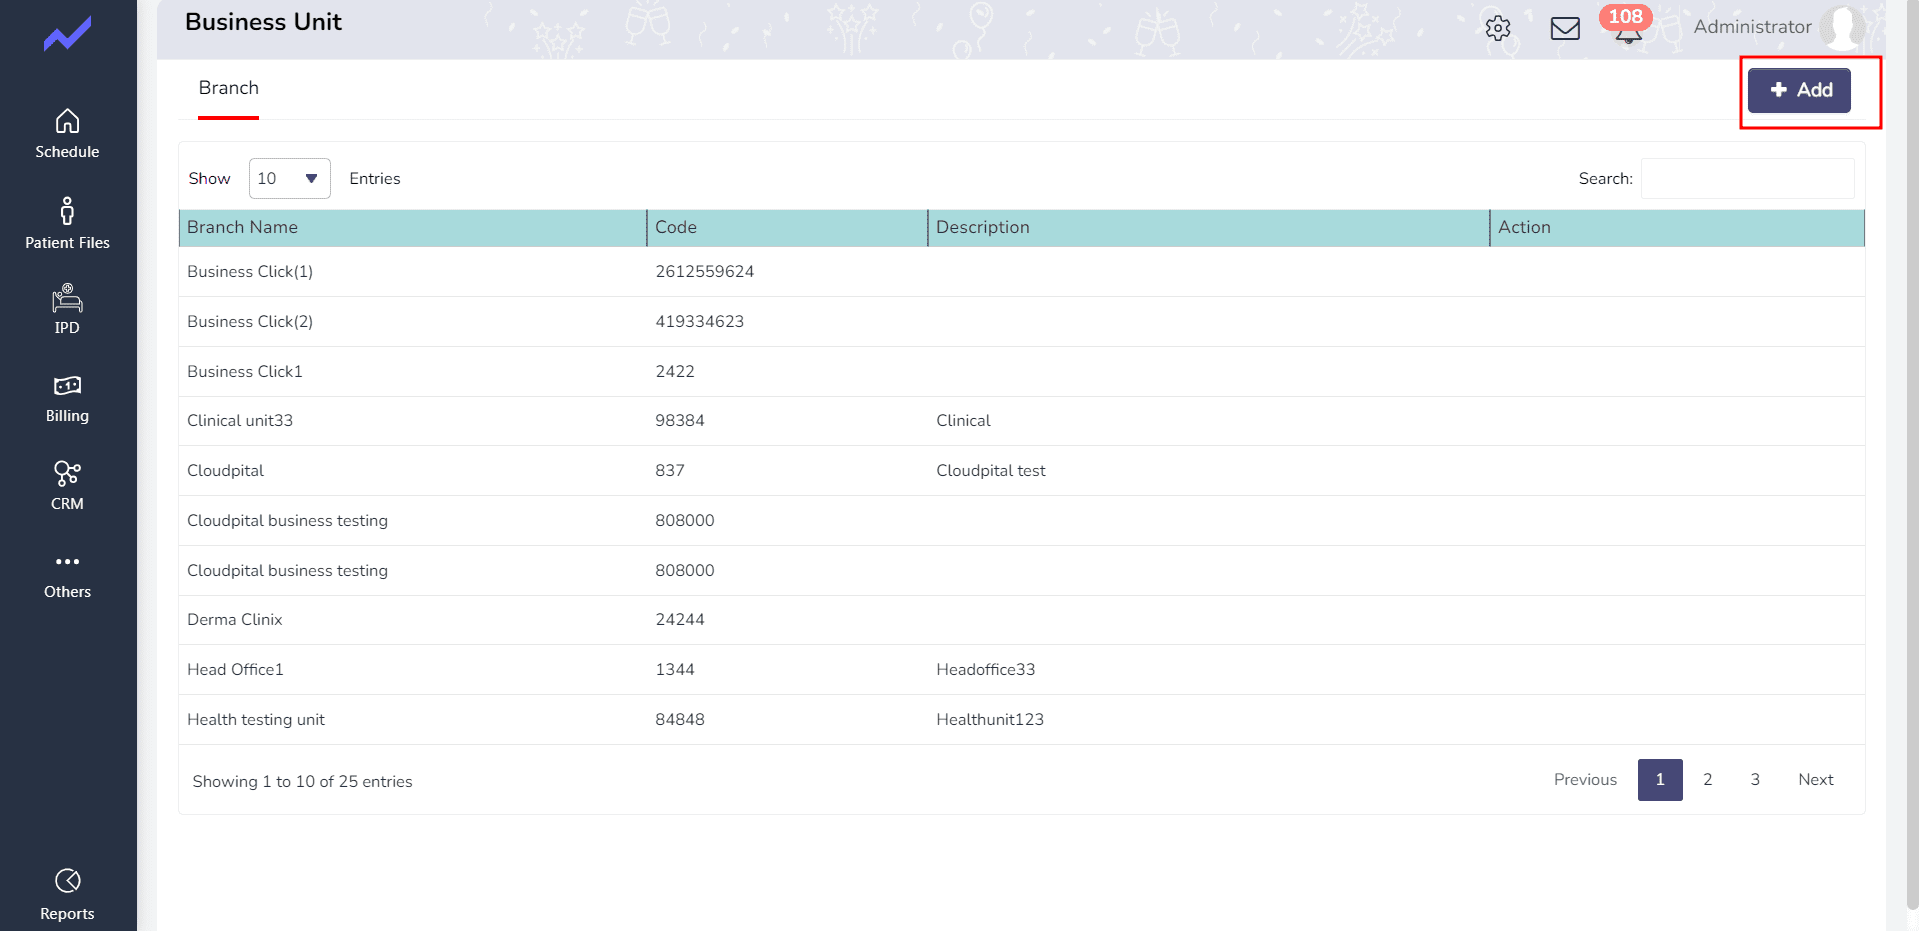
When they click on the business unit, a new screen opens, and in this screen, they click on “Add” to create a new branch.
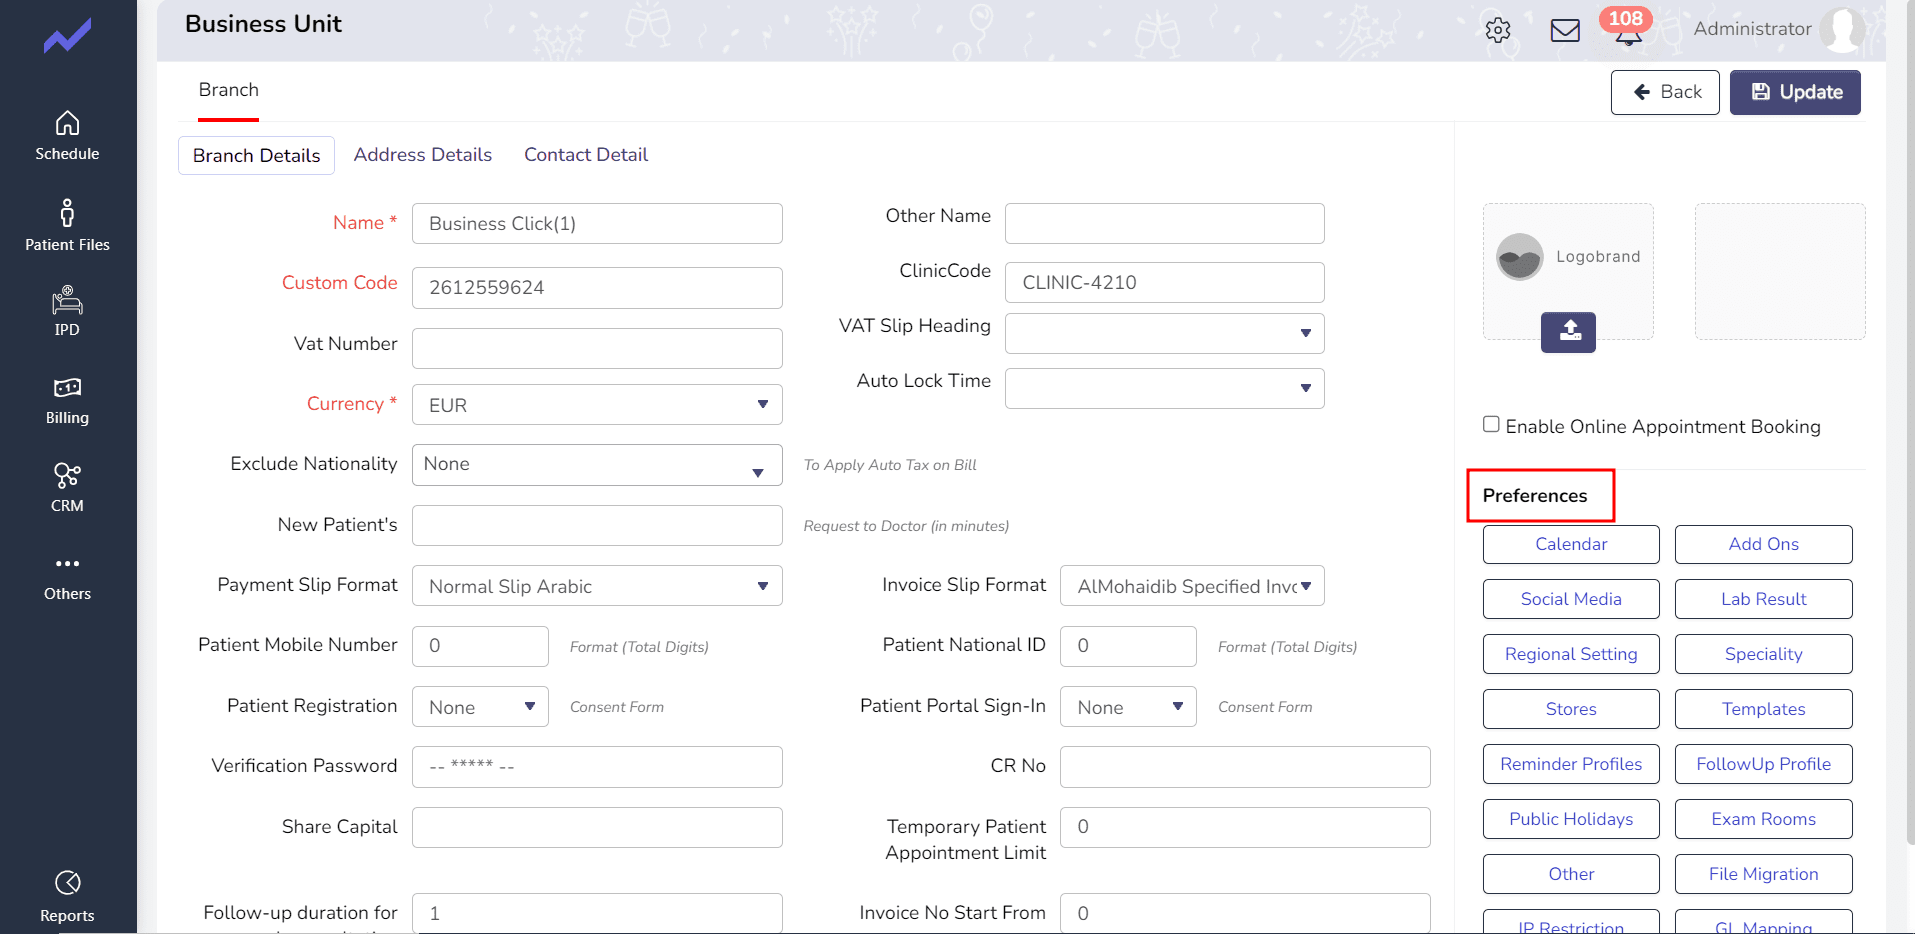
They fill in the required fields and select the specialty that corresponds to the branch. Additionally, in this screen, the admin can set various Preferences.
After completing these steps, they click on the “Save” button, and the branch that the admin added will be displayed on the screen.
Fig: Business Unit
- To begin, the administrator navigates to the “Others” section of the schedule screen.
- In this screen, they select the “Business Unit” option. Upon clicking “Business Unit,” a new screen appears.
- On this screen, they click on the “Add” button to create a new branch.
- The administrator proceeds to fill in the required fields for the new branch.
- They also select the appropriate specialty that corresponds to the branch.
- Within this screen, the administrator can add various preferences as needed.
- Finally, they click on the “Save” button to confirm the addition of the new branch. The newly added branch will now be visible on this screen, indicated by specific reference points.


