If you’re setting up a new branch of Cloudpital, you’ll need to know how to configure the Doctor Setting feature. This feature allows you to manage your doctors’ profiles, including their personal information, specialties, and availability.
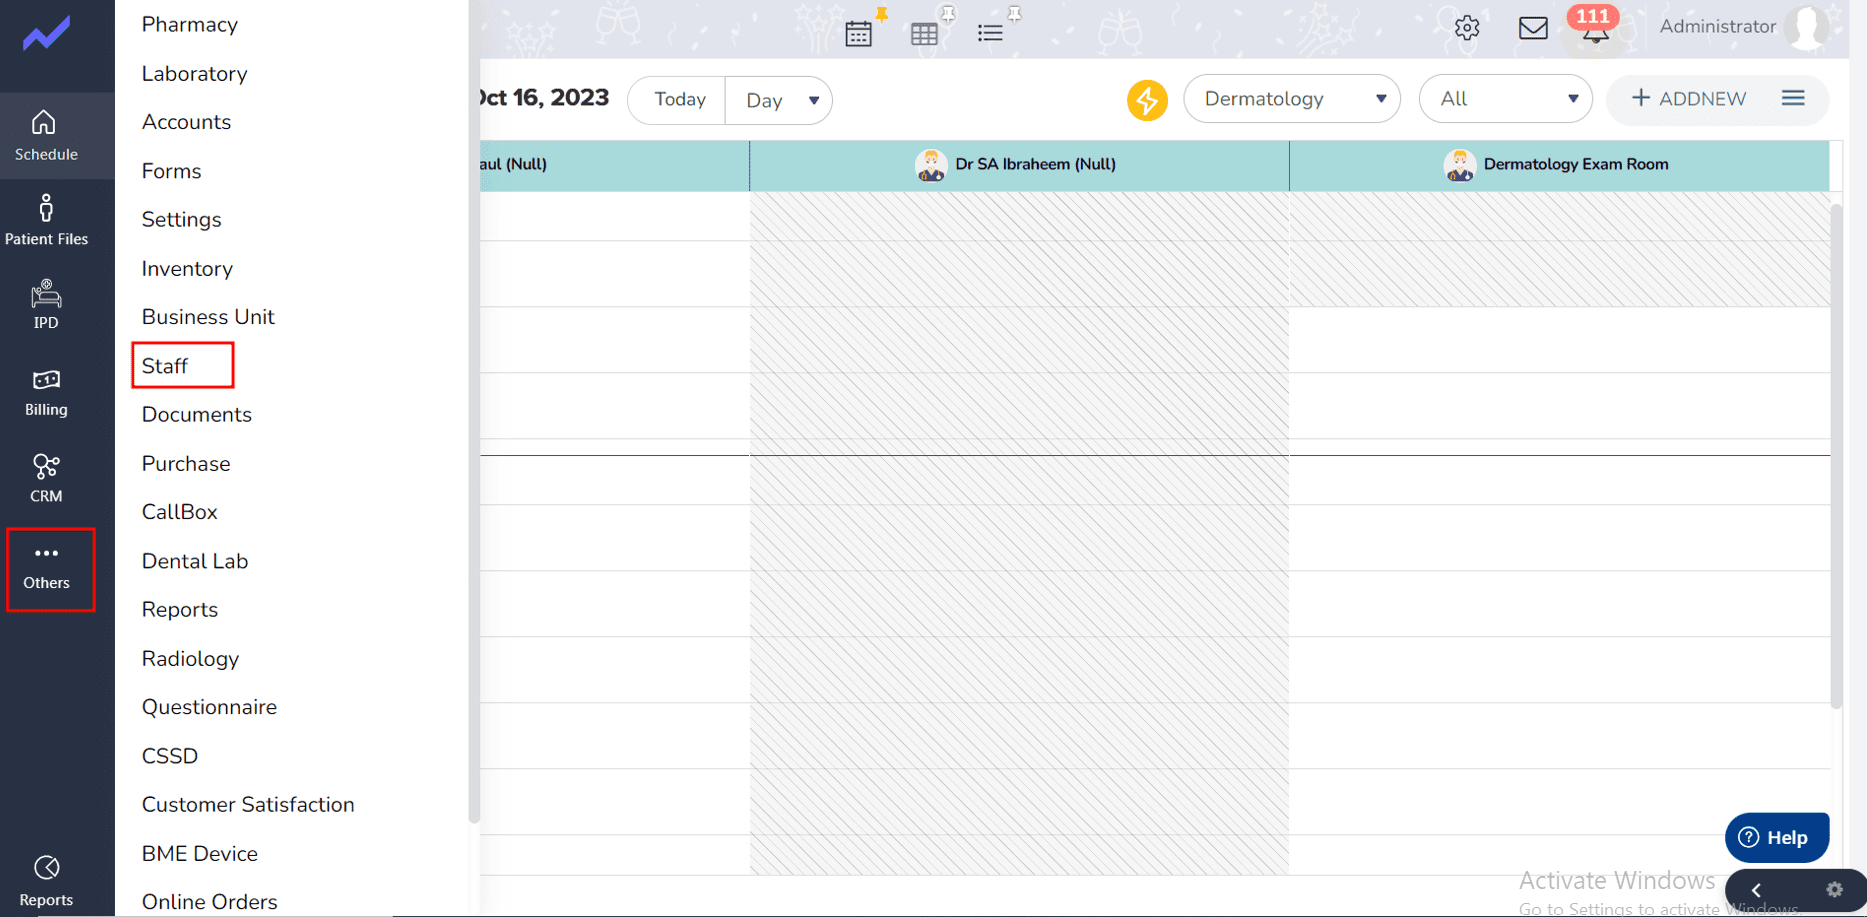
First click on the Others=>Staff=>Add.
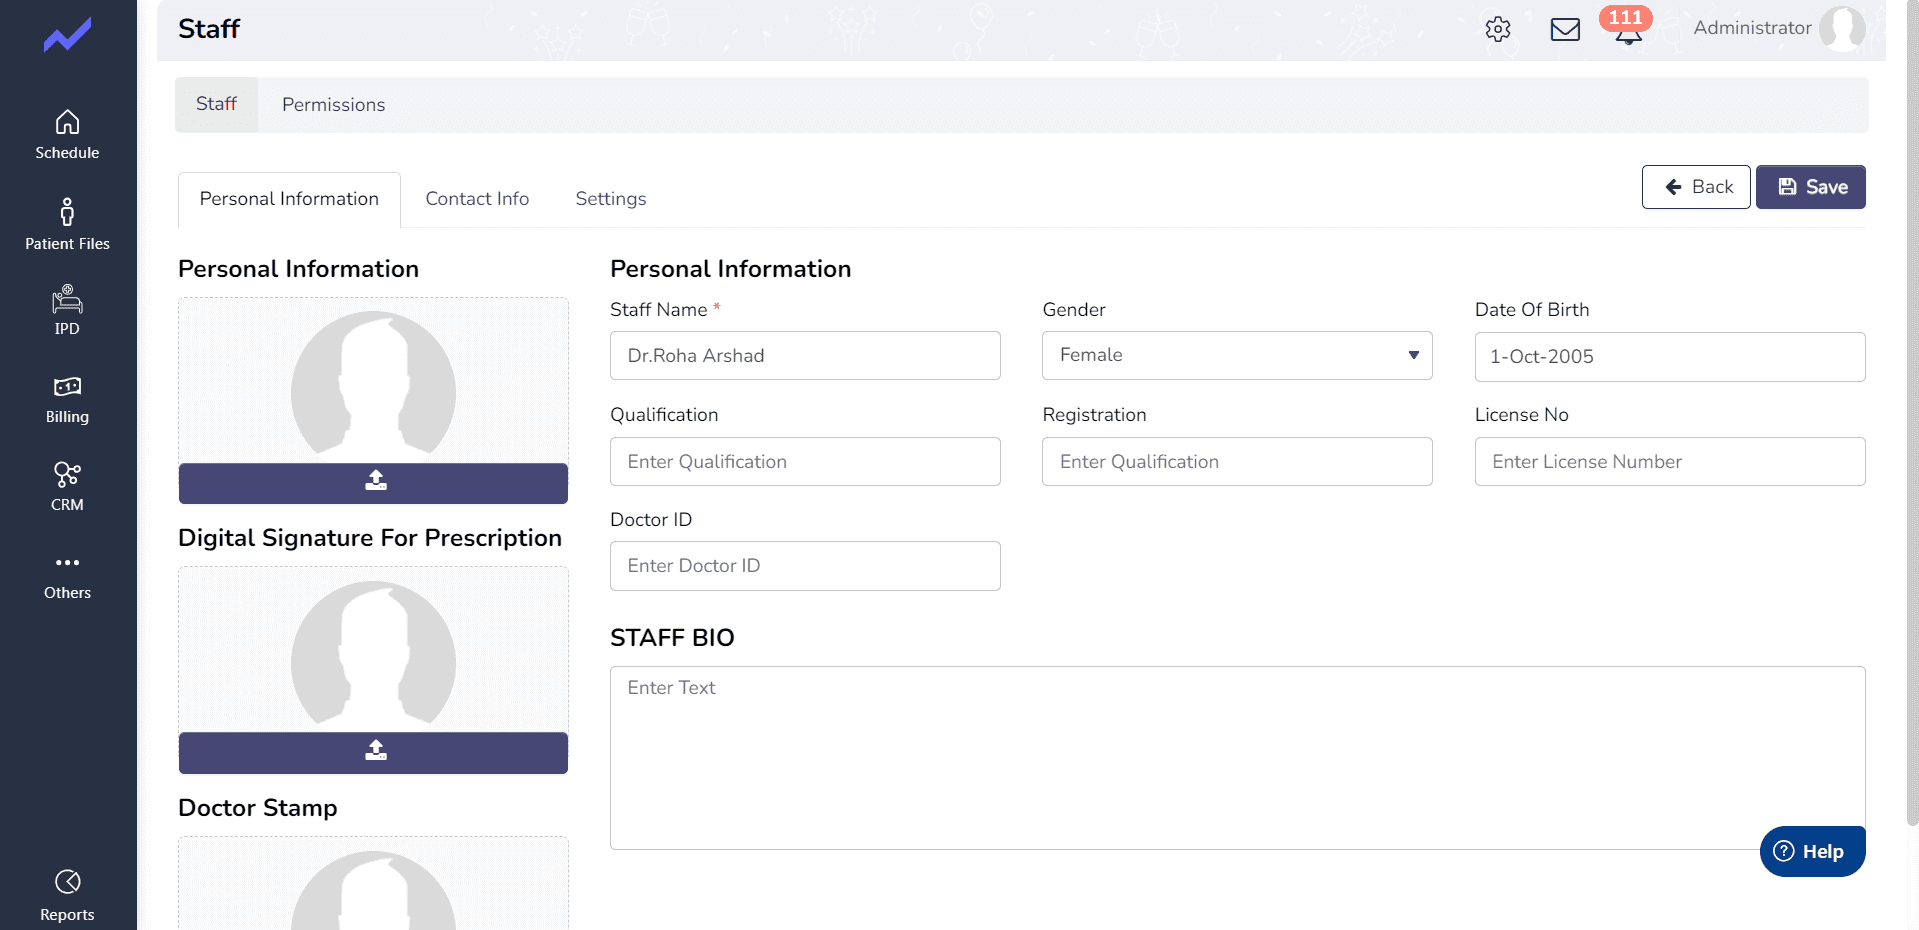
Add Important Information.
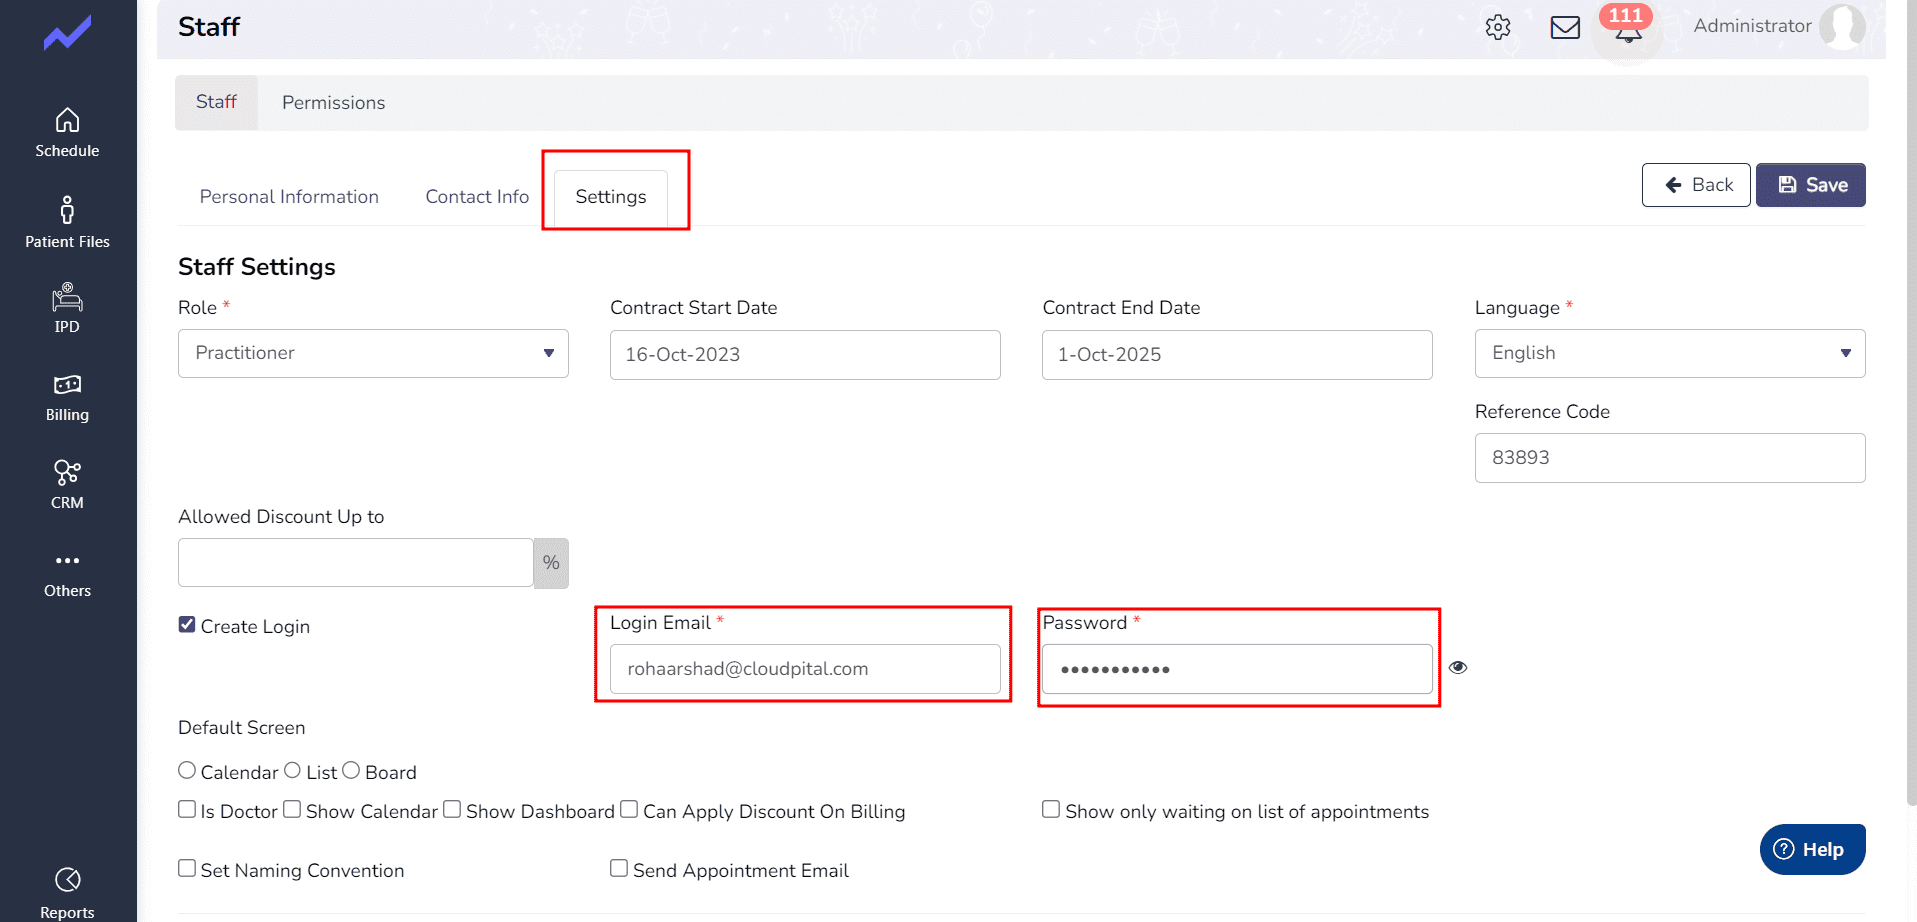
Go to Setting and Select Role and also add login Credentials of this Doctor.
In this screen ,Click on the Clinical Role.

When we click, in this screen add the New Branch, Specialty, Sub Specialty and Permissions.

Next, in this screen, the Admin should click on “Roster.” When the admin adds the roster, the system will generate a notification.

Finally, at the end of this process, the admin should click on “Save” on the main screen. At this point, the staff member has been successfully added by the admin.
Then go to the
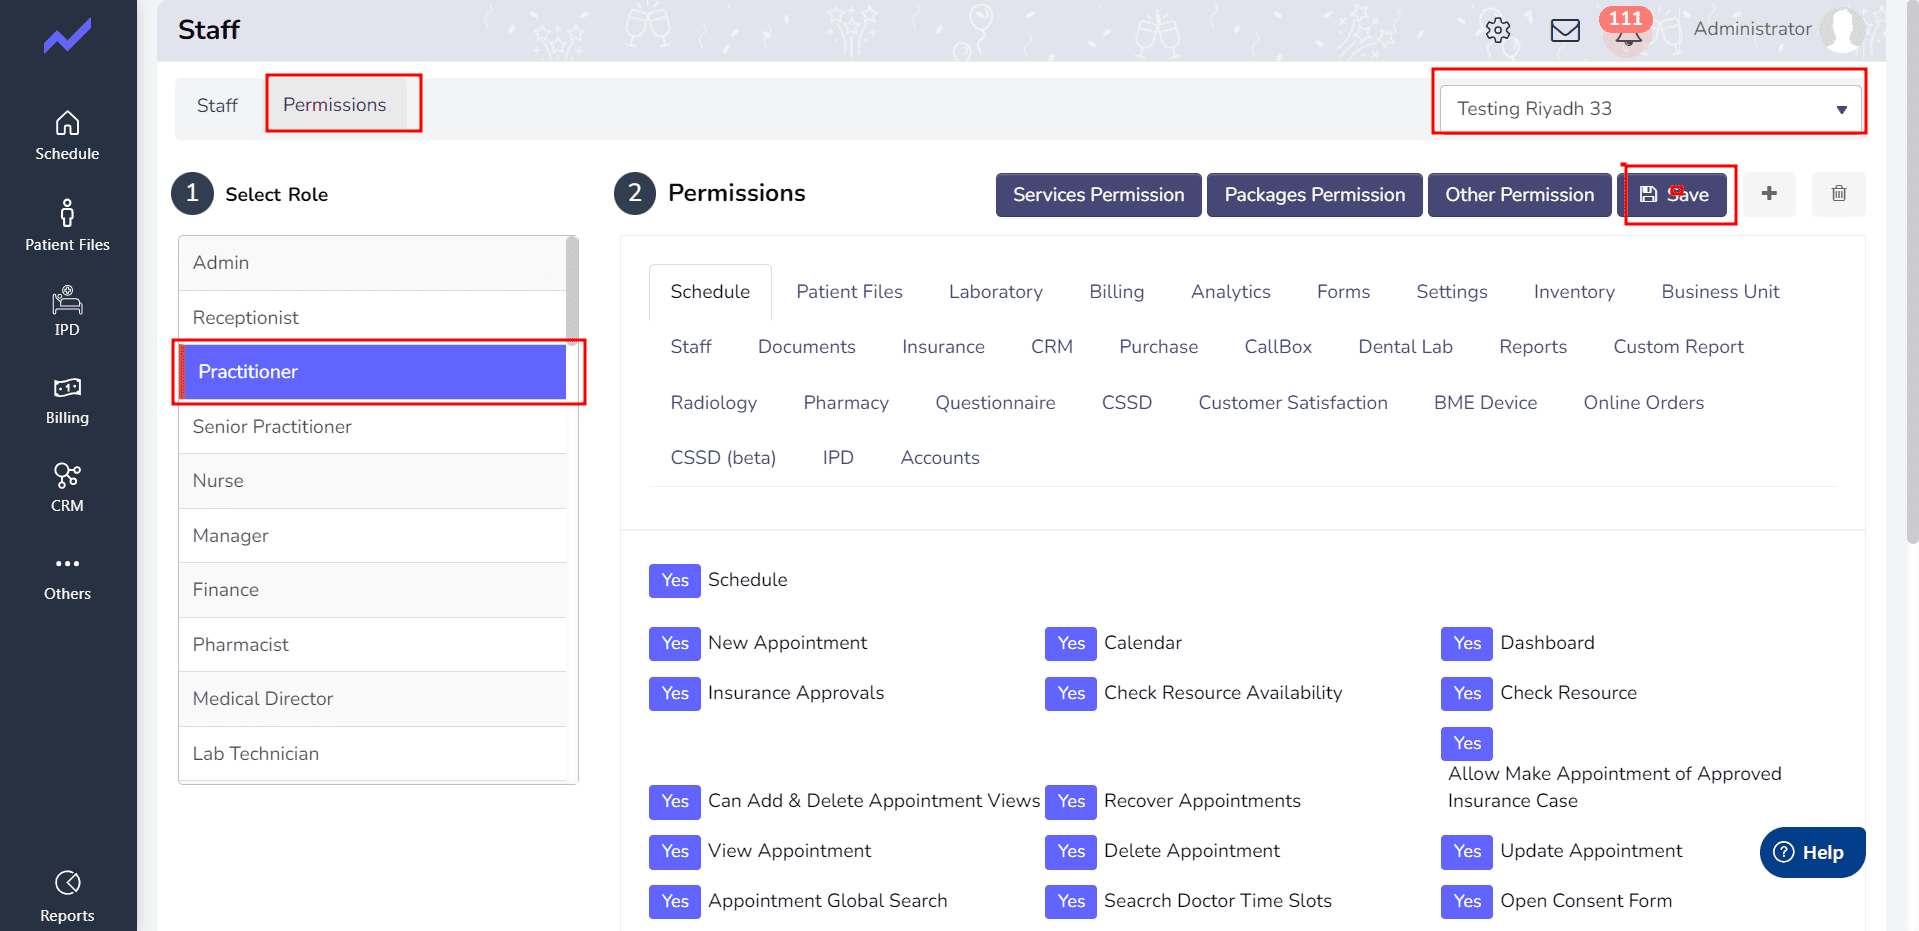
Staff=> Search Staff=> Edit=> Permissions=> Select Role=> Select Branch and save it.
At the end the Doctor will show in the Schedule screen of new Branch.
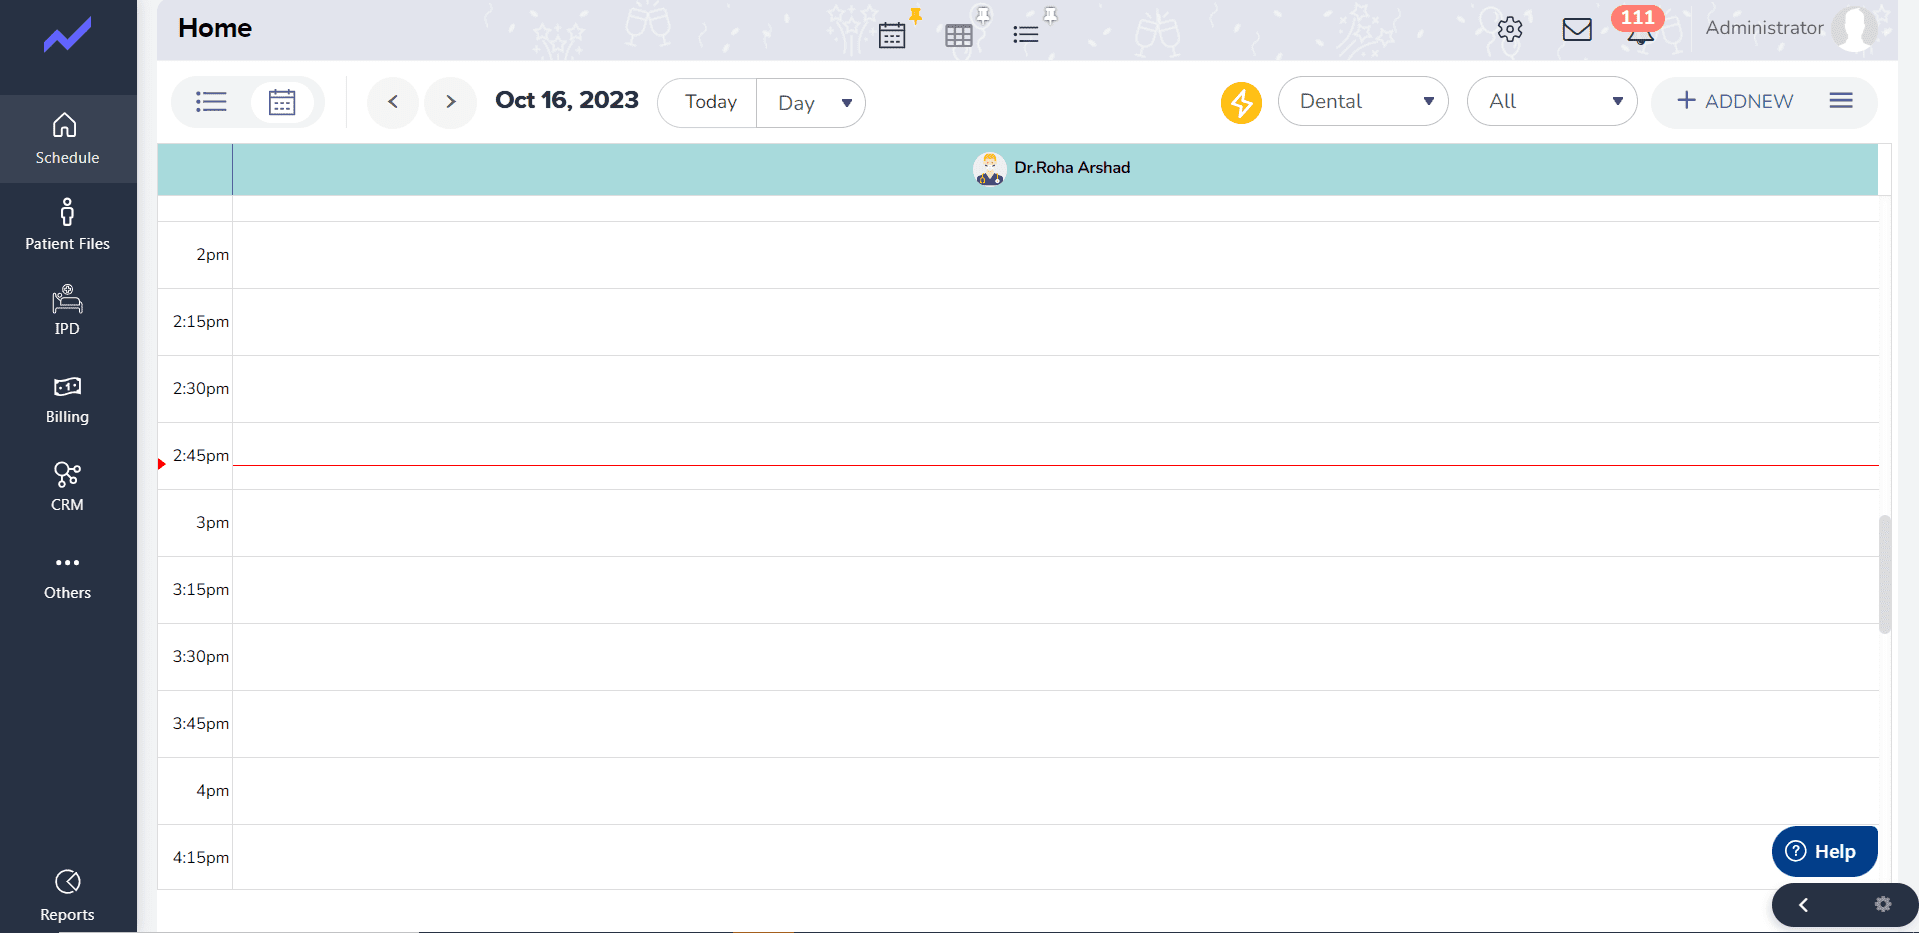
Once you’ve set up your doctors’ profiles, you can easily manage their schedules and appointments using the Cloudpital platform. You can also view their availability in real-time and make changes as needed.


