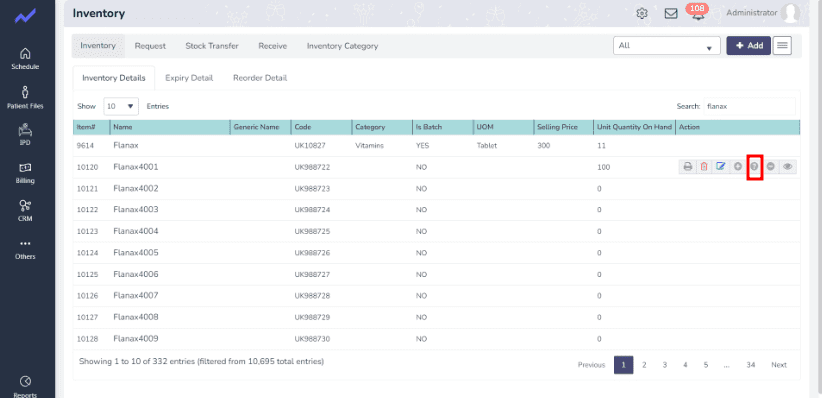
To initiate an Inventory Request, you’ll follow a series of steps. First, when you decide to request specific inventory items, it’s prudent to check their current stock levels. You can do this by clicking on the Question mark icon, which provides you with a quick overview of the inventory in stock.
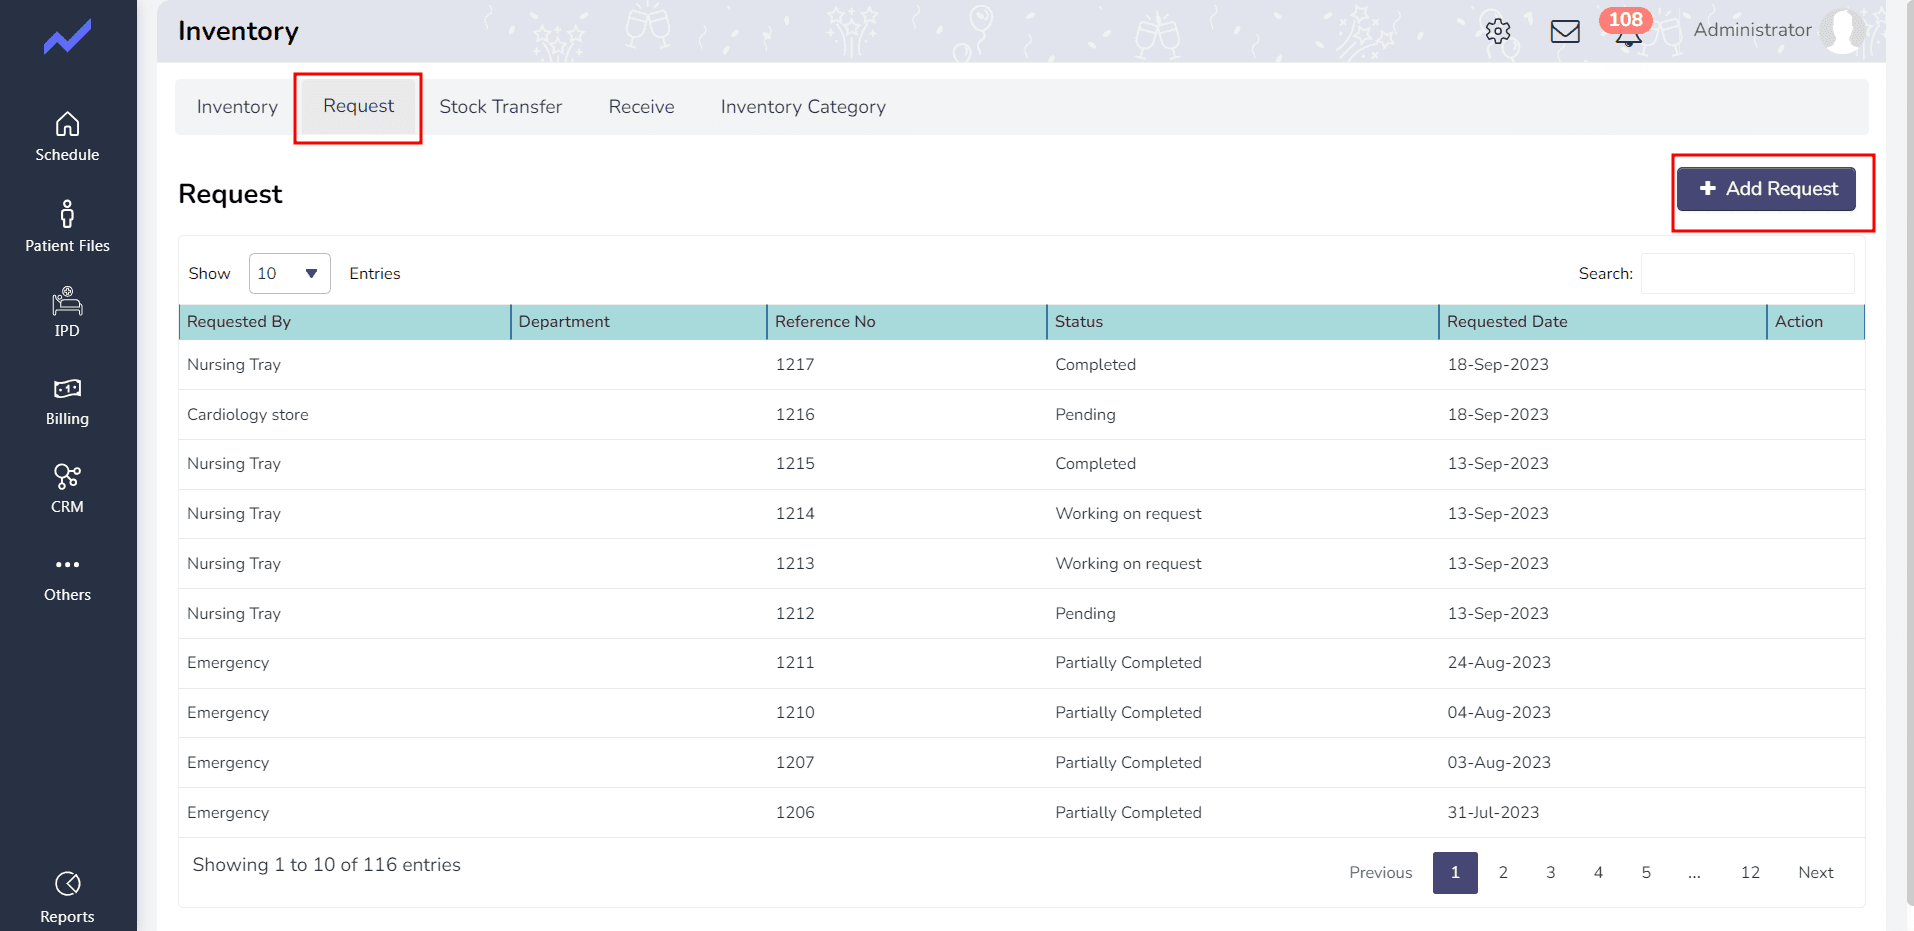
After reviewing the inventory, proceed by clicking on the “Request” option. Within the request screen, you’ll find the option to add a new request by clicking on the “ADD Request “ button.
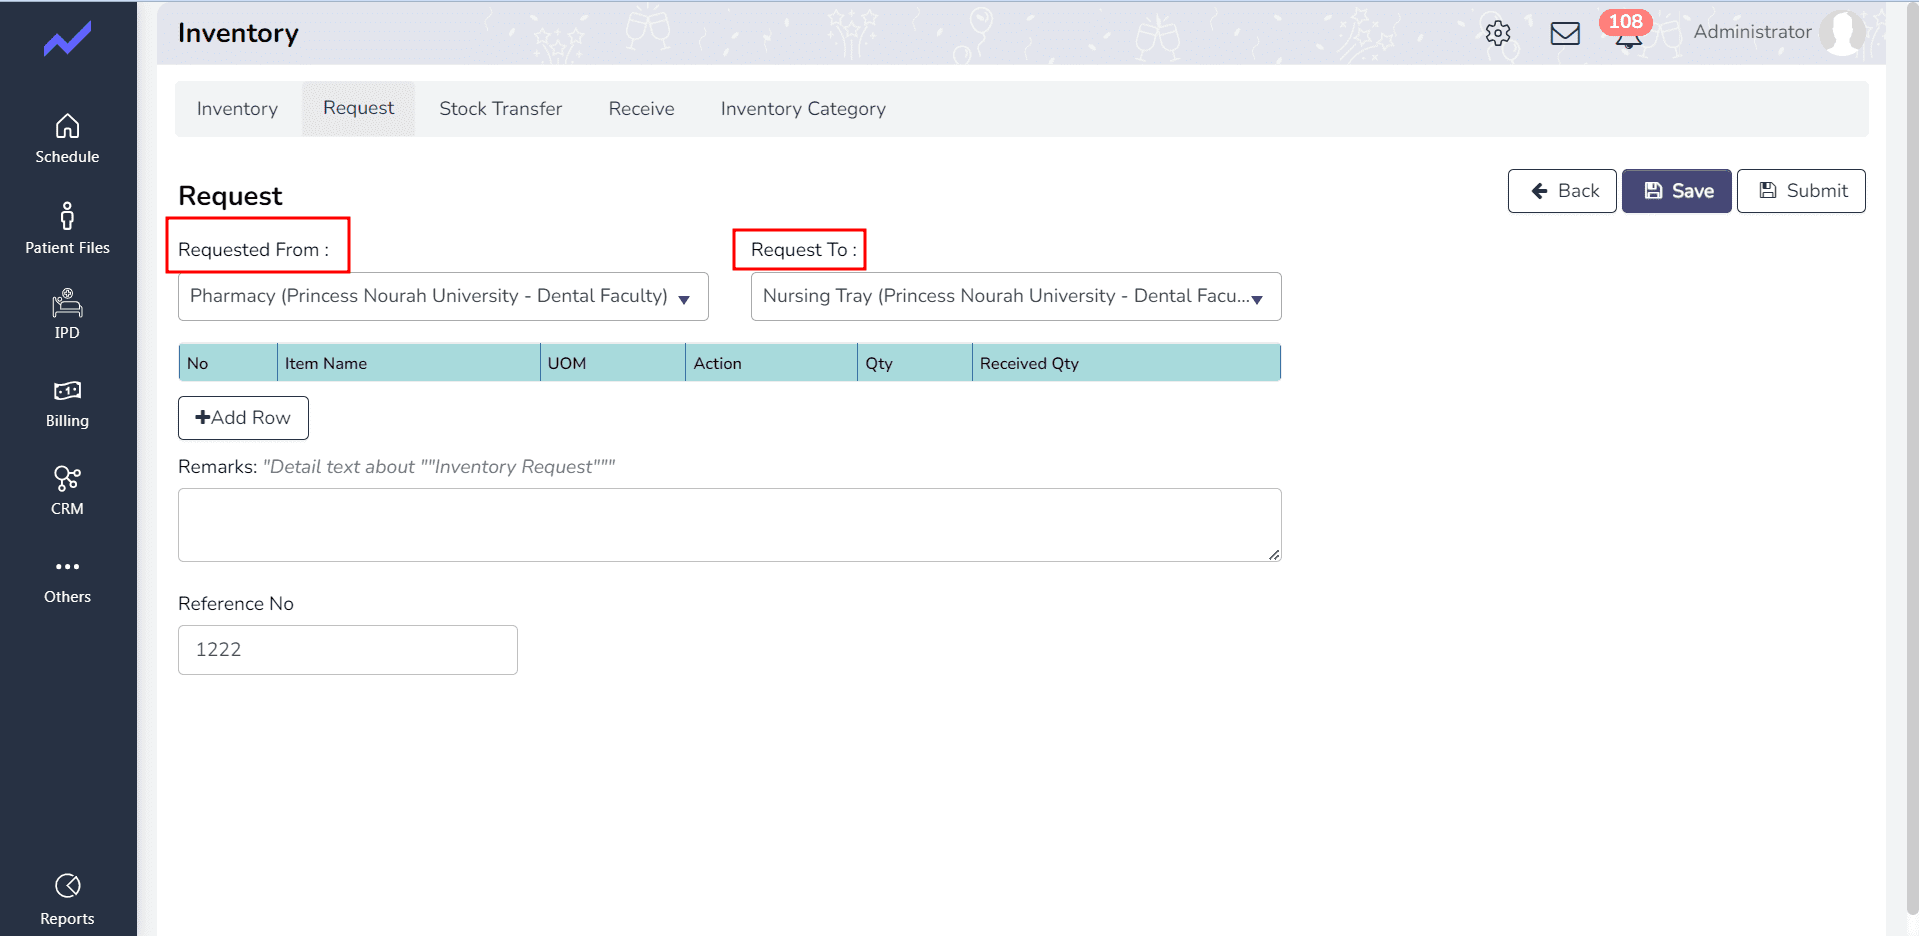
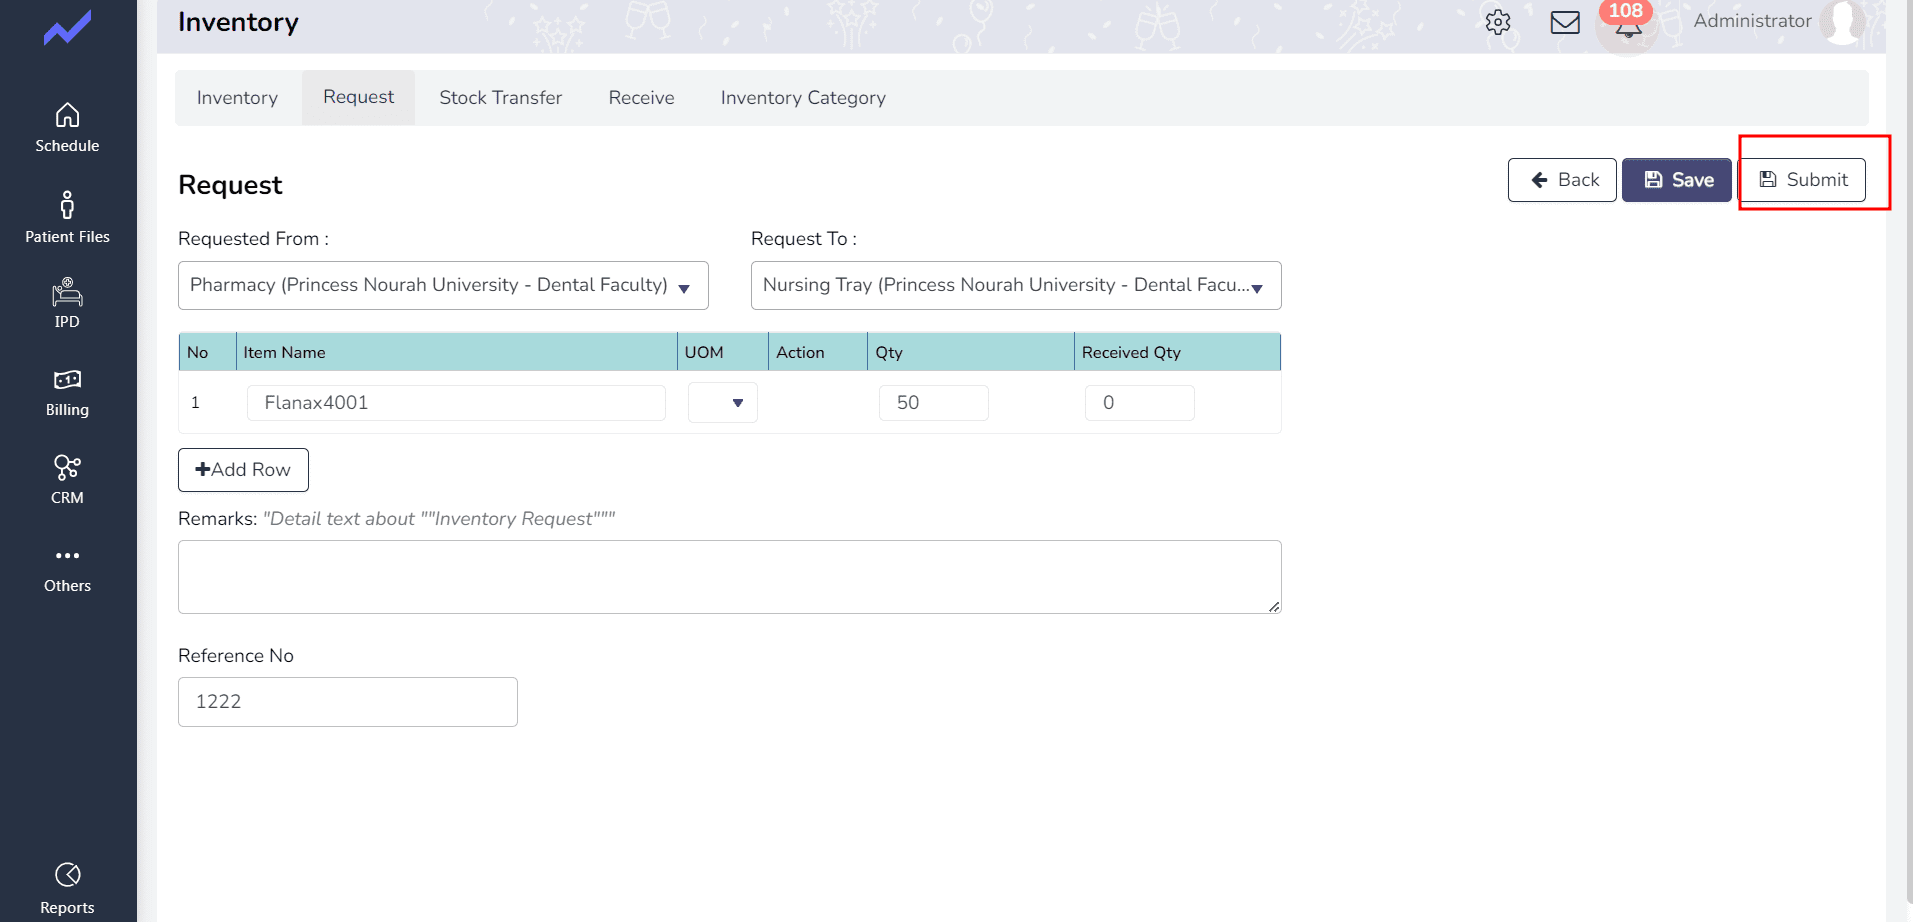
It’s crucial to specify both the recipient (“Request To”) and the relevant store. Additionally, you’ll need to indicate where the inventory is available (“Request From”) and select the corresponding store.
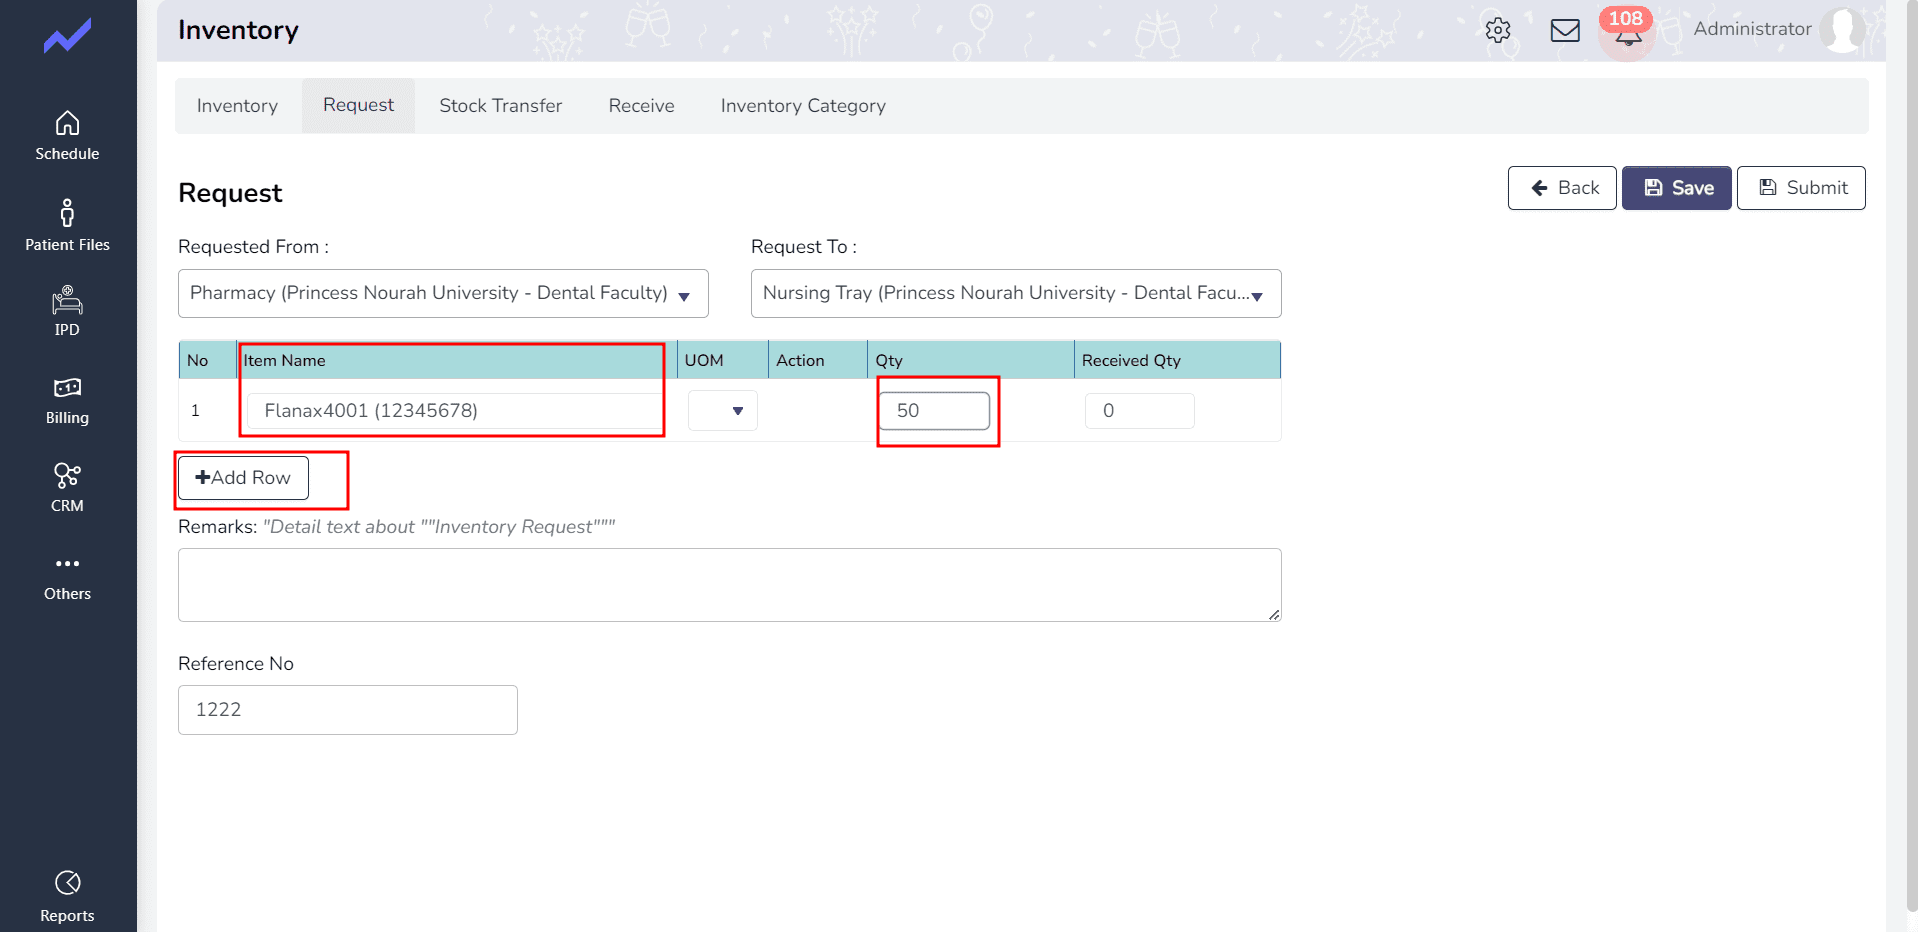
To include specific inventory items in the request, click “Add Row,” search for the desired item, input the required Quantity, and then save the request.
Initially, the inventory request will have a status of “Draft.” To modify this status, click on the “Edit” action.
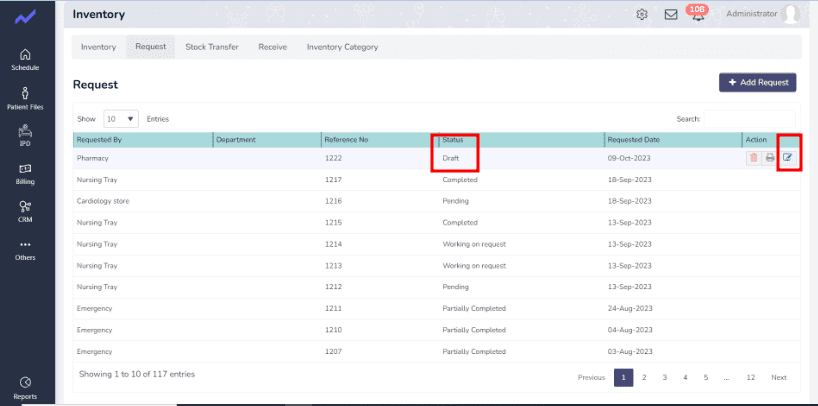
After making any necessary changes, Submit the request.
This action will transition the status from “Draft” to “Pending,” ensuring that the inventory request process is well-managed and efficient.
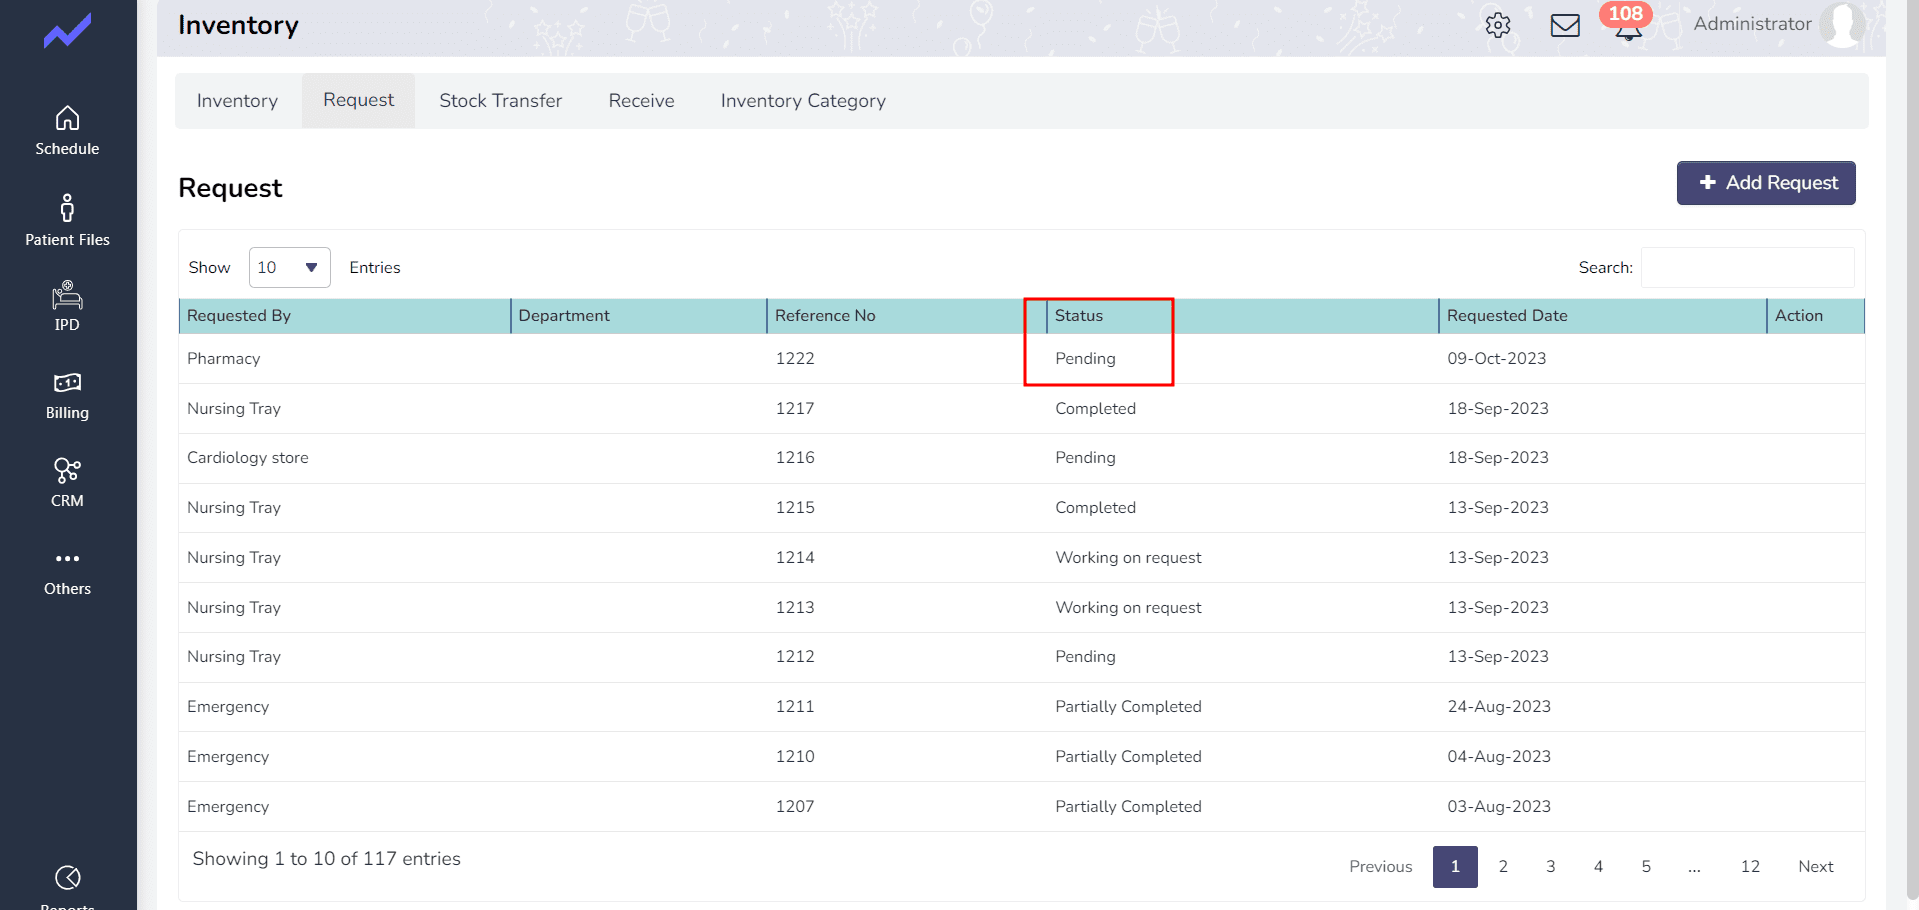
Fig :Inventory Request
- Begin by initiating an Inventory Request. To do this, start by searching for the specific inventory item to check its current stock by clicking on the Question mark icon.
- After reviewing the inventory details, proceed by clicking on the “Request” option to formally request the inventory.
- On the request screen, click the “Plus” button to create a new request.
- Firstly, specify who the request is intended for (“Request To”) and select the corresponding store.
- Next, indicate where the inventory is available (“Request From”) and select the relevant store.
- To add an inventory item to the request, click “Add Row,” search for the desired inventory item, input the required quantity, and then save the request.
- Initially, the inventory request status will be marked as “Draft.” To change this status, click on the “Edit” action, and after making any necessary changes, submit the request.
- Following submission, the status will transition from “Draft” to “Pending.”


