Perio Module: #
The Perio Module in Cloudpital is designed to assist in the assessment and documentation of periodontal health. It captures detailed information about the patient’s gum condition, including measurements such as FGM (Free Gingival Margin), MQJ (Mucogingival Junction), furcation involvement, tooth mobility, plaque accumulation, bleeding on probing, delayed bleeding, and suppuration. The module allows for the recording of these parameters at different dates, enabling the tracking of periodontal health over time.
This comprehensive data collection aids in diagnosing periodontal diseases, monitoring treatment progress, and planning personalized periodontal care. The module also includes sections for treatment notes and observations, ensuring that all relevant information is documented for effective patient management.
1.1 Permission Settings for Dental’s Perio Feature: #
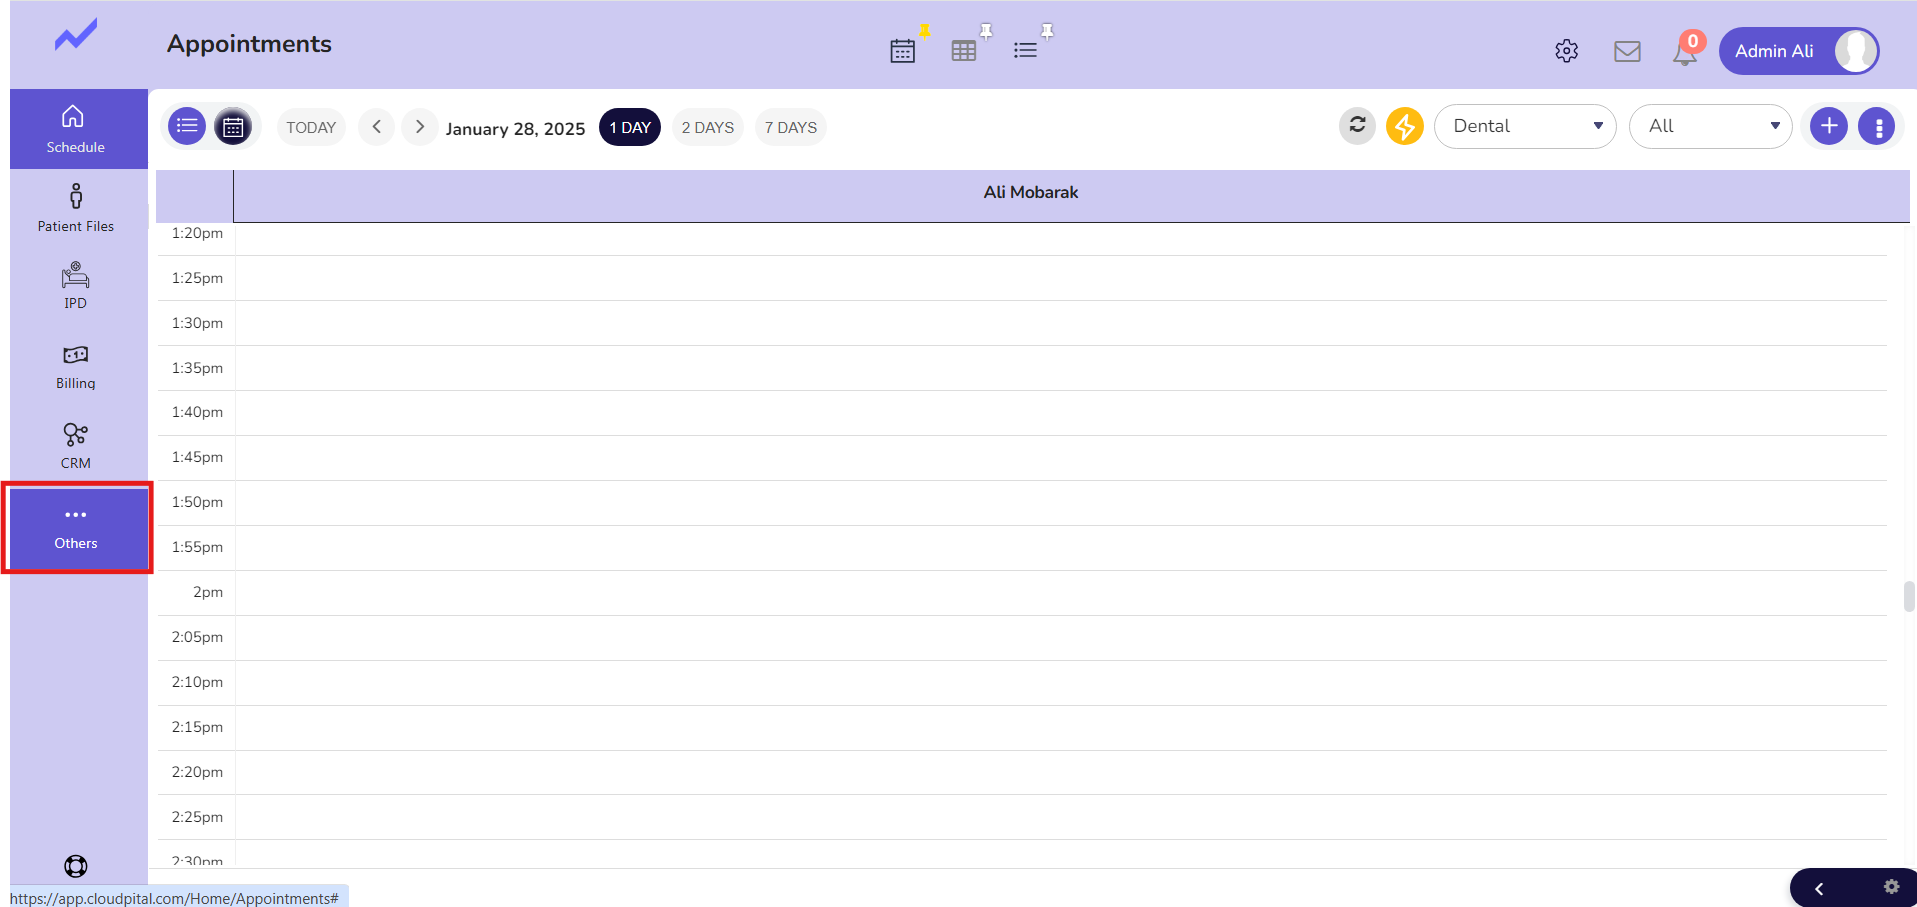
From the Schedule screen click on Others.
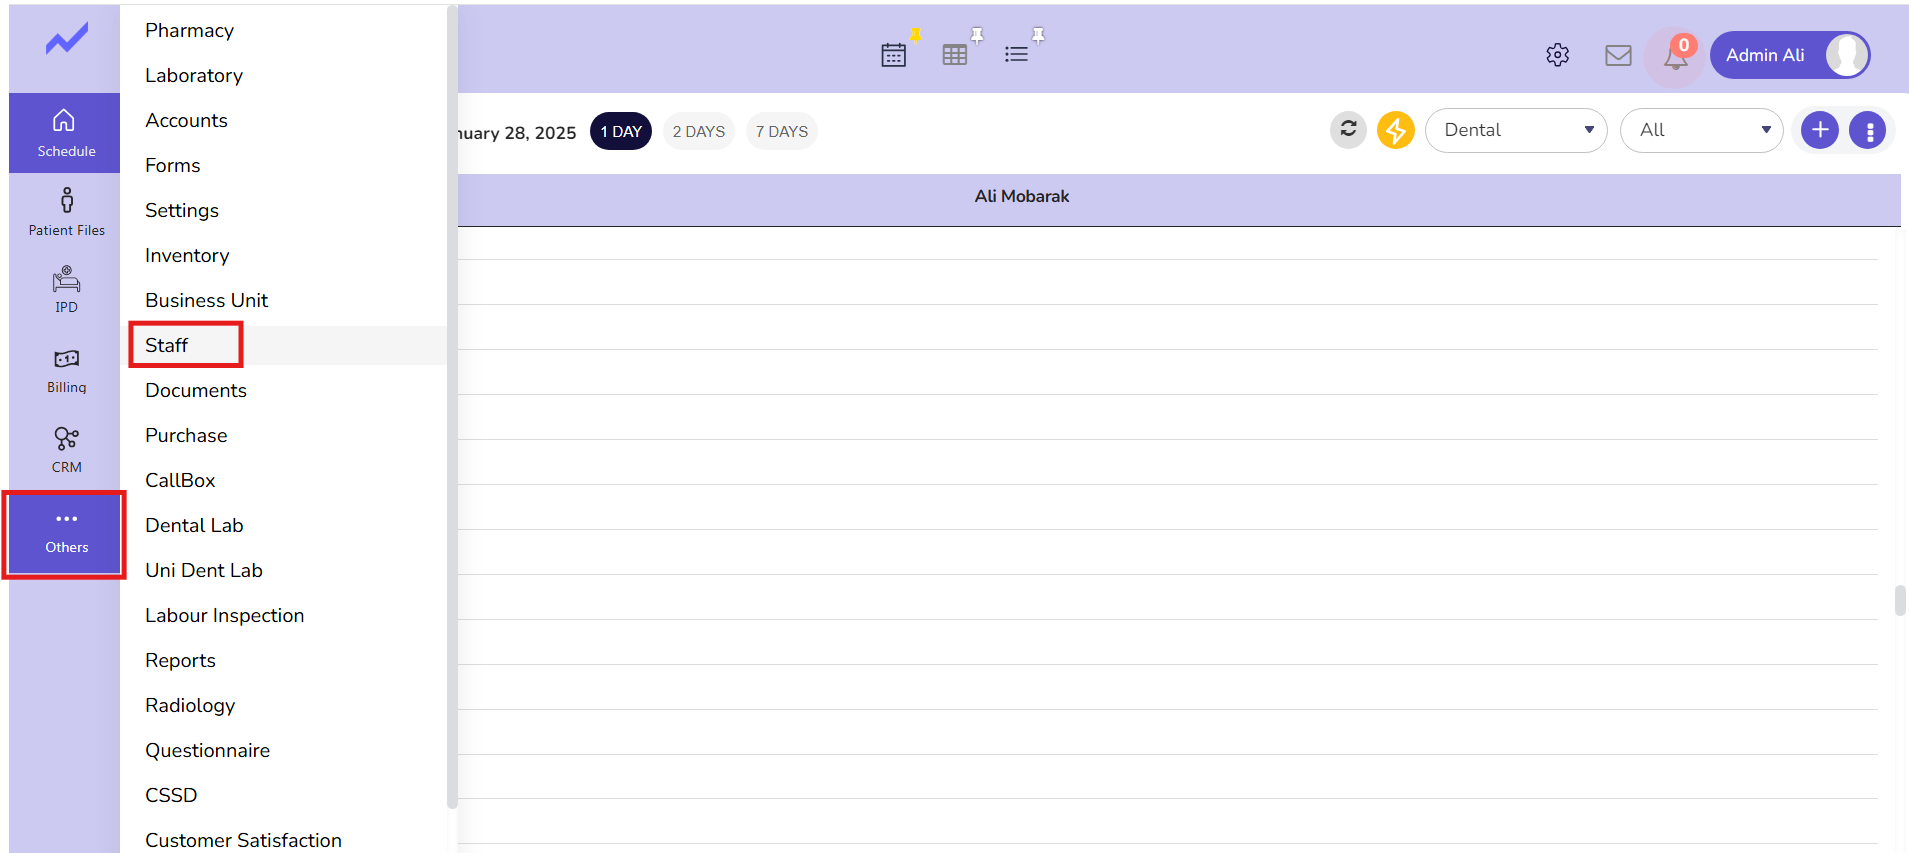
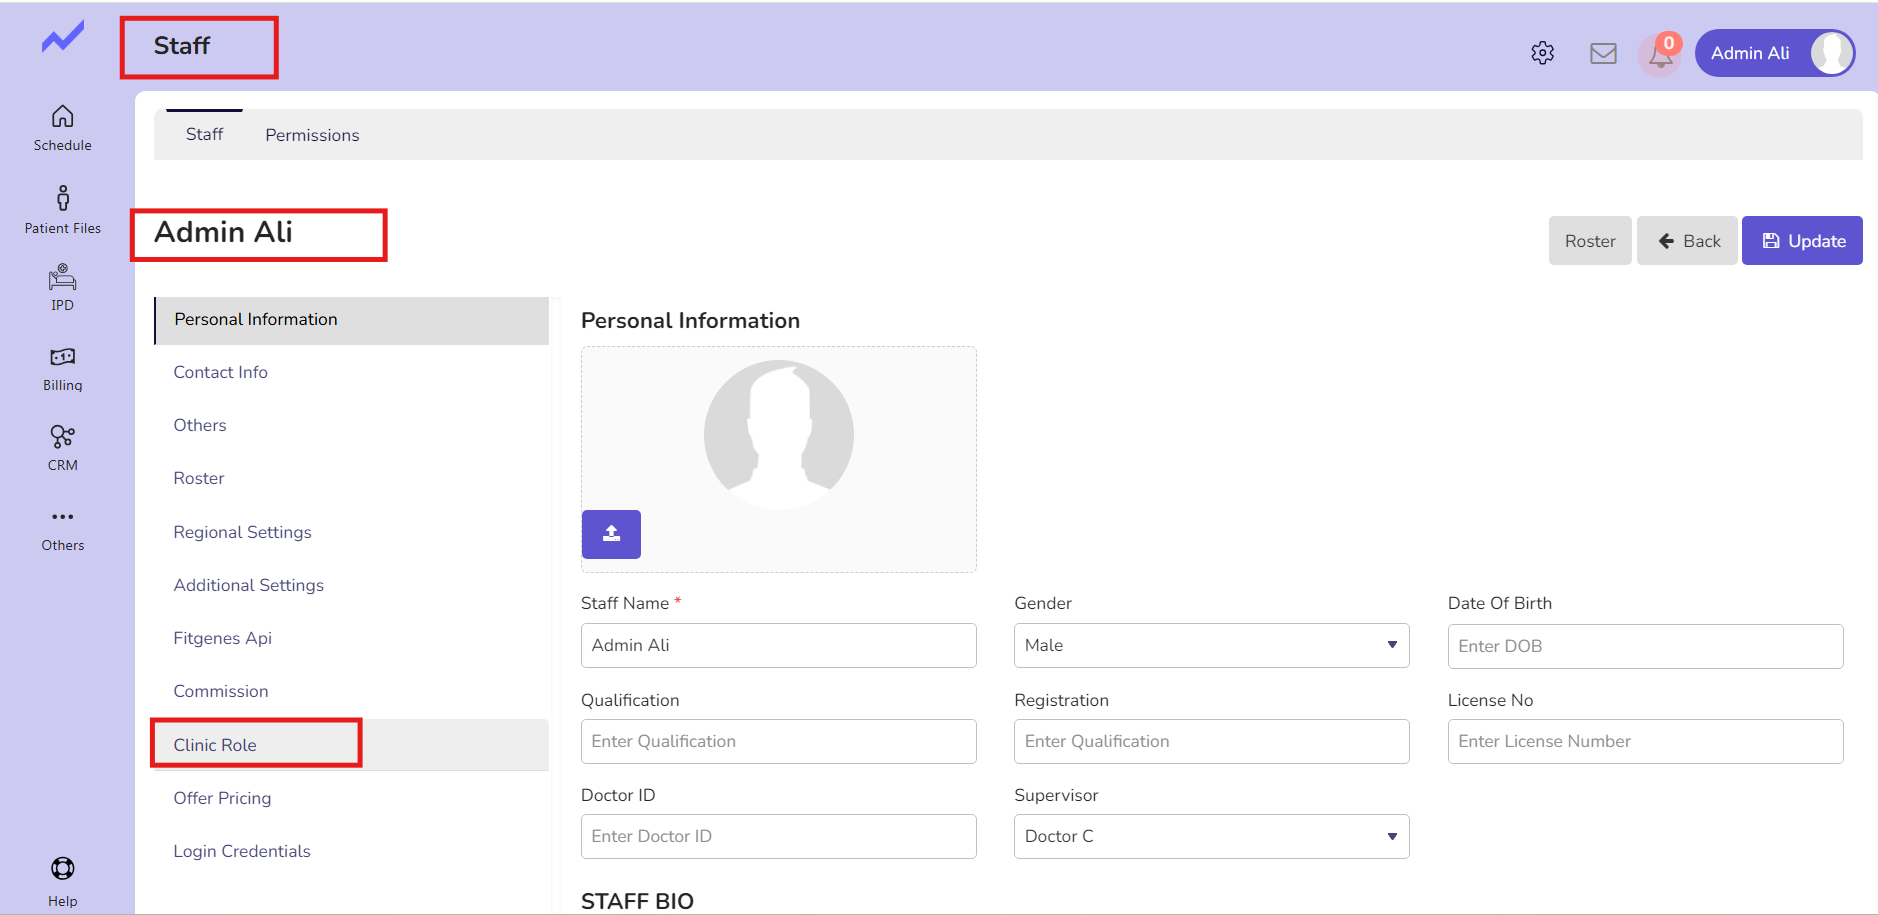
Click on Staff.
The Staff screen appears. Select the user with whom you are currently logged in. In this case, I am granting permissions to Admin Ali, as I am currently logged in as Admin Ali.
You just need to click on the edit icon.

The staff screen will appear. Now, click on ‘Clinic Role’
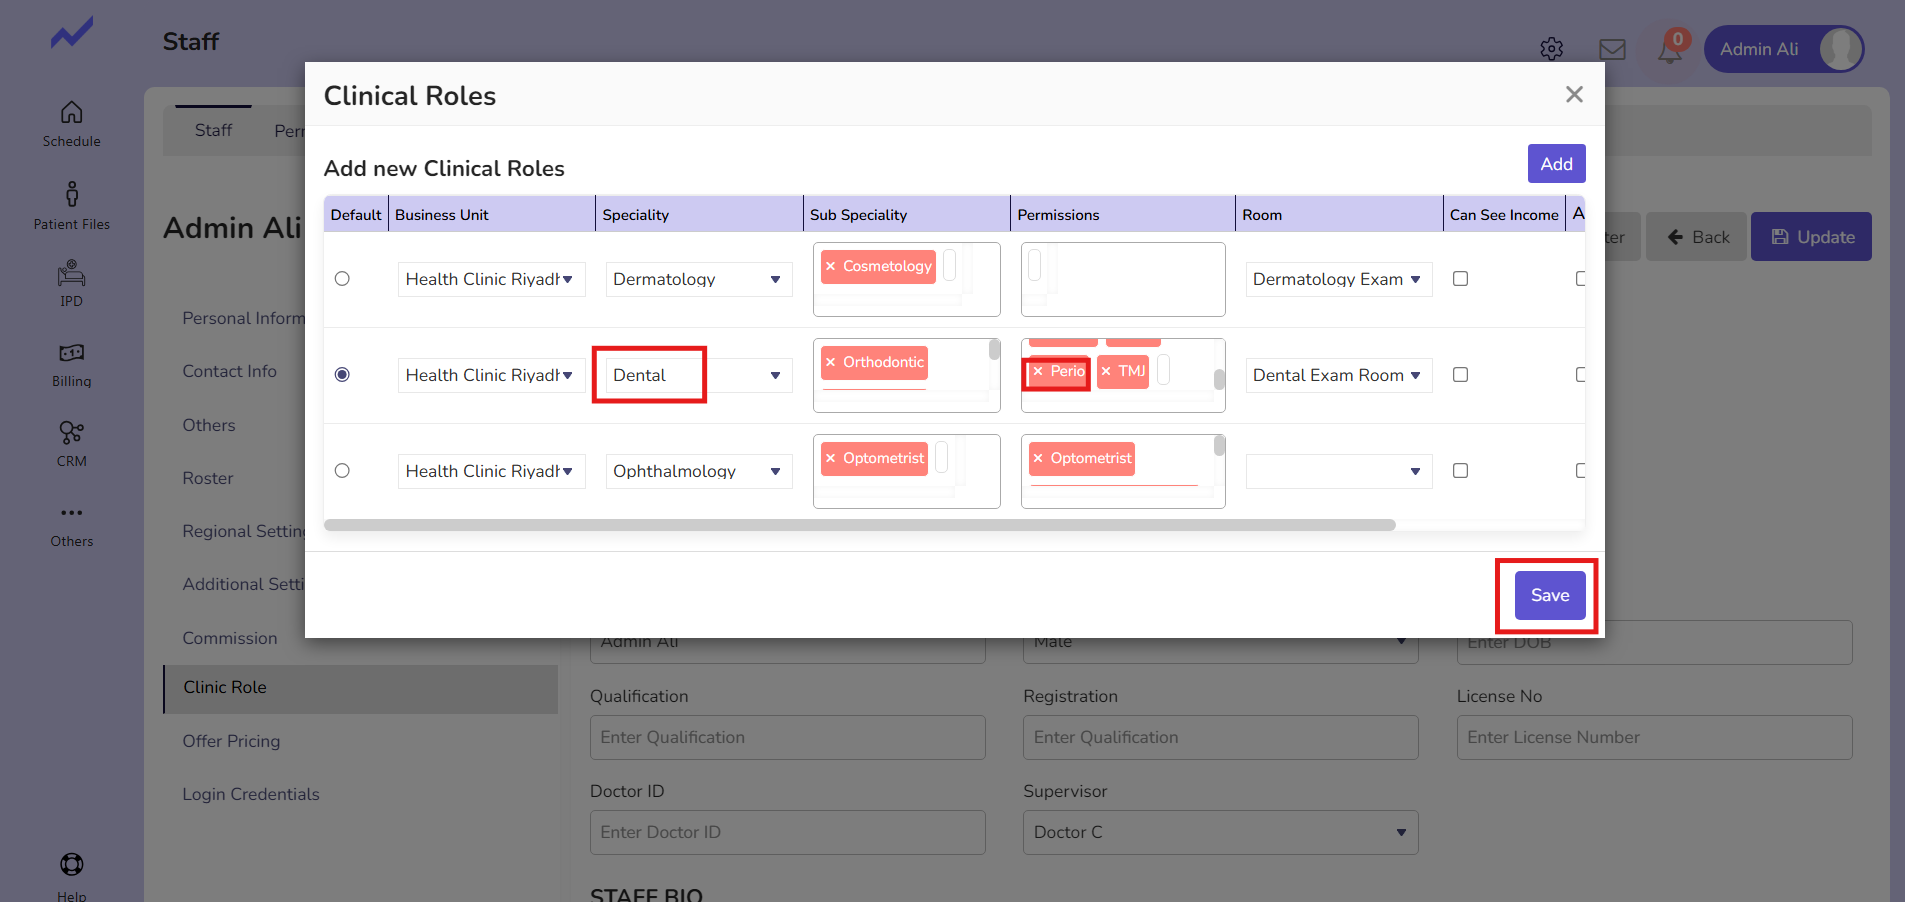
For the Dental specialty, you have to click on Permissions in order to assign this doctor the permissions for the Perio module.
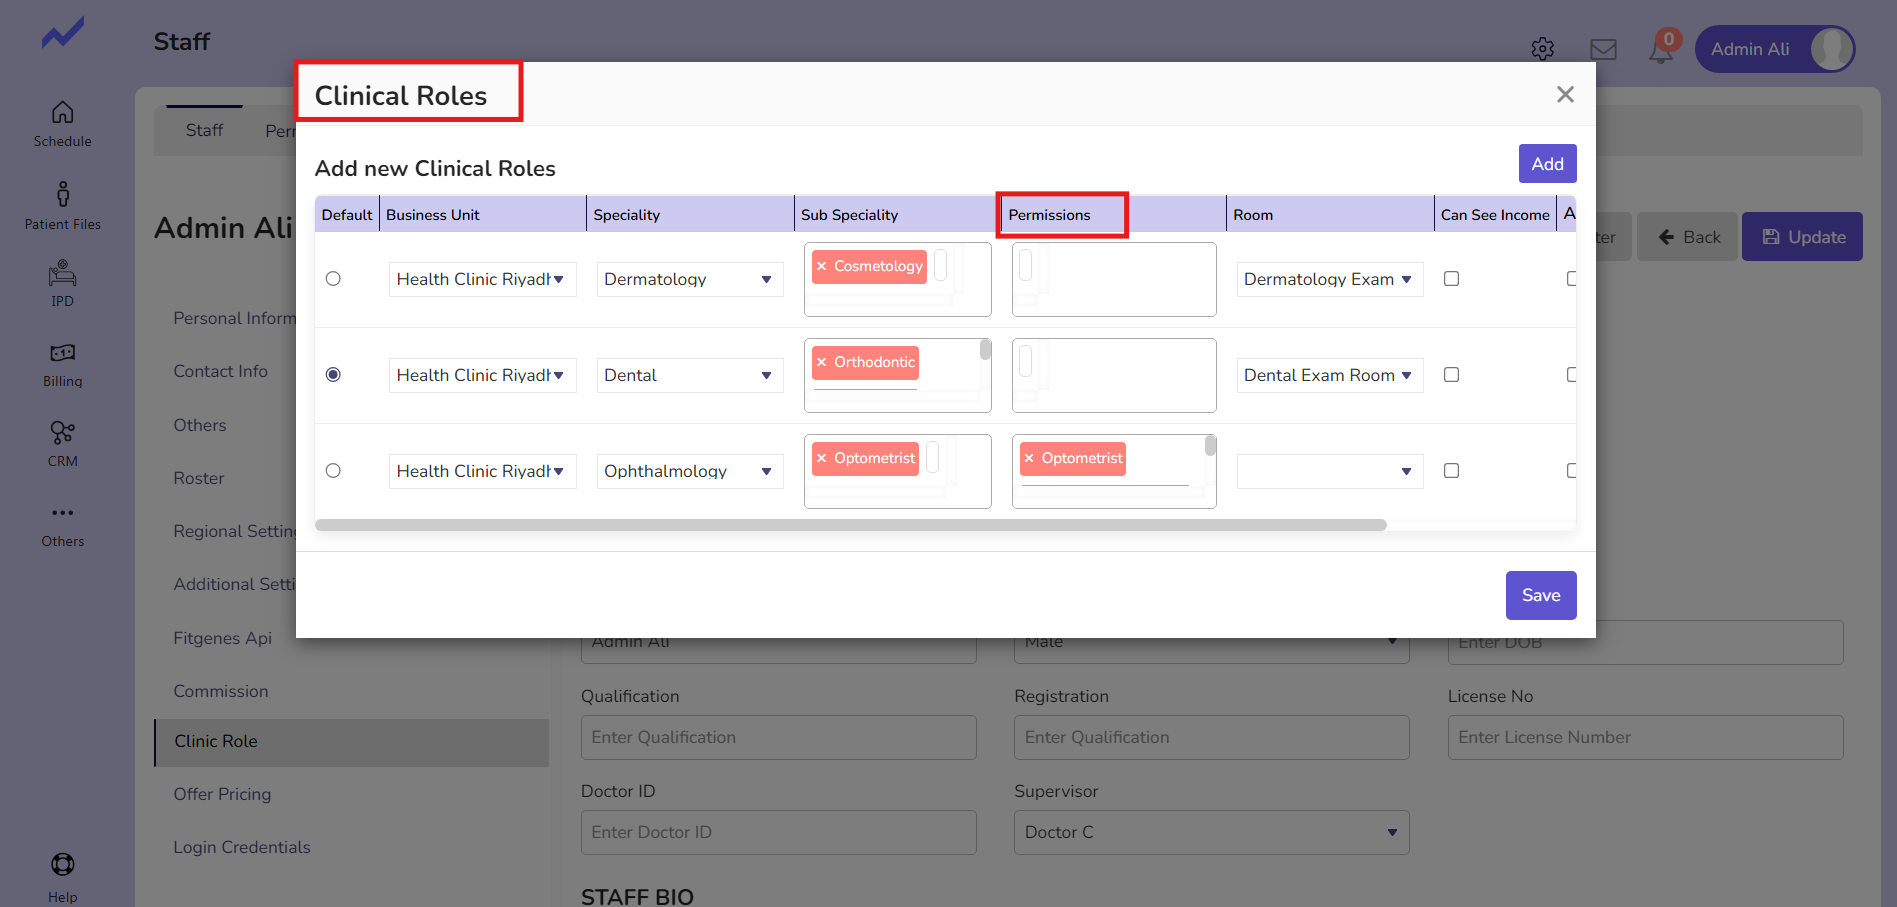

When you click on Permissions, a drop-down will appear with the option of Perio. Select Perio and then click on the Save button. The Perio permission will be granted to Admin Ali.
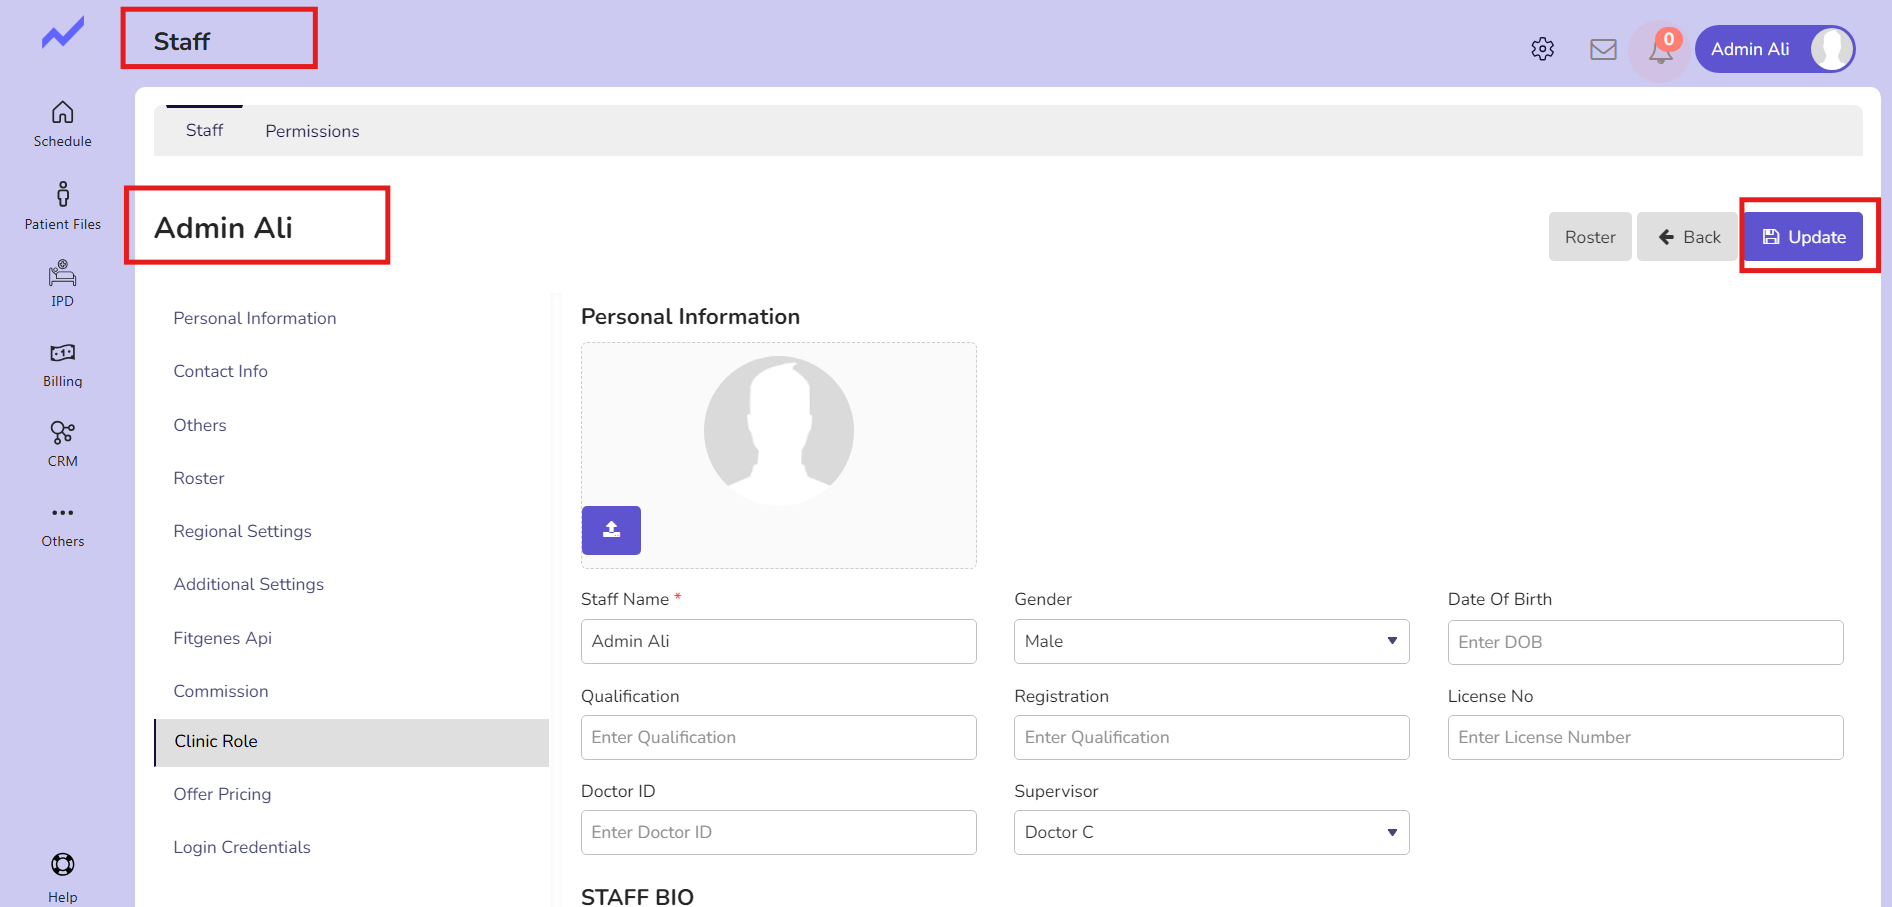
Now click on the update button and the changes will be saved successfully.
1.2 Create dental Appointment #
Now, go to the Schedule screen and create an appointment for a dental patient with any Doctor .
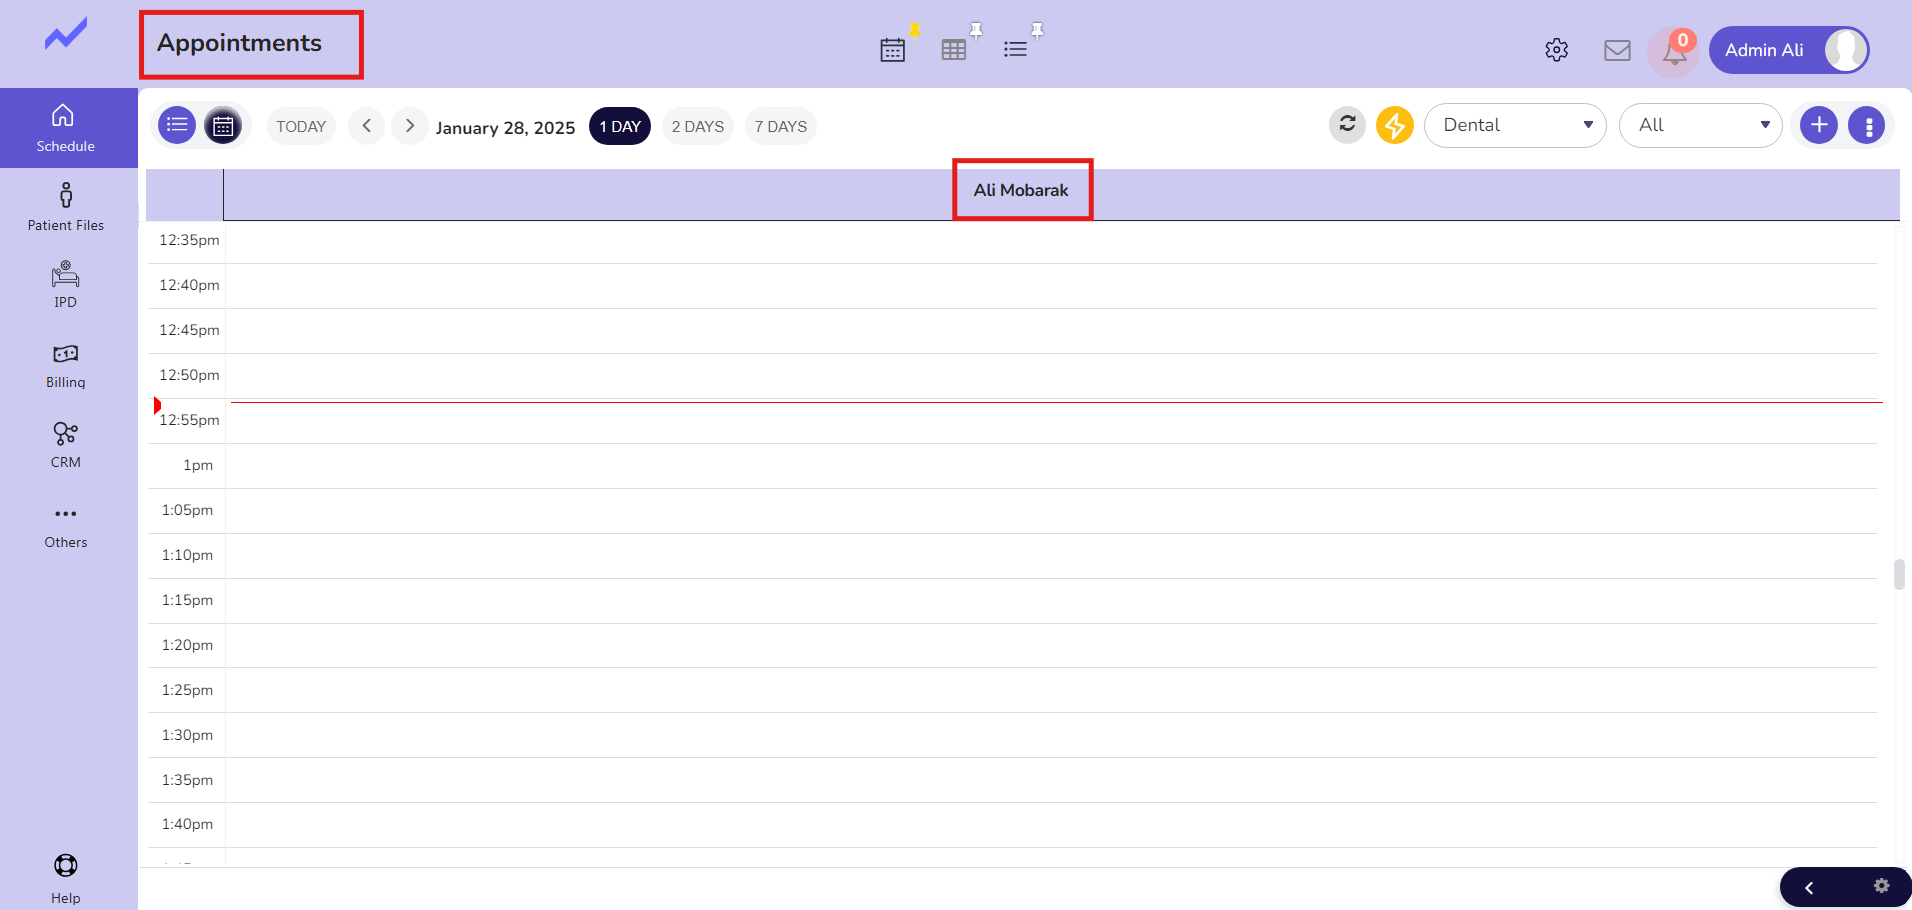
Click on any Slot and make an appointment.
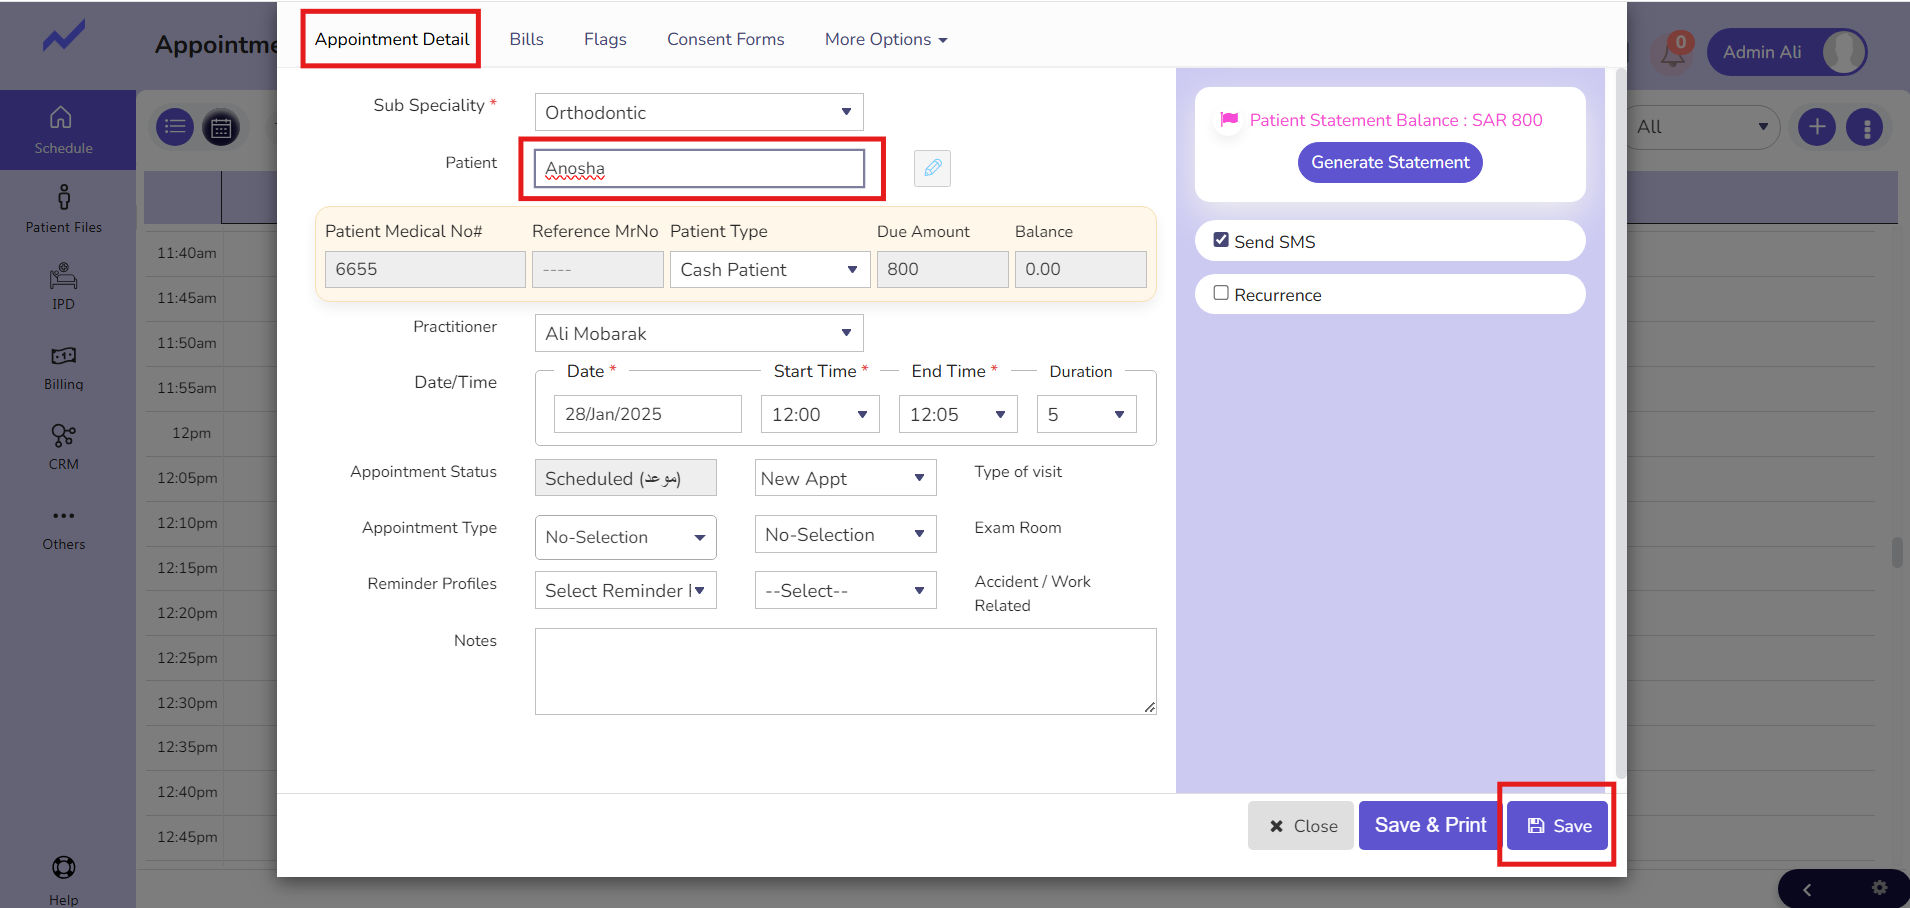
The Appointment Details screen will appear. Select the patient and click on the Save button.
Appointment has been created.
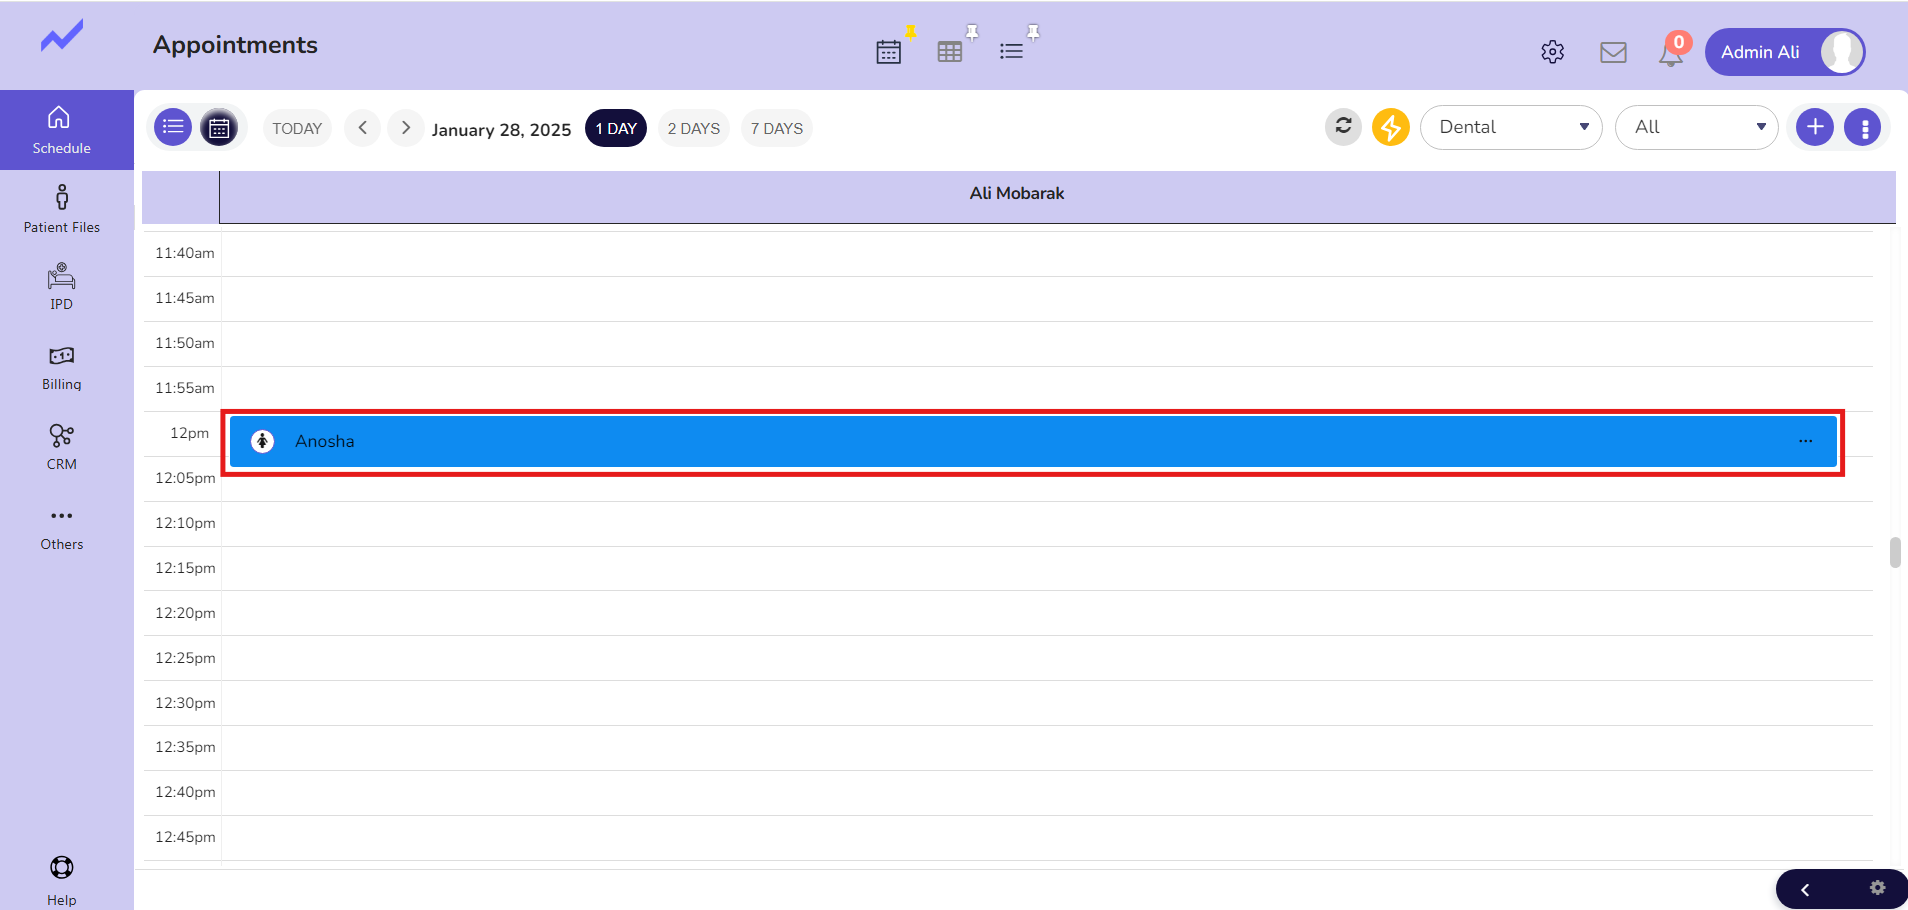
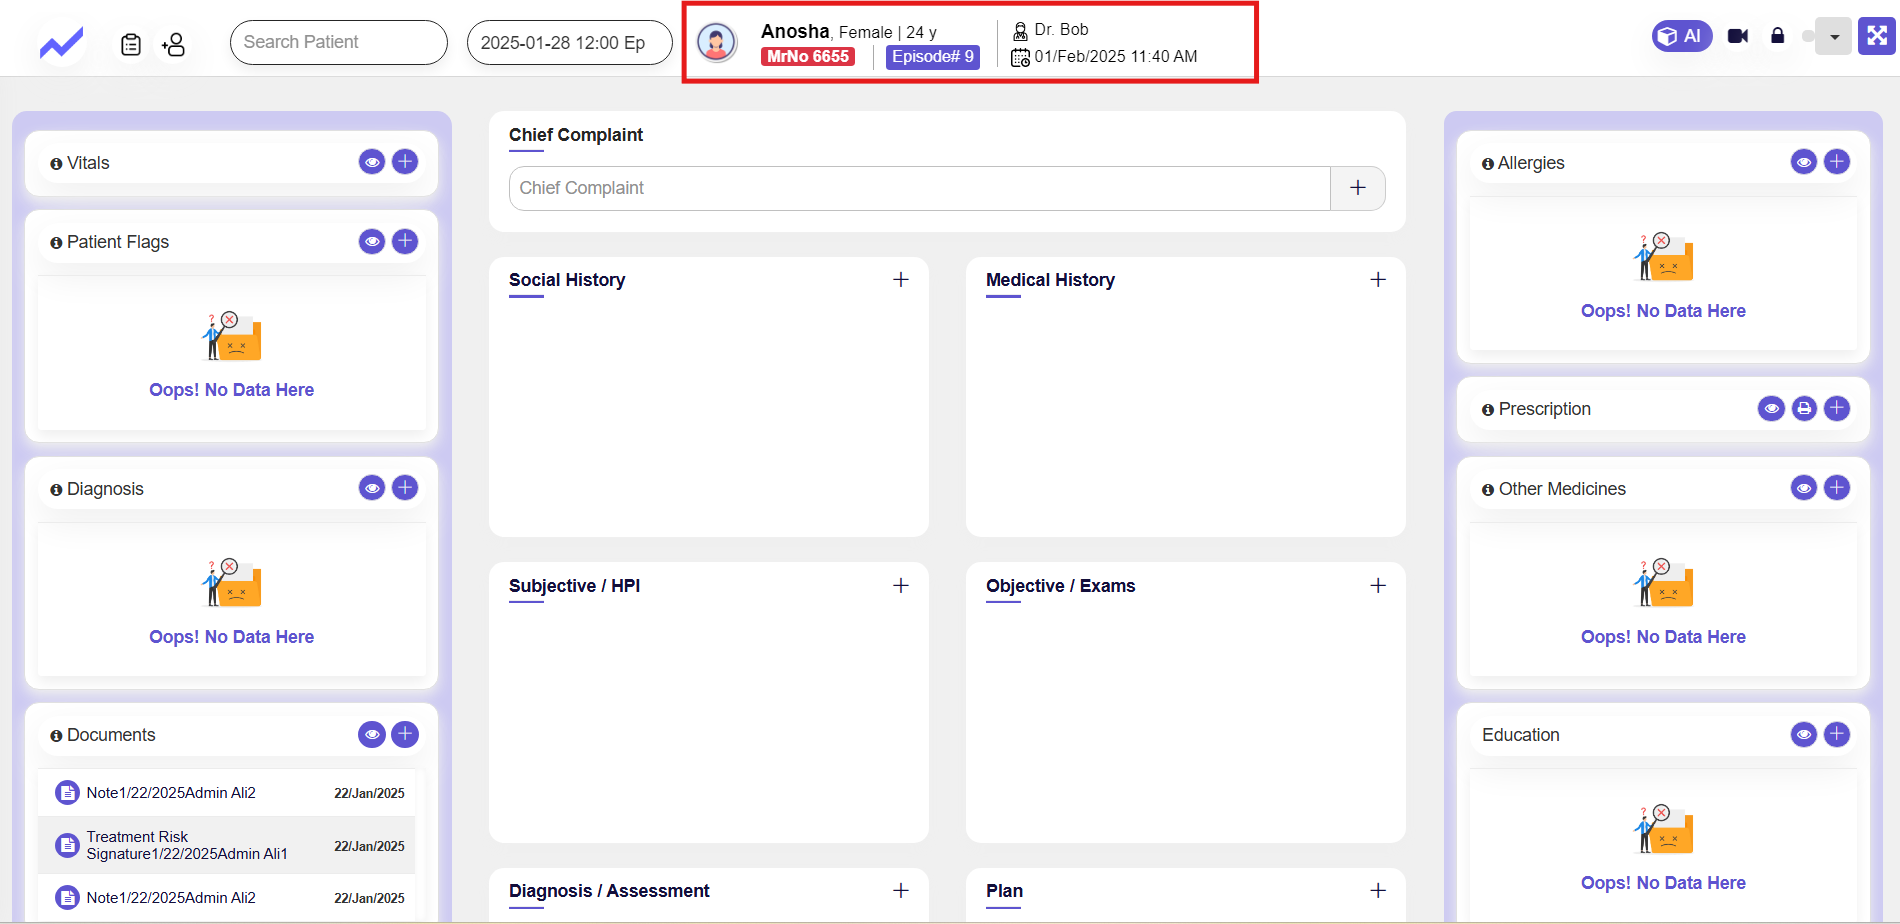
Now, click on the Appointment and then click on the Clinical Note button.
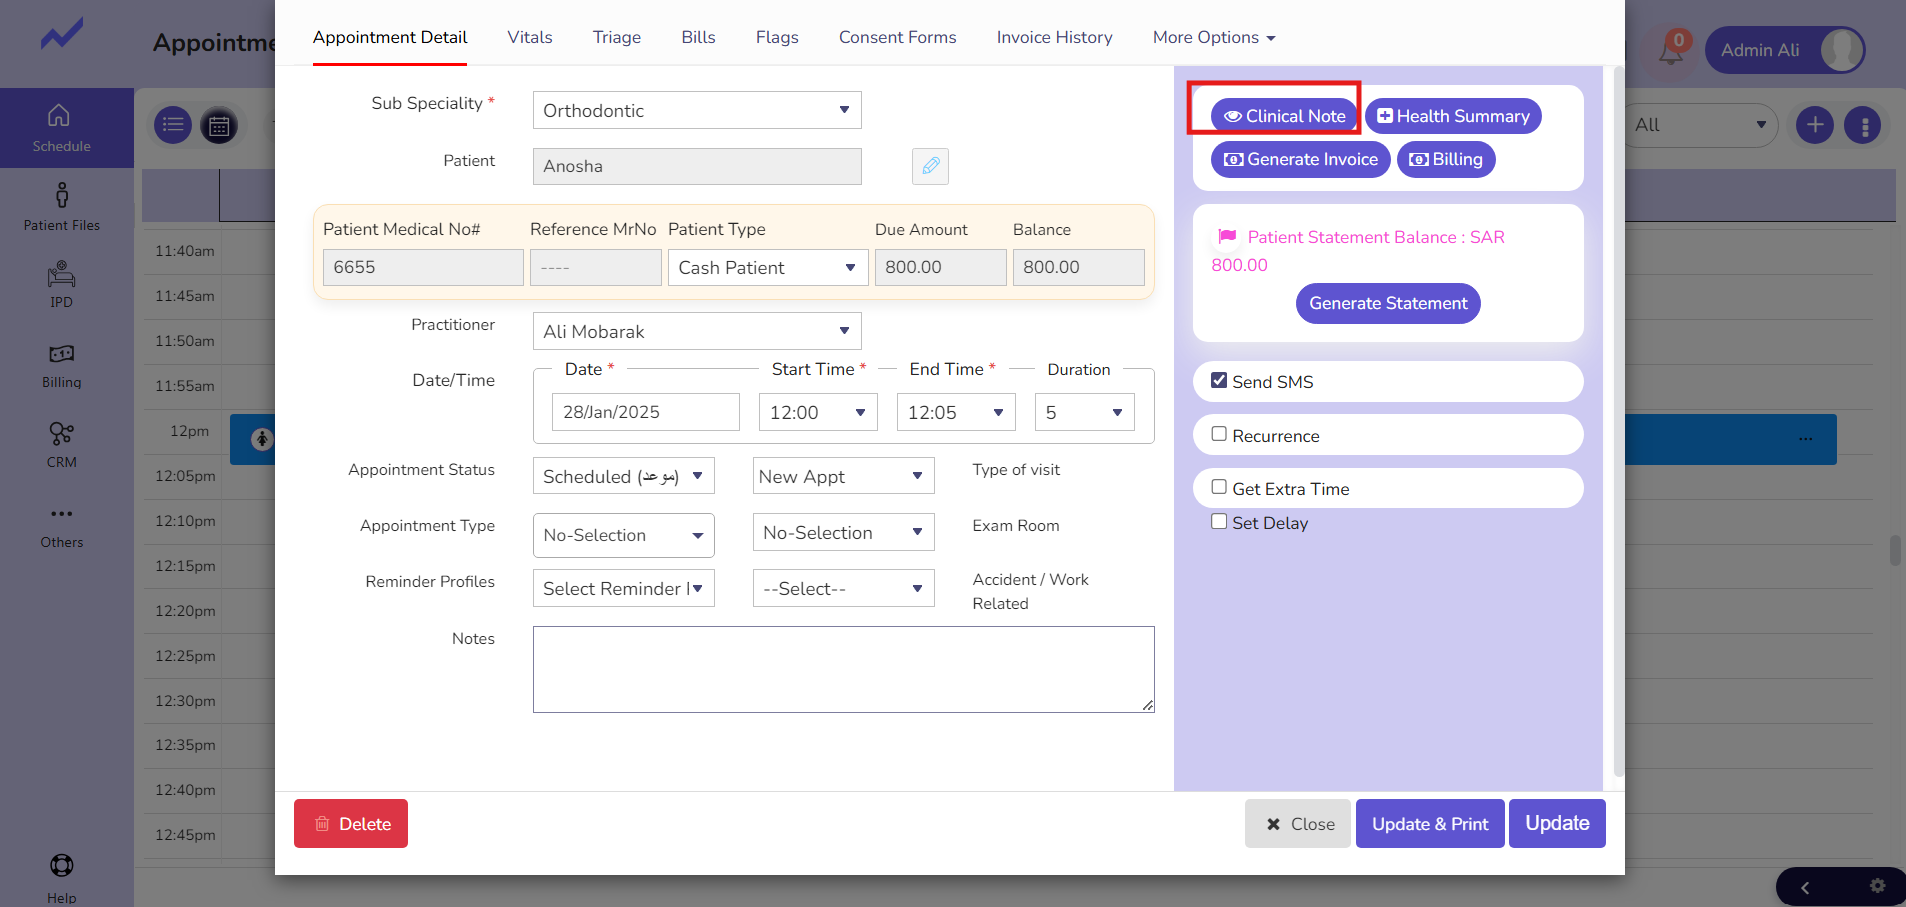
Clinical Note screen will appear.
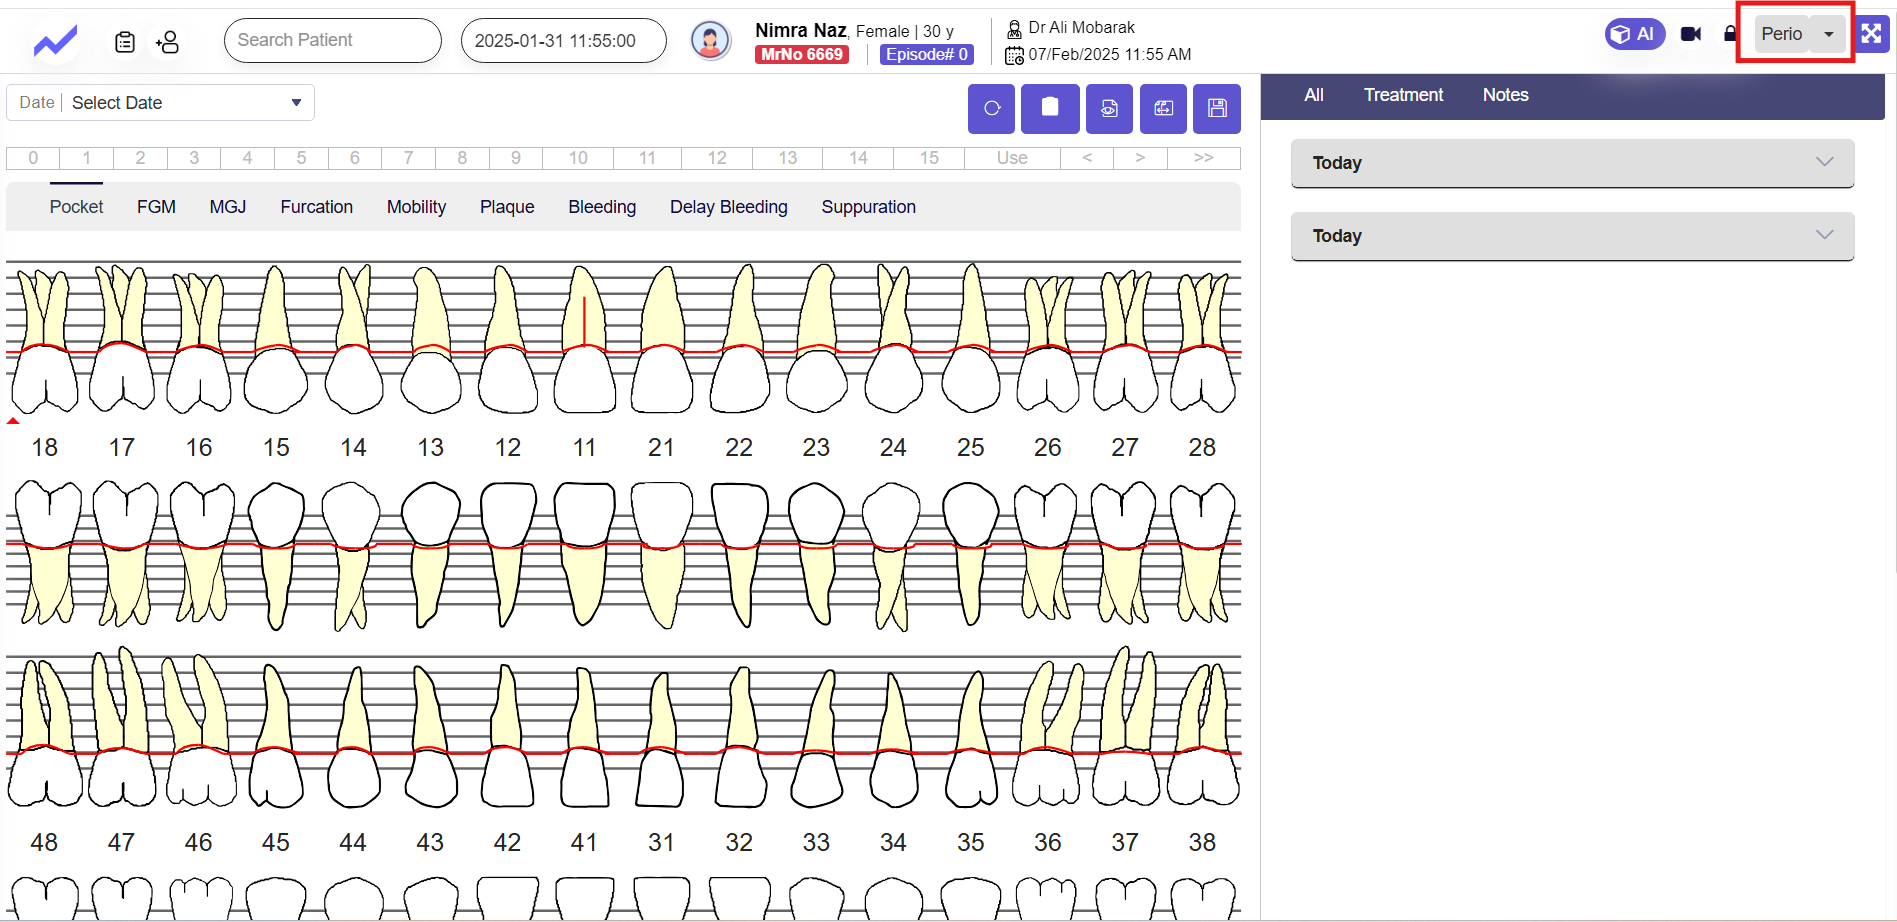
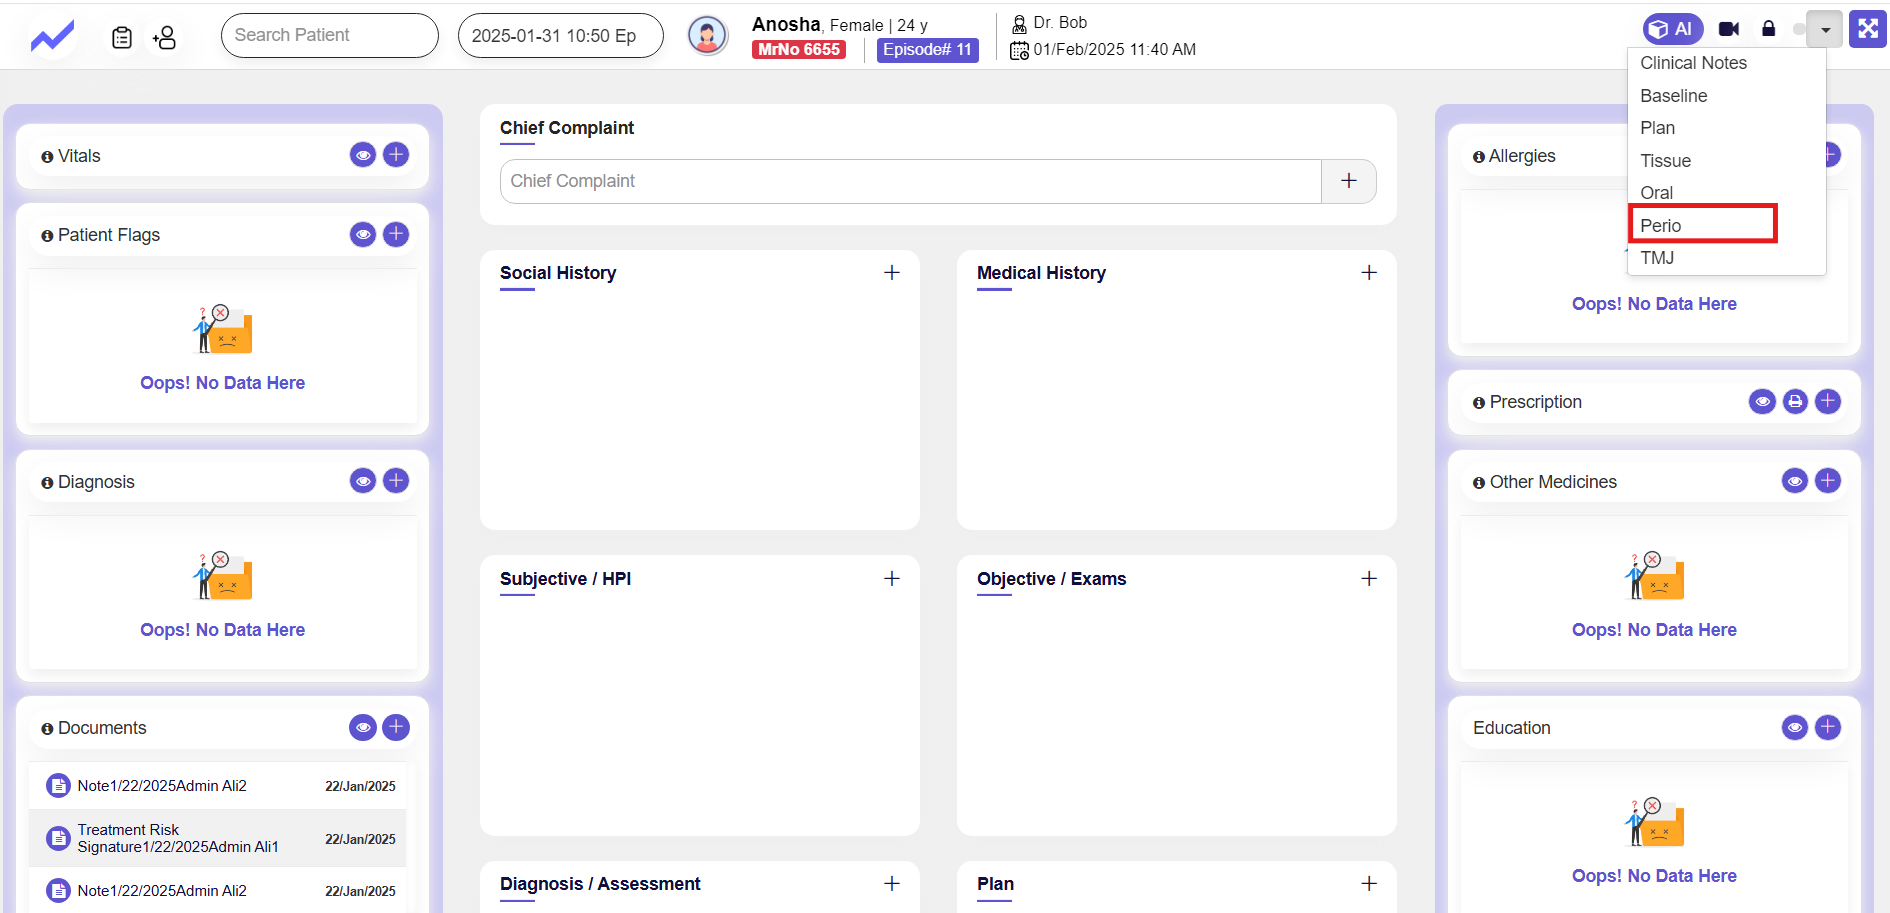
On the top-right corner, there is a drop-down menu that allows you to access the Perio screen.
1.2.1 Periodontal Charting (Tooth Diagram) #
- The top section displays a graphical representation of the patient’s teeth, divided into:
- Upper Arch (Maxillary teeth)
- Lower Arch (Mandibular teeth)
- Tooth Numbers (FDI Notation) are labeled beneath each tooth.
Red Lines Across Teeth likely indicate Gingival Margin levels, showing gum recession or inflammation.
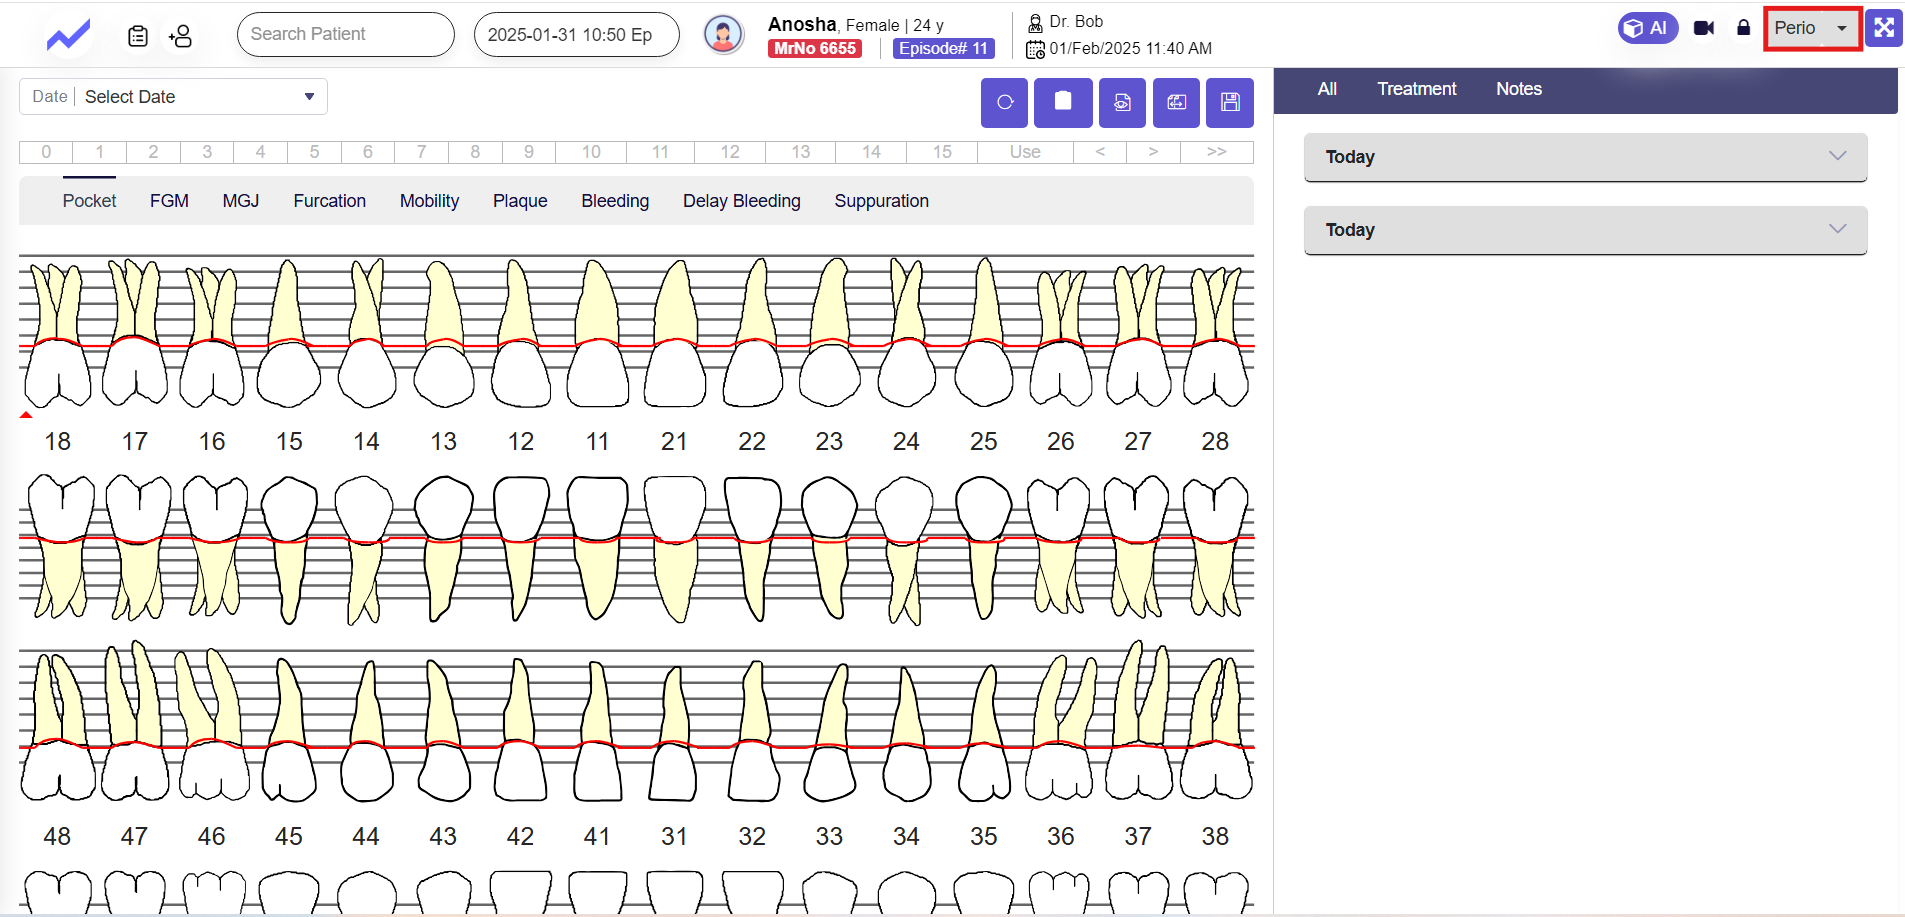
This Periodontal Charting Screen is designed for dentists to assess a patient’s gum health, diagnose periodontal diseases, and track progress over multiple visits. The detailed table helps in identifying gum recession, pocket depths, bleeding, and bone loss, ensuring effective treatment planning.
Side Panel (Treatment & Notes) #
- “All” Tab: Likely shows a history of periodontal exams and treatments.
- “Treatment” Tab: Displays procedures or recommendations for today.
“Notes” Tab: Additional observations recorded by the dentist.
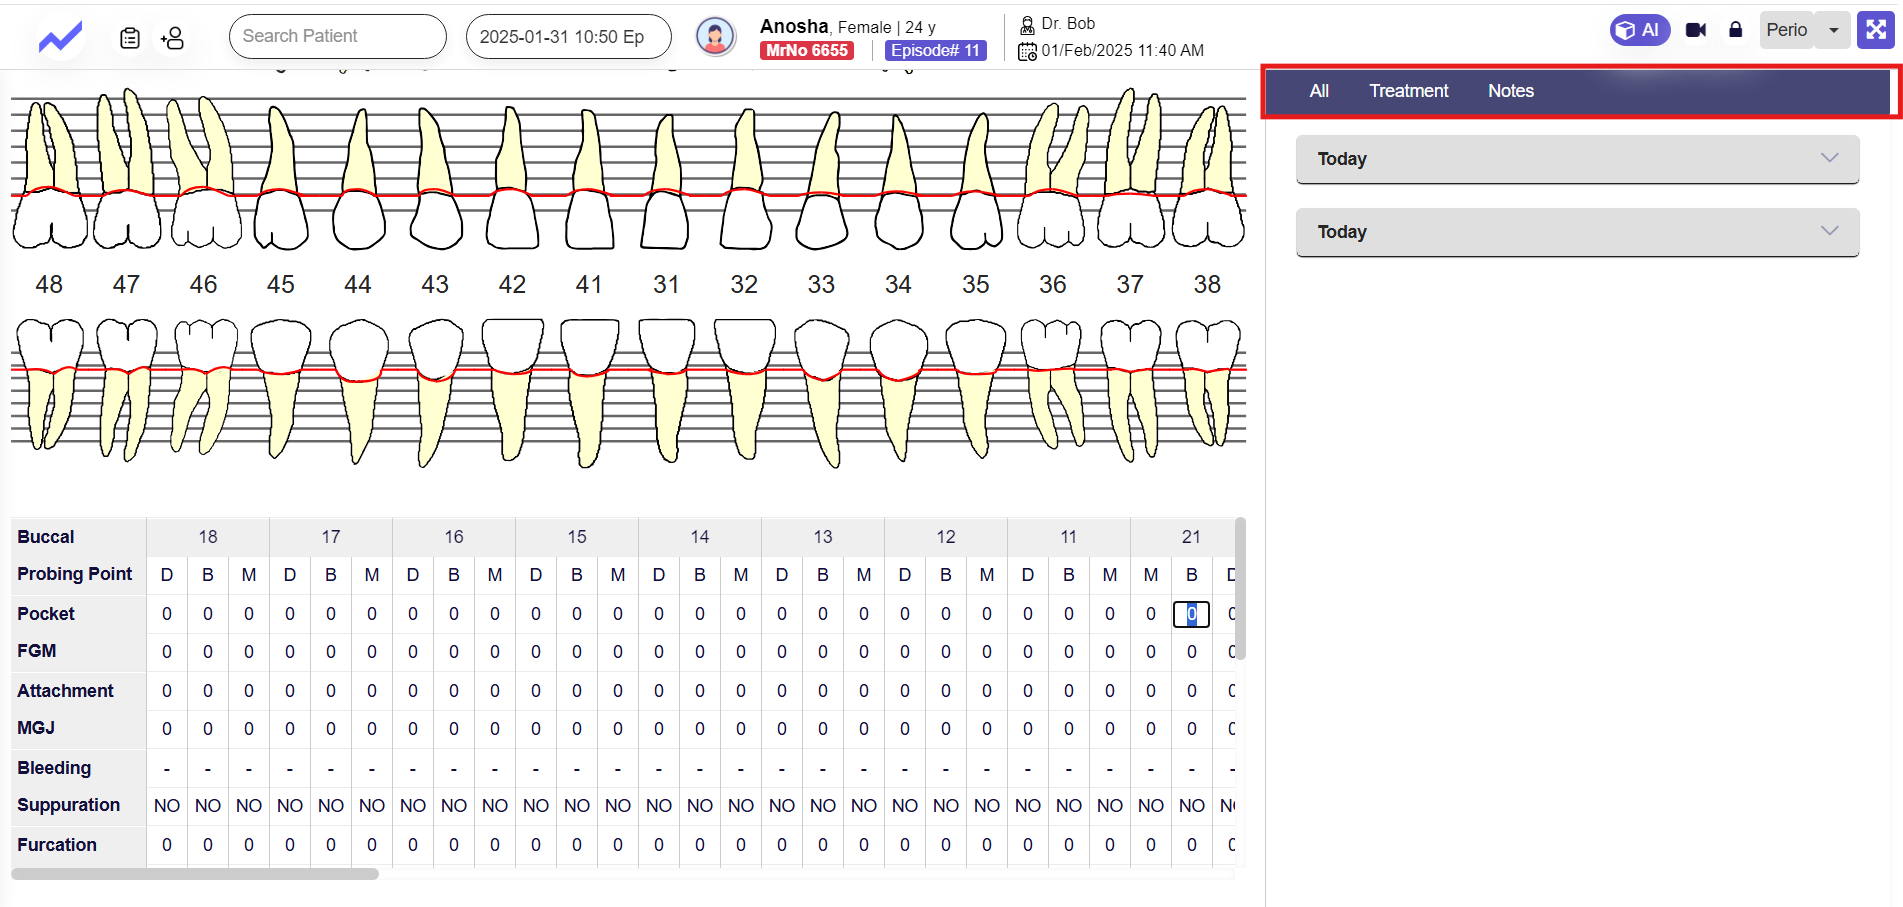
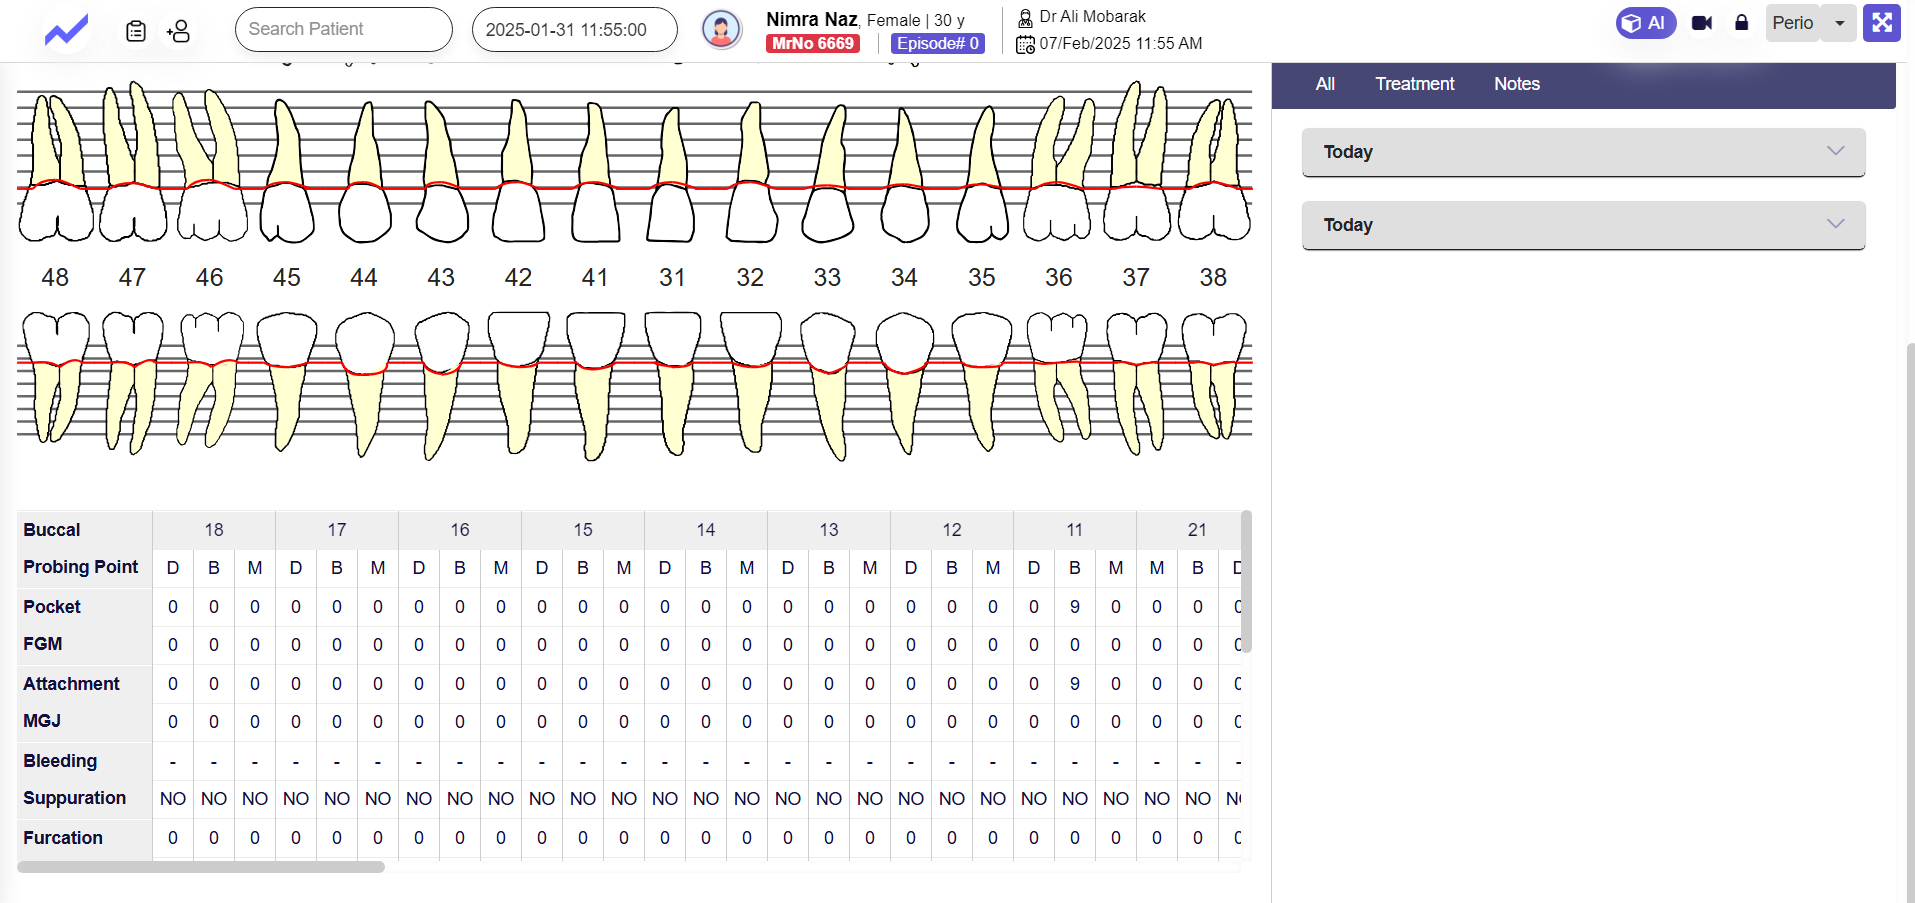
The Comprehensive Periodontal Charting feature allows doctors to record detailed periodontal parameters, including probing depths, attachment loss, bleeding, and suppuration. The graphical representation of teeth, along with structured numerical values, enables quick and precise visual assessment. Additionally, automated calculations for attachment loss and pocket depths reduce manual workload, improving efficiency in patient evaluations.
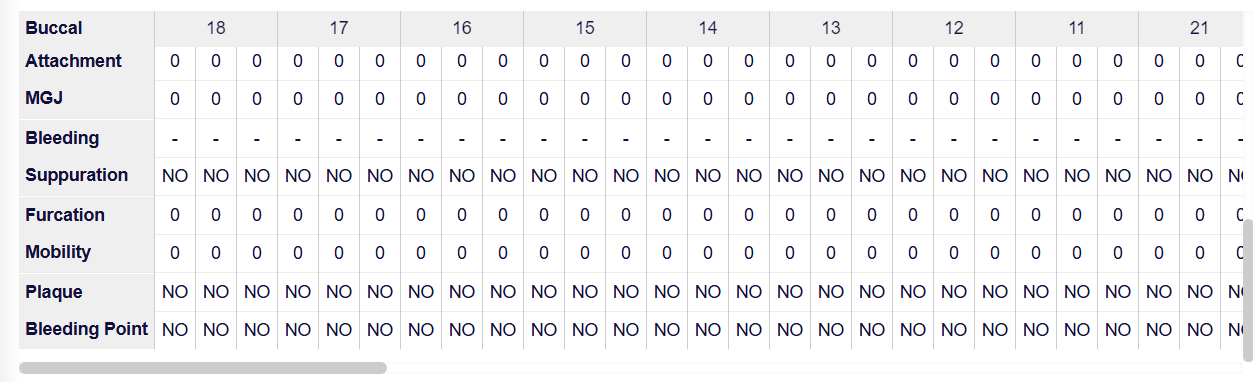
Buccal: This refers to the outer surface of the teeth that face the cheeks. It is an important aspect in periodontal assessment as it helps in evaluating gum and tooth conditions from the external side.
Probing Point: These are specific points around each tooth where periodontal probing is performed to measure pocket depths. Typically, measurements are taken at three points—Distal (D), Buccal (B), and Mesial (M)—to assess the severity of gum disease.
Pocket Depth: This measures the depth of the space between the tooth and gum line. A healthy pocket depth is typically between 1-3mm, while deeper pockets (4mm and above) indicate potential periodontal disease.
FGM (Free Gingival Margin): This represents the level of the gum tissue relative to the tooth structure. It is crucial in assessing gum recession or overgrowth.
Attachment Loss: This indicates the detachment of gum tissue from the tooth, often due to periodontal disease. Higher values signify advanced gum disease and bone loss.
MGJ (Mucogingival Junction): This is the boundary where the gum tissue meets the alveolar mucosa. It helps in evaluating the gum’s mobility and detecting mucogingival defects.
Bleeding: The presence of bleeding upon probing is a key sign of gum inflammation and potential periodontal disease. If bleeding is observed, it suggests an active infection or irritation.
Suppuration: This refers to the presence of pus around the gum line, which is a strong indicator of infection or abscess formation. It helps in diagnosing advanced periodontal disease.
Furcation: This measures the extent of bone loss in multi-rooted teeth. Higher values indicate deeper furcation involvement, making the tooth more susceptible to mobility and potential loss.

Doctors can add values according to the specific tooth number. Each row in the periodontal chart corresponds to a different parameter (such as pocket depth, attachment loss, bleeding, etc.), and each column represents an individual tooth.
Doctors can enter probing depths, bleeding points, suppuration, and other periodontal indicators at multiple points around each tooth (Distal, Buccal, Mesial). This allows for precise tracking of gum health and disease progression for each specific tooth.
The system helps in monitoring changes over time, identifying areas of concern, and planning appropriate treatments, such as deep cleaning, scaling, or surgical intervention if necessary.


