Cloudpital’s labour inspection and Iqama attestation process is designed to simplify and streamline the process for our customers. Here’s how it works:
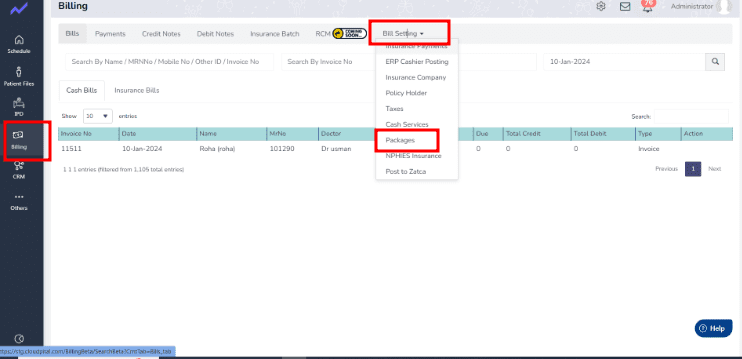
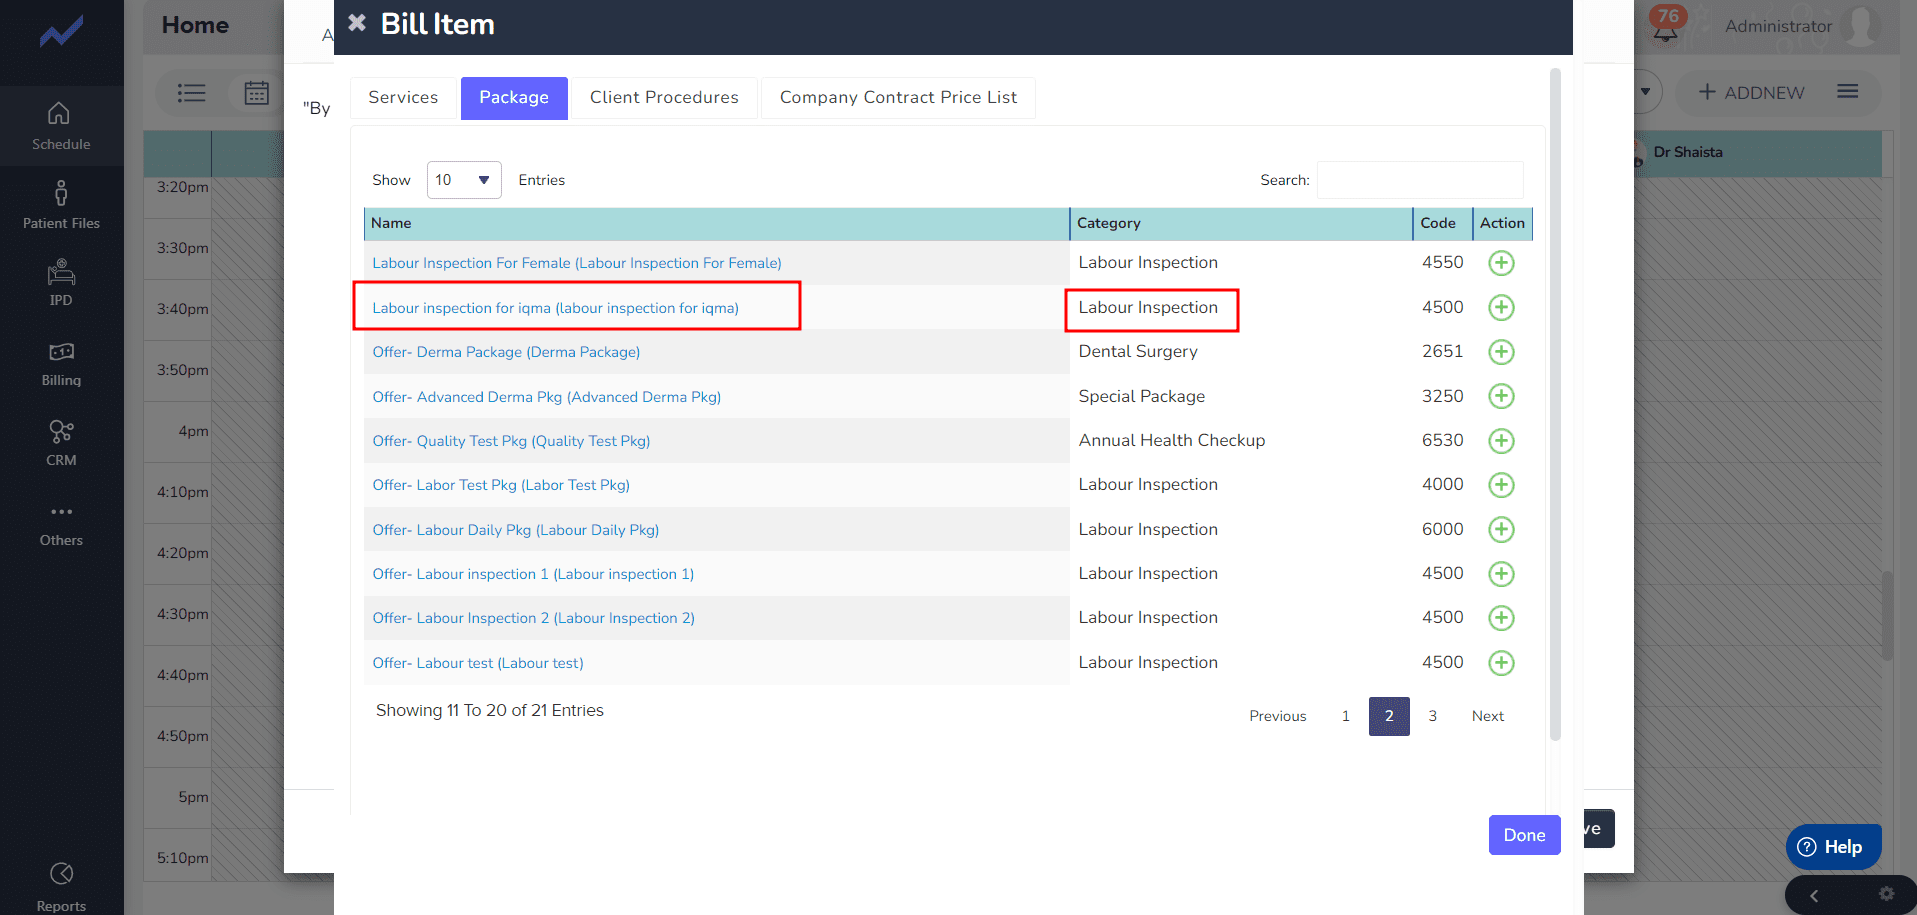
- First go the Billing => Bill setting => Packages
- Click on the Add new and fill the Required field.
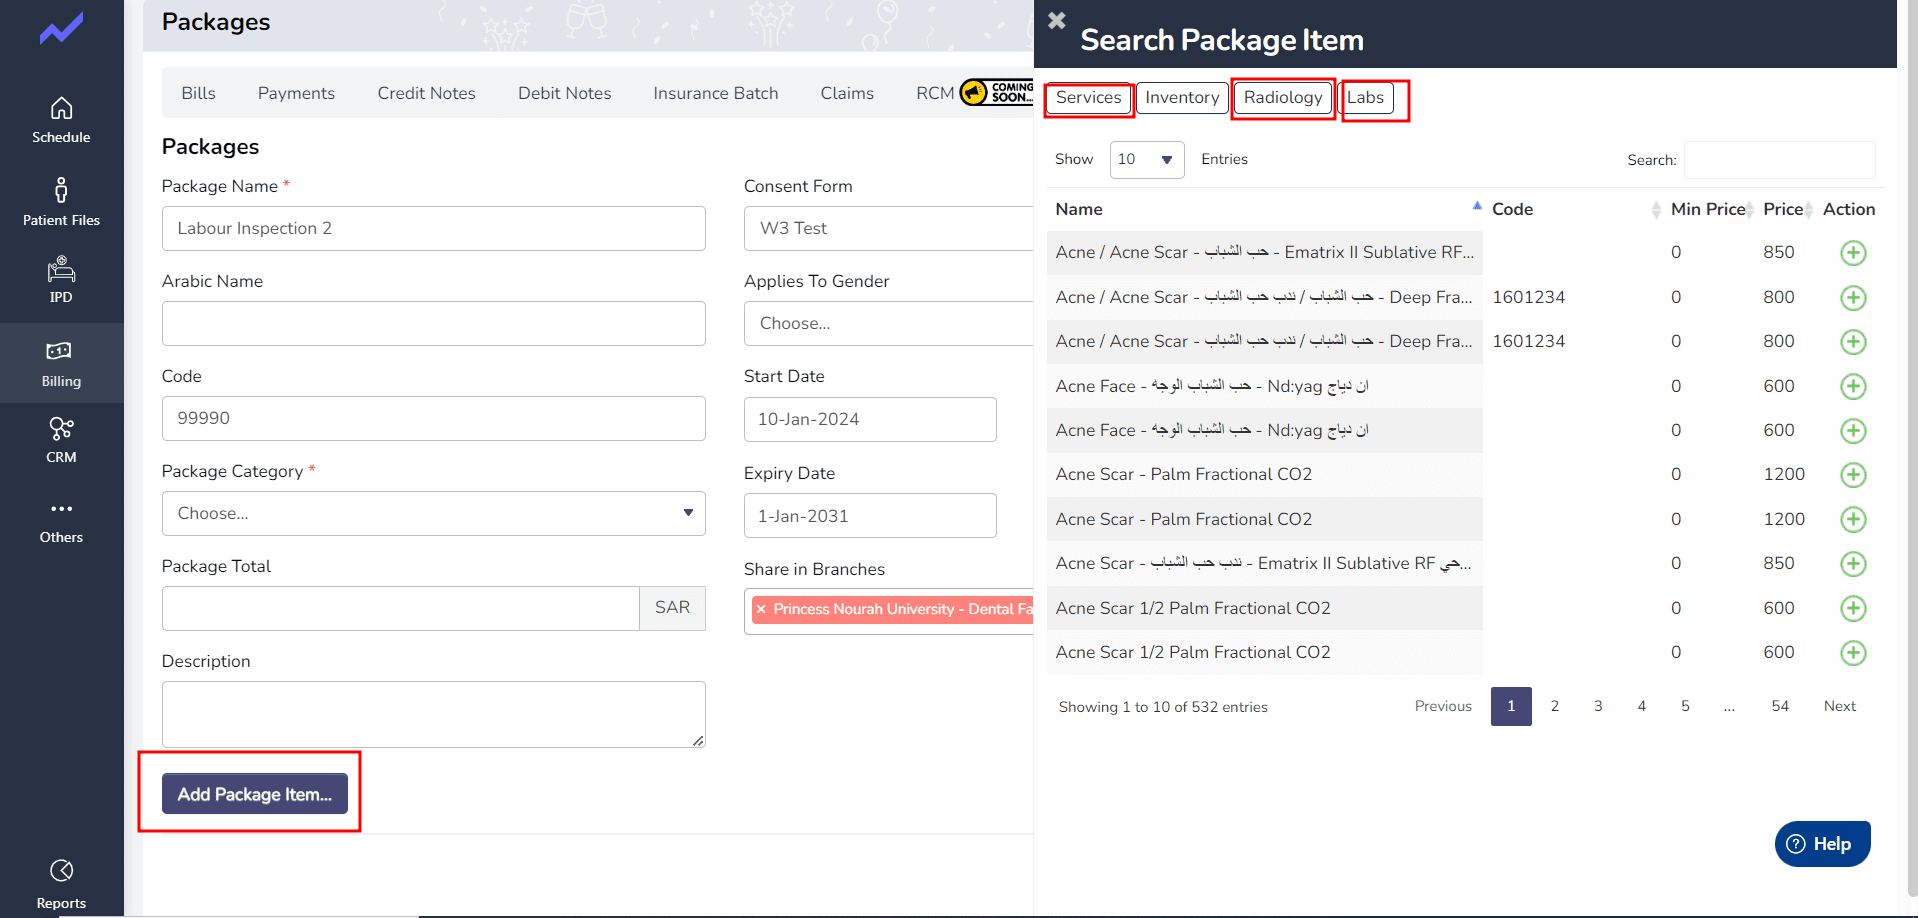
- Click on the add Package Item and add the services.
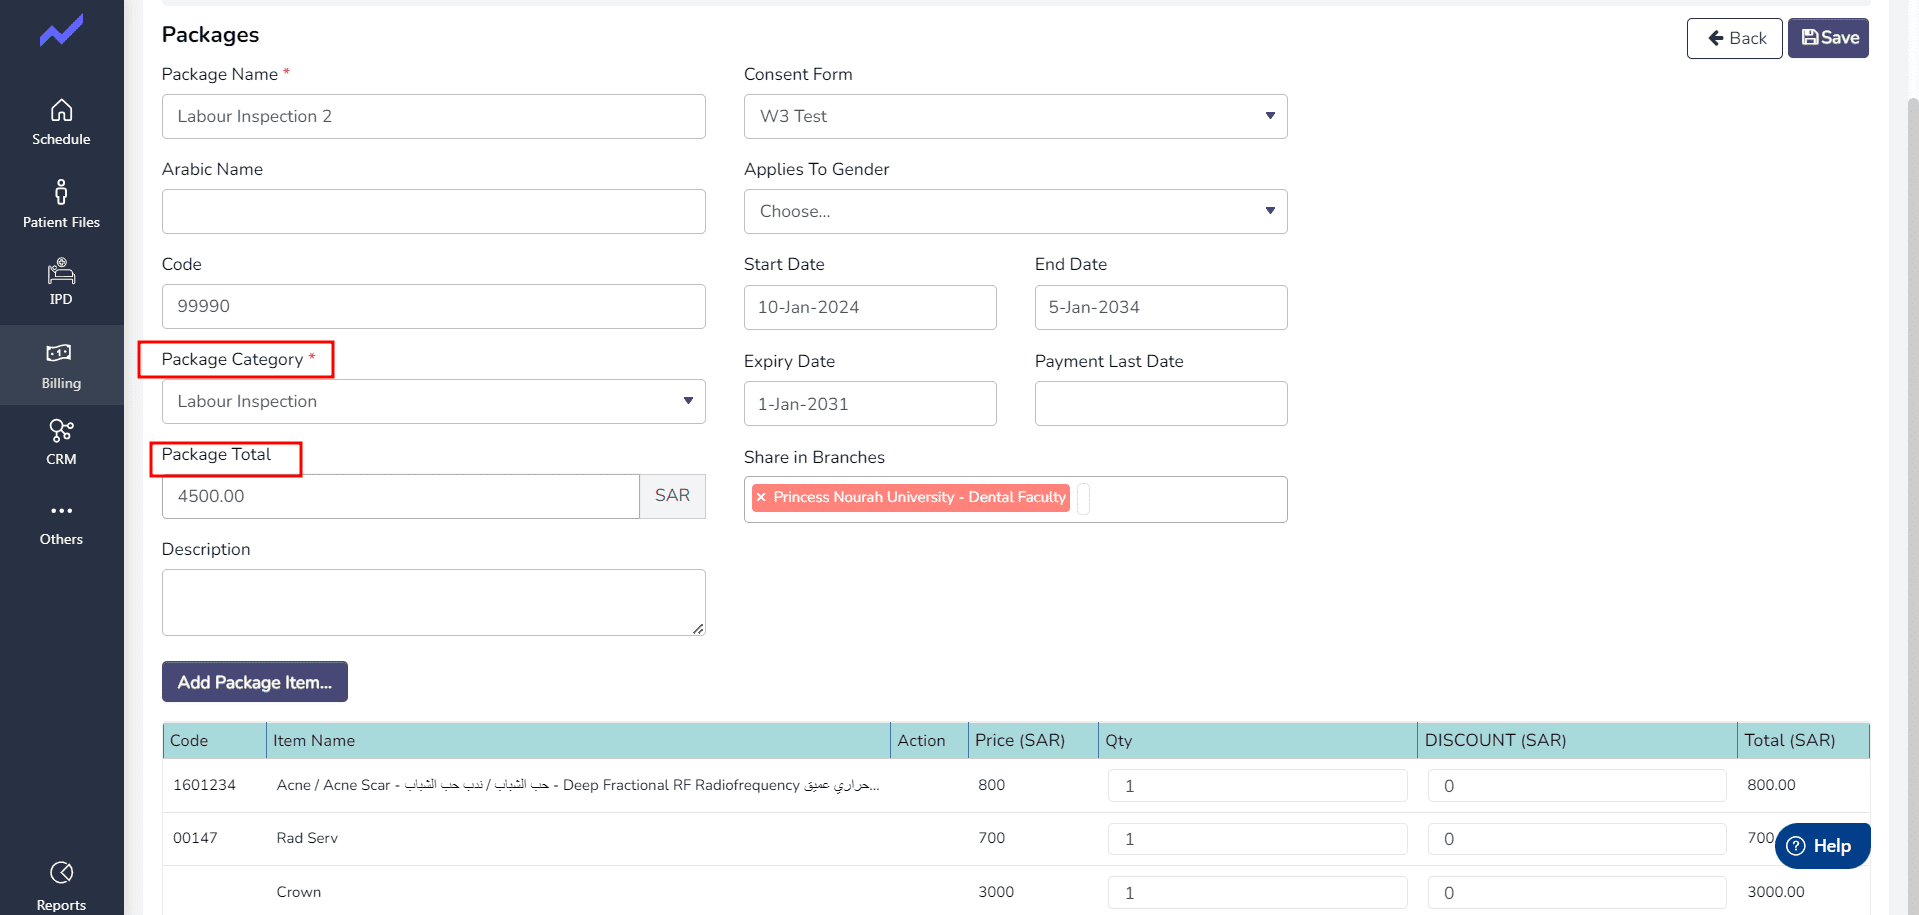
- When we select the Package category Labour Inspection the Package total should be editable otherwise it should not be editable.
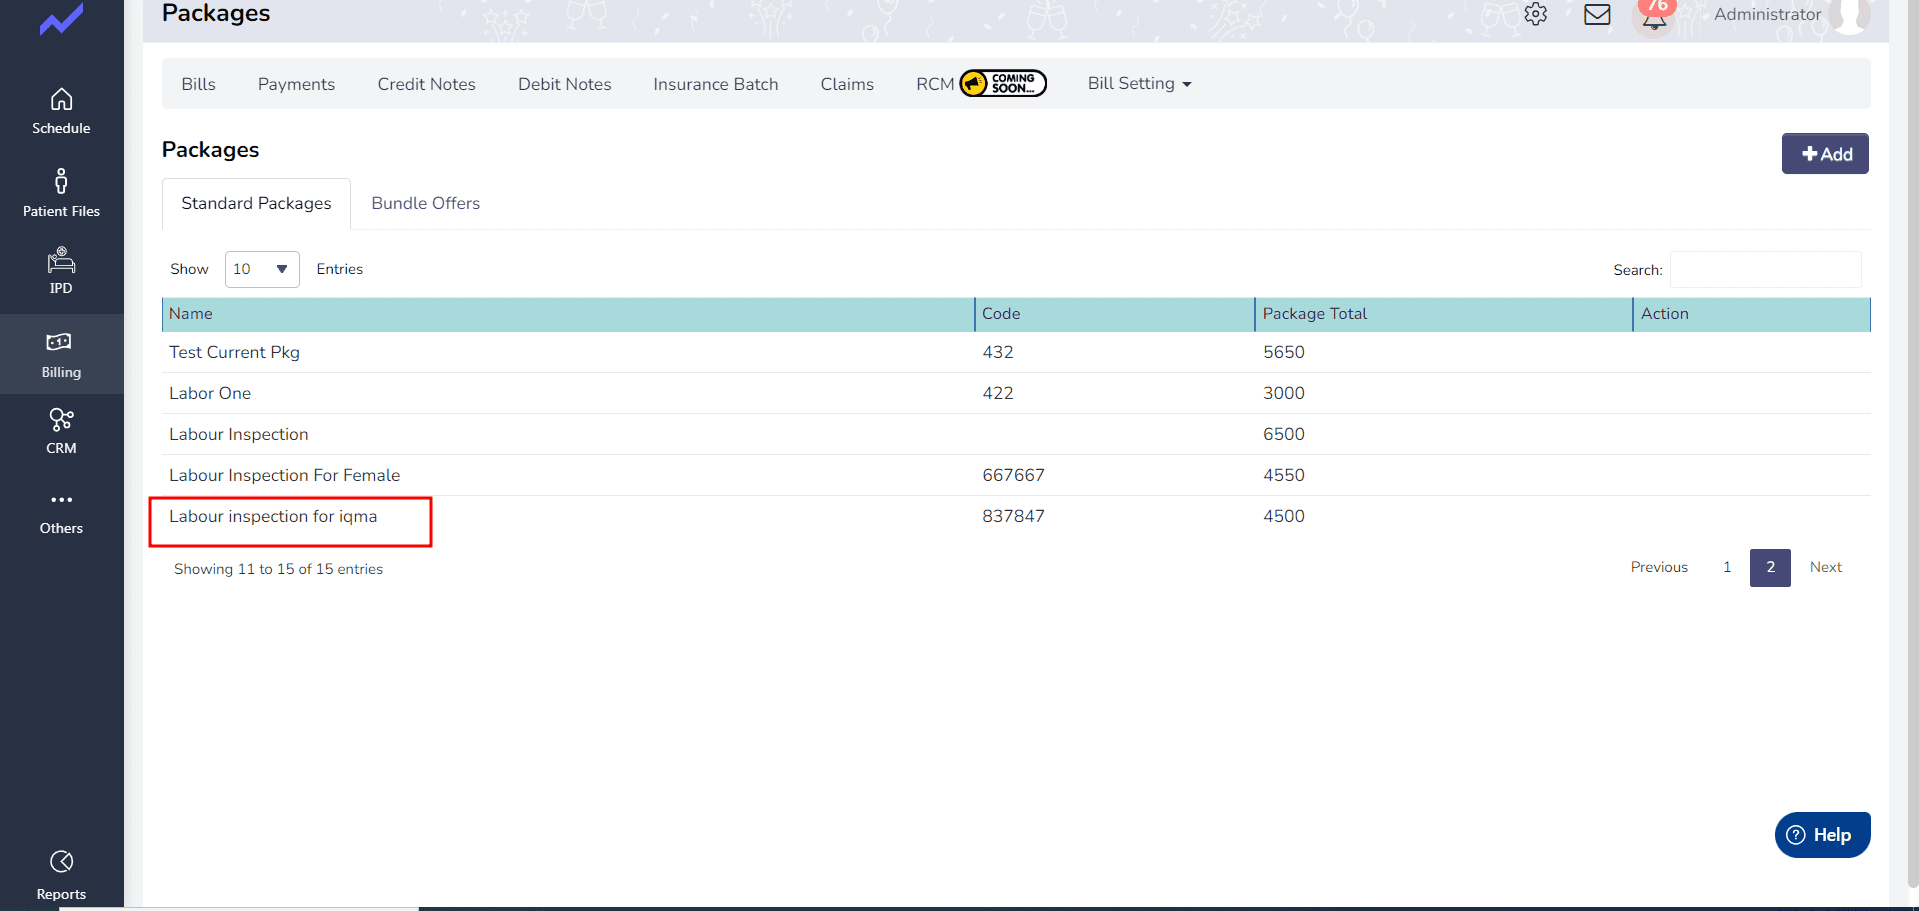
- When we save this it show in the main Package screen.

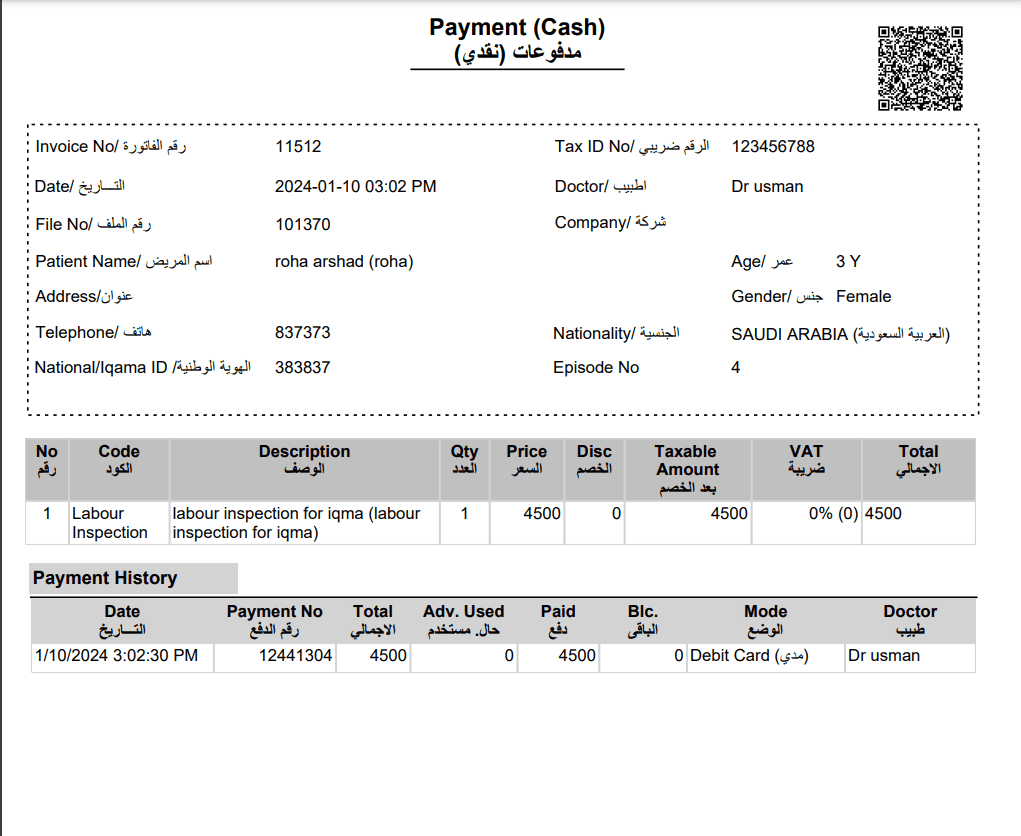
- Make the appointment and the Package.
- Then Generate the invoice.
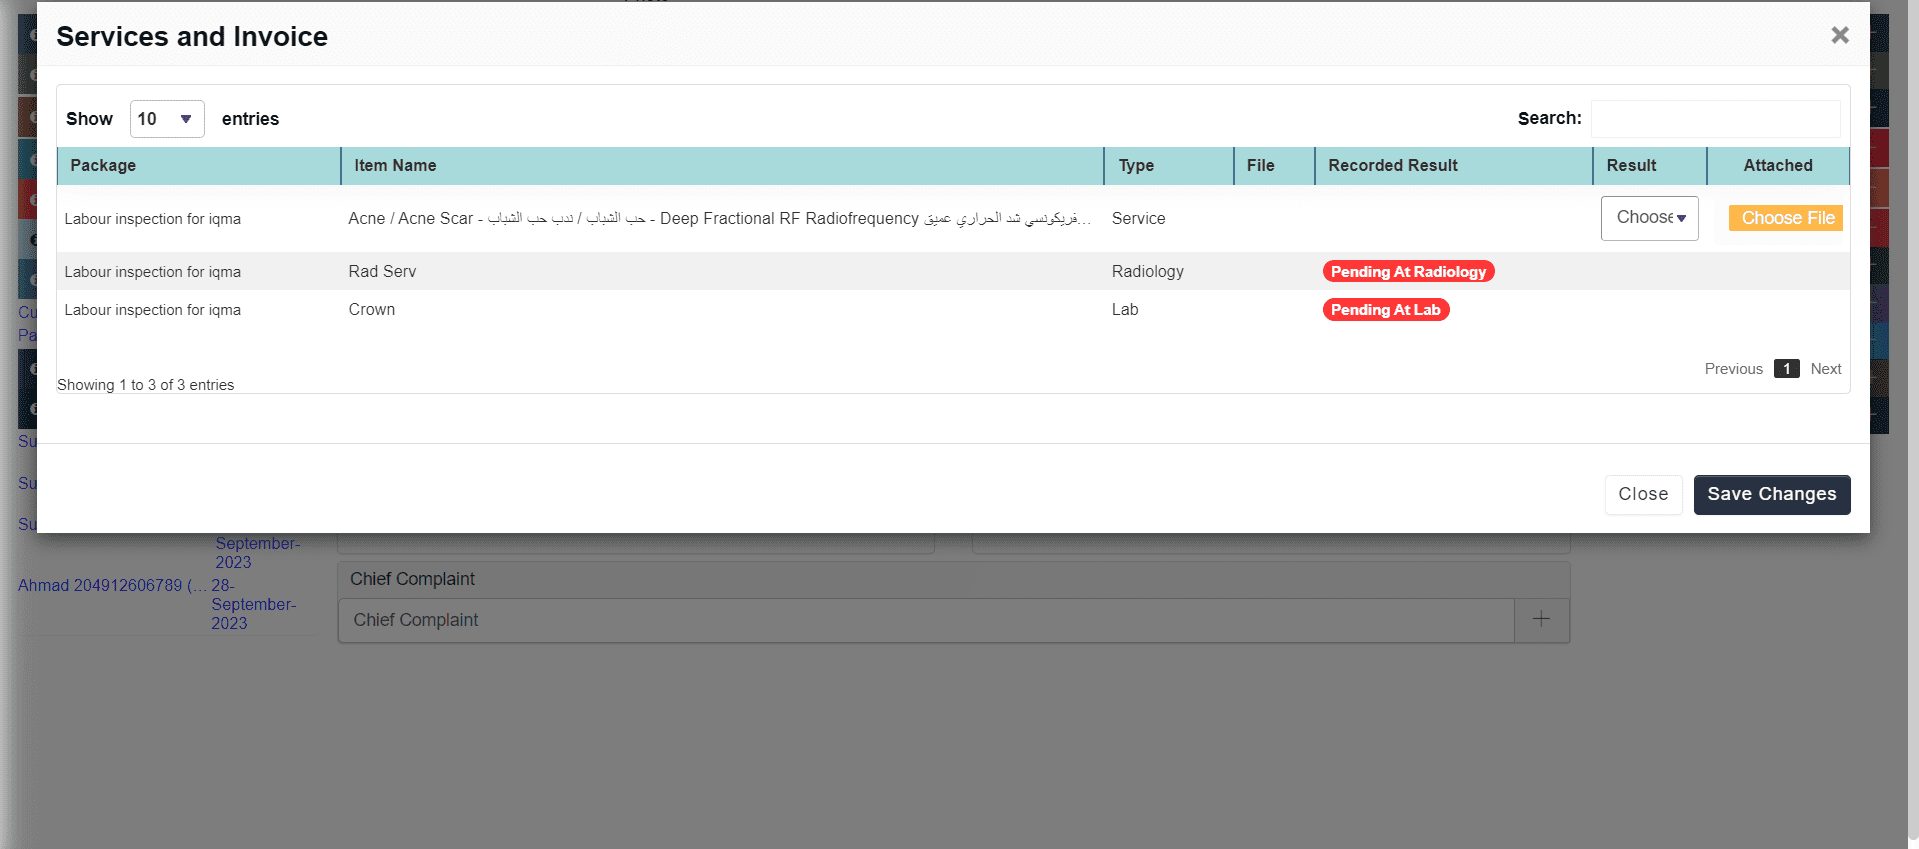
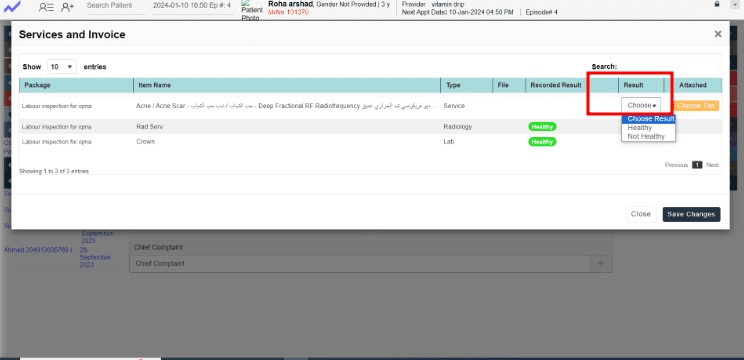
- Go to the Clinical note screen => Labour Inspection to see the Recorded result of the package which you added it.
- Click on the Others => Laboratory
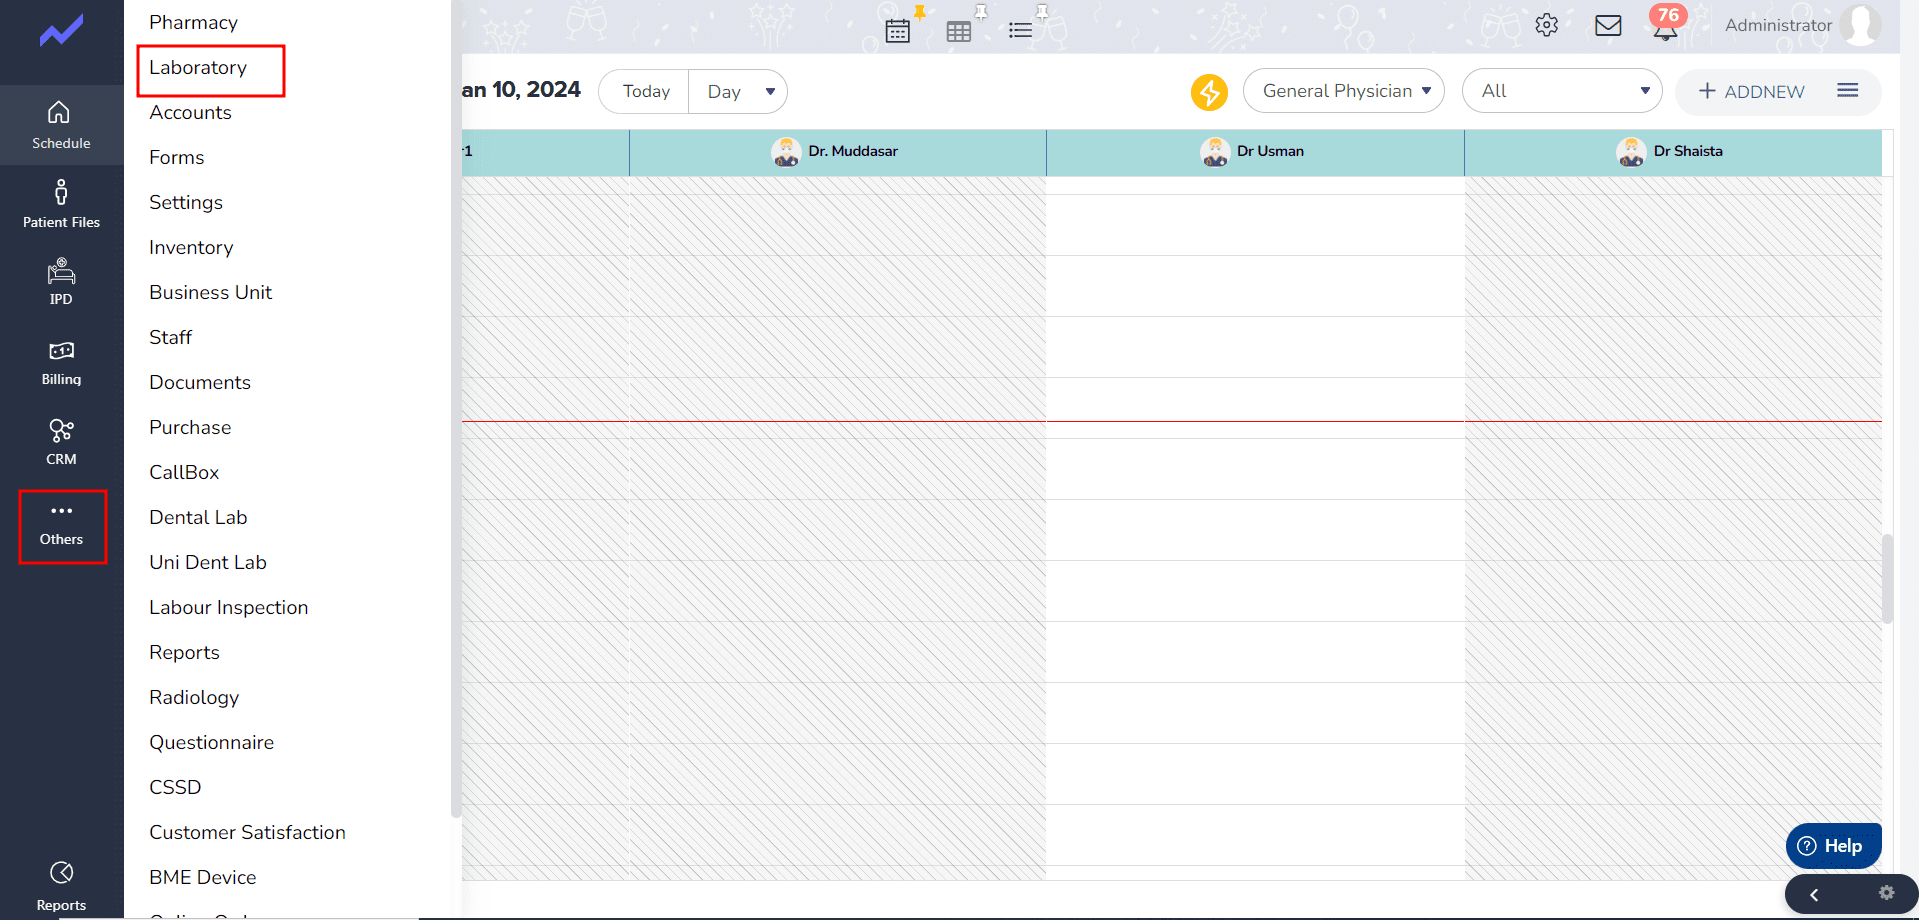
- In this screen choose the Labour Inspection.
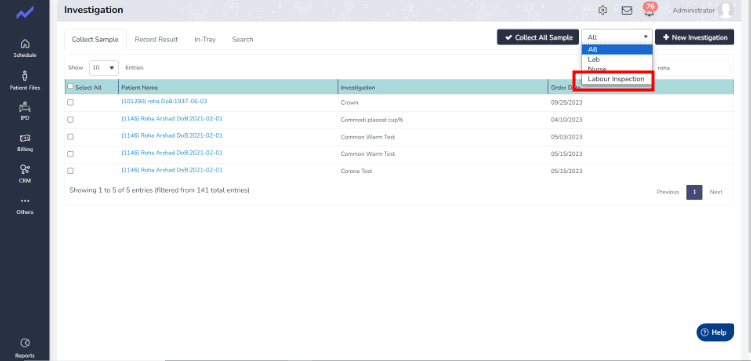
- Search the Patient and select it.
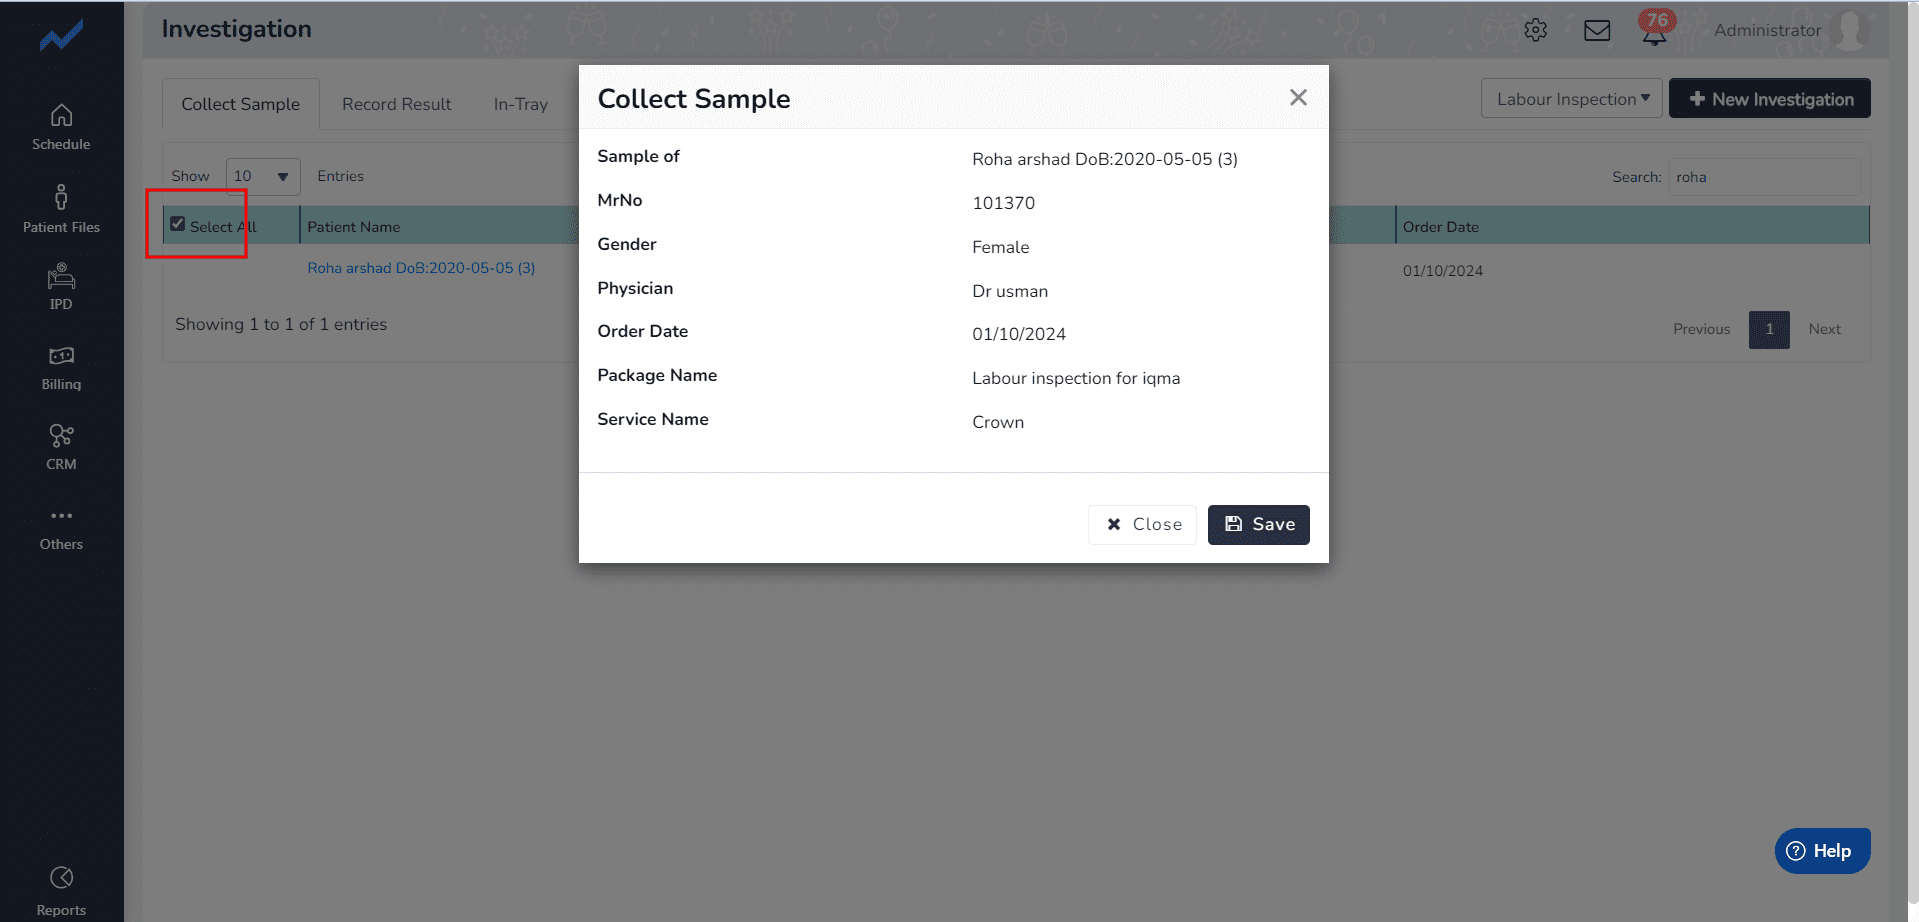
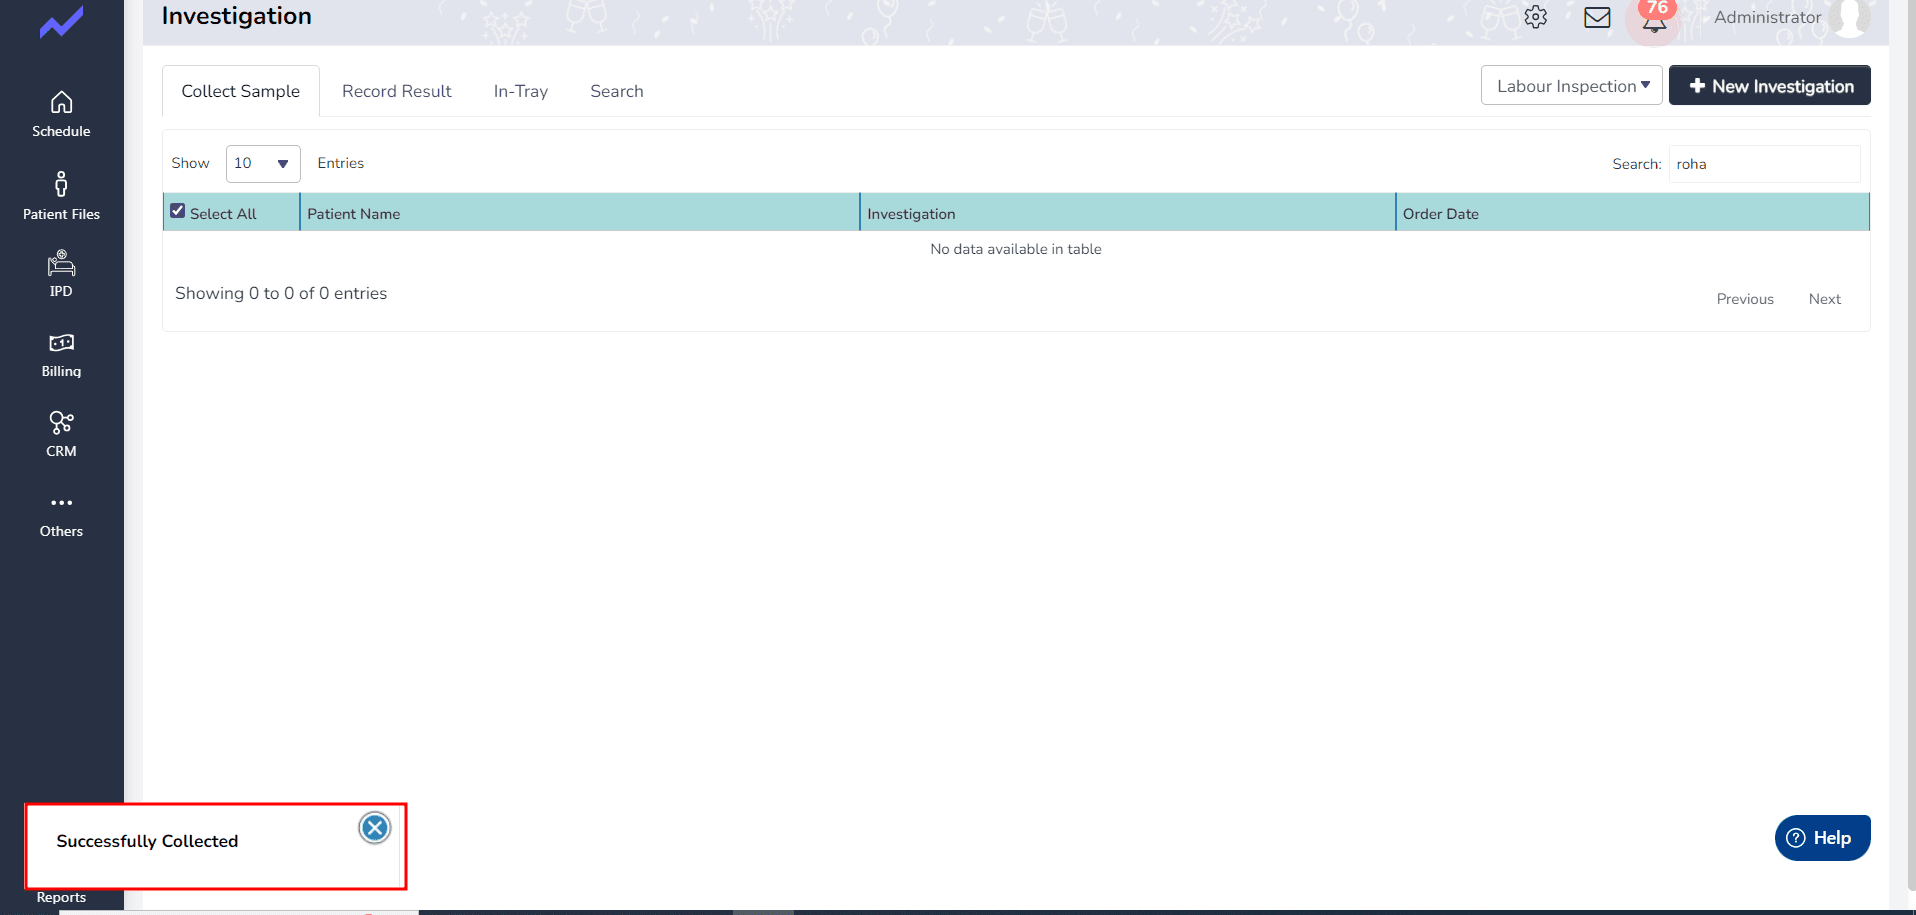
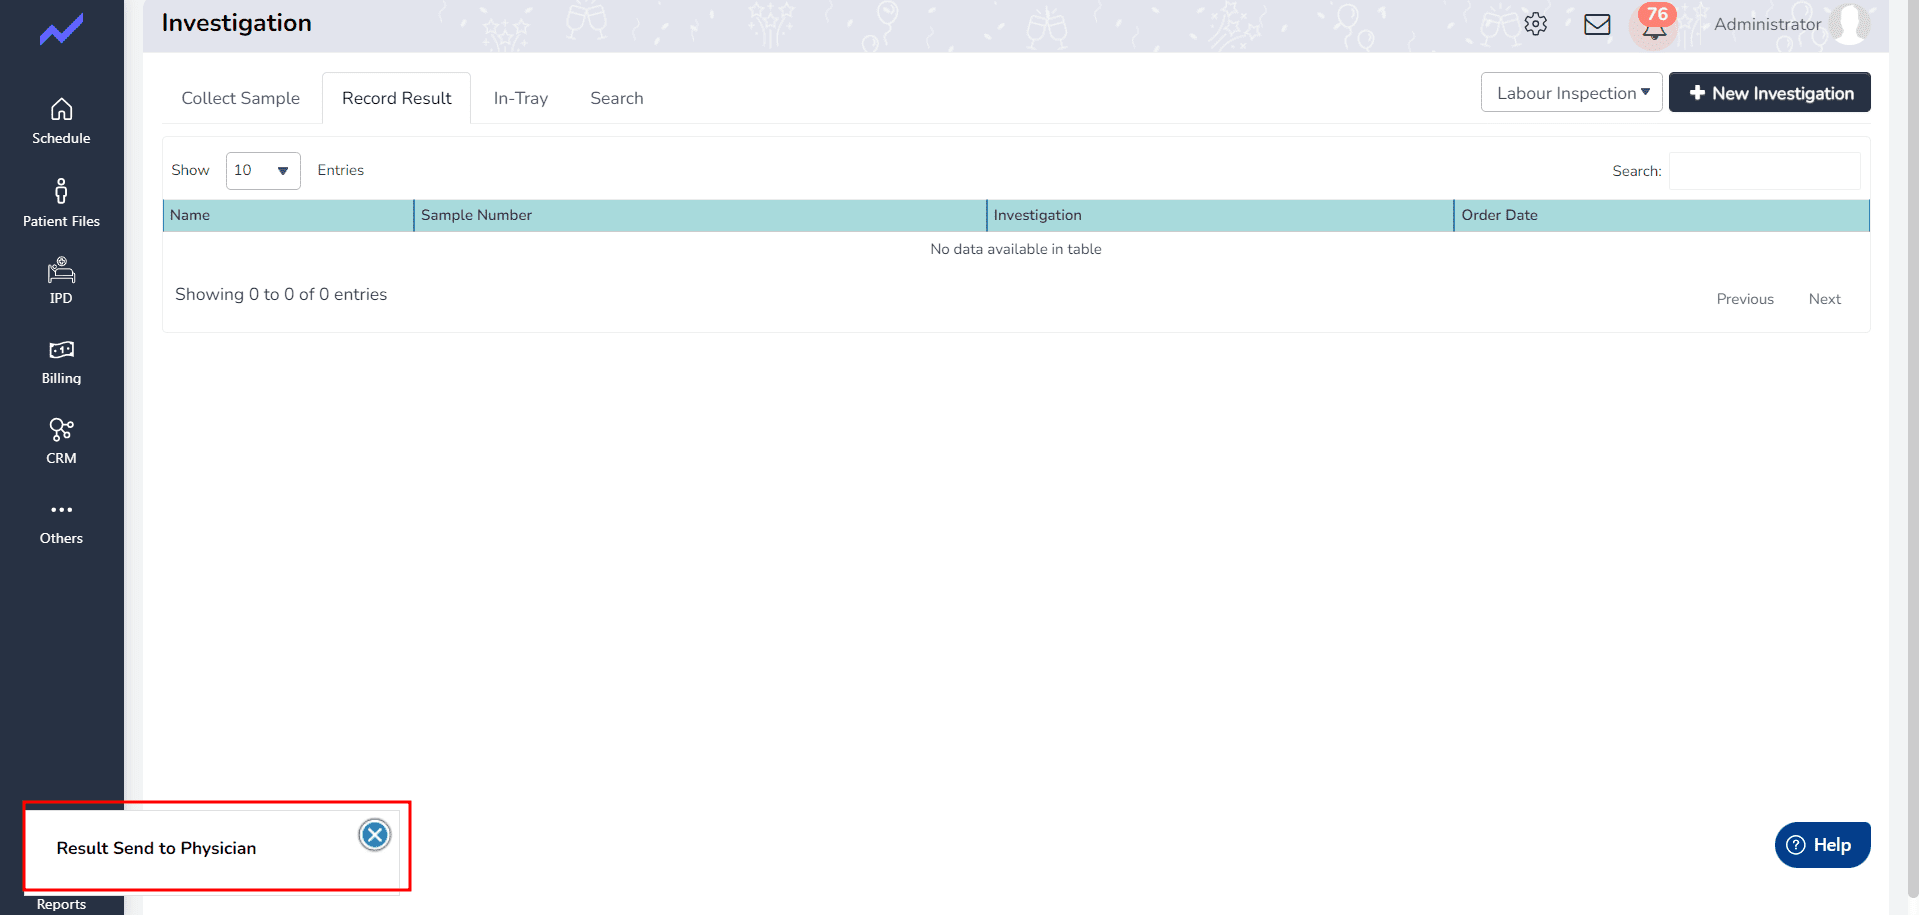
- When we save the system generates a message “Successfully Collected“
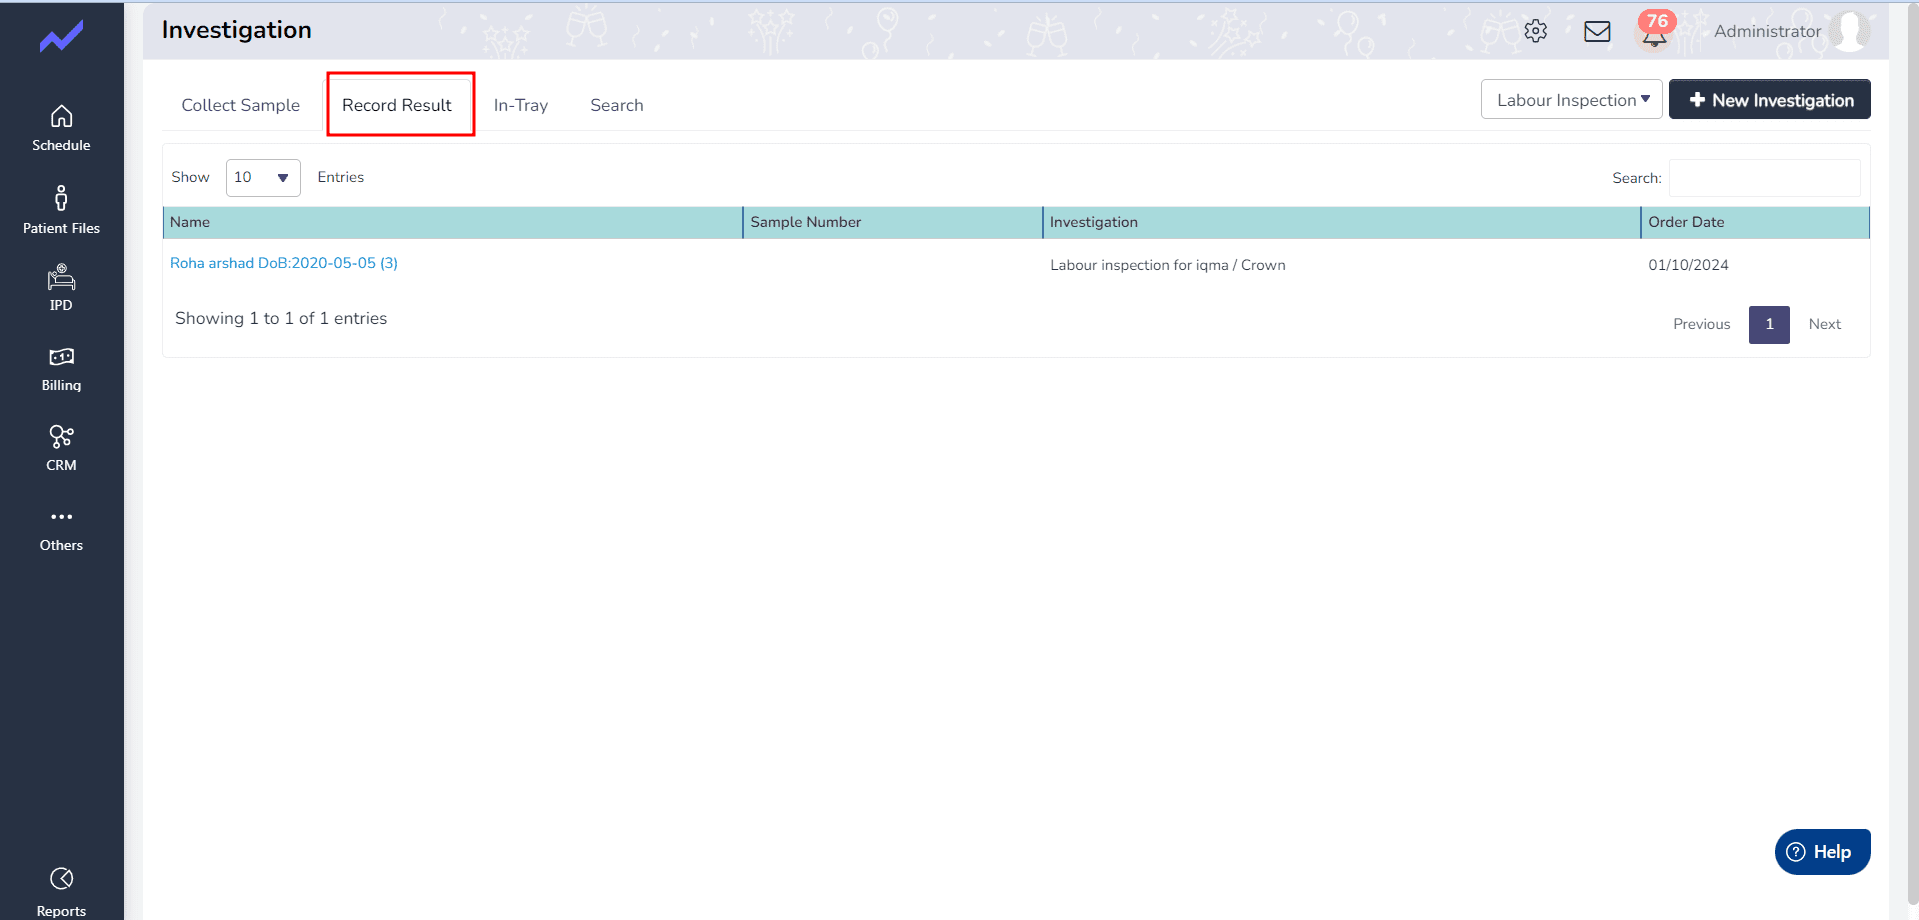
- When we click on the Record Result it also show in this screen.
- When we click on the Patient name the screen navigate in this screen wo also choose the Result.
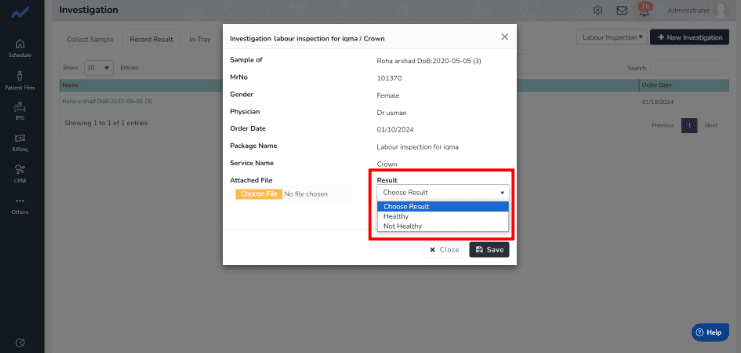
- When we save the system generates a message ” Result send to Physician“
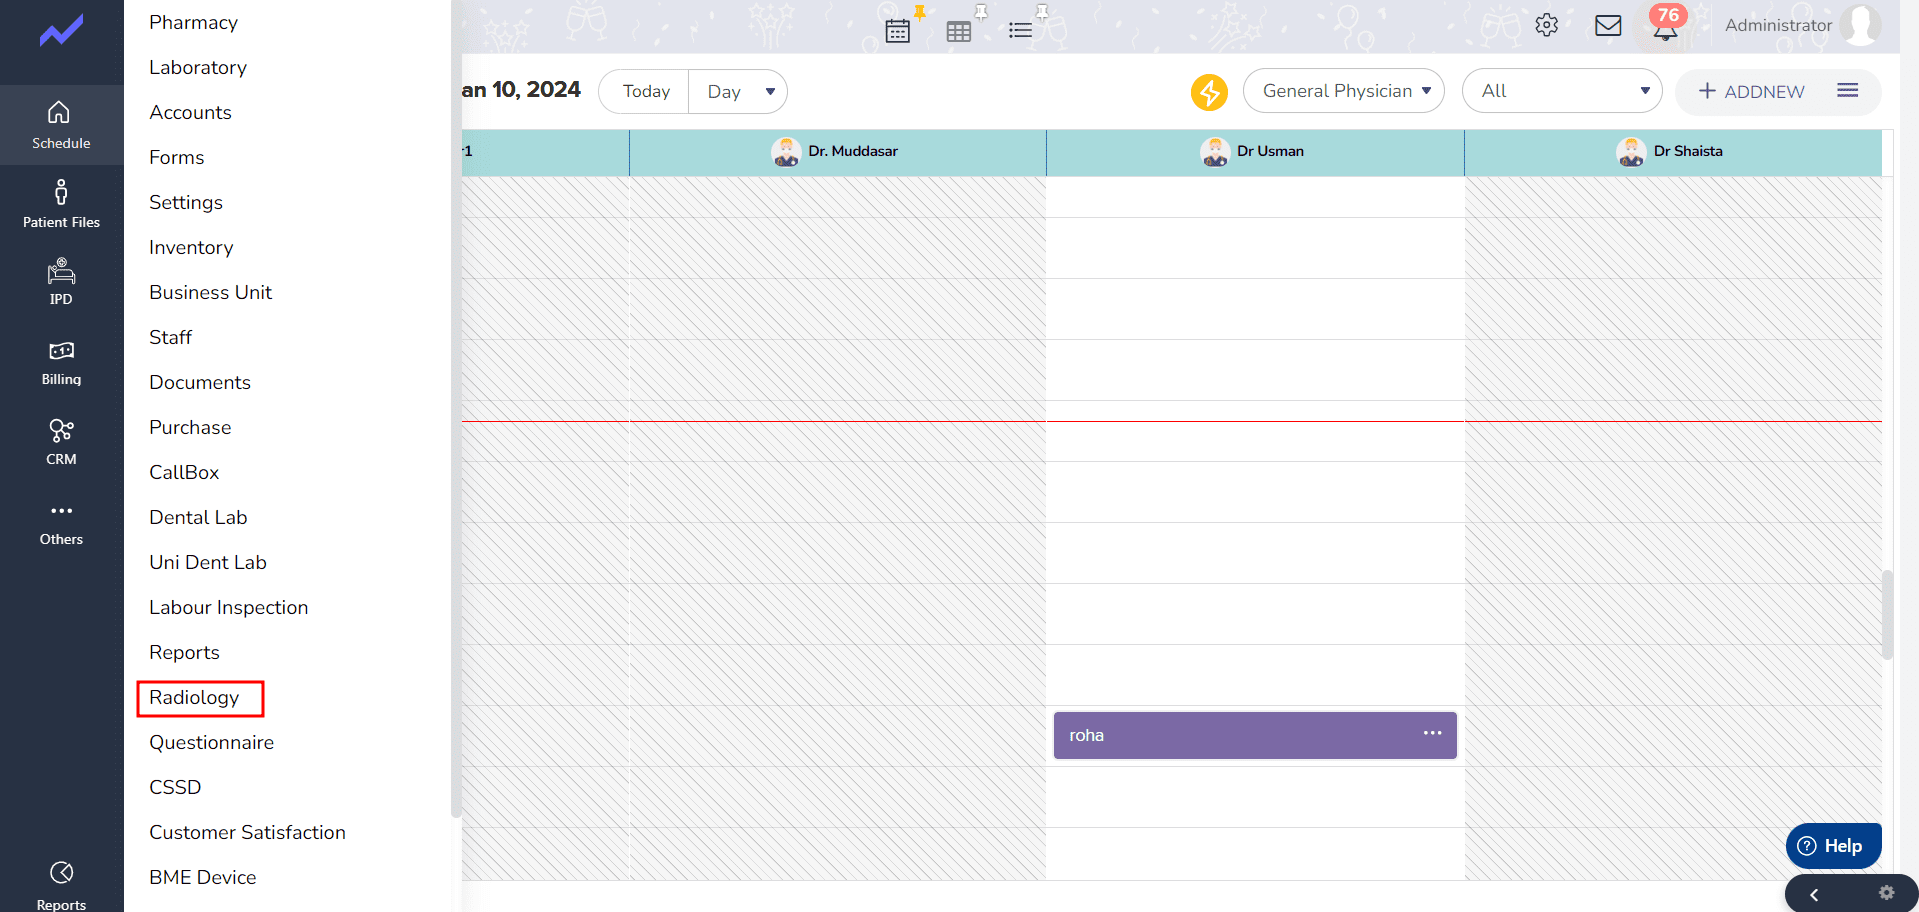
- Click on Others => Radiology.
- When the Radiology is open click on the Labour Inspection.
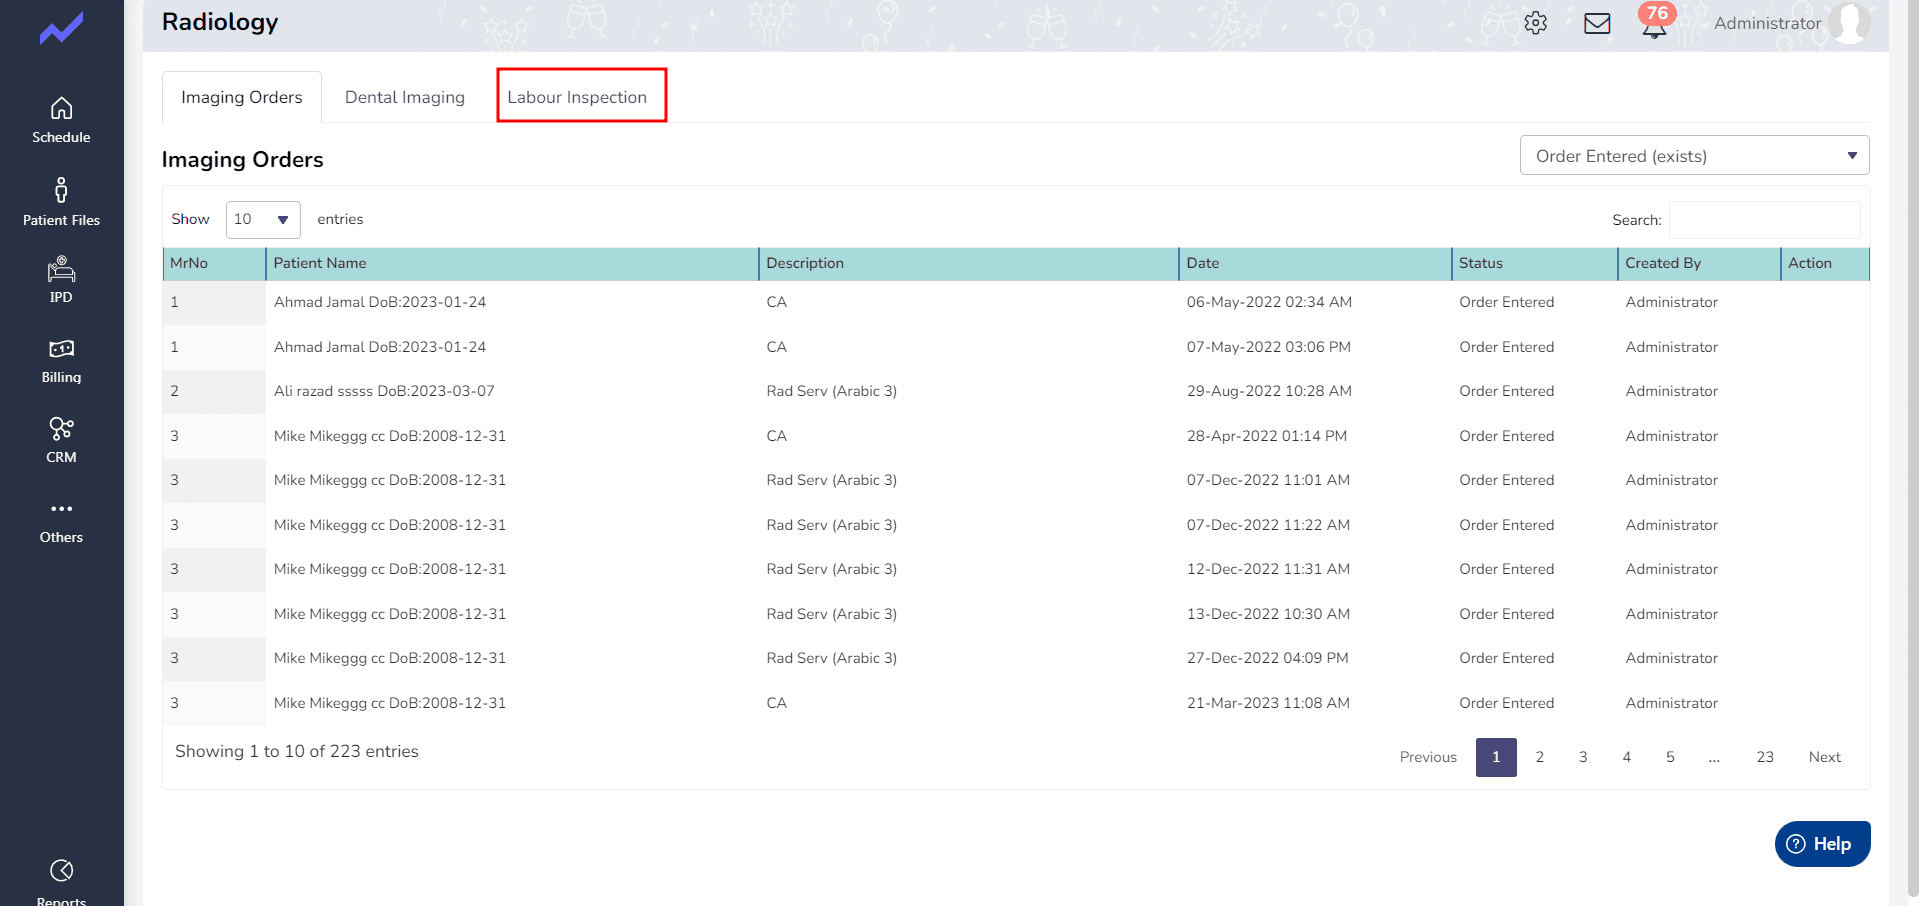
- When we click on the Labour Inspection the Patient name is show in which the Package is show.
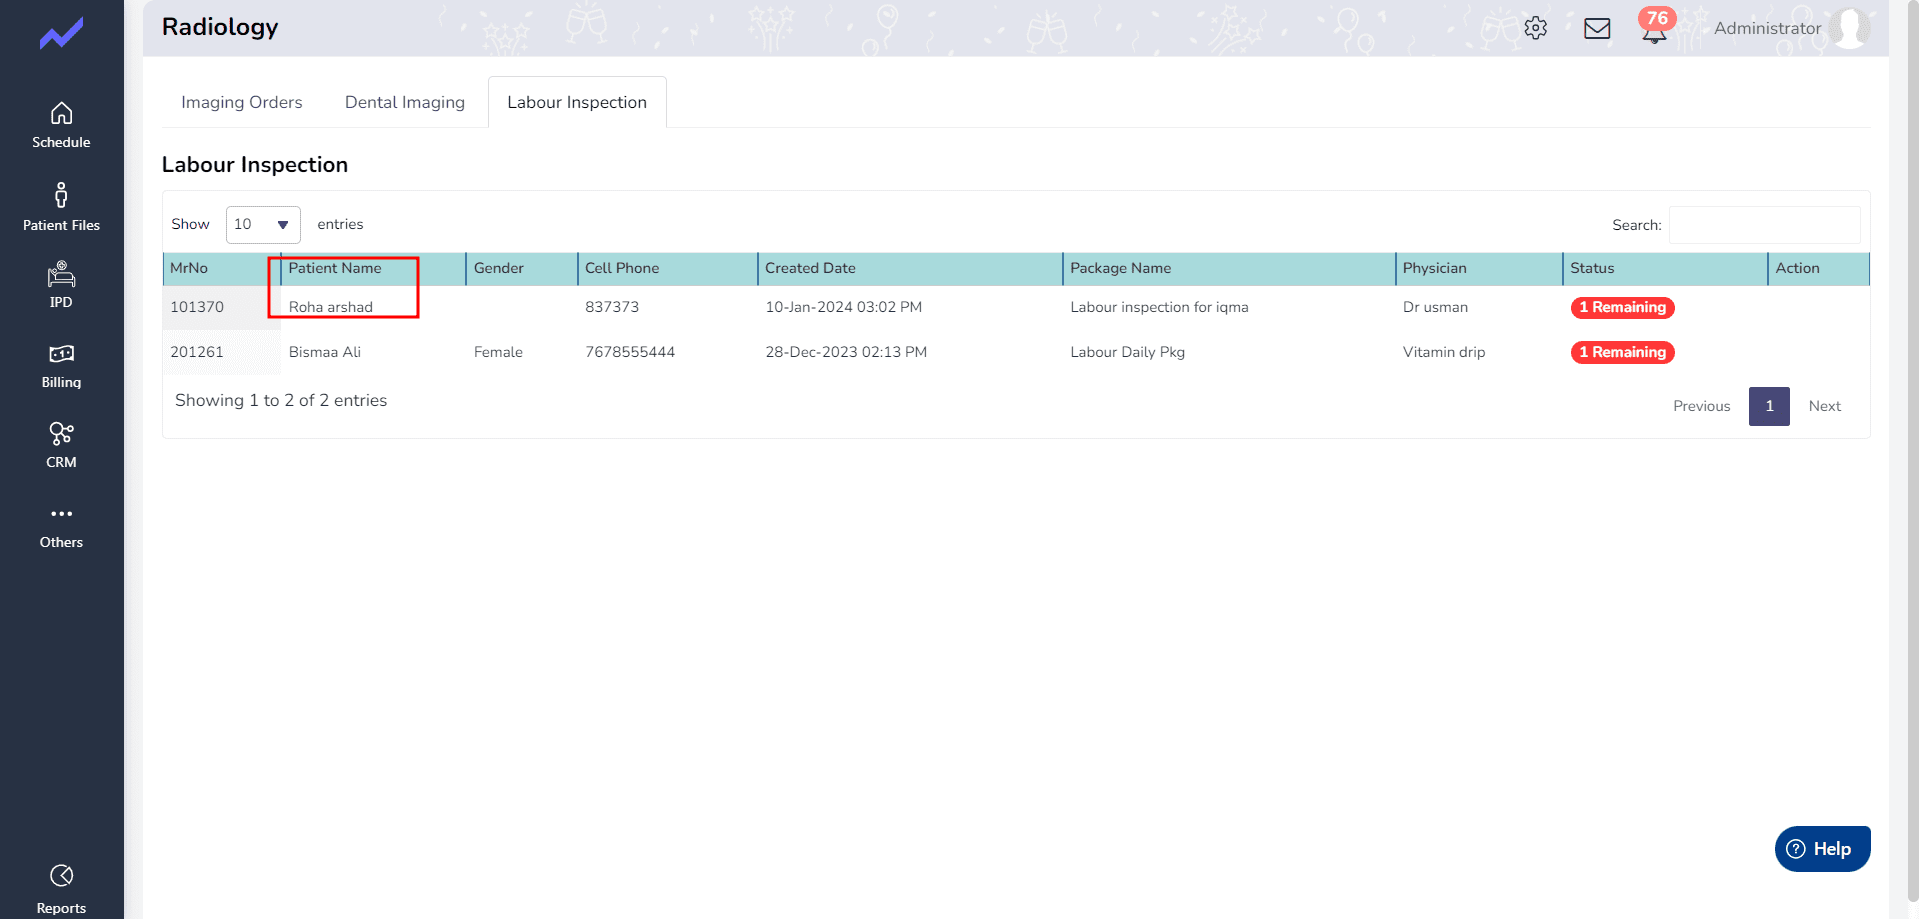
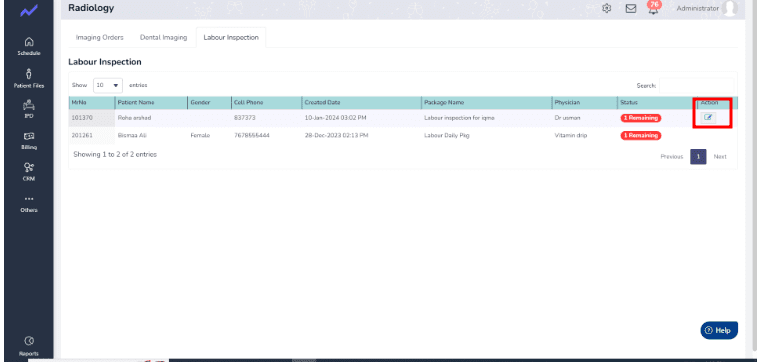
- In this Screen Click on the Edit action.
- In this screen Select the Result and click on the Action Tick.
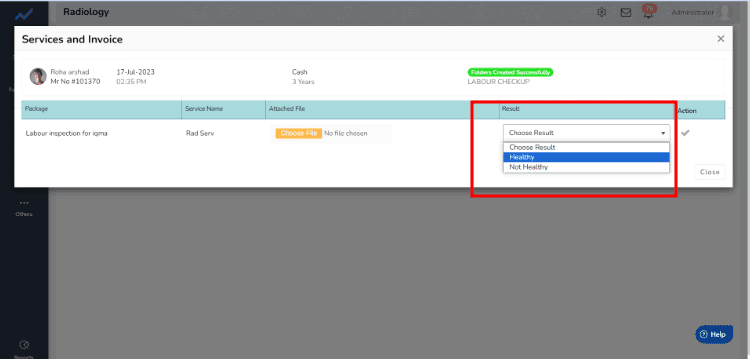
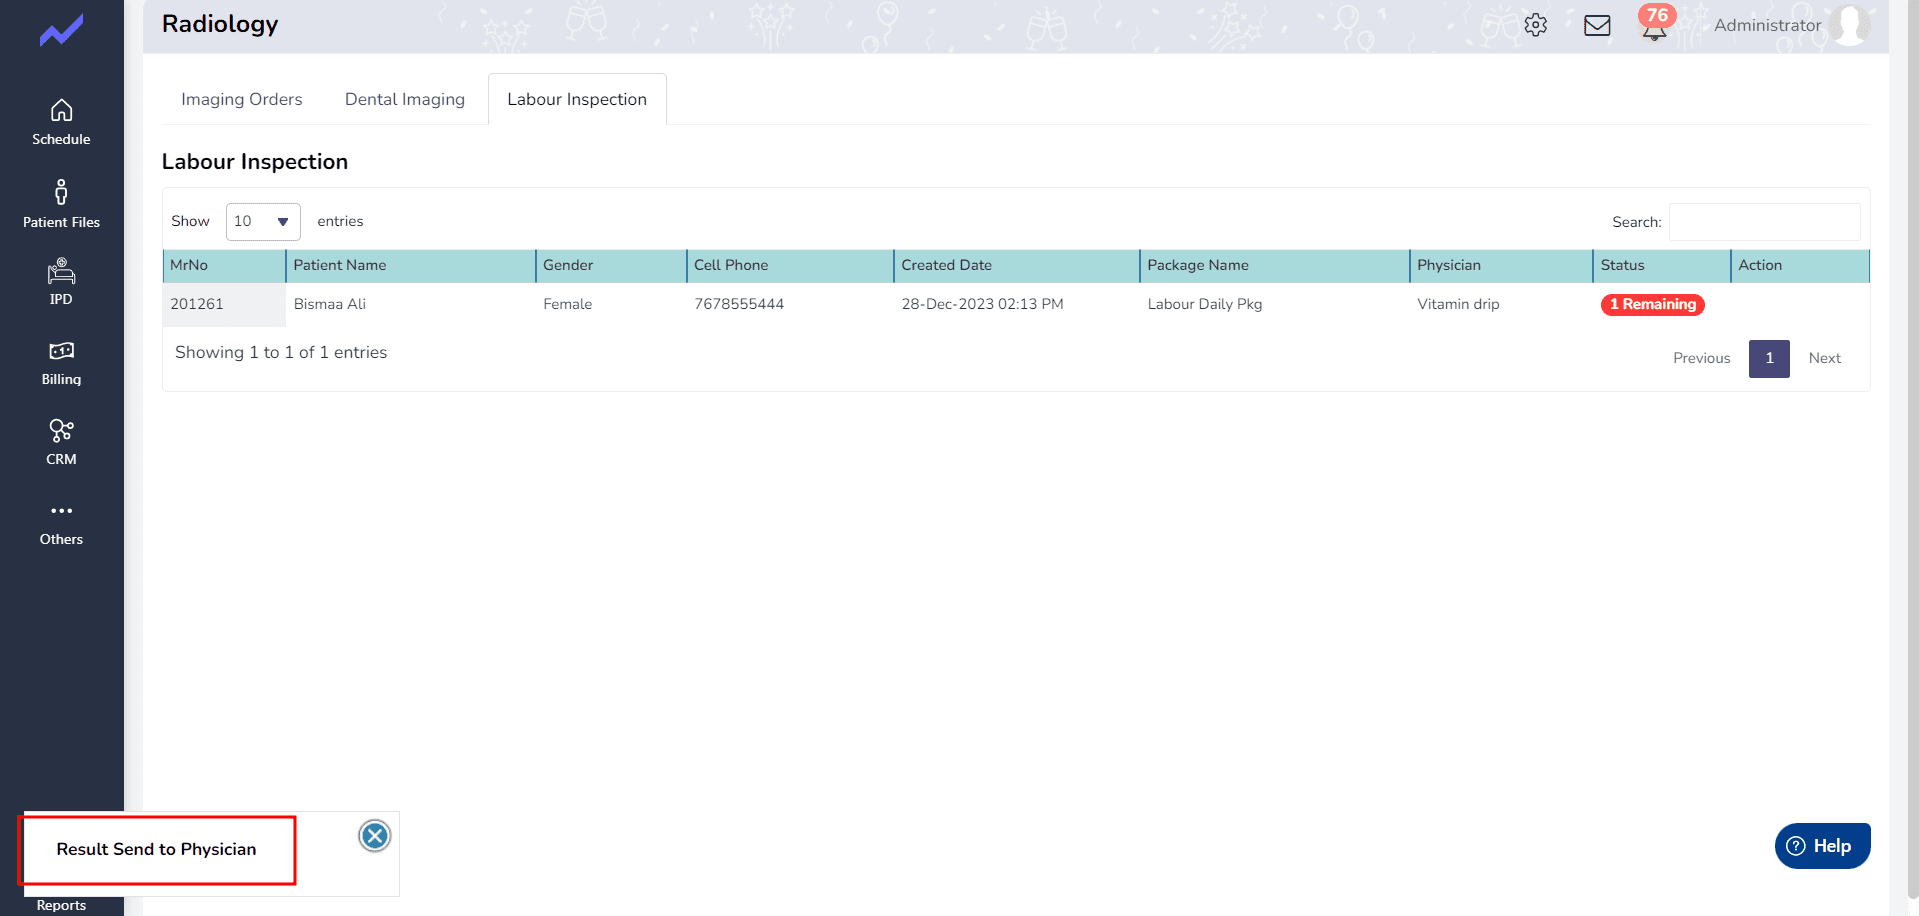
- When we click the system generates a message “Result send to Physician“
- Go back to the View Clinical note => Labour Inspection the result which you uploaded is show.
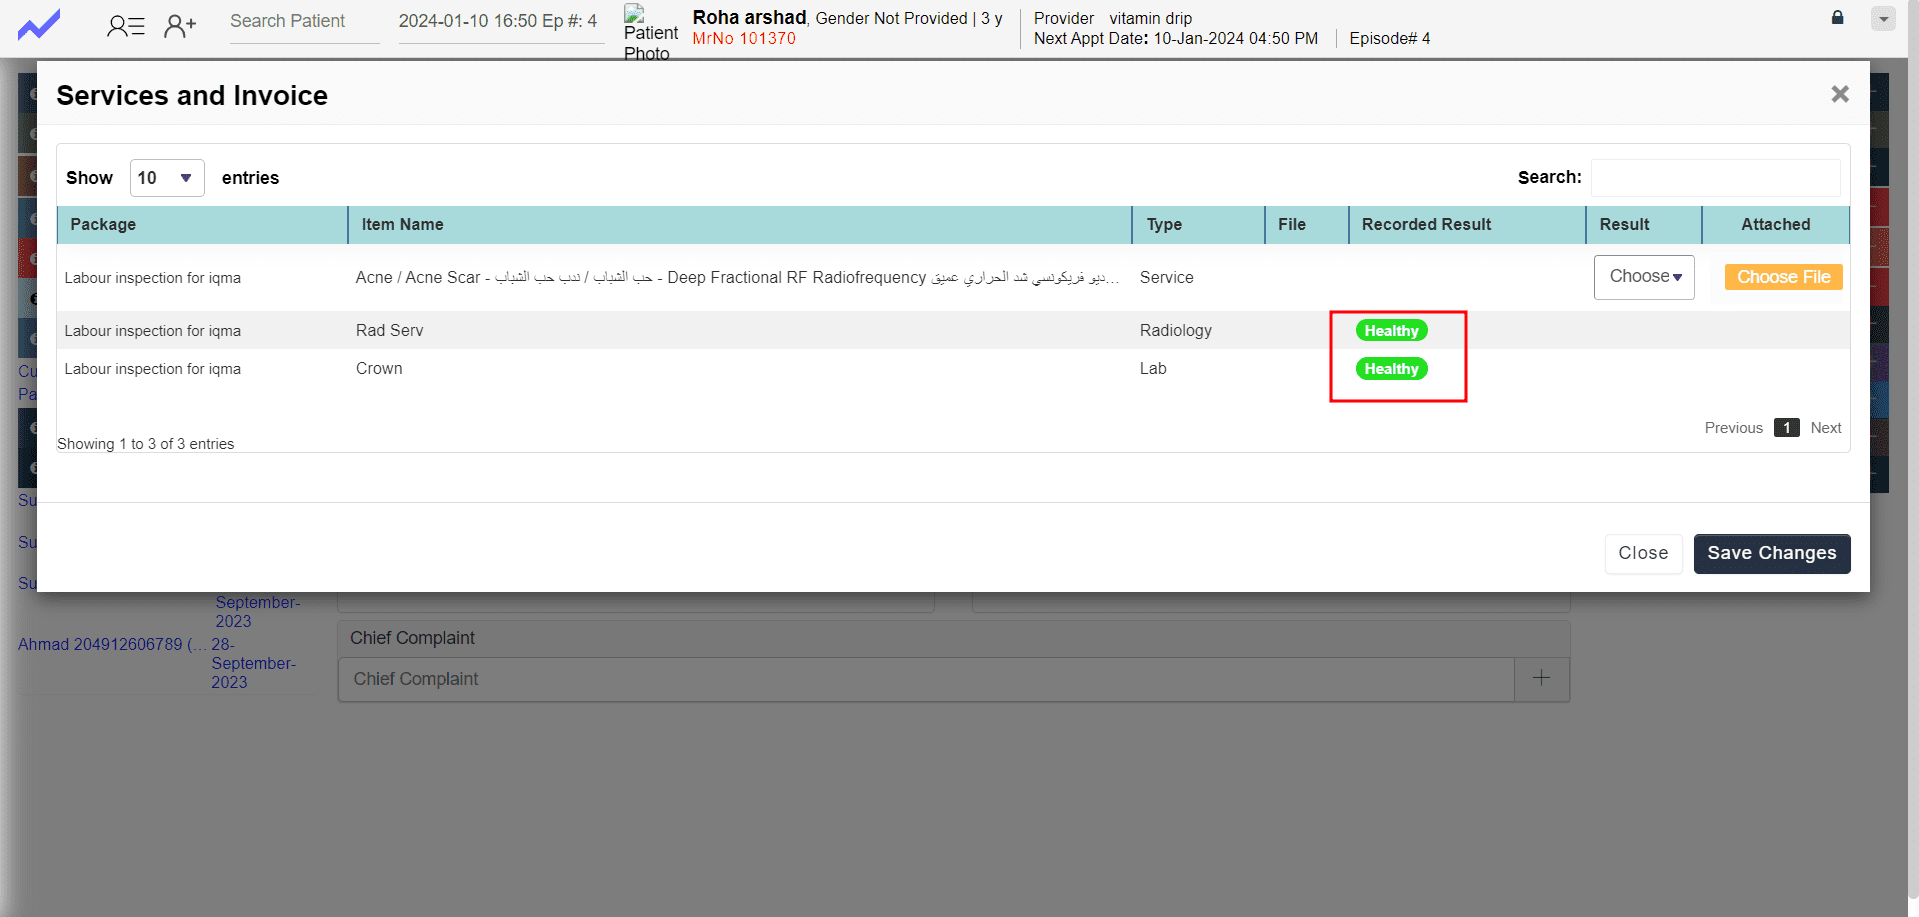
- Doctor can choose the Result of the services.
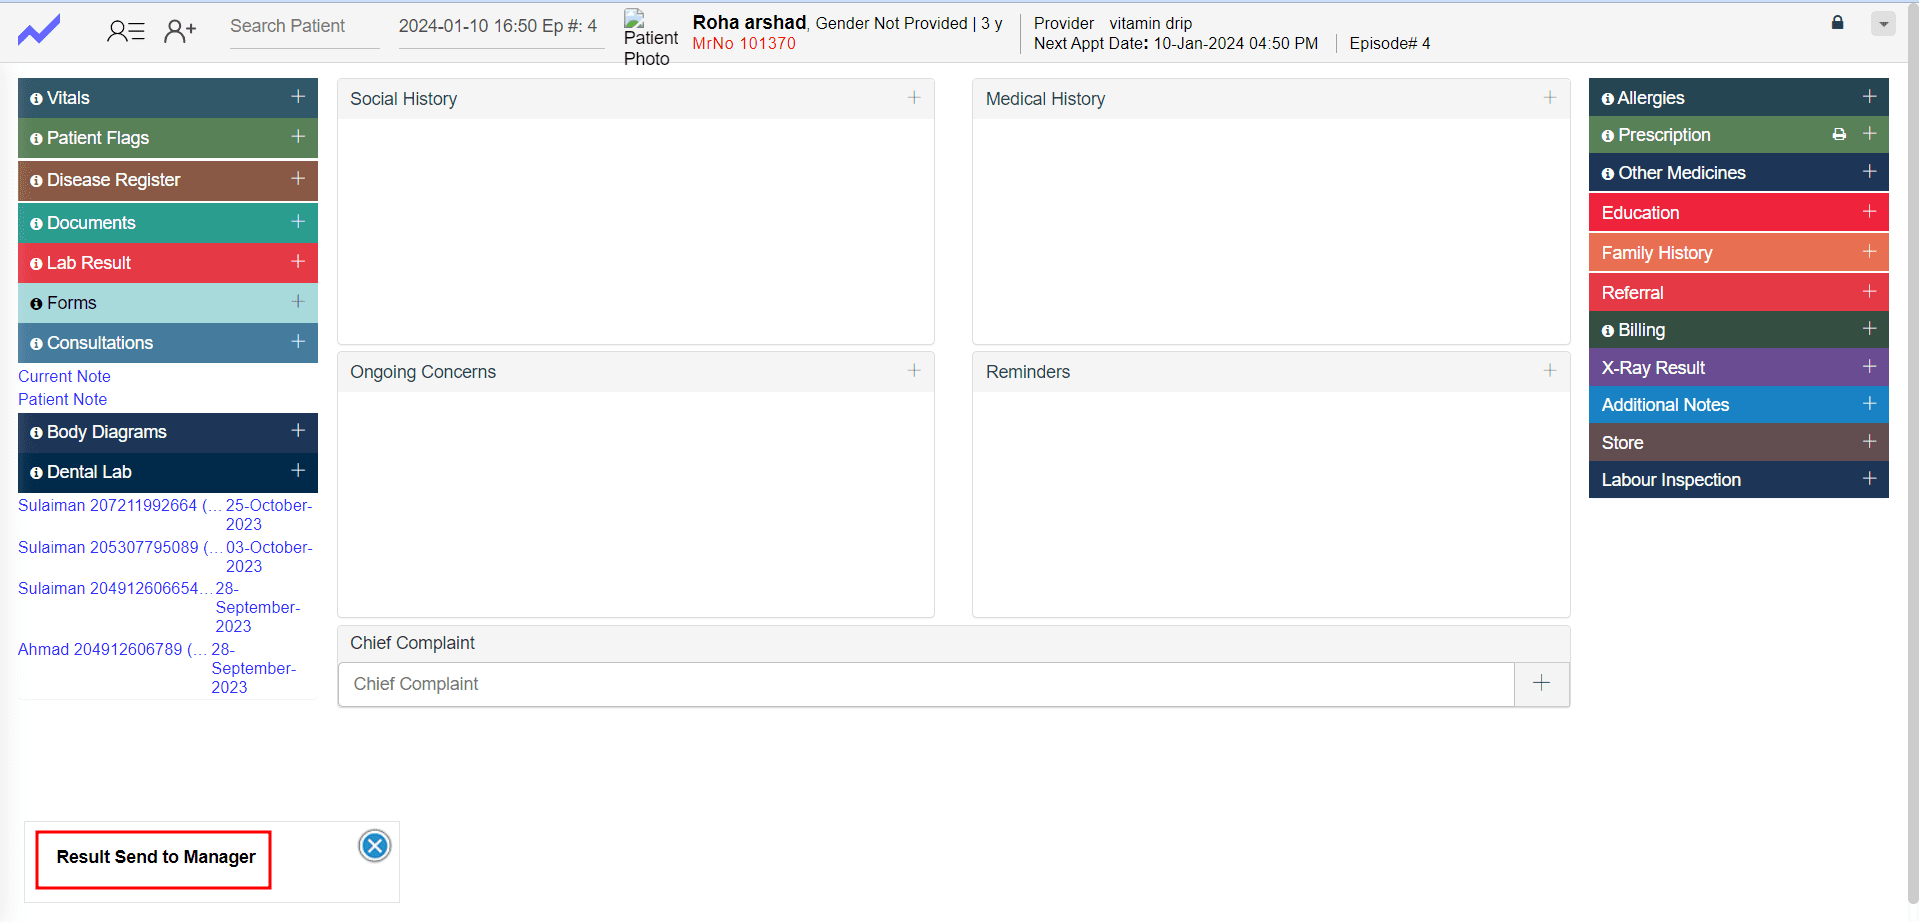
- When the Doctor add the result of the service the system generates a message “Result send to Manager”
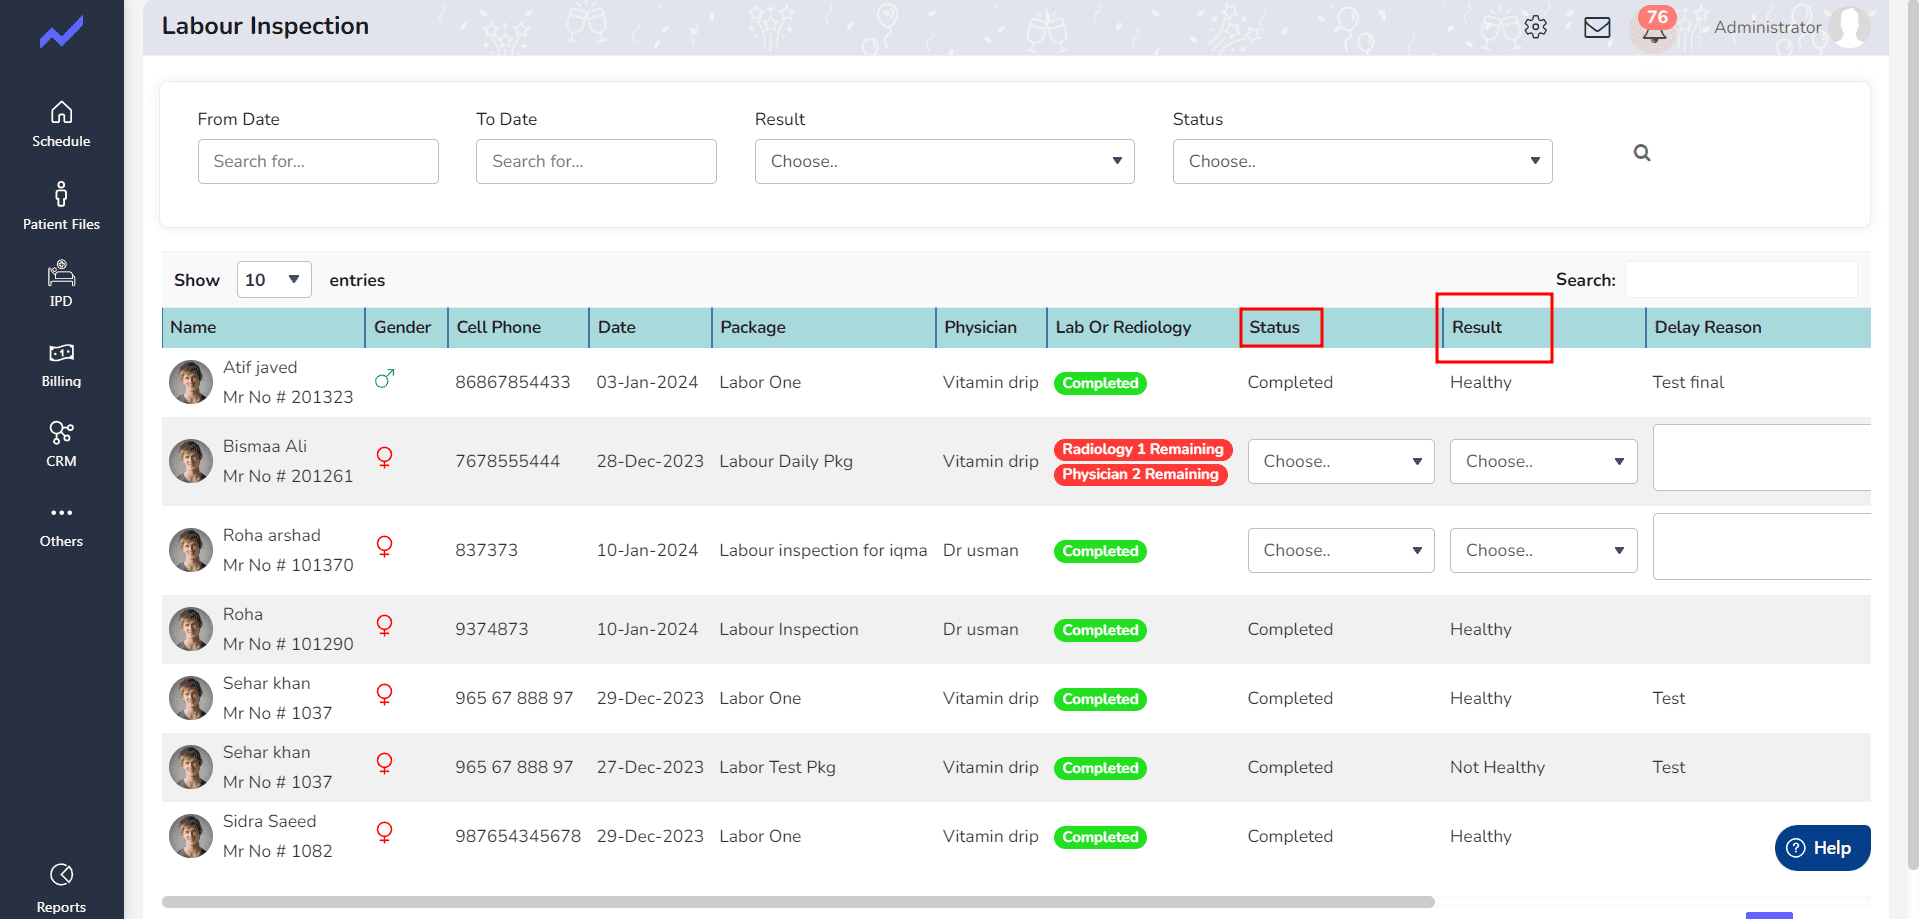
- Go back to the Other => labour Inspection.
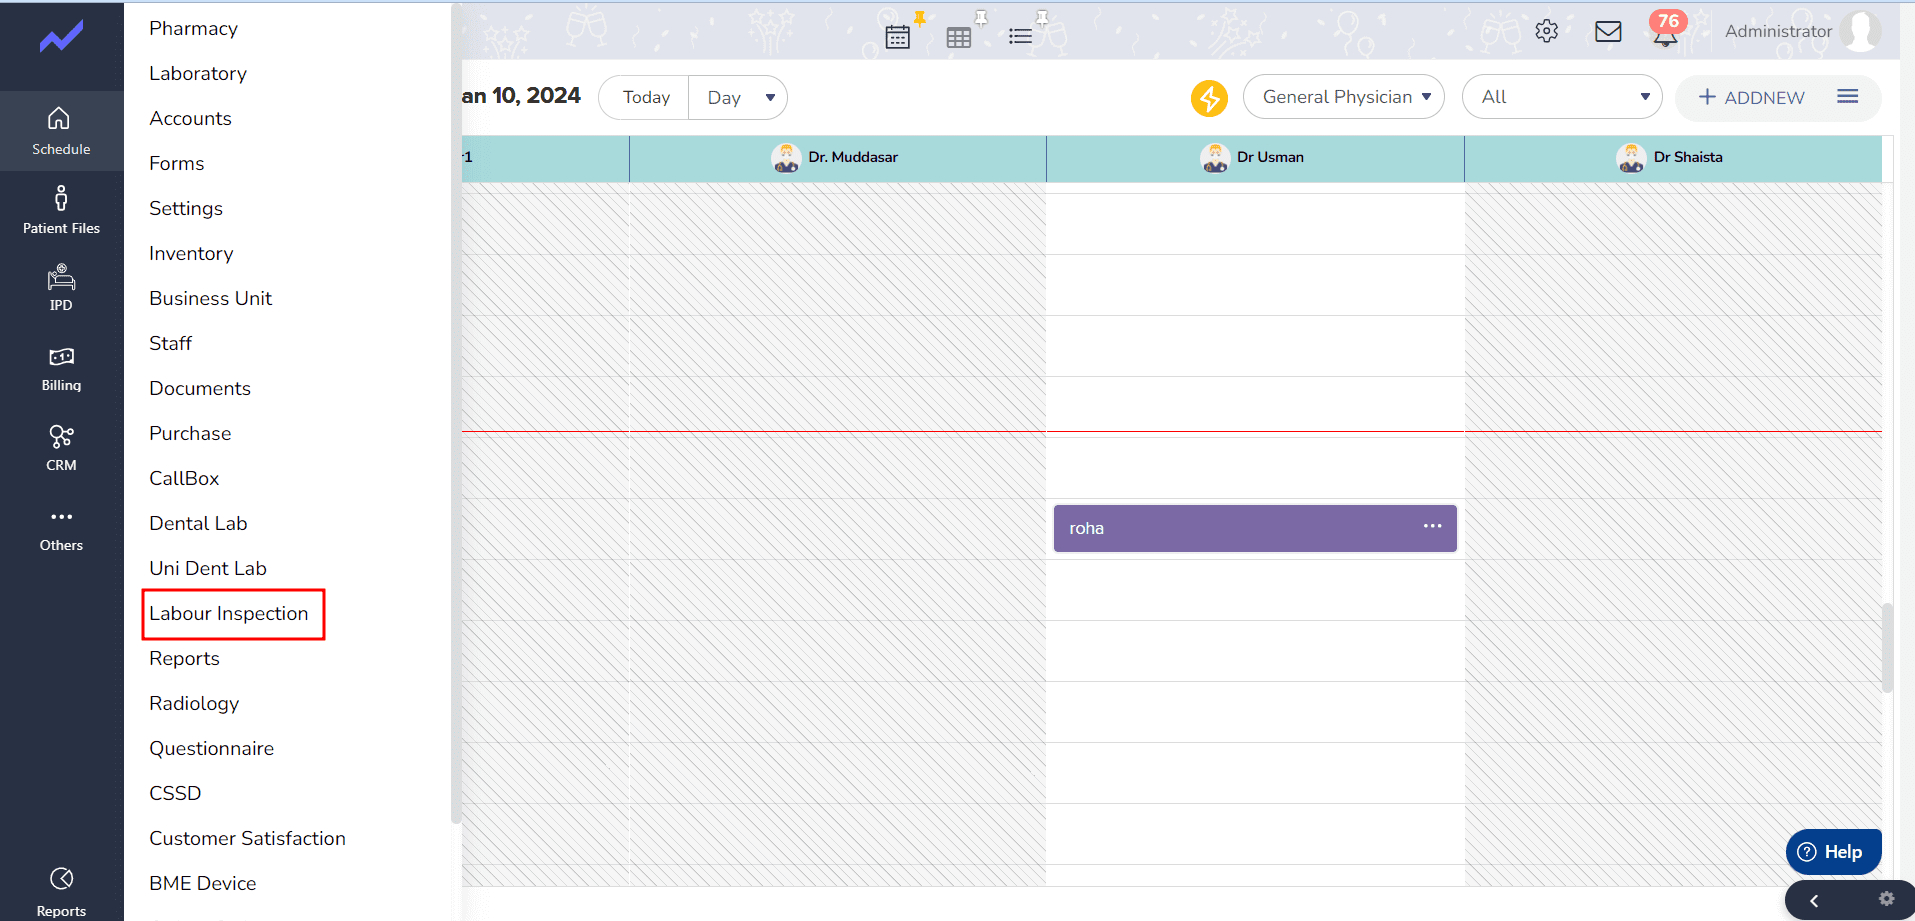
- In this screen the status is Completed.
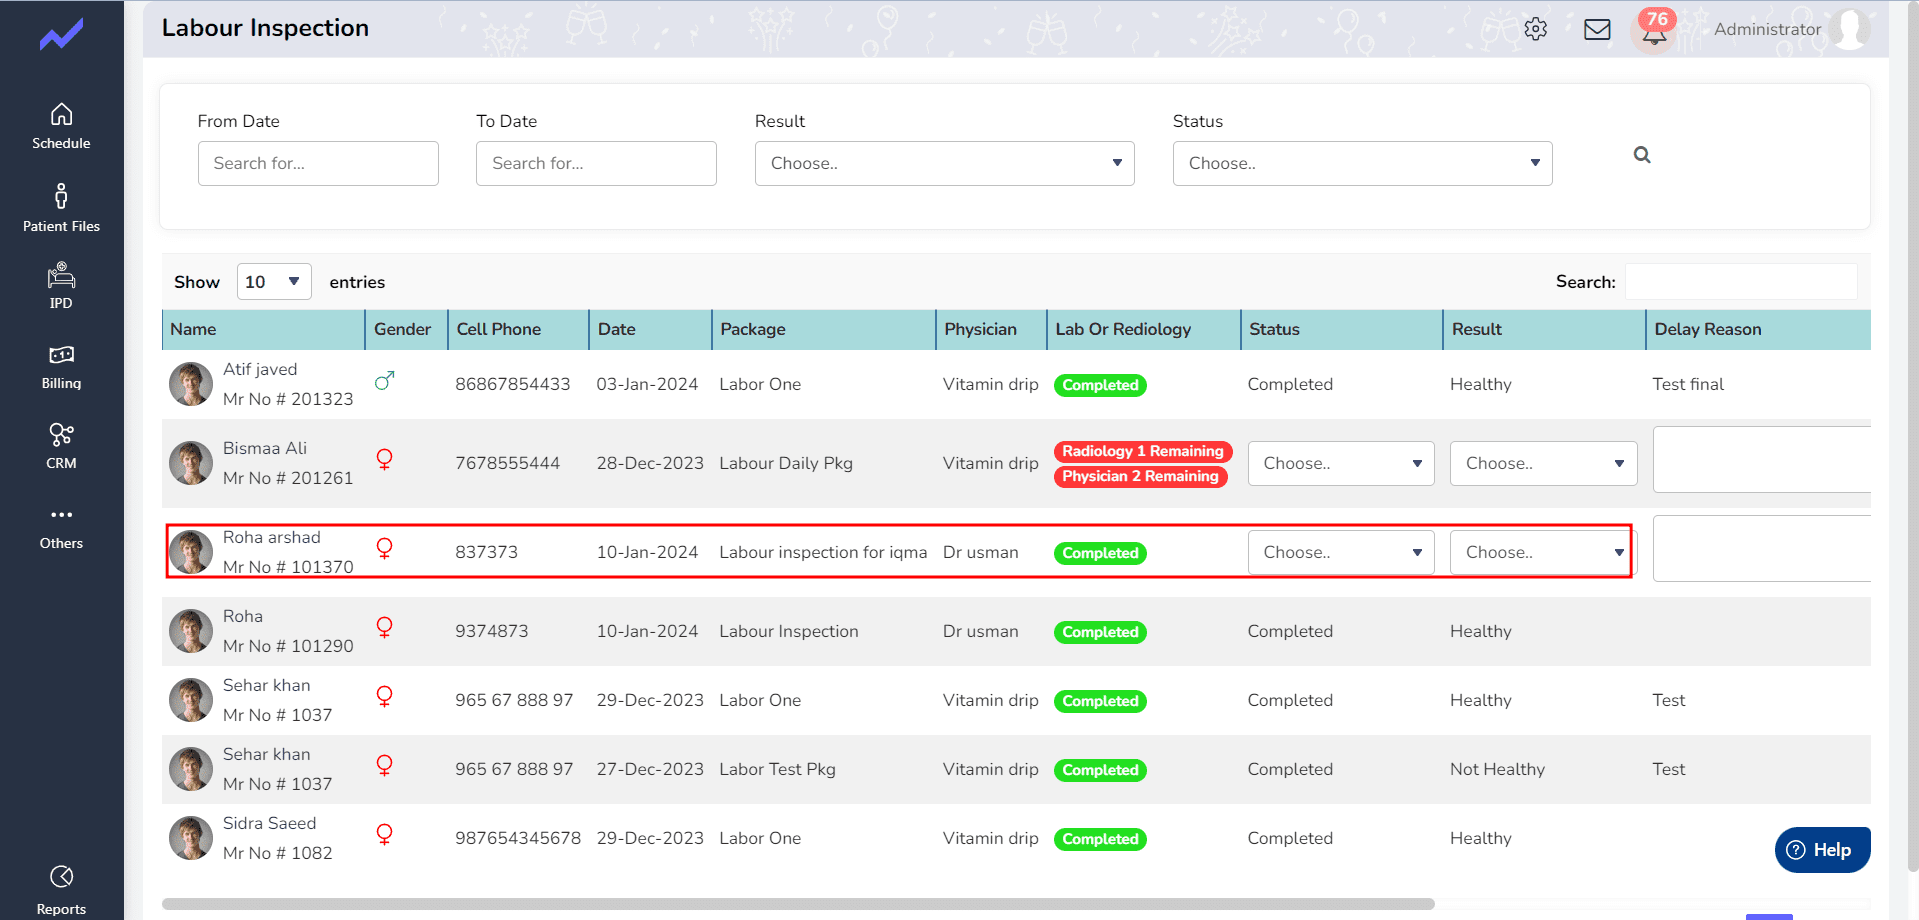
- We can also change the Status and result.
Overall, the labour inspection and Iqama attestation process in Cloudpital is designed to be simple, efficient, and transparent.


