On the main IPD Screen, there is a setting icon
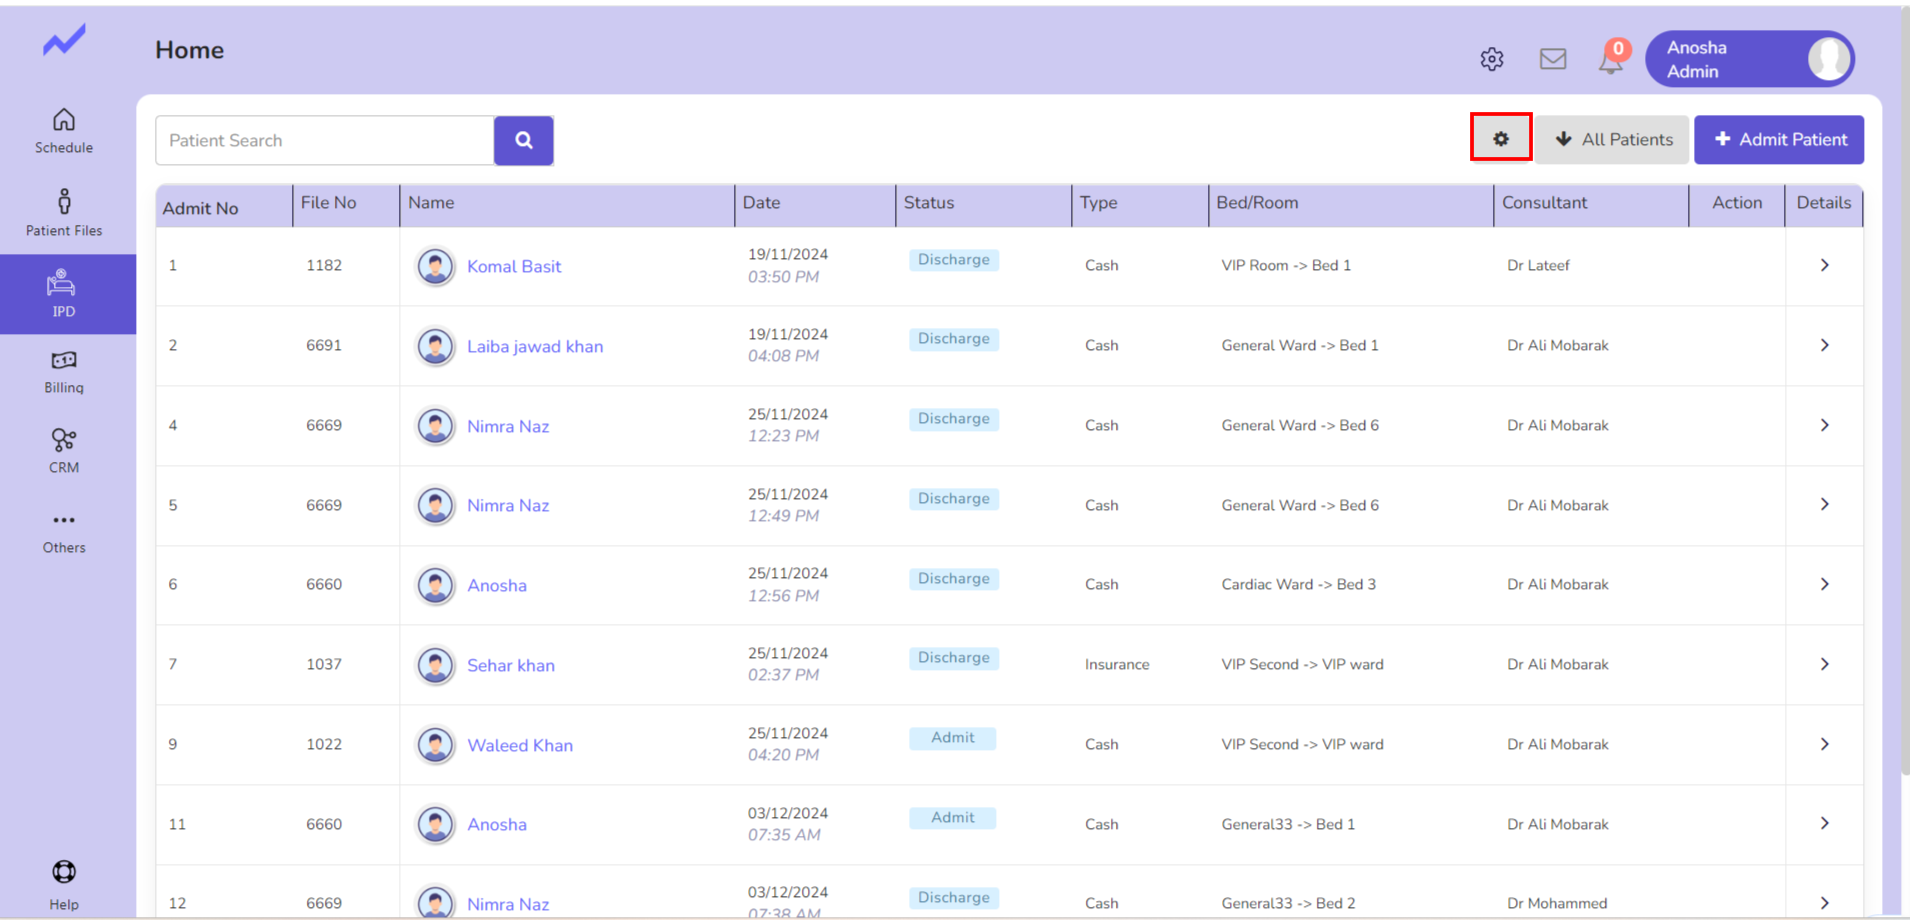
Click on the icon to navigate to the IPD Settings screen, which contains various fields for configuration.
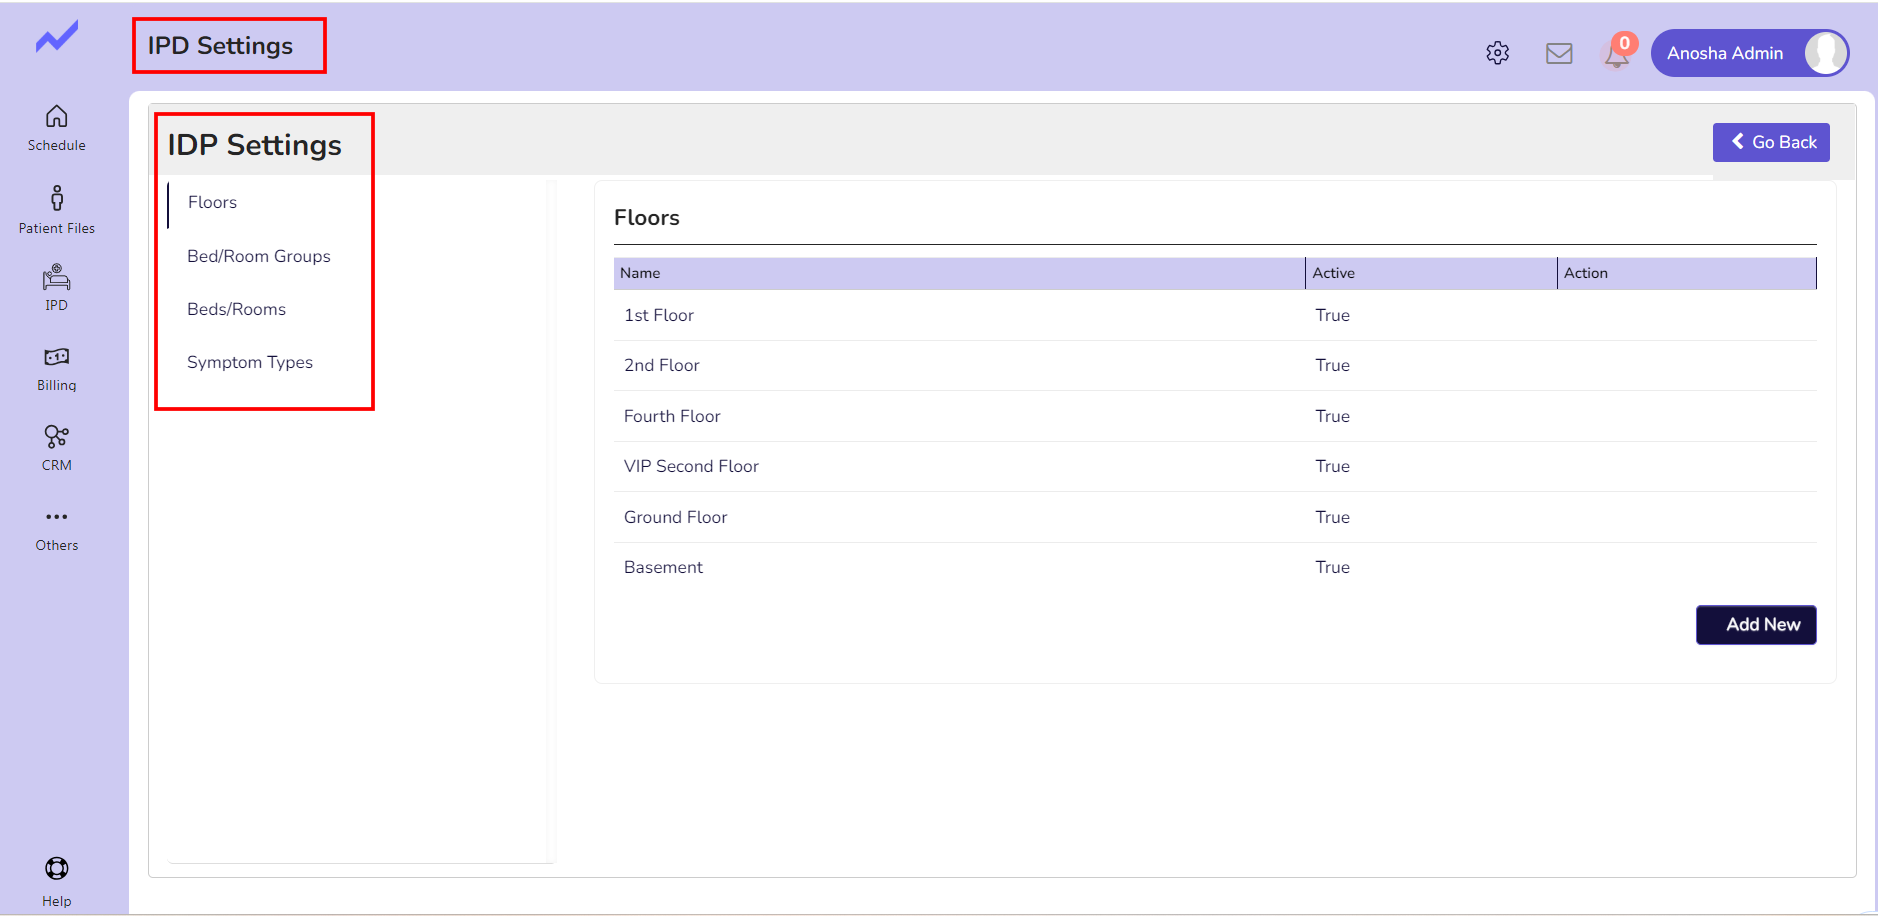
Click on the Floor to add the floor by clicking on the Add new button.
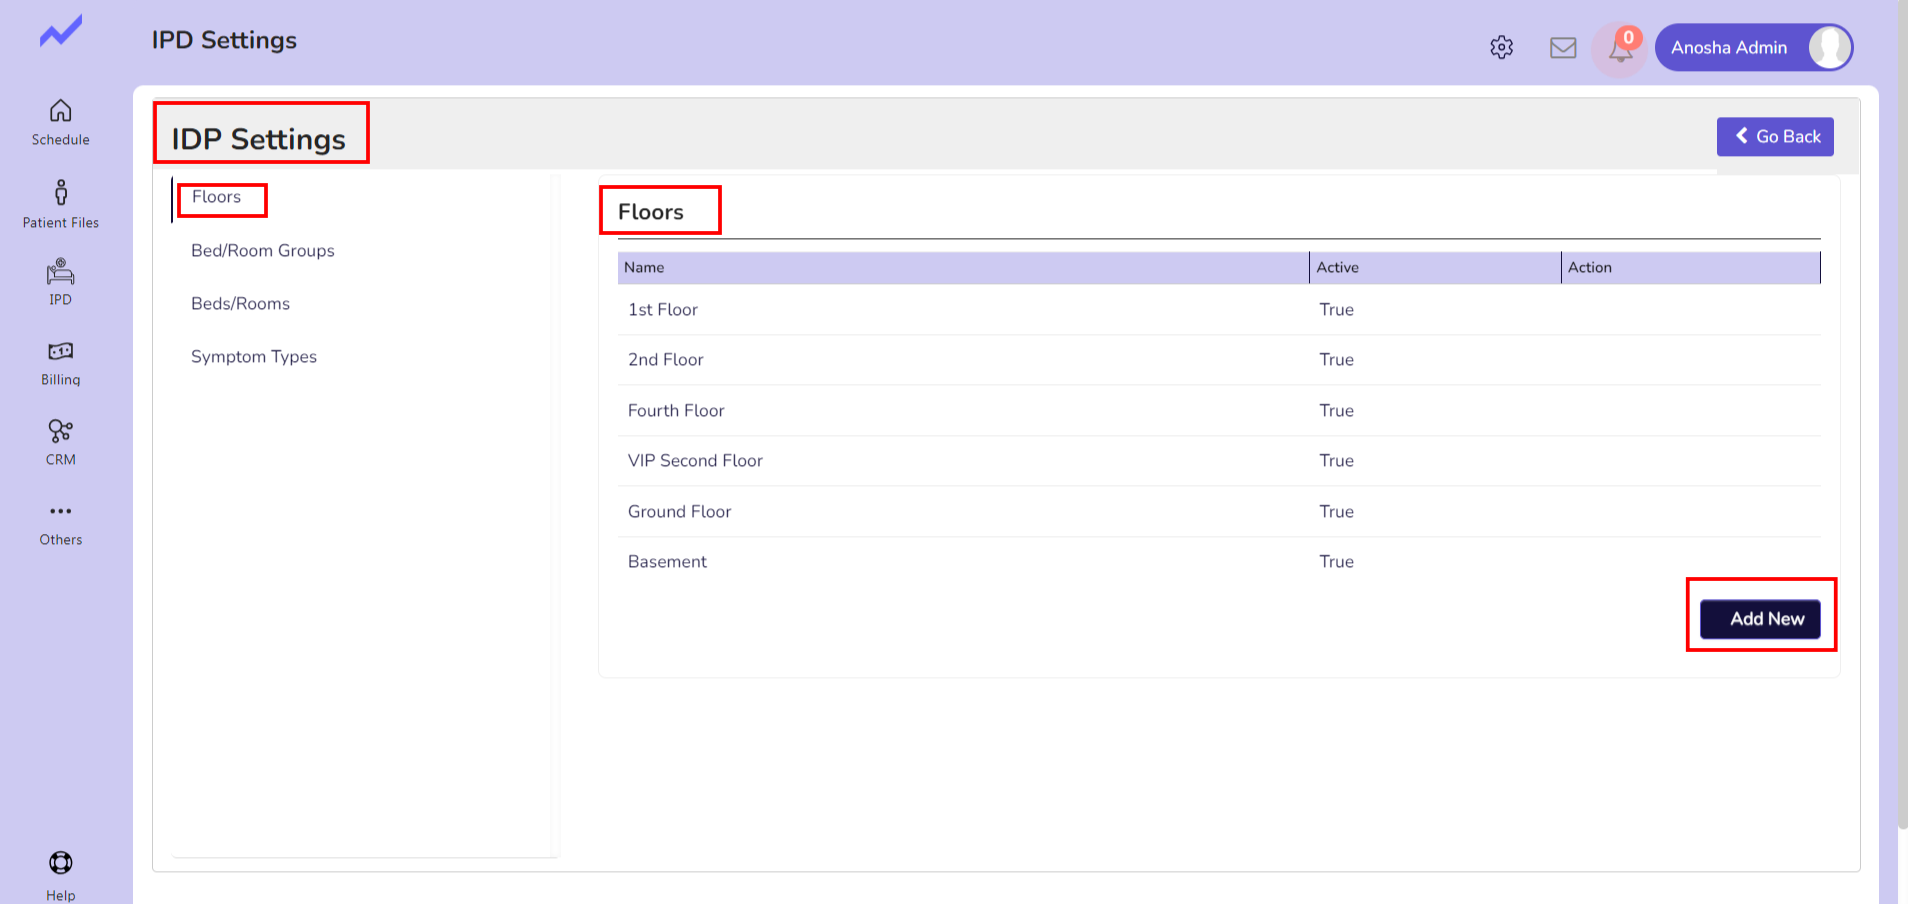
When you click on the Add New button—>it will navigate to the next window
Here enter the name of the floor and click on the save button
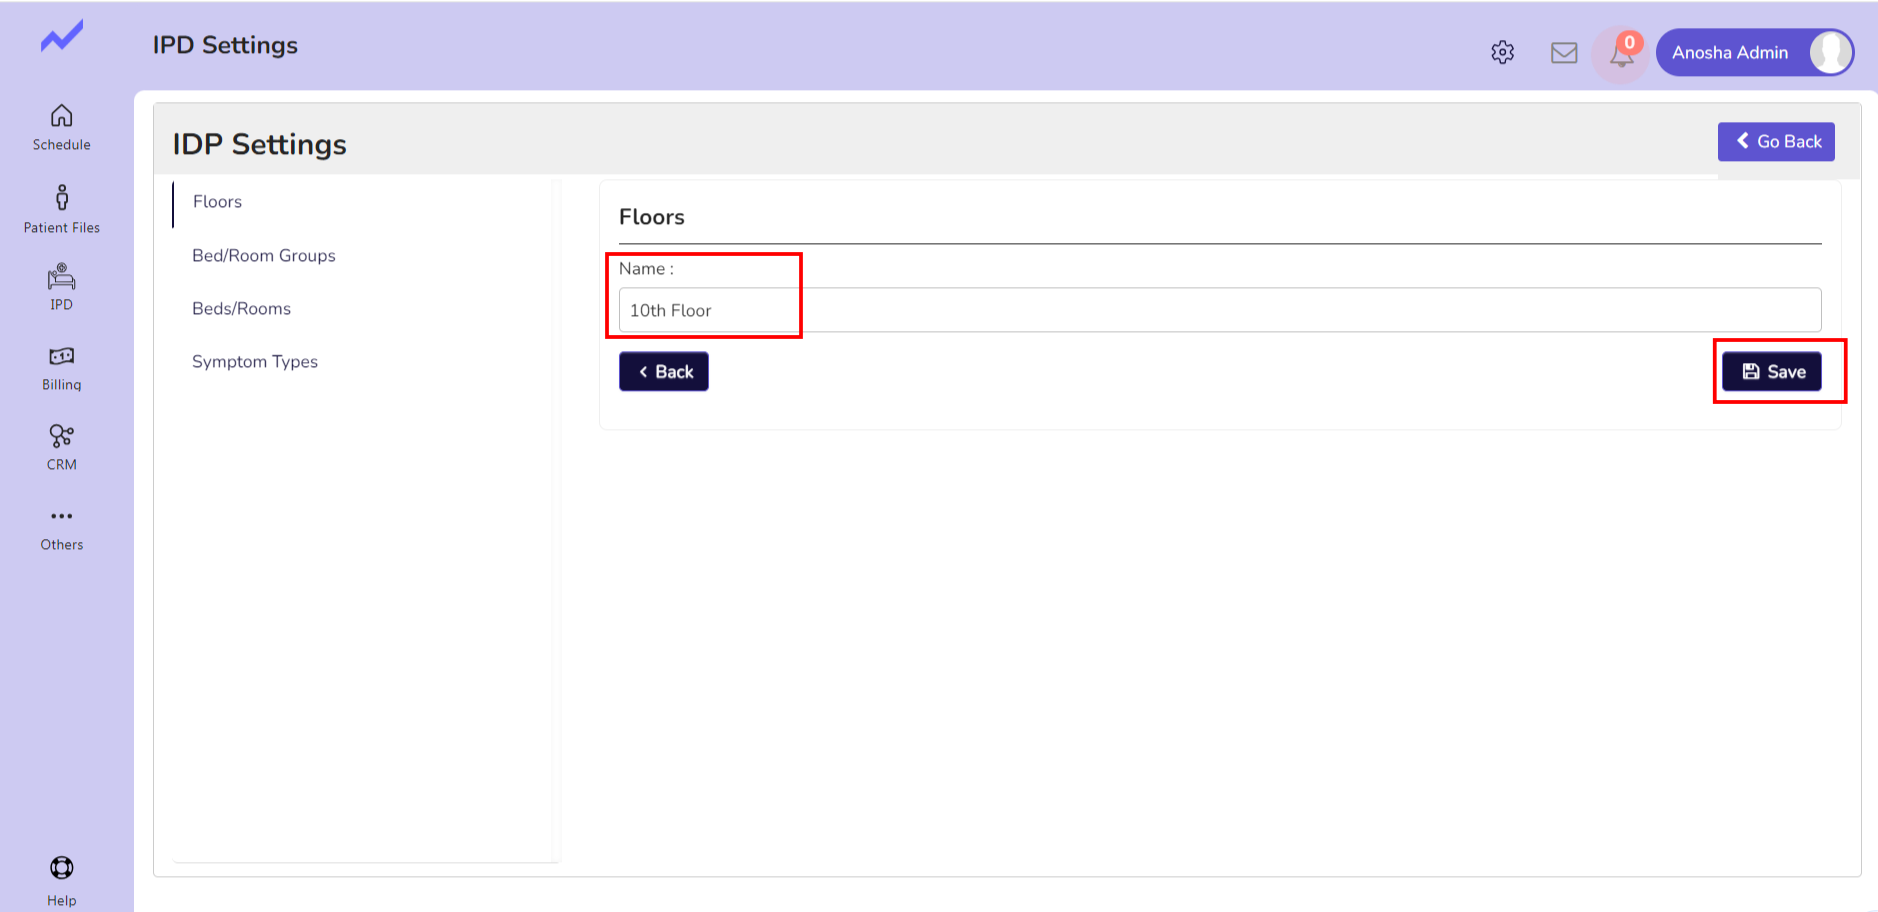
The floor you have added will be saved successfully.
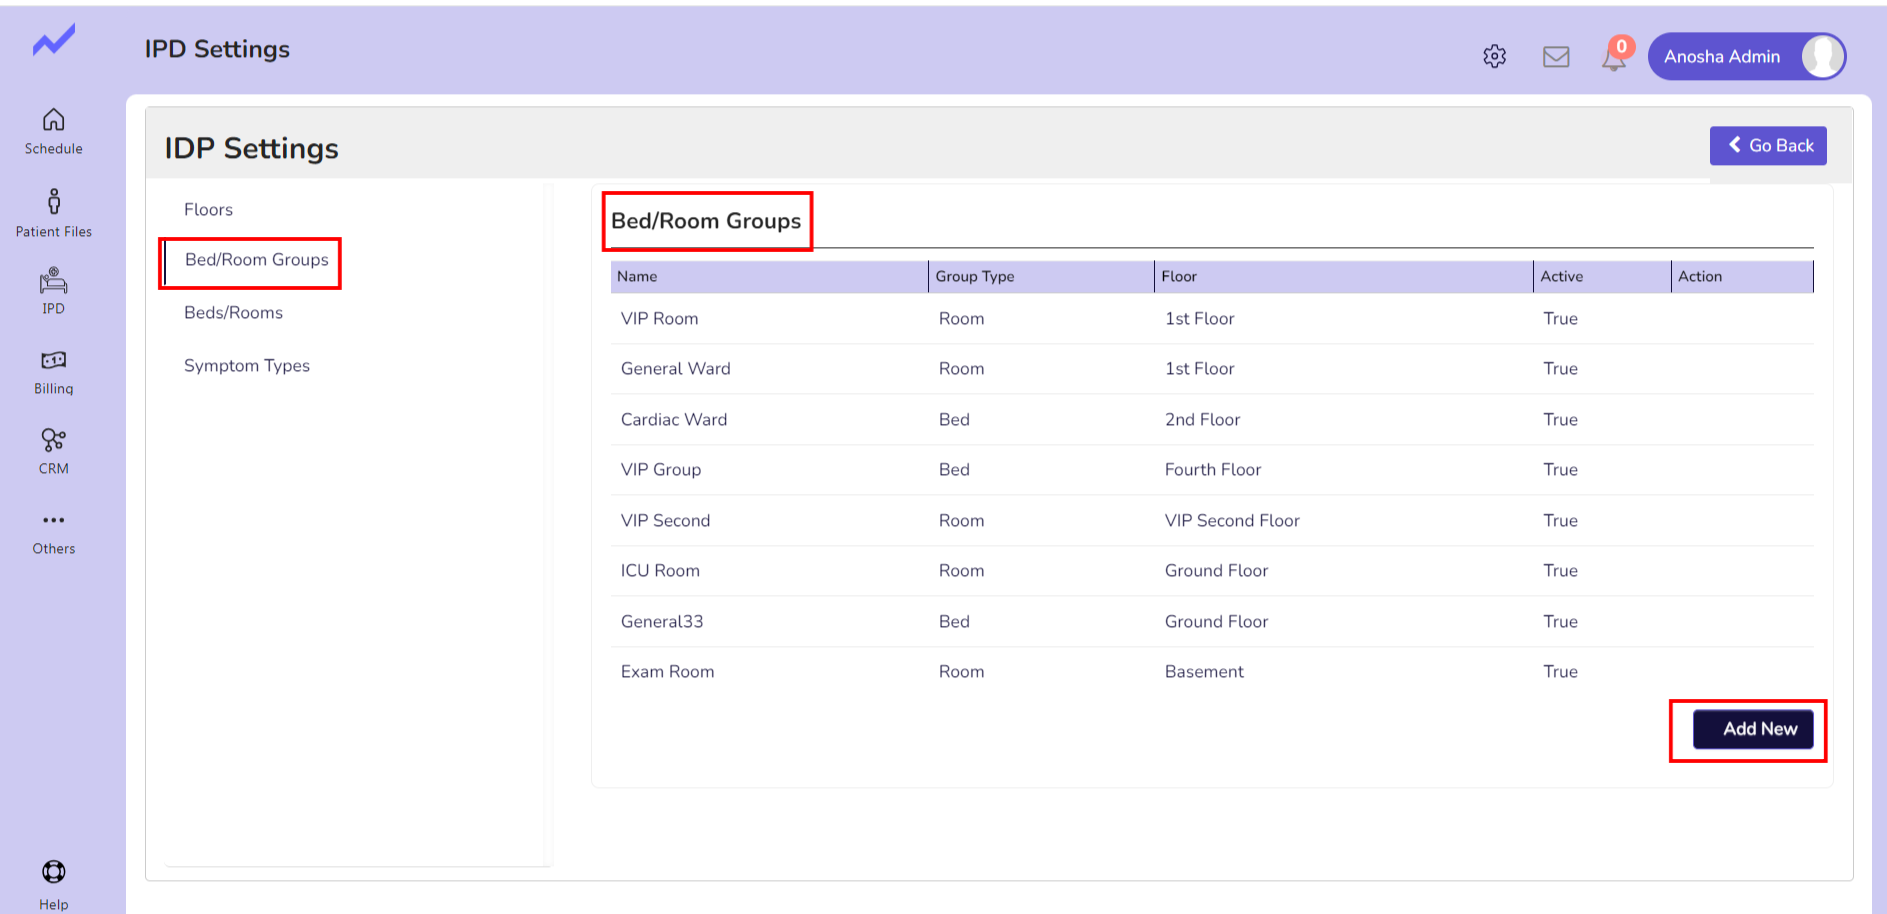
Now Click on the Bed/Room Group and click on the Add new button to add a new bed group
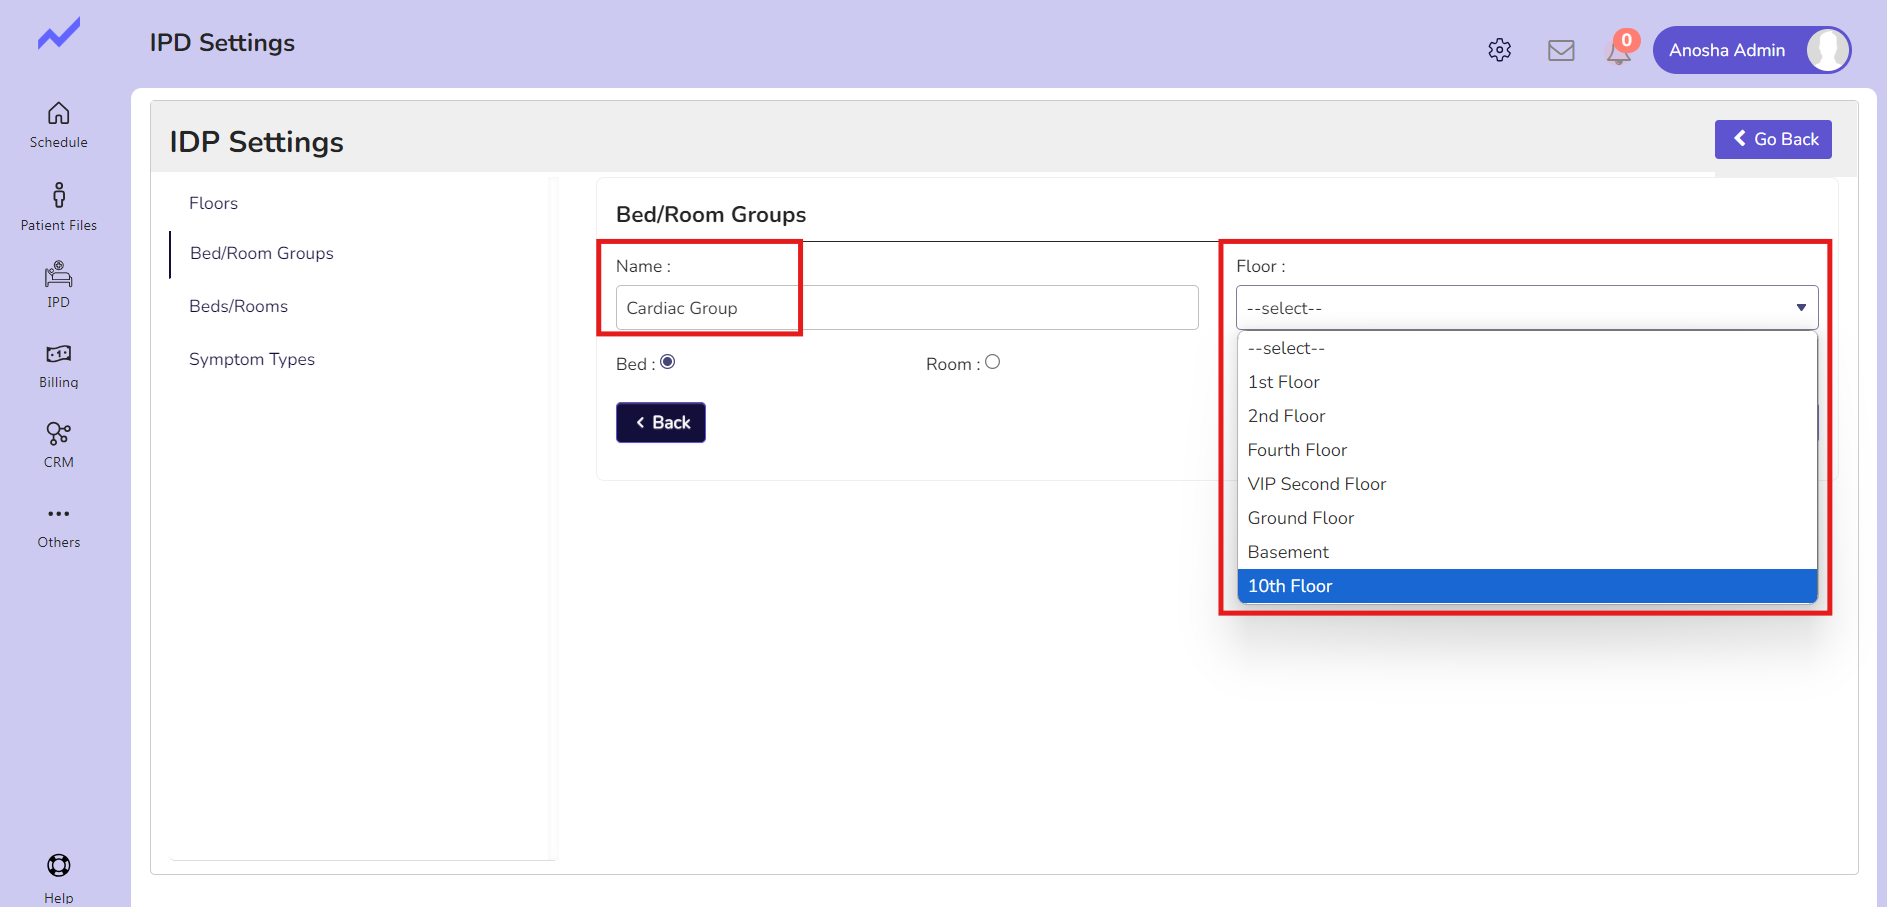
Enter the group name and select floor from the drop-down
After that click on the save button—>the newly added bed group will be saved successfully.
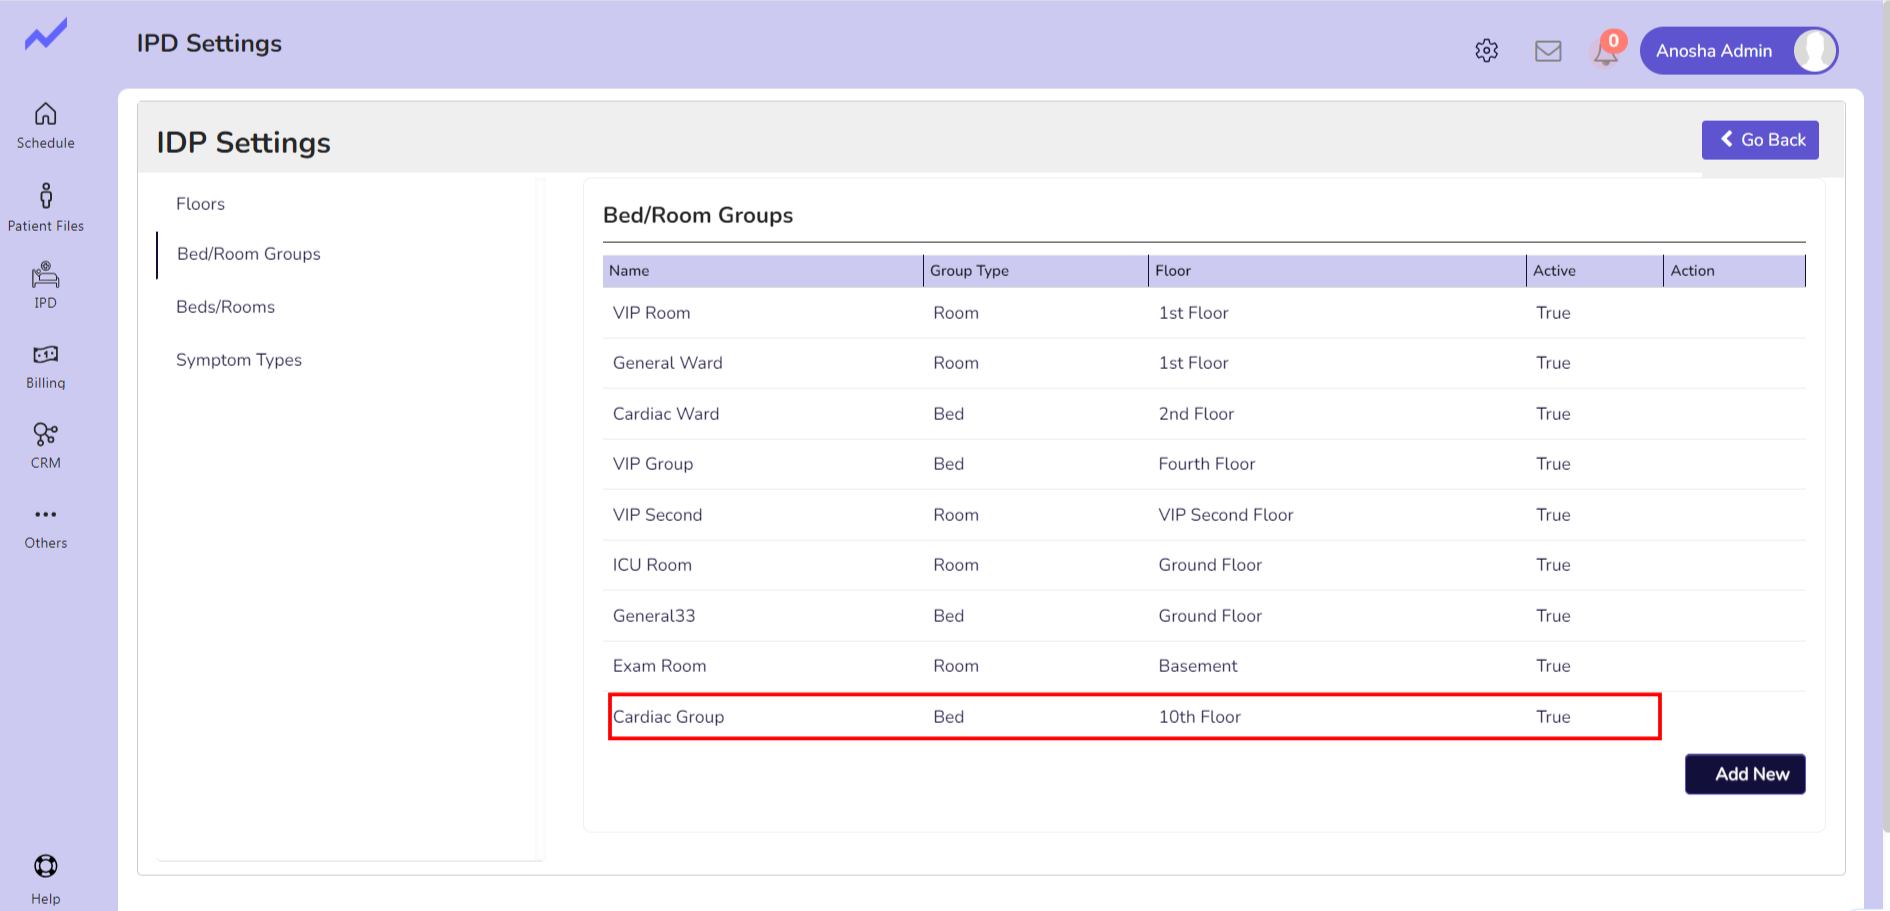
The group you have entered will appear in the list below.
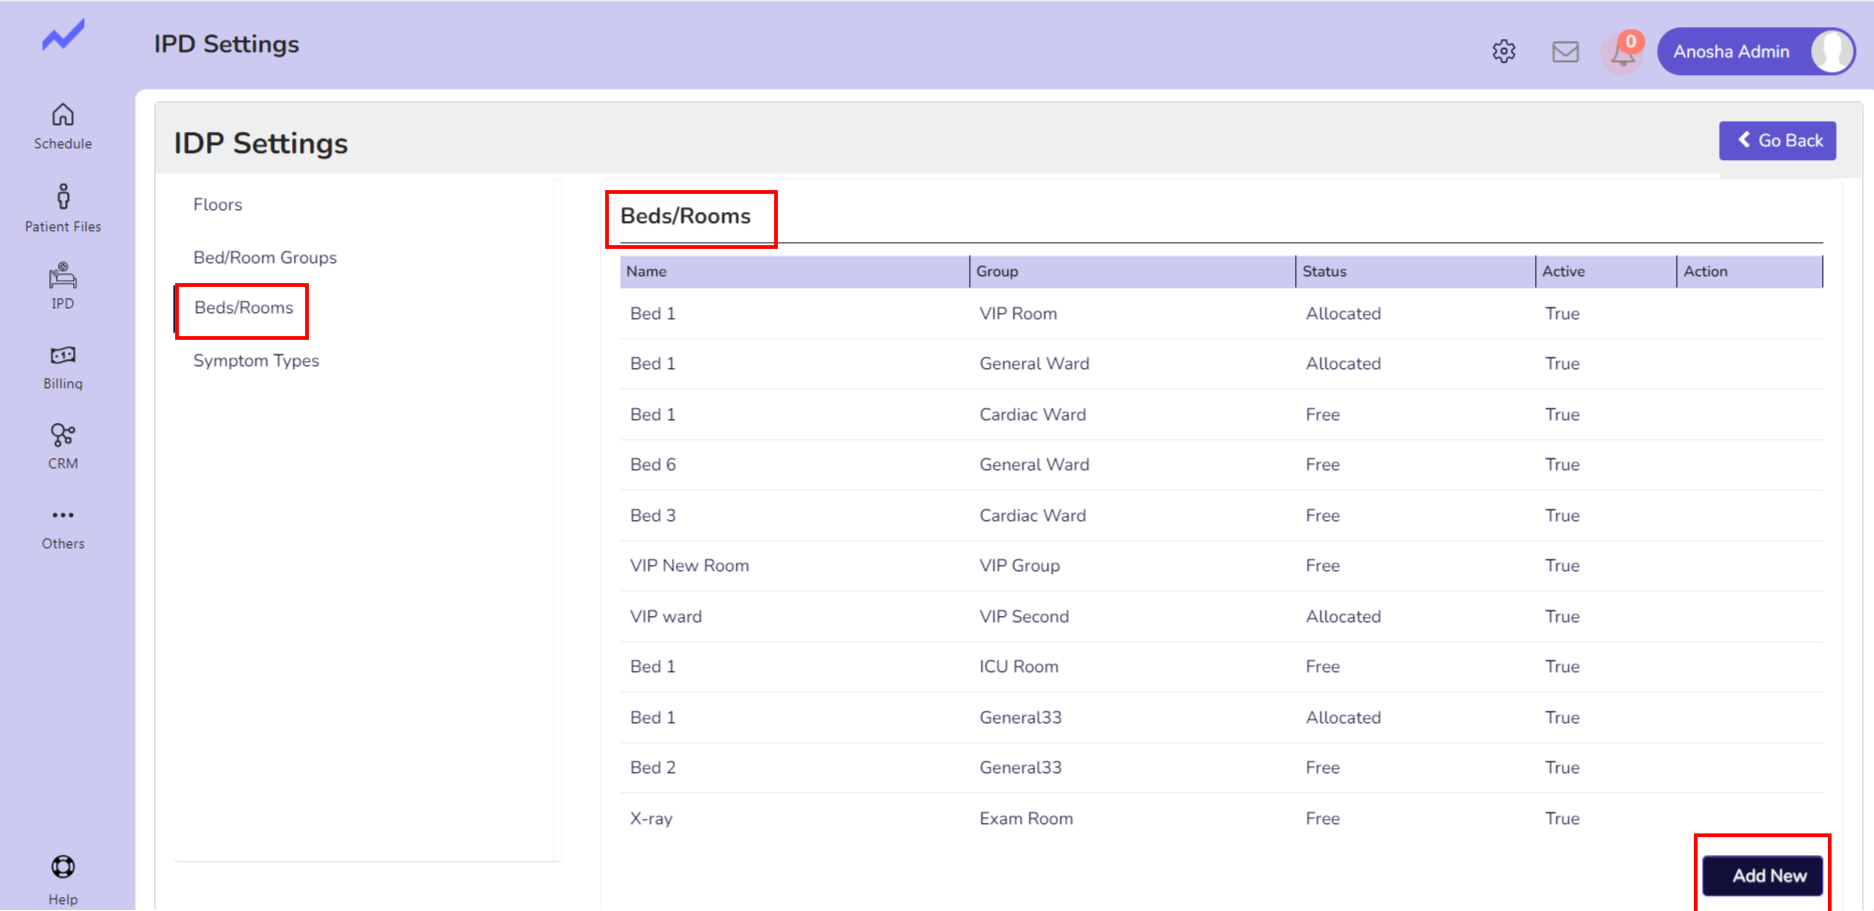
Now click on the Beds/Rooms tab and click on the ADD new button in order to add beds to the group you have created.
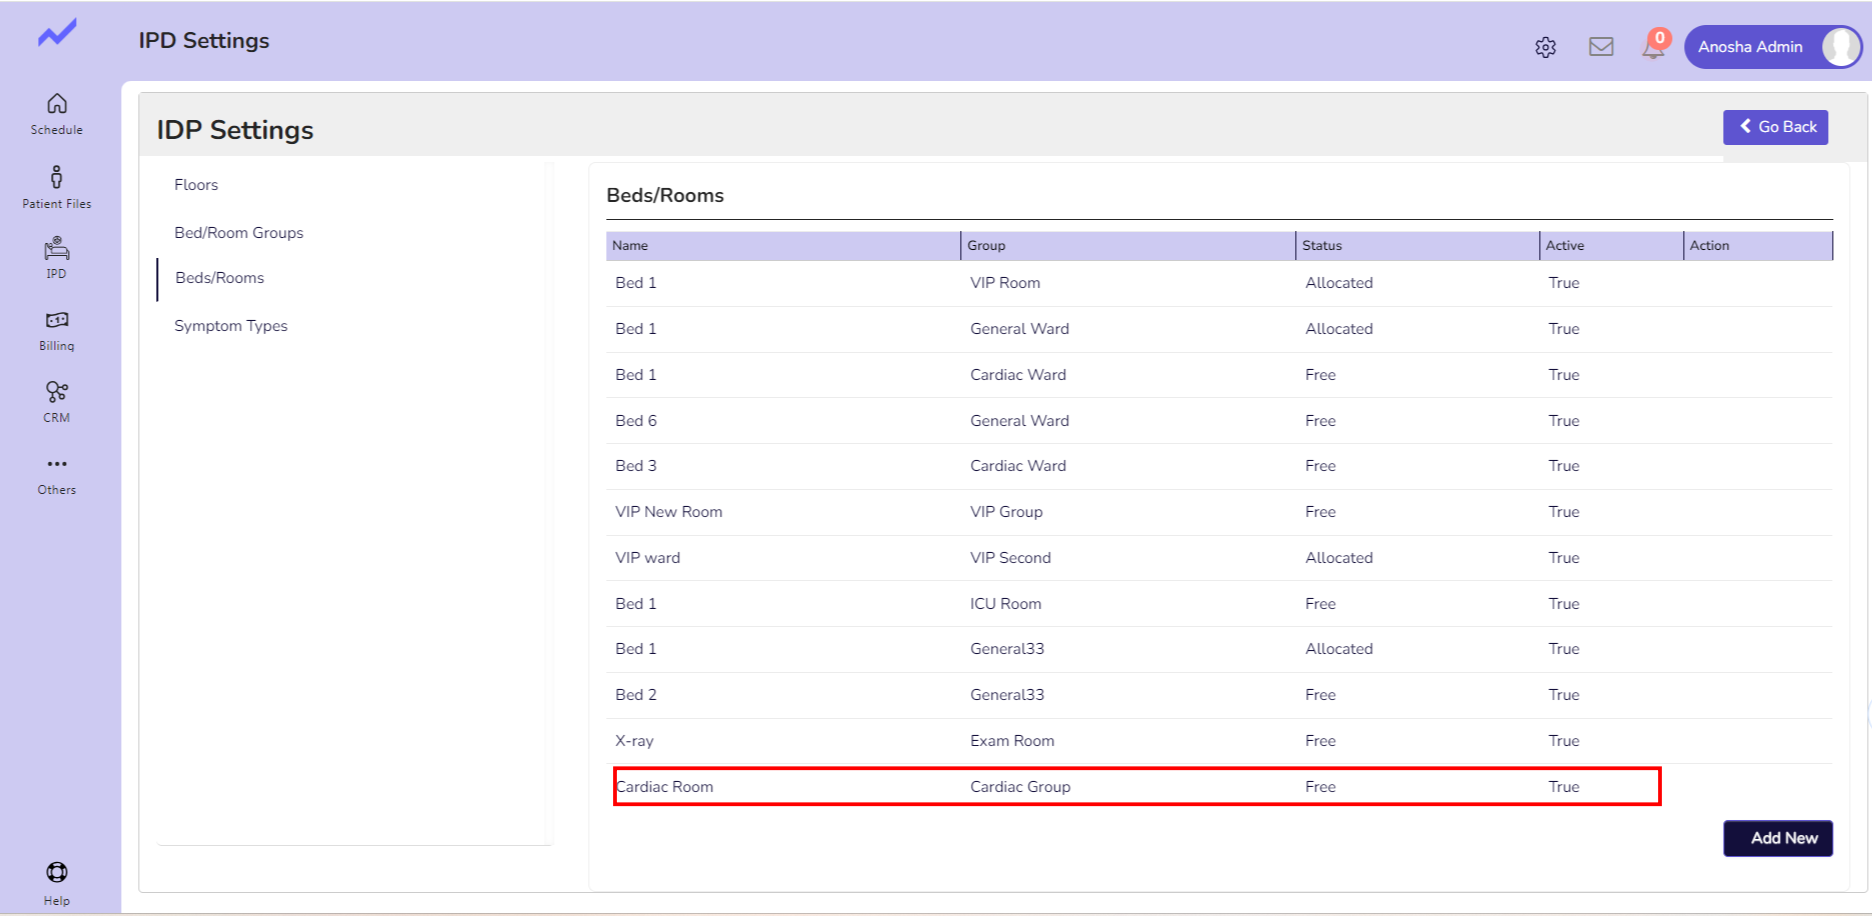
When you click on the ADD new button it will navigate to a new window enter the name here and also select the Group from the drop-down (you can select the group you have just added)

After clicking on the save button the bed/room will be added successfully
Here you can see, that as the bed is not assigned to any patient, the status of this bed is showing free here. Now you can assign this bed to any patient.


