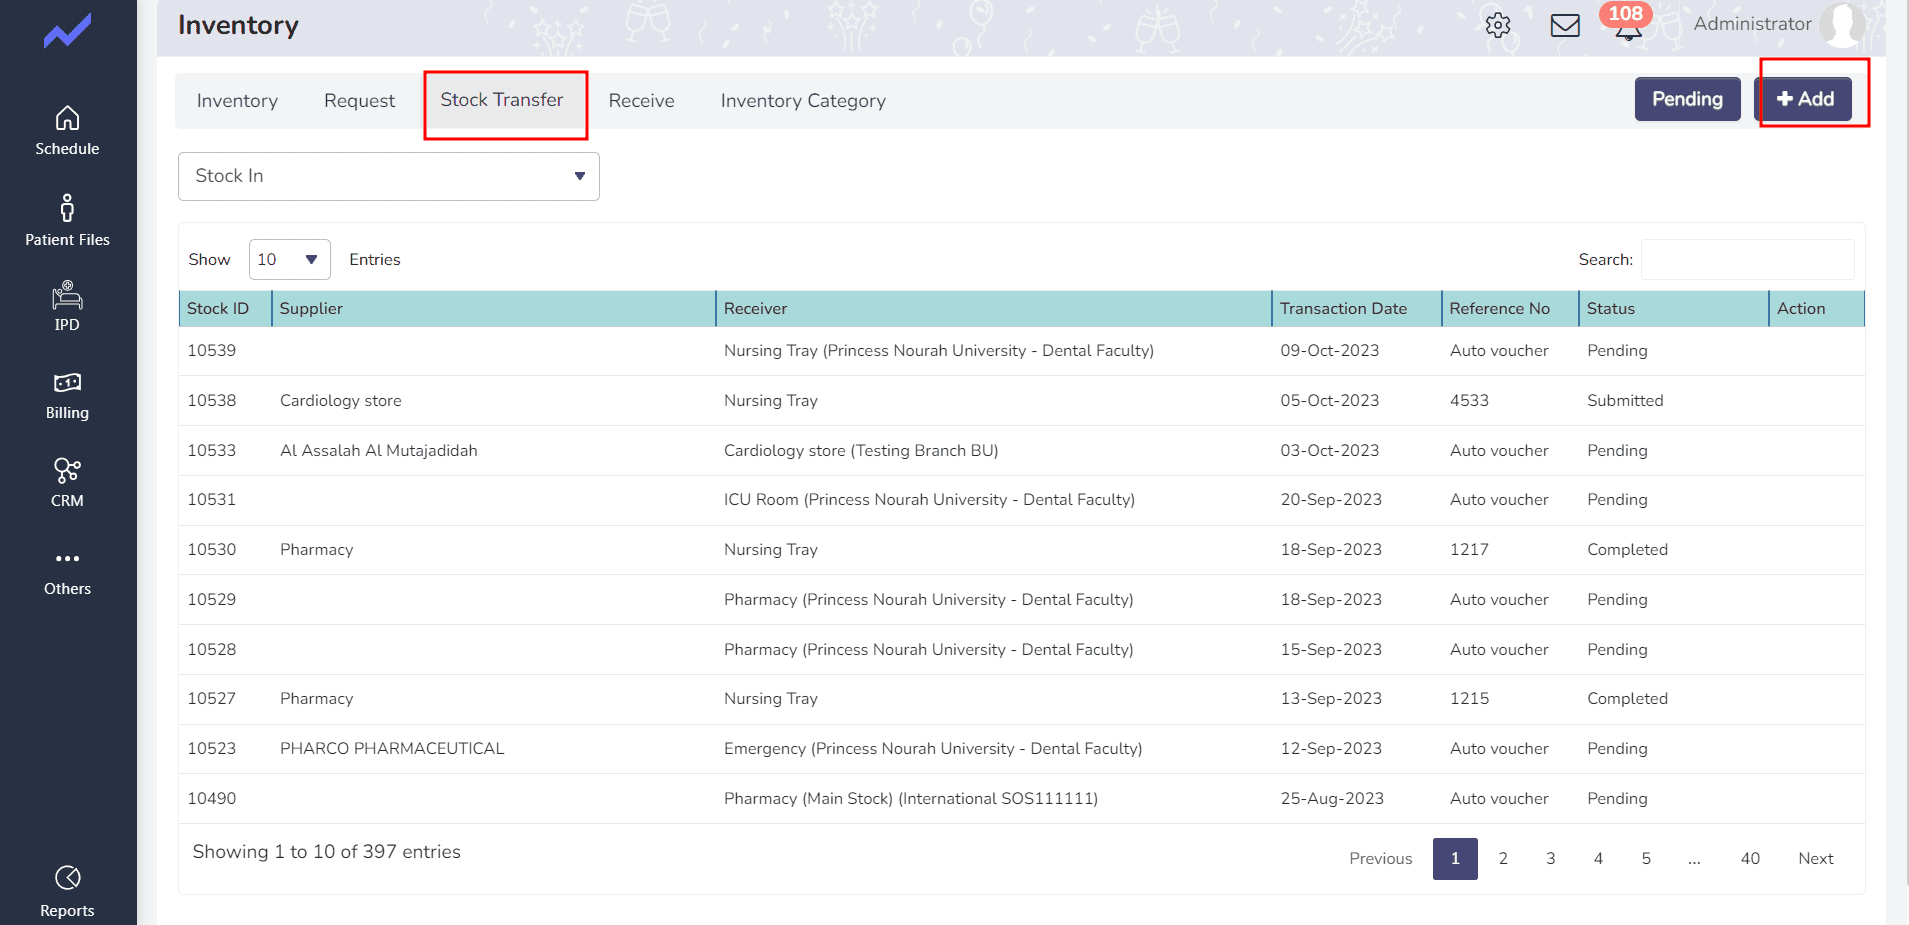
To initiate a stock transfer, first, click on “Stock Transfer,” then use the “Plus Add” option to begin the transfer.
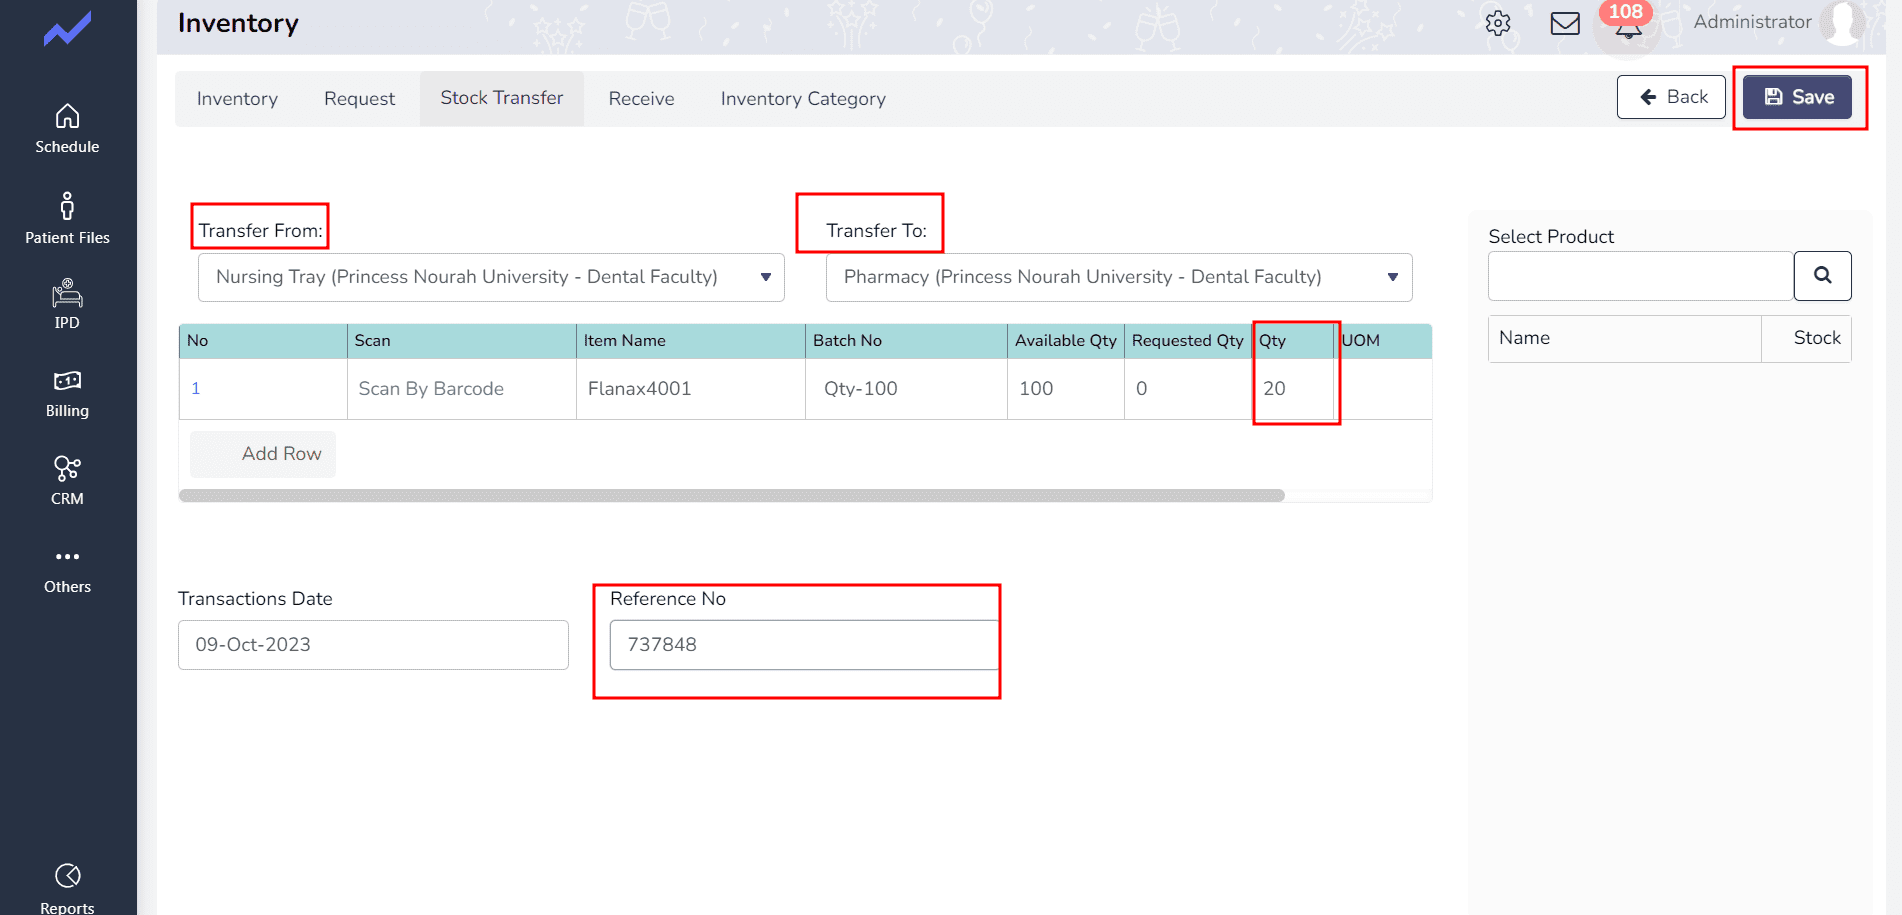
Select the originating store in the “Transfer From” section and the receiving store in “Transfer To,” add inventory items by clicking “Add Row,” specifying the name and quantity, including a Reference number, and upon clicking “Save.”
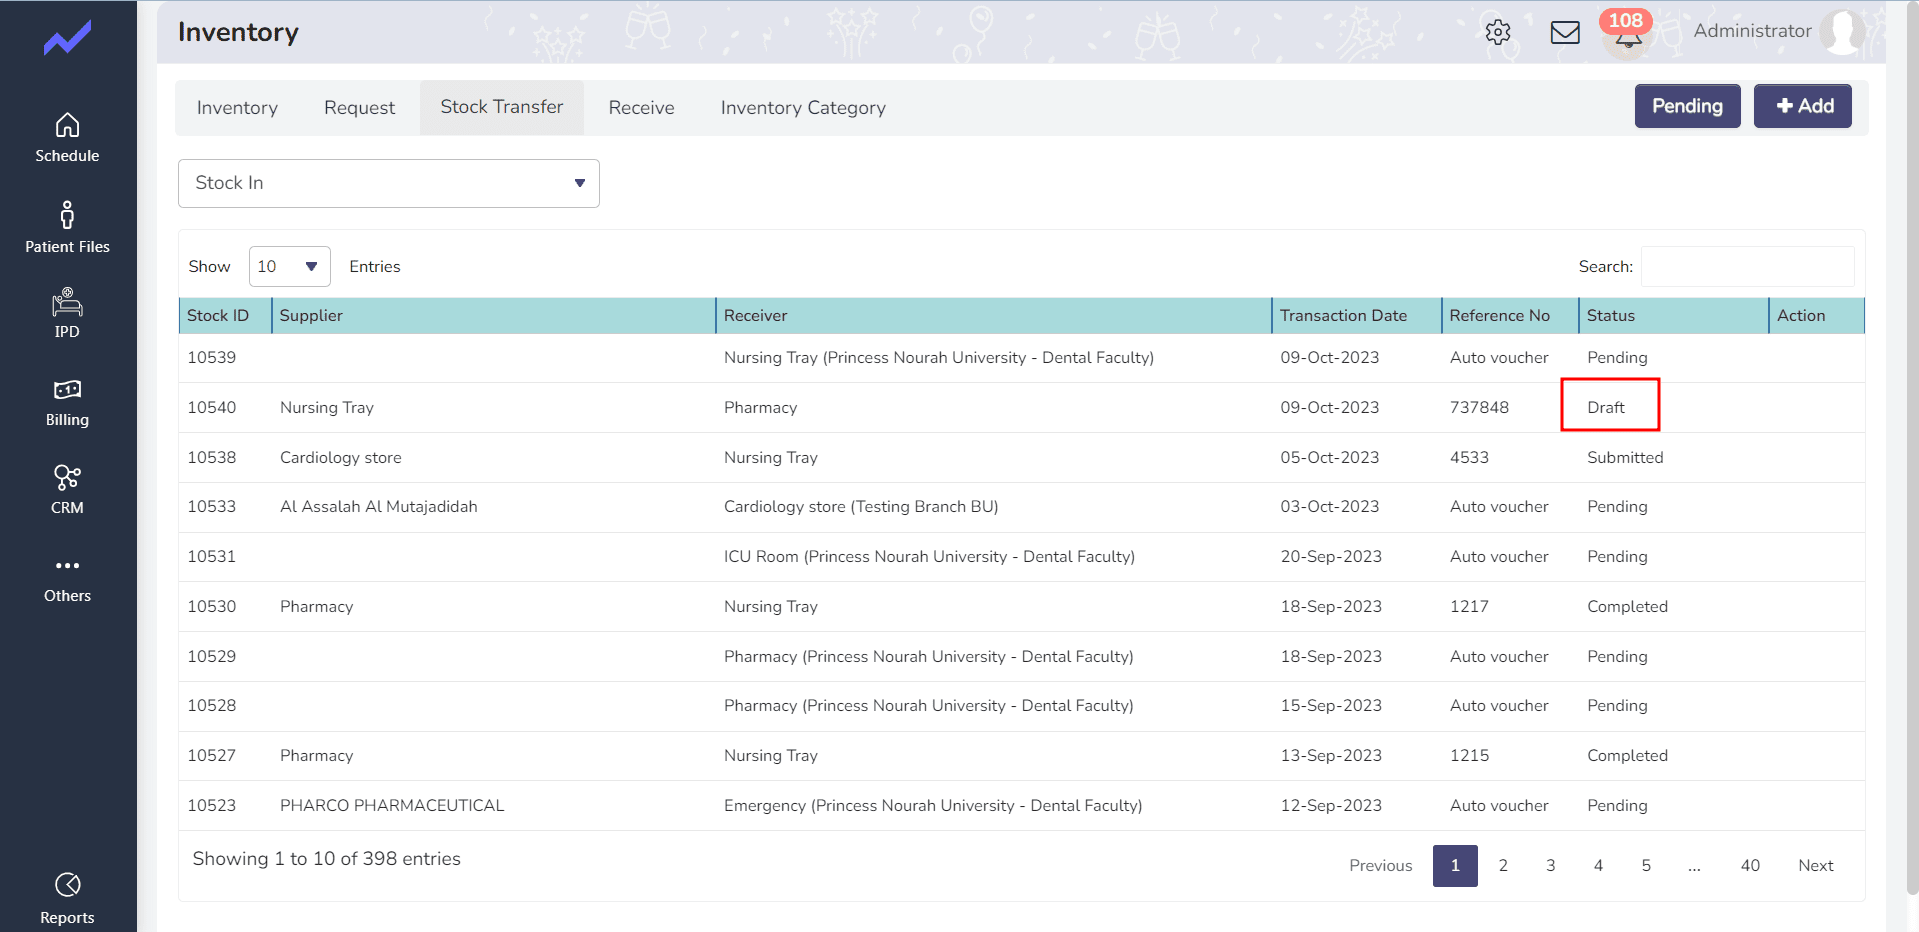
The status will be set to “Draft”.
You can later change the status by using the “Edit” action.
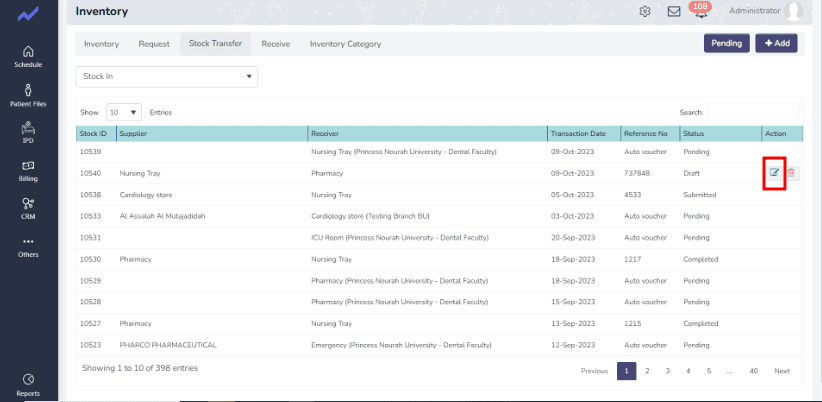
Finally, clicking “Submit” successfully transfers the stock from one store to another.
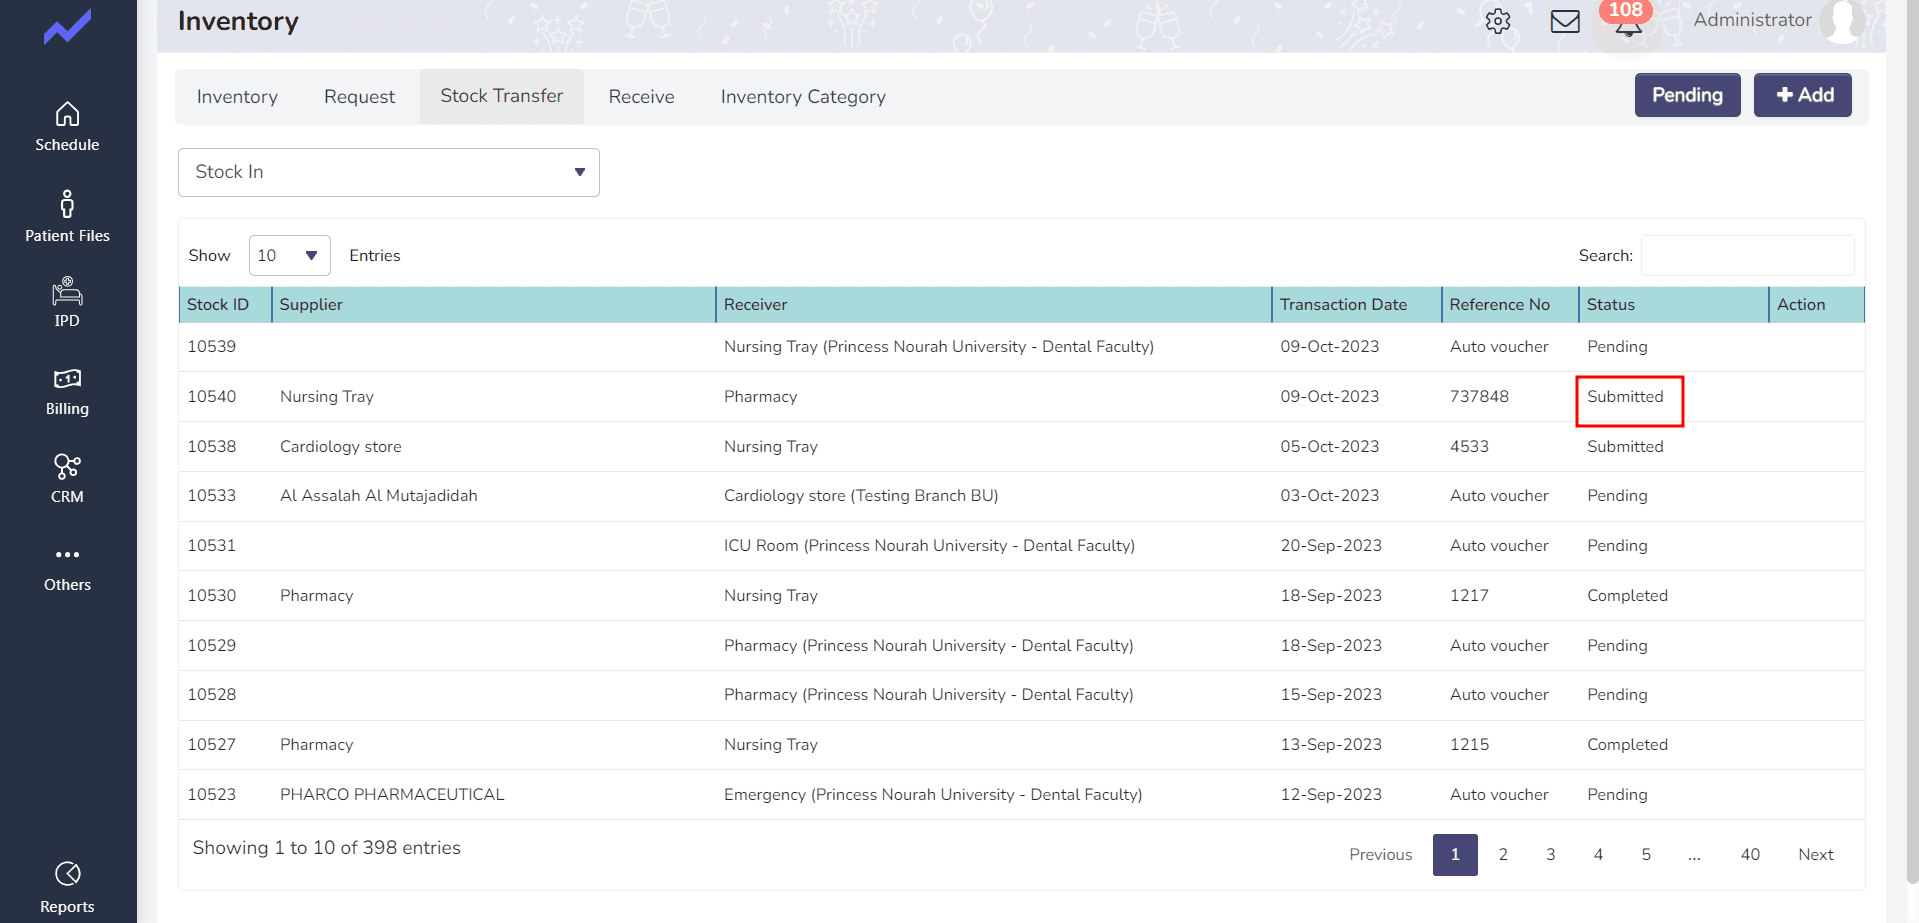
Fig: Inventory Stock Transfer
- Start by clicking on “Stock Transfer.”
- Then, click on the “Plus” button to initiate a new stock transfer.
- In the “Transfer From” section, choose the store from which you wish to transfer the stock.
- In the “Transfer To” section, select the store that will receive the transferred stock.
- Click on “Add Row” to specify the inventory item you want to transfer. Enter its name and select it from the list, and then input the quantity you intend to transfer.
- Additionally, provide a Reference number in the designated field.
- Upon completion, clicking the “Save” button will set the status to “Draft.”
- To change the status, click on the “Edit” action.
- Finally, clicking “Submit” will successfully complete the stock transfer, ensuring that the inventory moves from one store to another as intended.


