1. Baseline: #
The Baseline module in CloudPital’s dental specialty facilitates comprehensive documentation of a patient’s current dental health status. It allows dental professionals to assess and record the condition of the patient’s teeth, gums, and oral cavity in a structured and detailed manner. This module is the foundation for tracking progress, planning treatments, and ensuring personalized care tailored to patients’ needs.

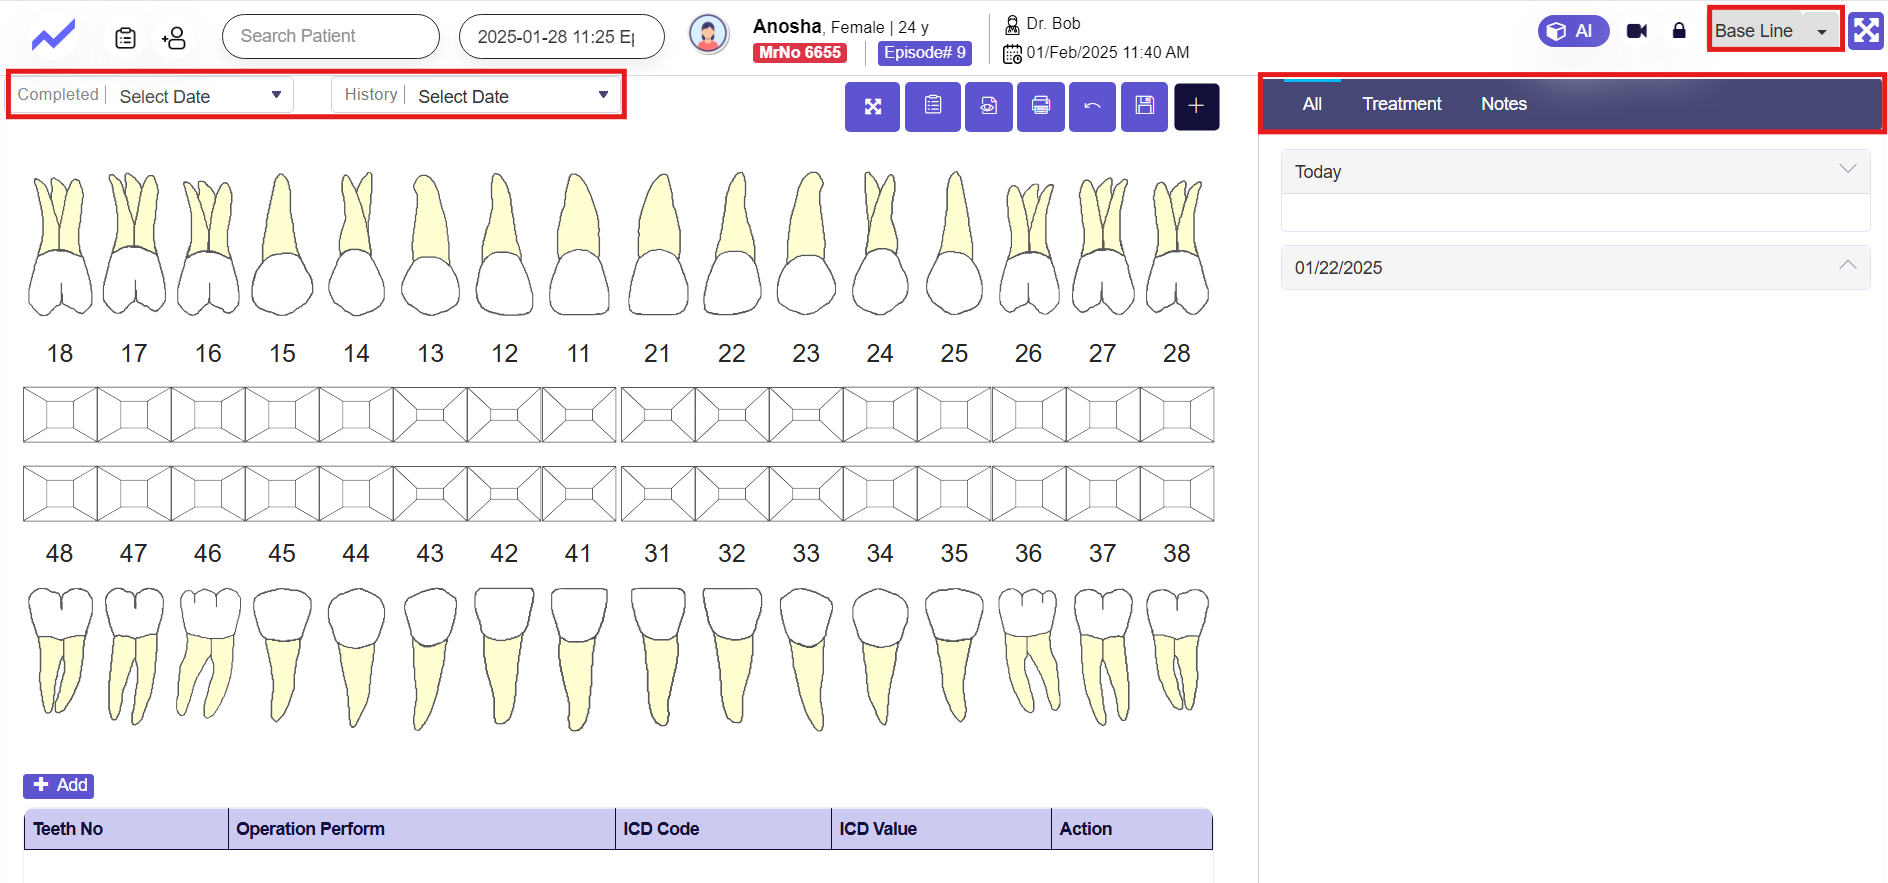
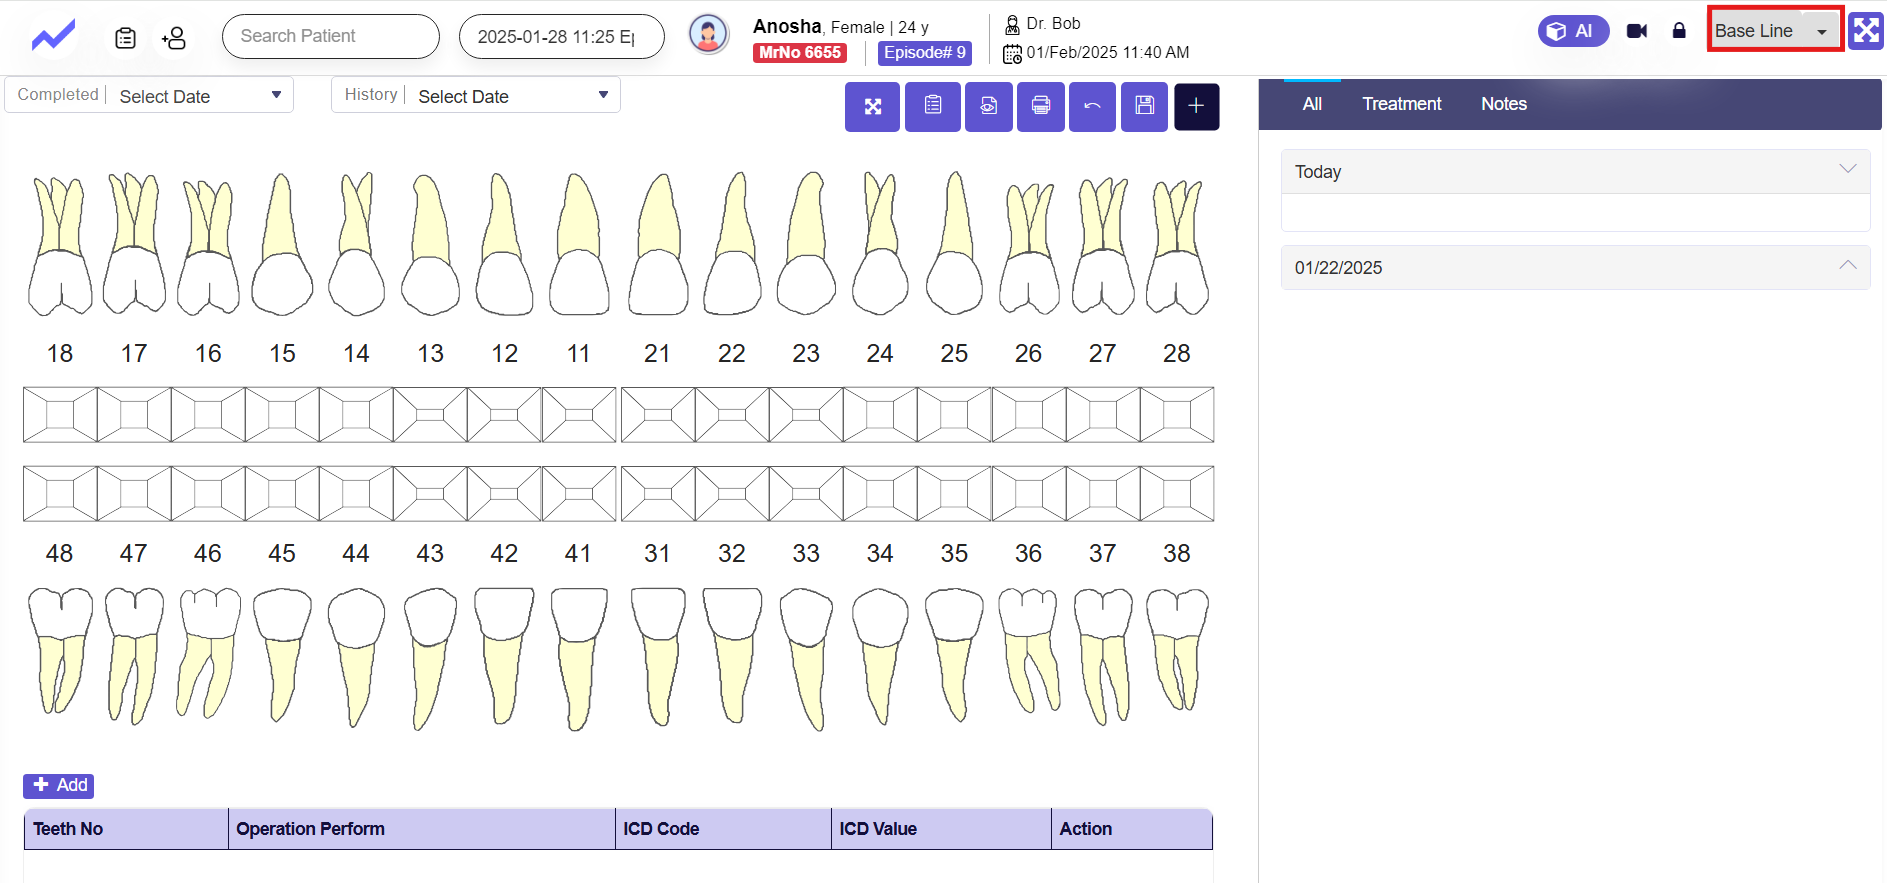
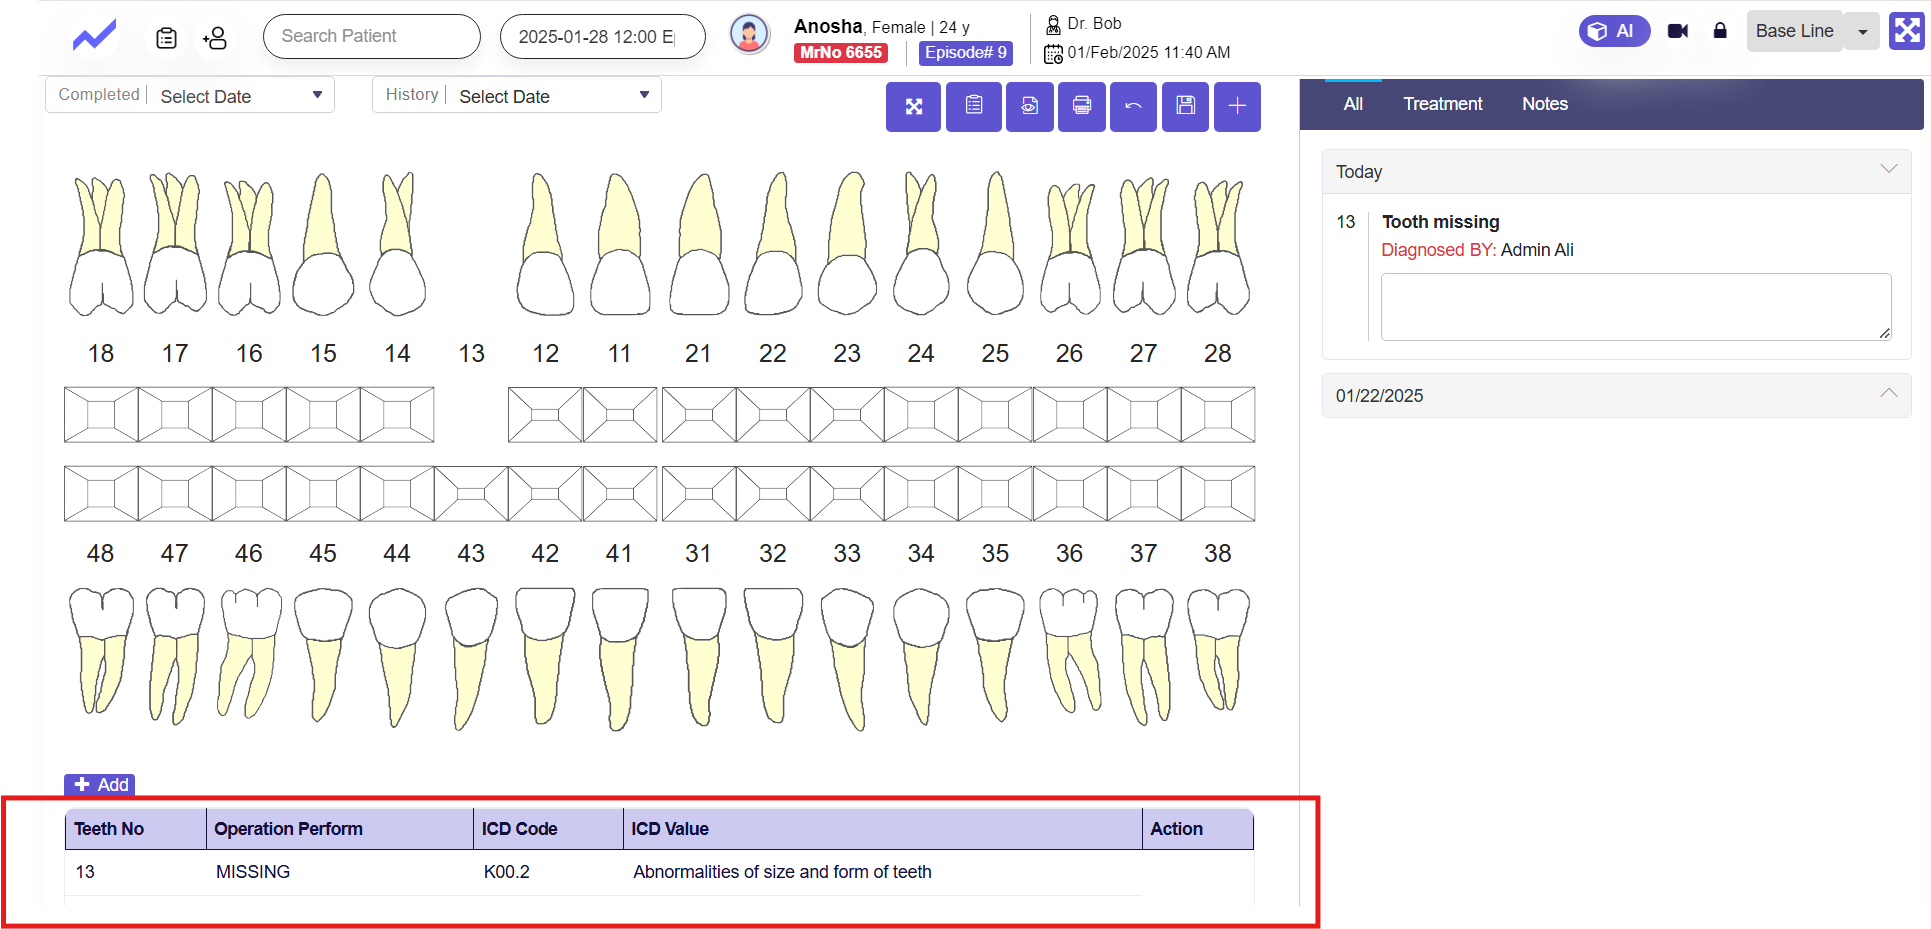
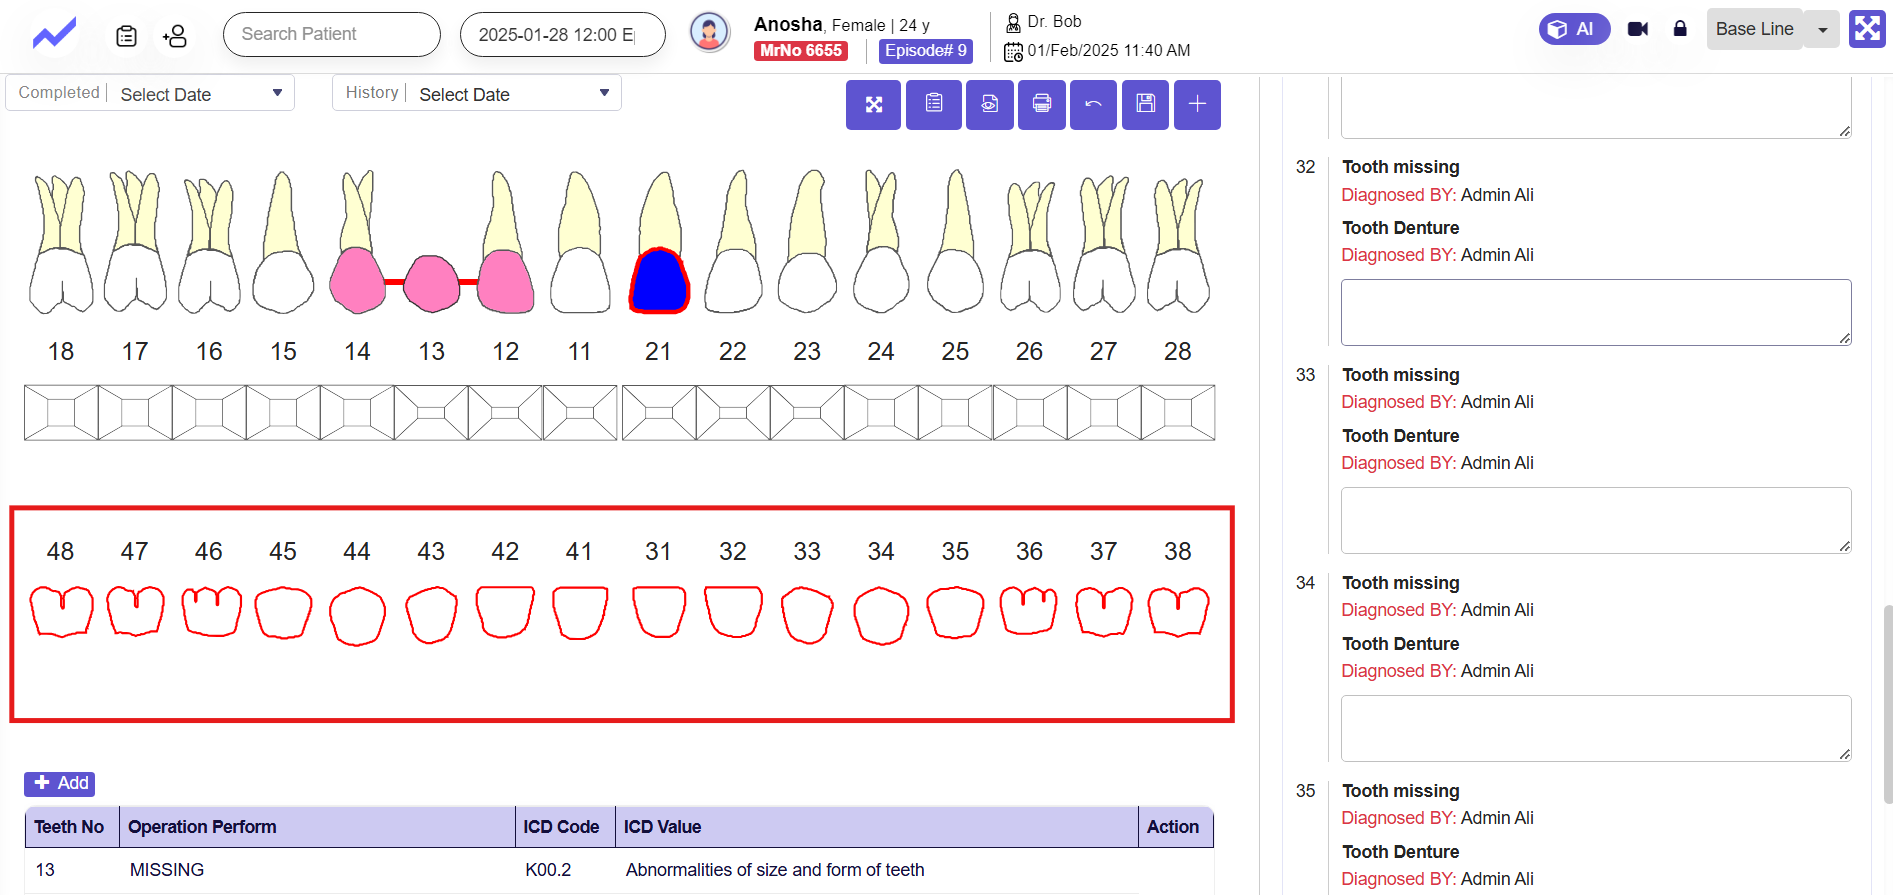
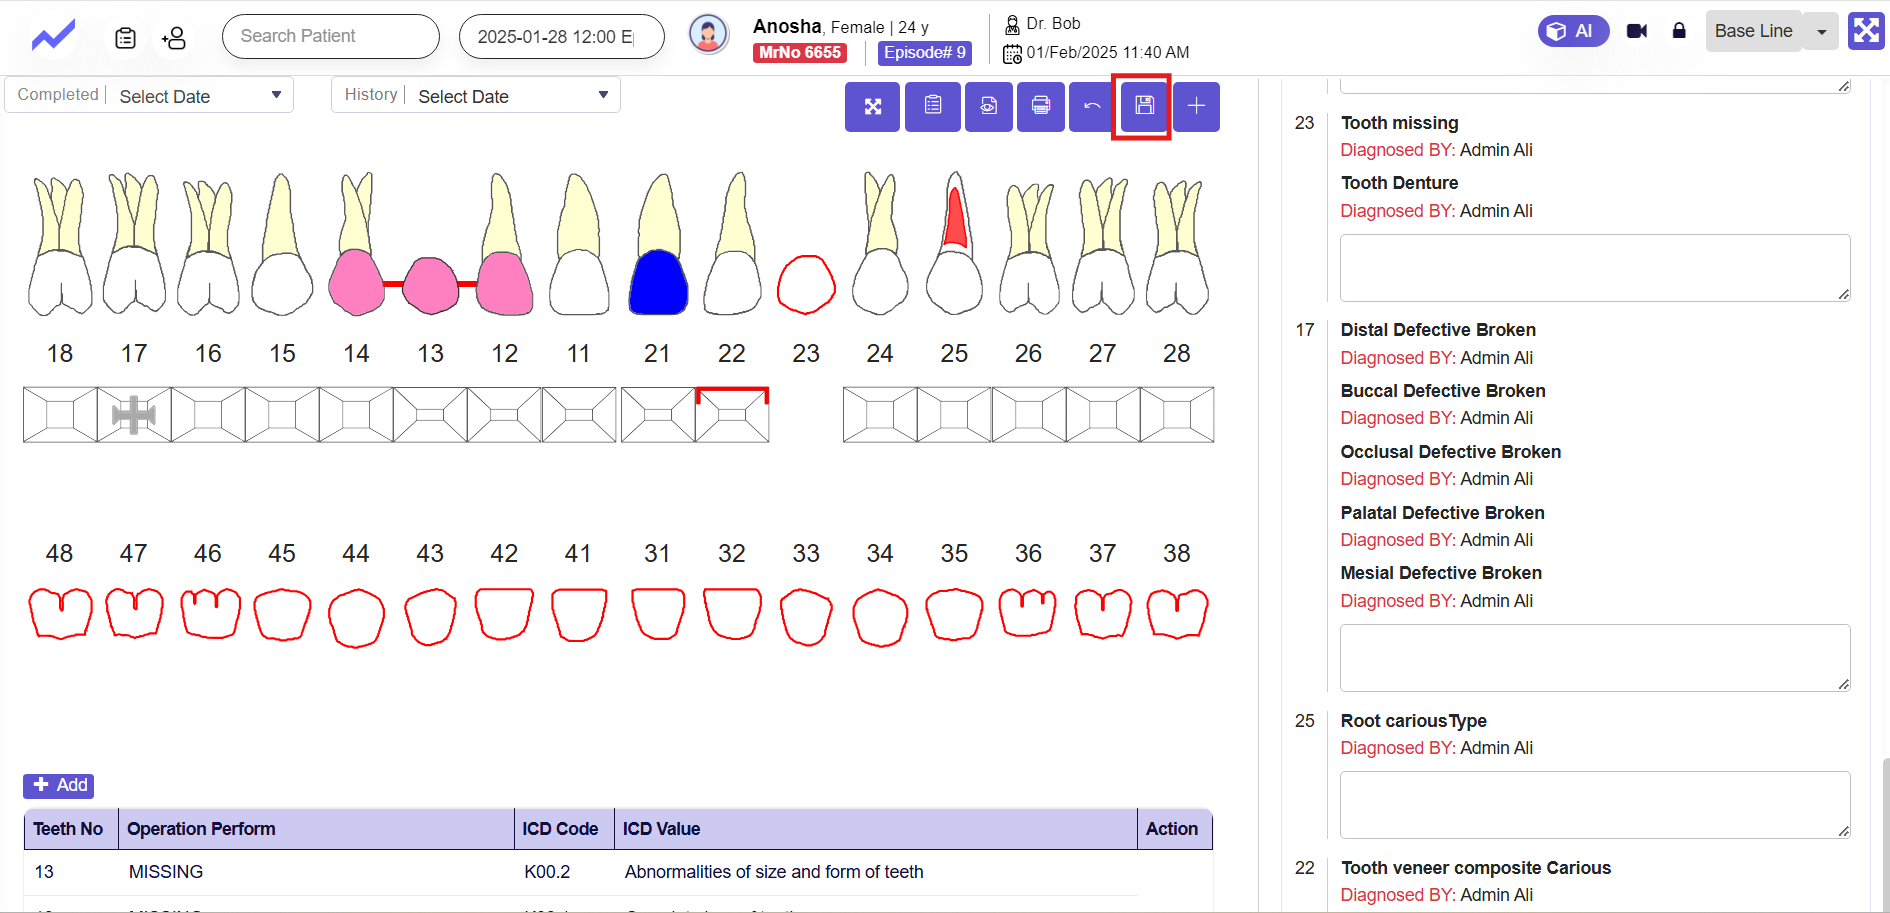
Teeth Representation:
- The screen displays a visual representation of a full set of teeth (both upper and lower arches).
- Each tooth is numbered according to the dental numbering system for easy identification.
Roots and Surfaces:
- Teeth are shown with their roots and surfaces. This detailed view helps dental professionals identify and document specific conditions affecting different parts of the teeth, such as decay, wear, or fractures.
Interactive Features:
- The interface includes options to select a tooth, add notes, or record specific operations performed on it.
- Dental professionals can specify details such as the tooth number, operation performed, ICD code, and ICD value in the table at the bottom.
Toolbar and Navigation:
The toolbar at the top provides additional options for history, completed assessments, and other functions relevant to the Baseline module.
1.1 Permission Settings for Dental’s Baseline Feature: #
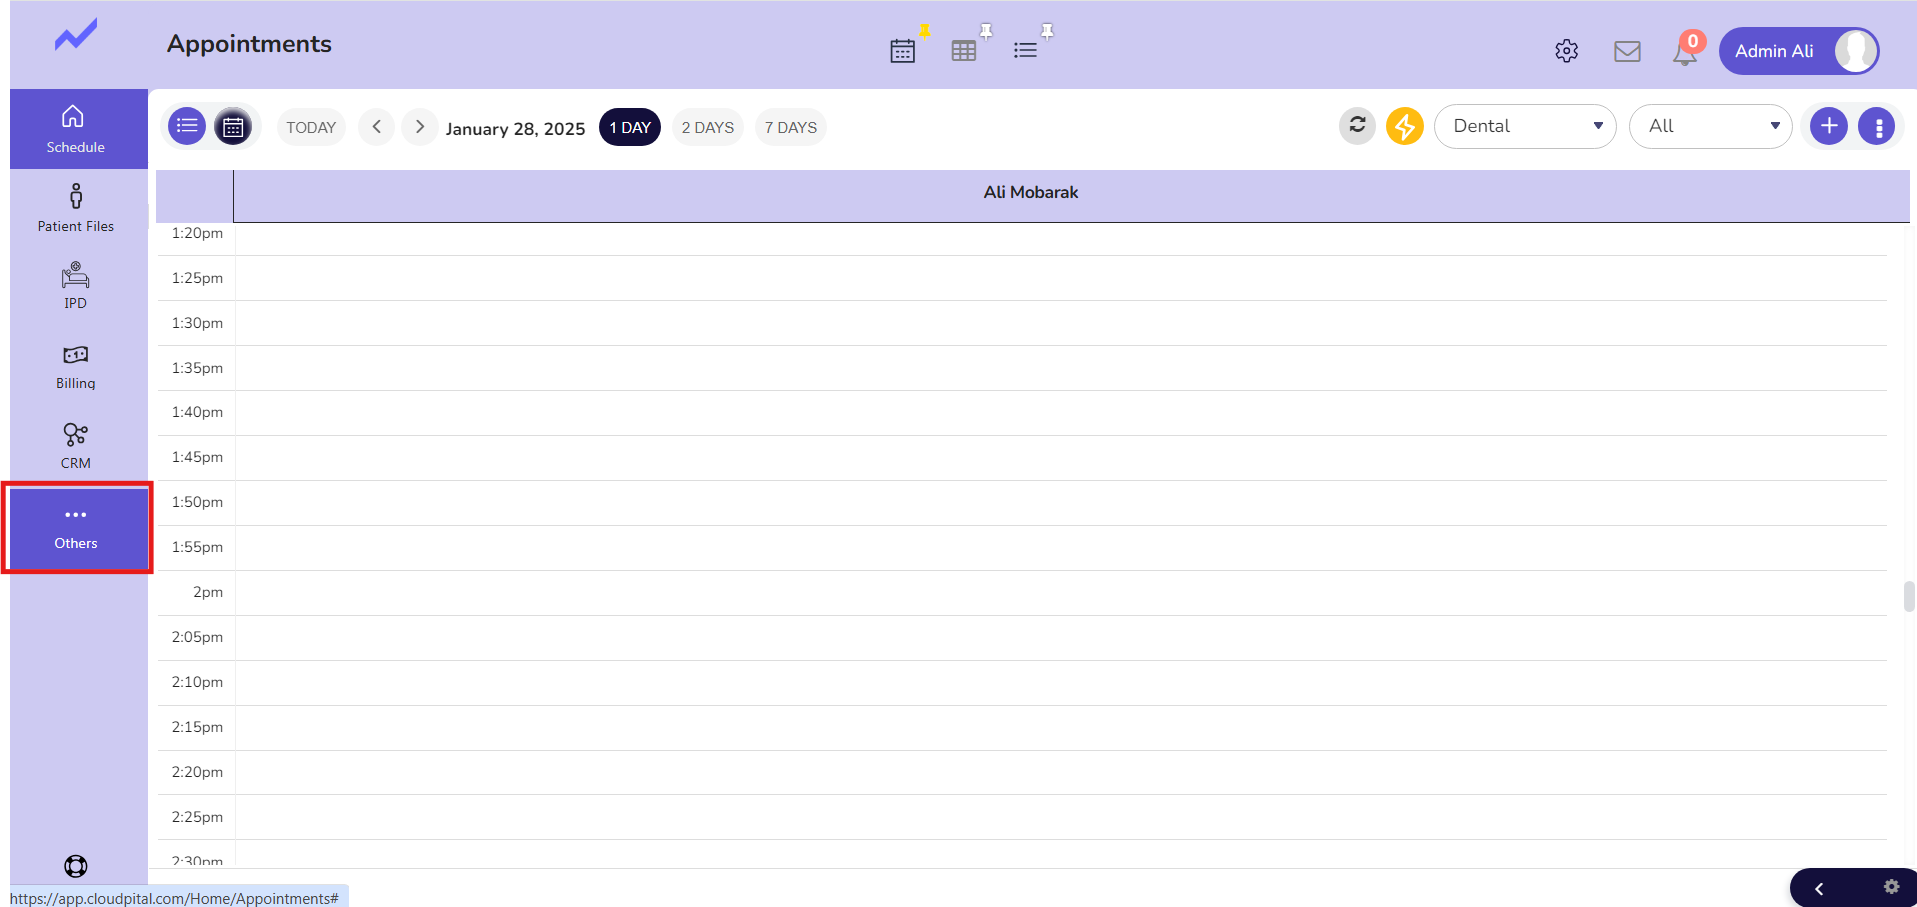
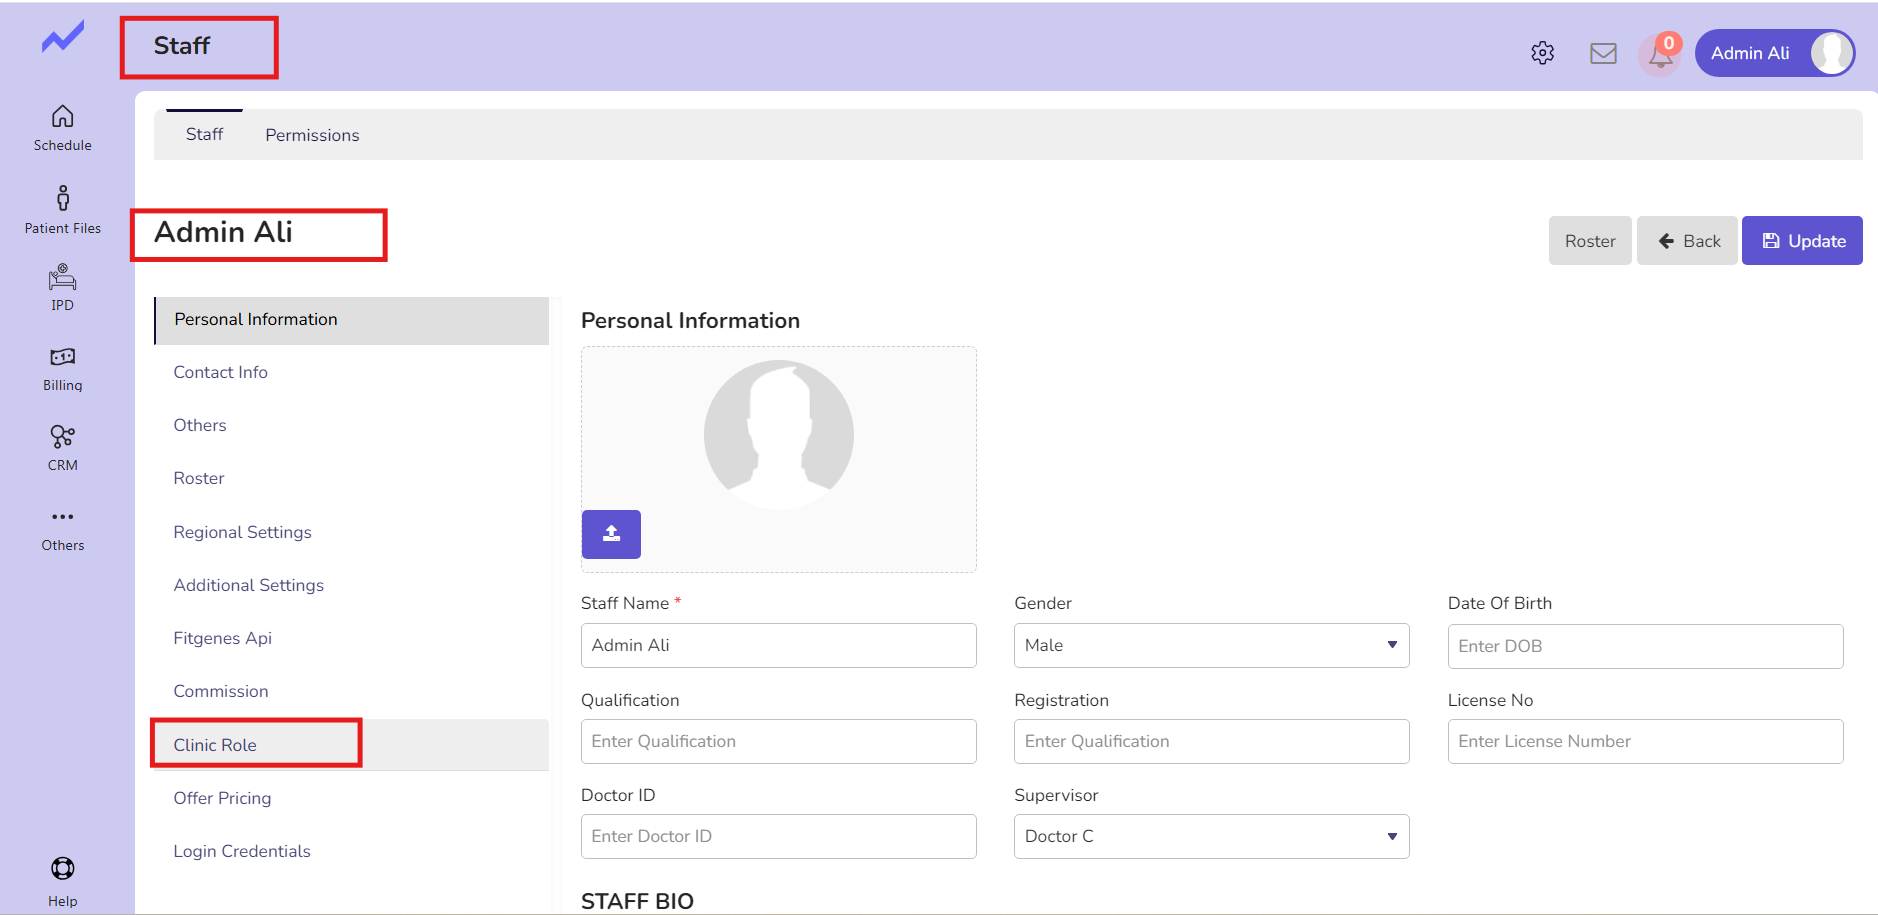
From the Schedule screen click on Others.
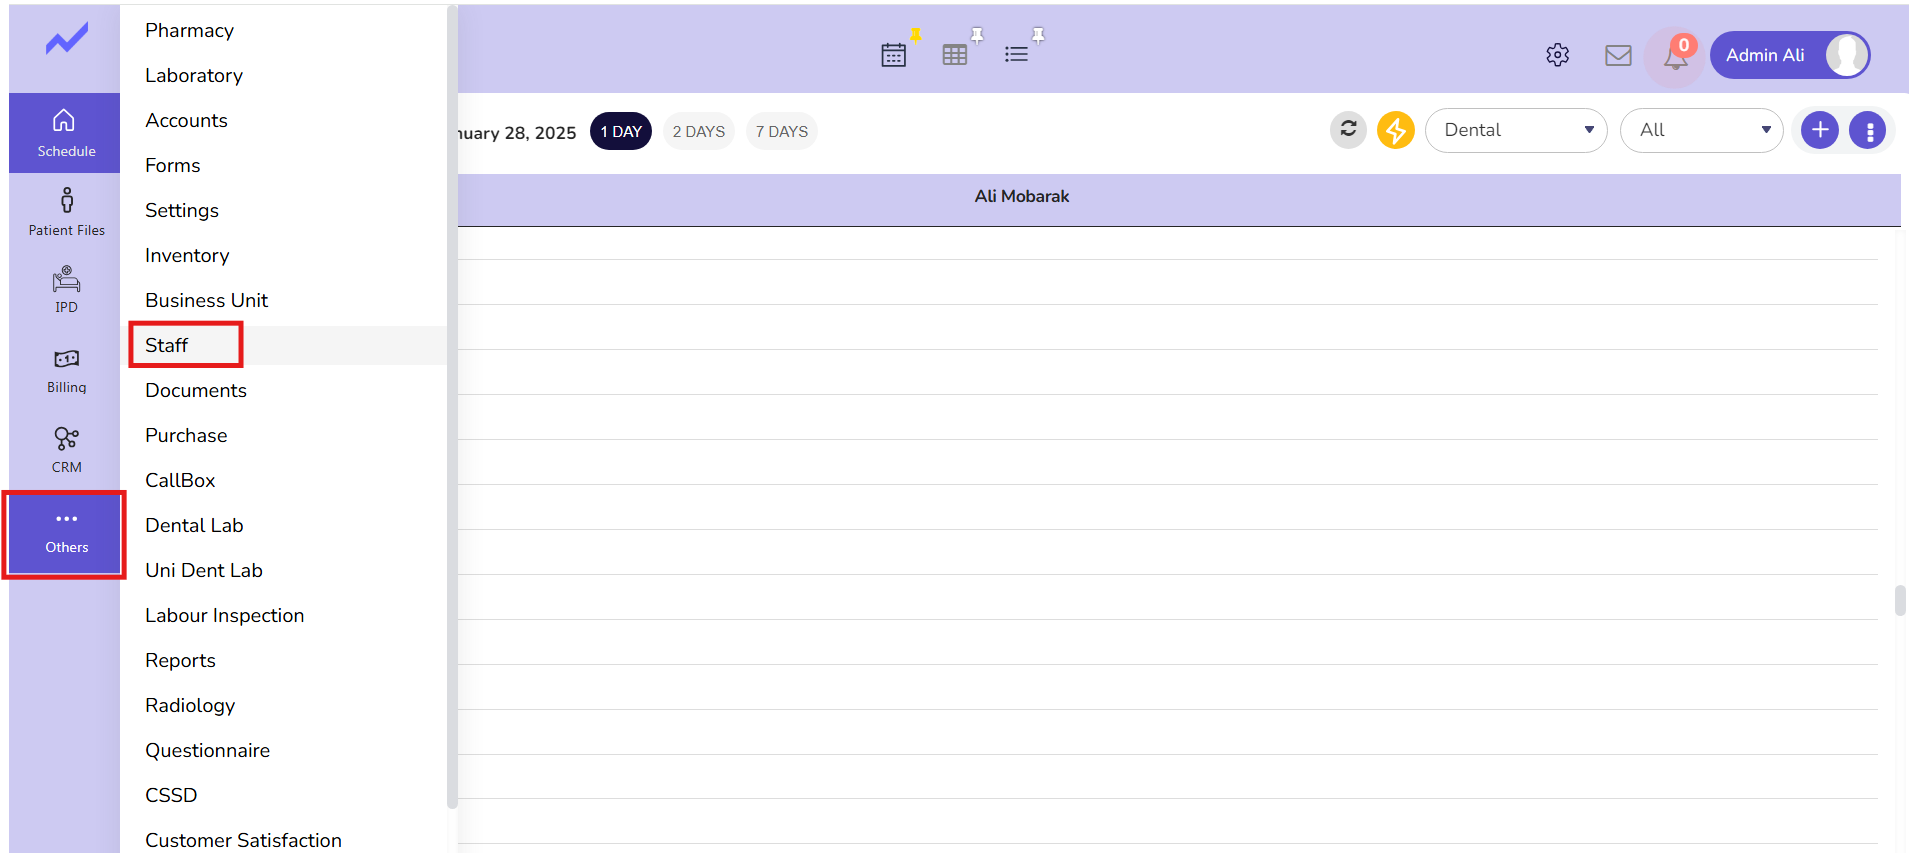
Click on Staff.
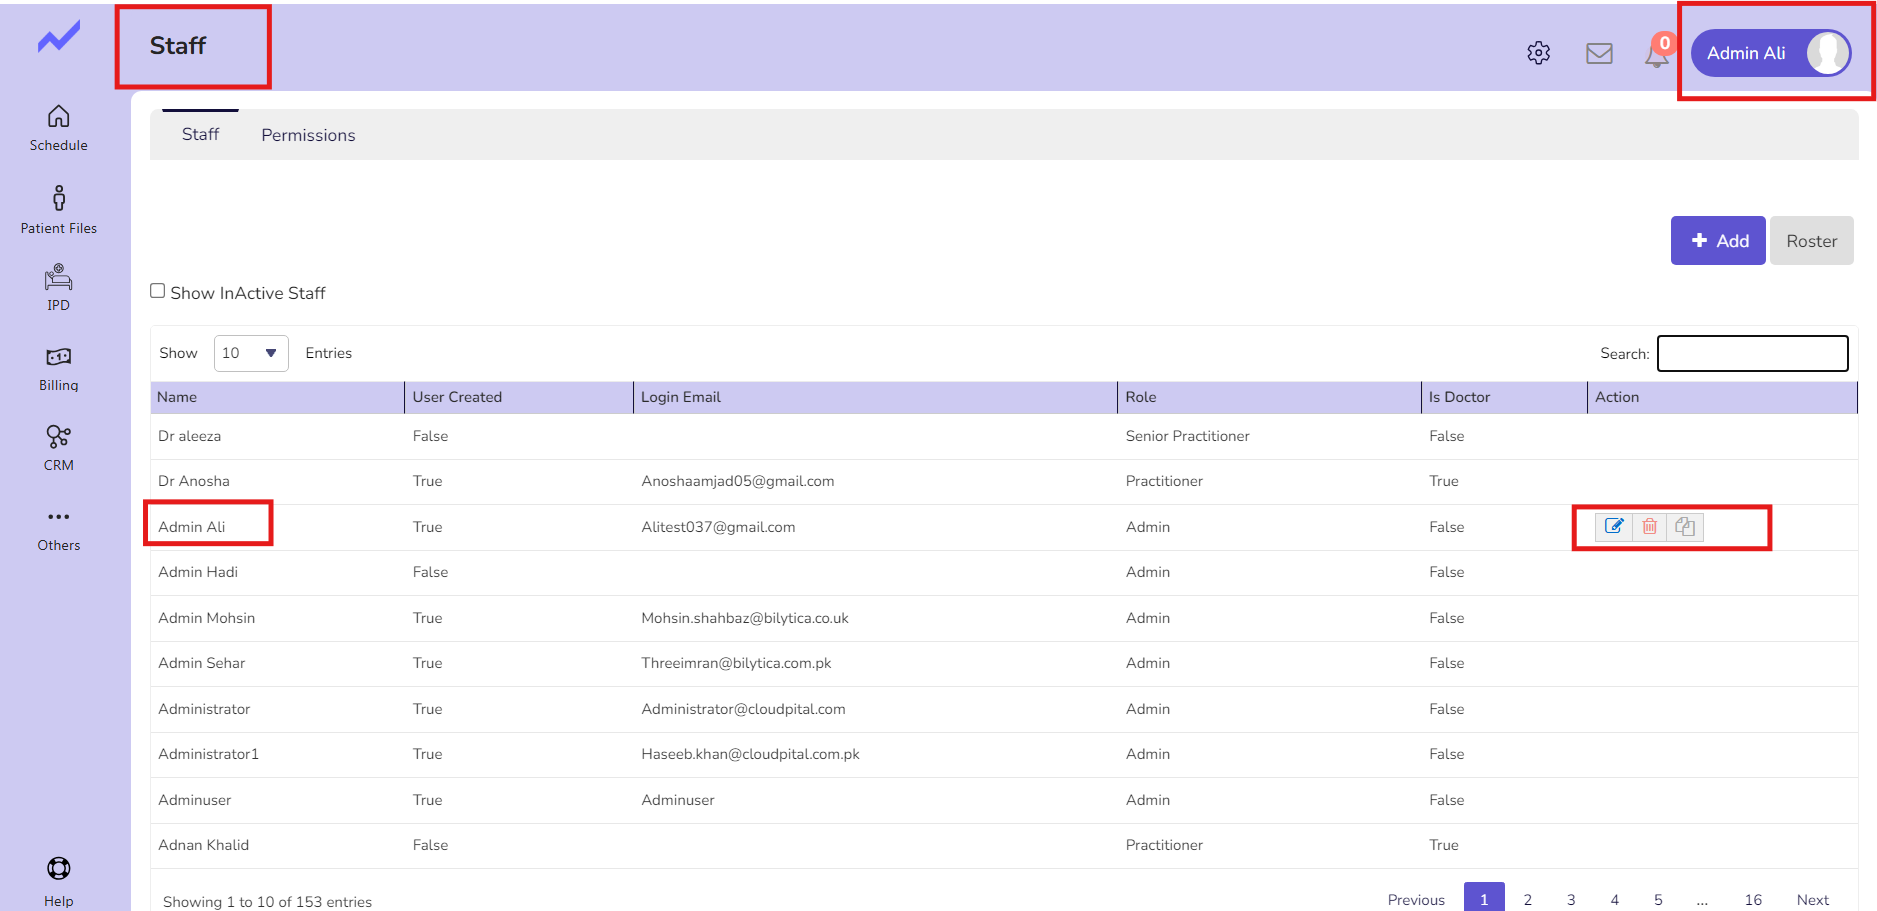
The Staff screen appears. Select the user with whom you are currently logged in. In this case, I am granting permissions to Admin Ali, as I am currently logged in as Admin Ali.
You just need to click on the edit icon.
The staff screen will appear. Now, click on ‘Clinic Role’.
For the dental specialty, you have to click on Permissions to assign this User permission to the Baseline module.
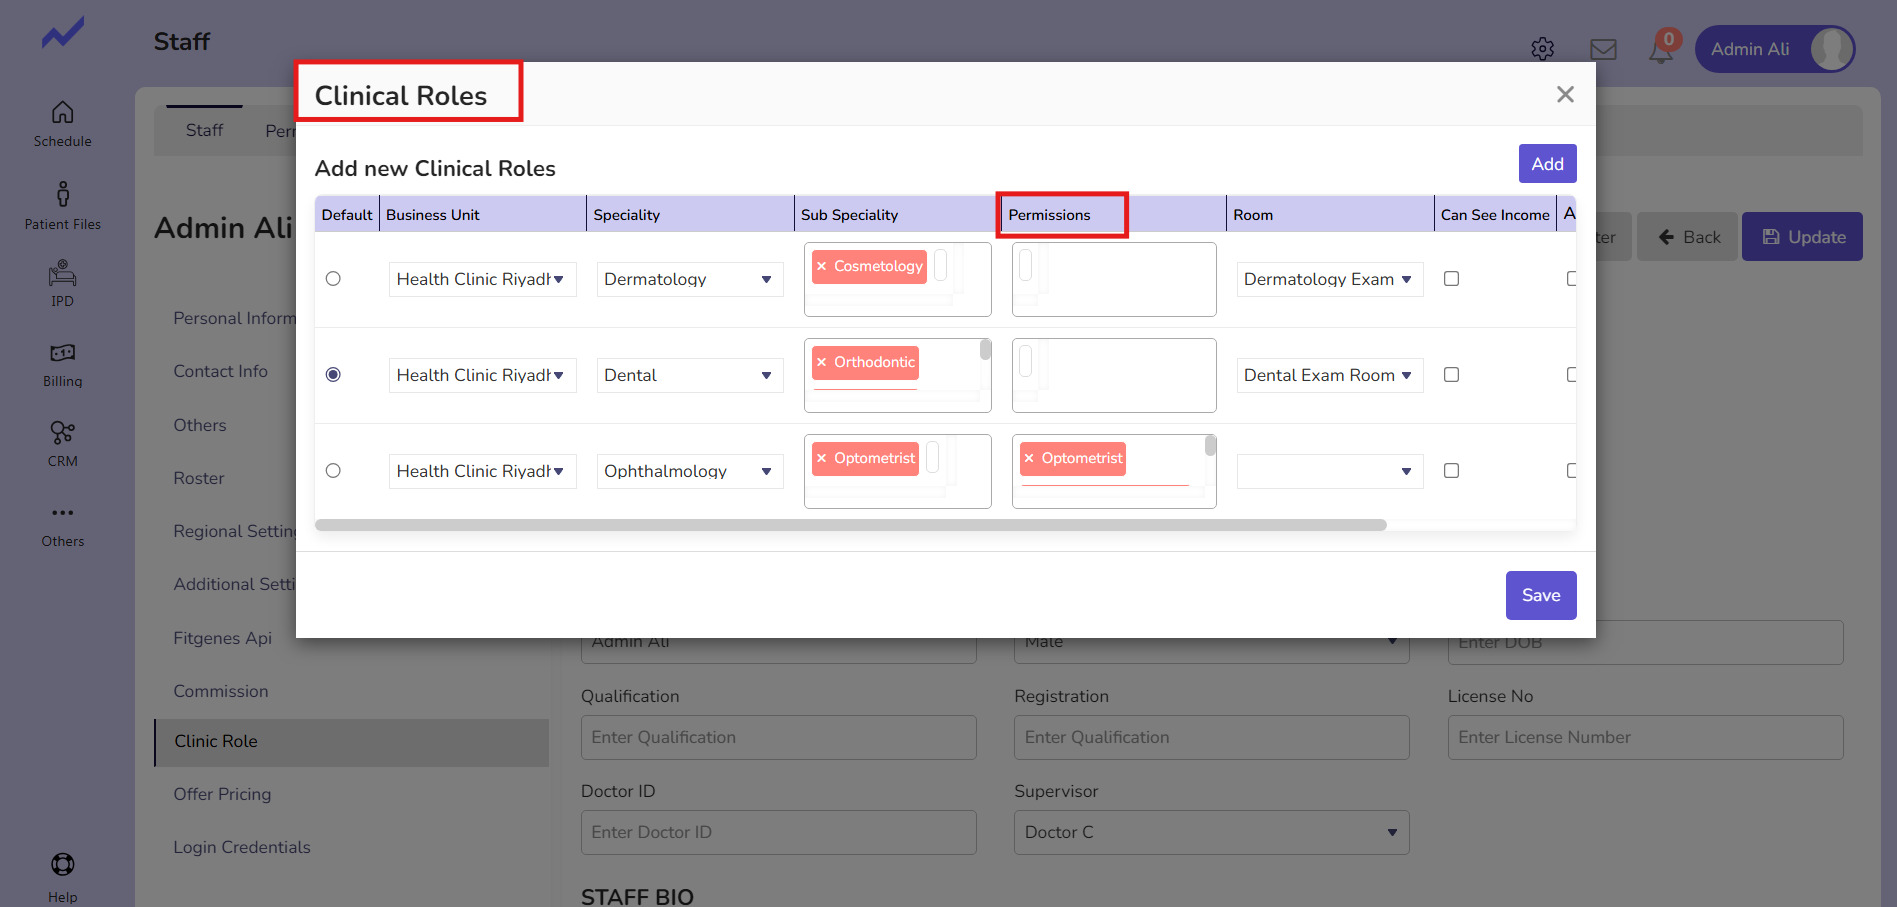
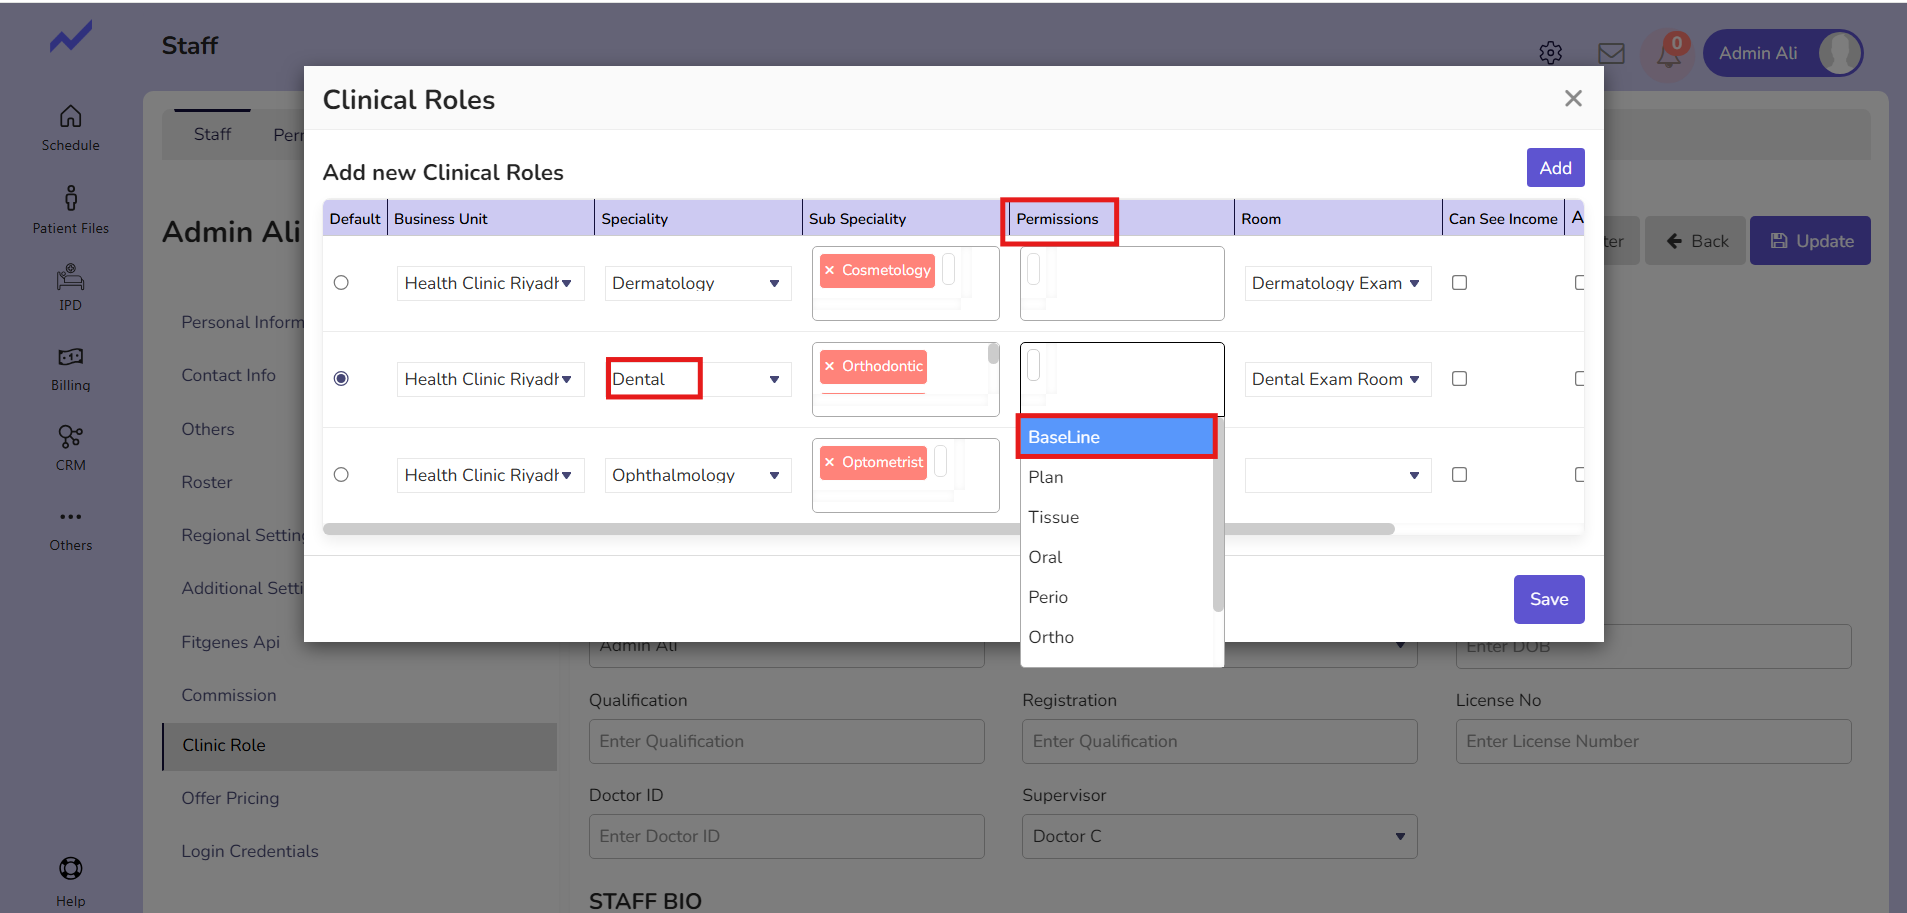
When you click on Permissions, a drop-down will appear with the option of Baseline. Select Baseline and then click on the Save button. The Baseline permission will be granted to Admin Ali.
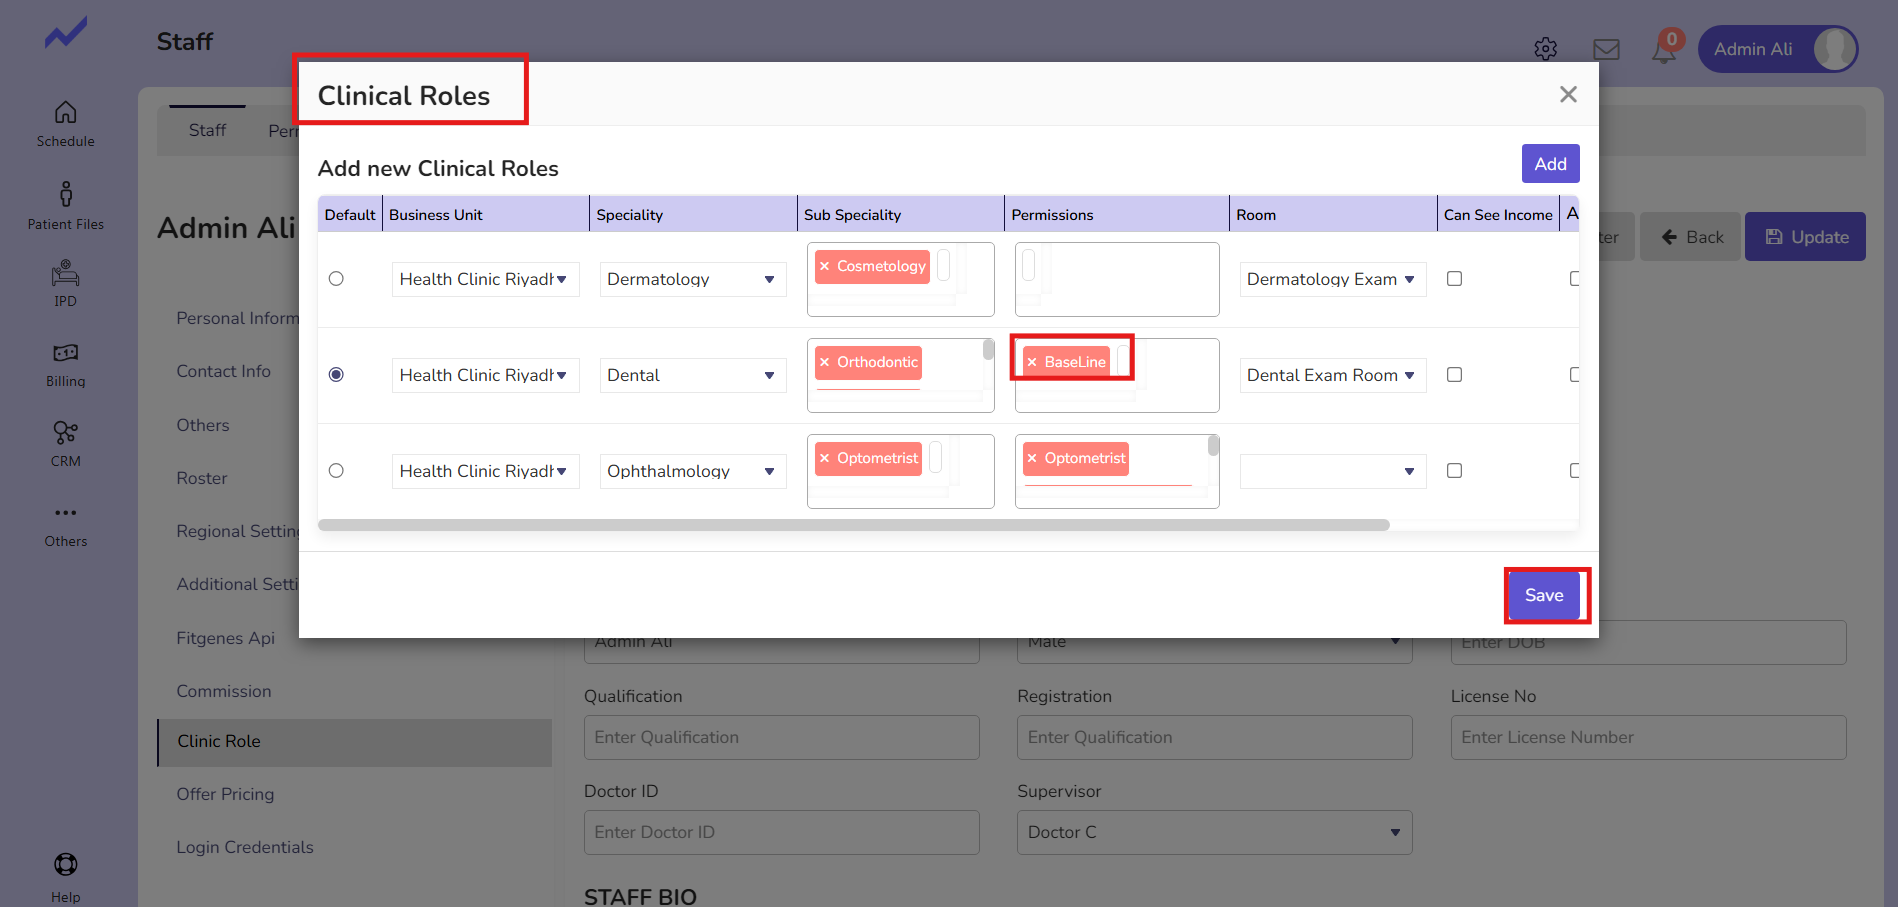
Now click on the update button and the changes will be saved successfully.
1.2 Create a dental Appointment #
Now, go to the Schedule screen and create an appointment for a dental patient with any Doctor.

Click on any Slot and make an appointment.
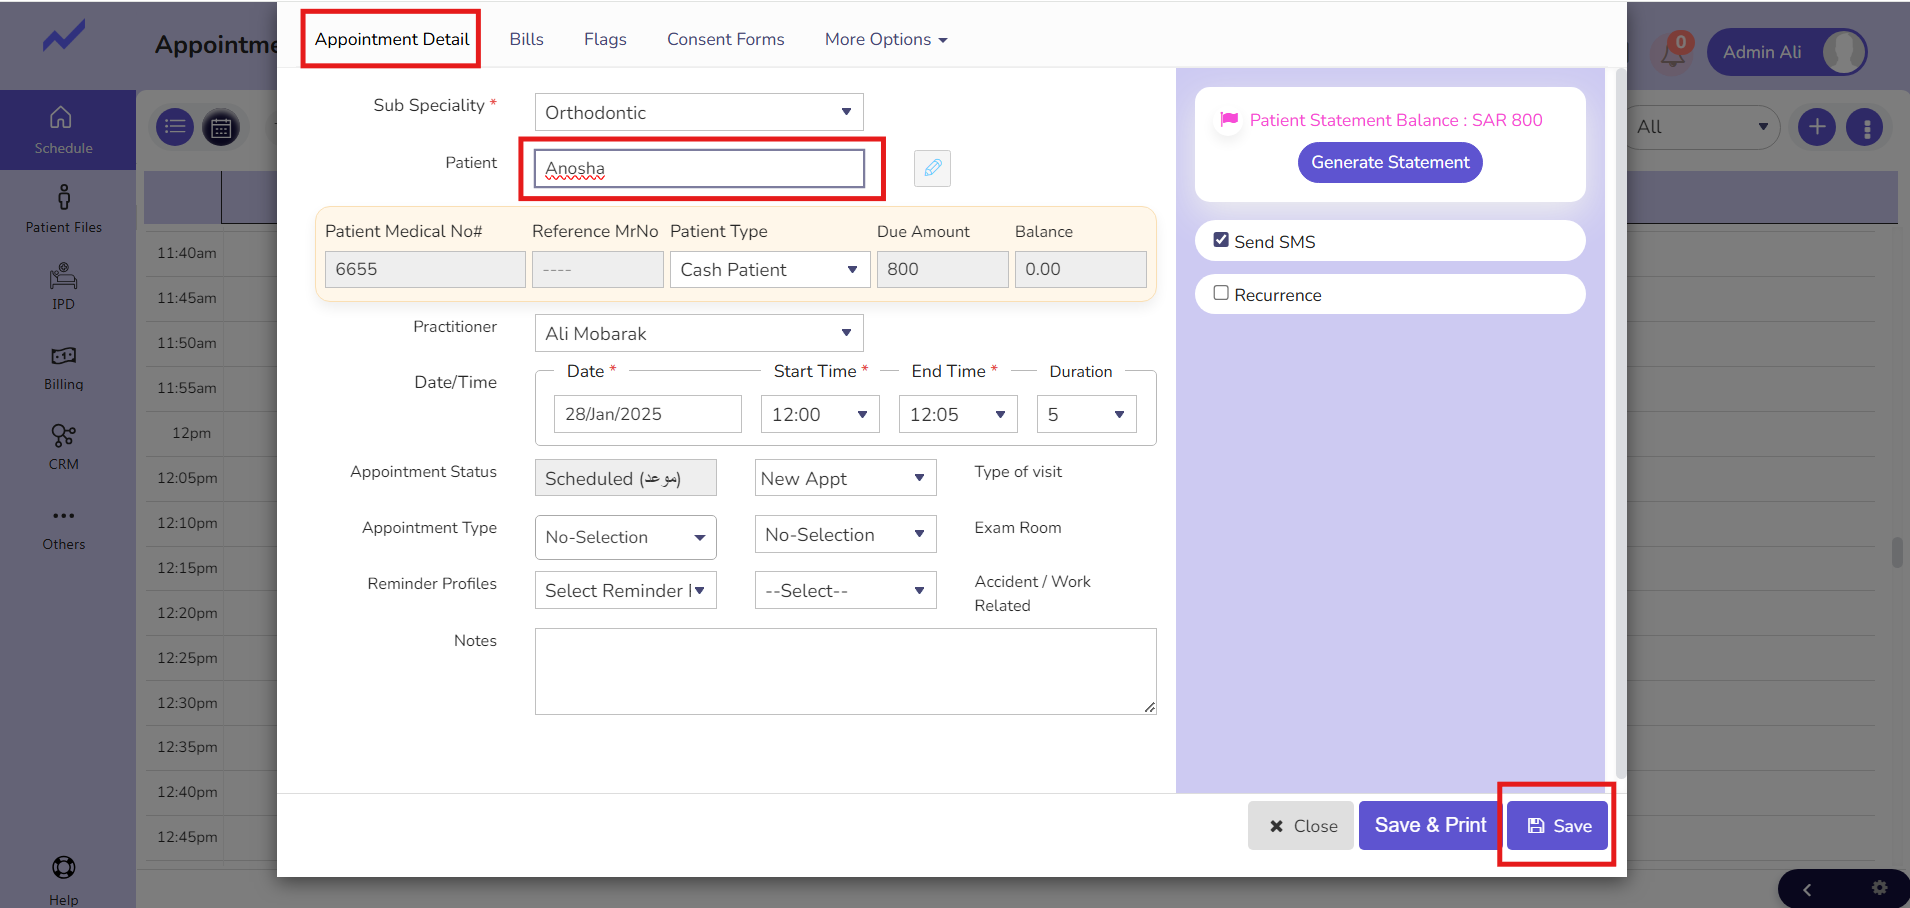
The Appointment Details screen will appear. Select the patient and click on the Save button.
Appointment has been created.
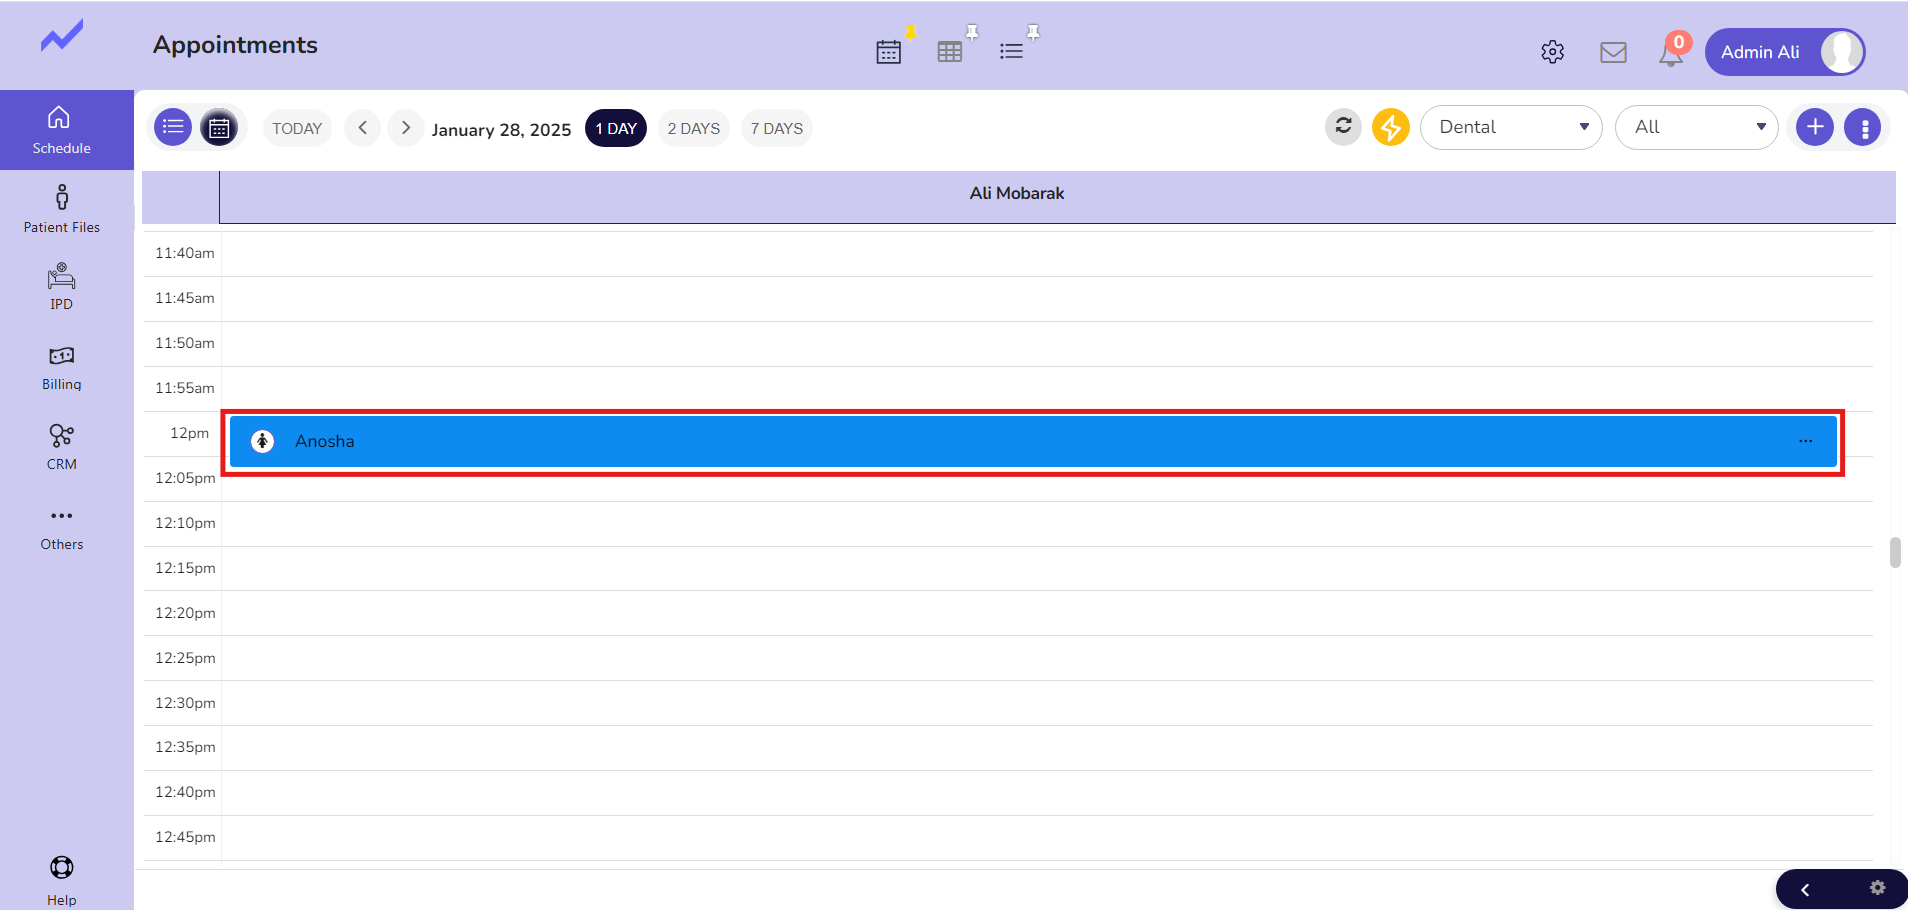
Now, click on the Appointment and then click on the Clinical Note button.
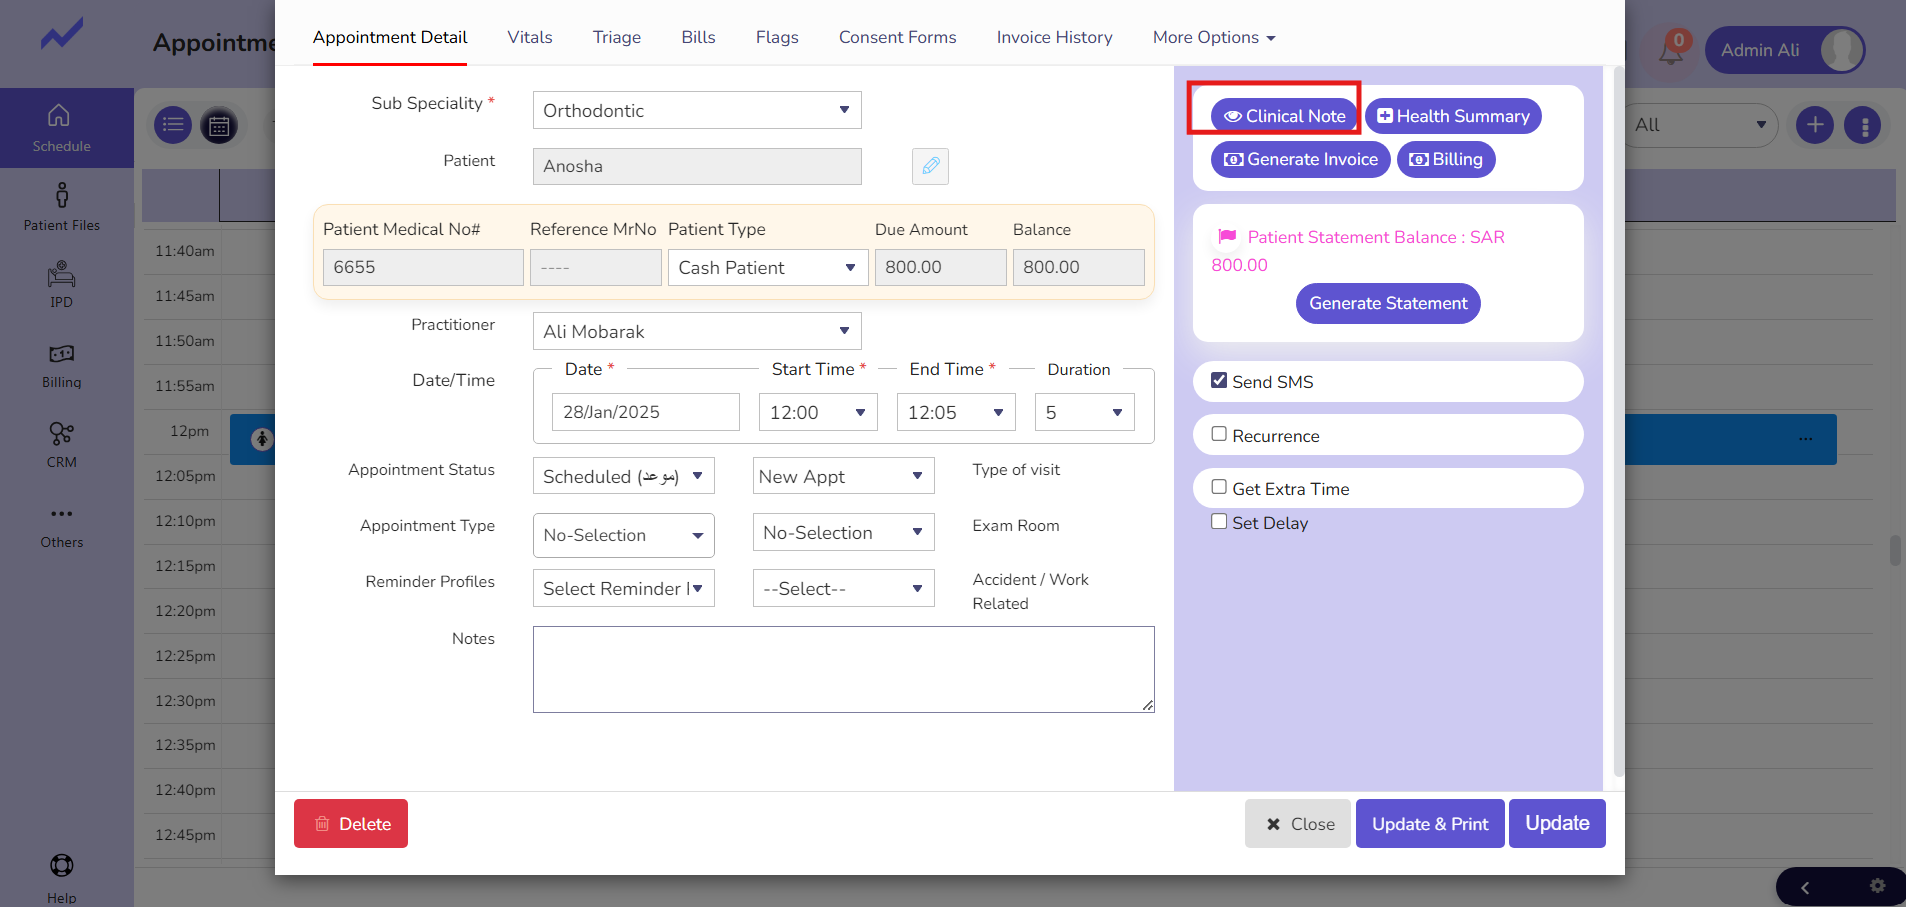
A clinical Note screen will appear.
On the top-right corner, there is a drop-down menu that allows you to access the Baseline screen.
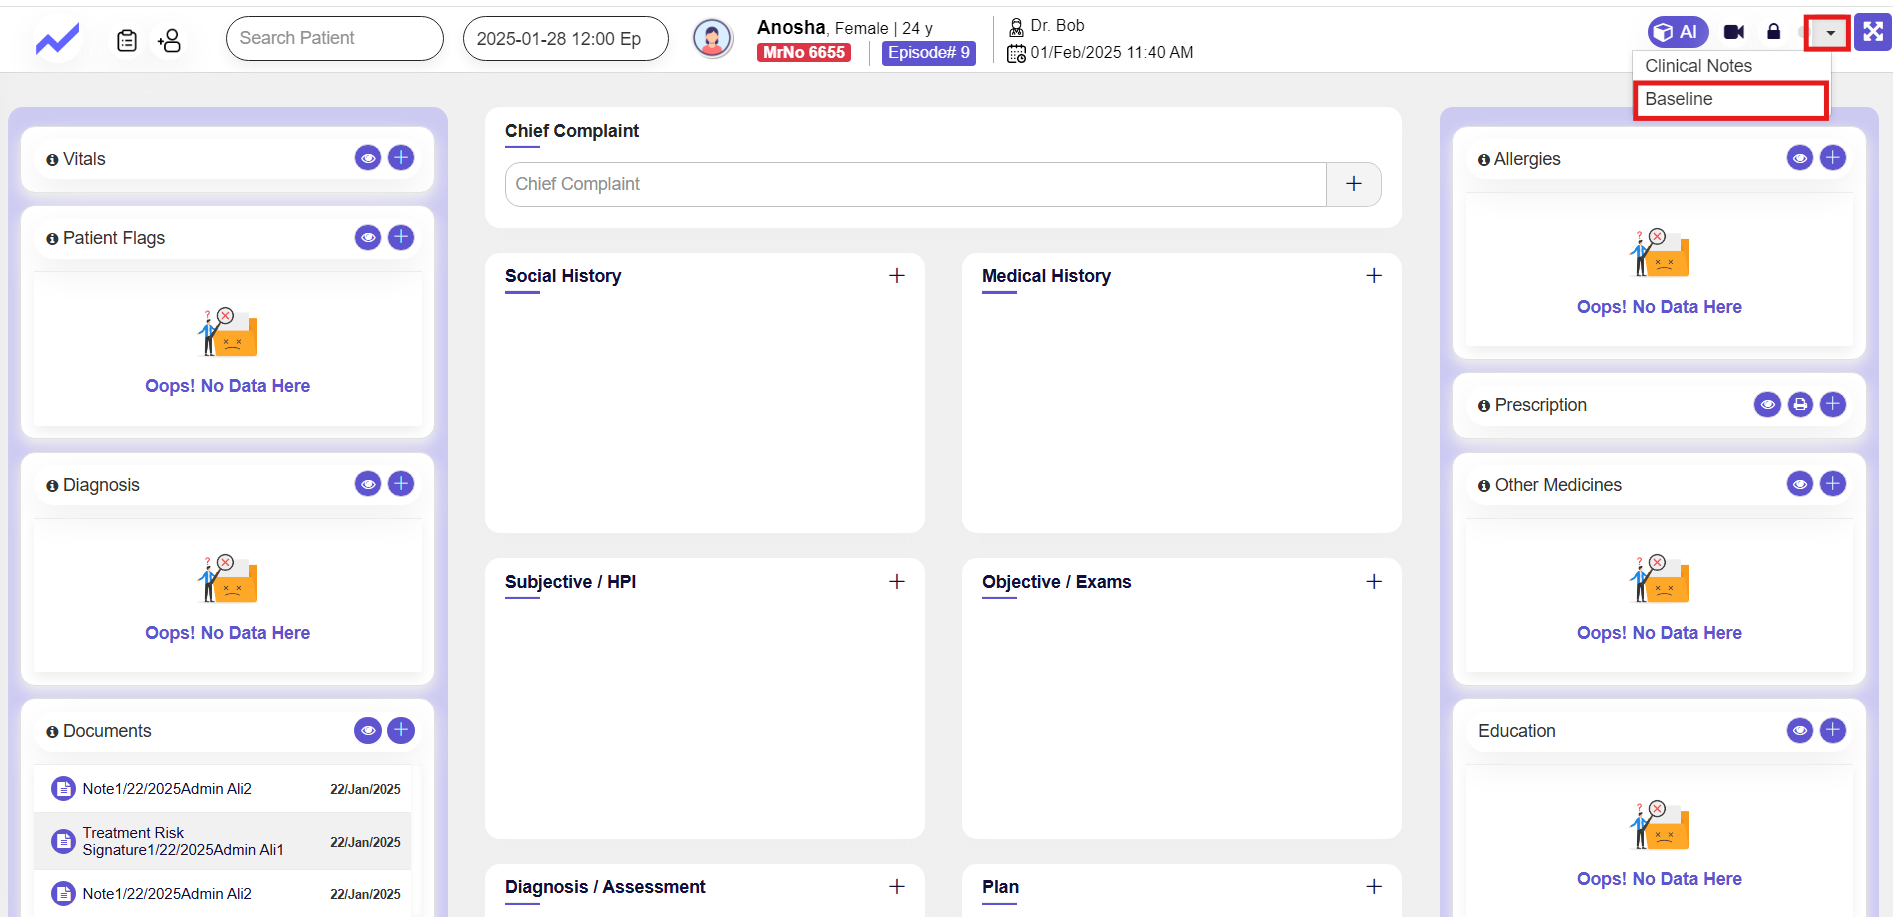
As only Baseline permissions have been granted, the Baseline option is the only one available in the drop-down menu.
When you click on baseline the baseline screen will appear
1.3 Baseline Operations #
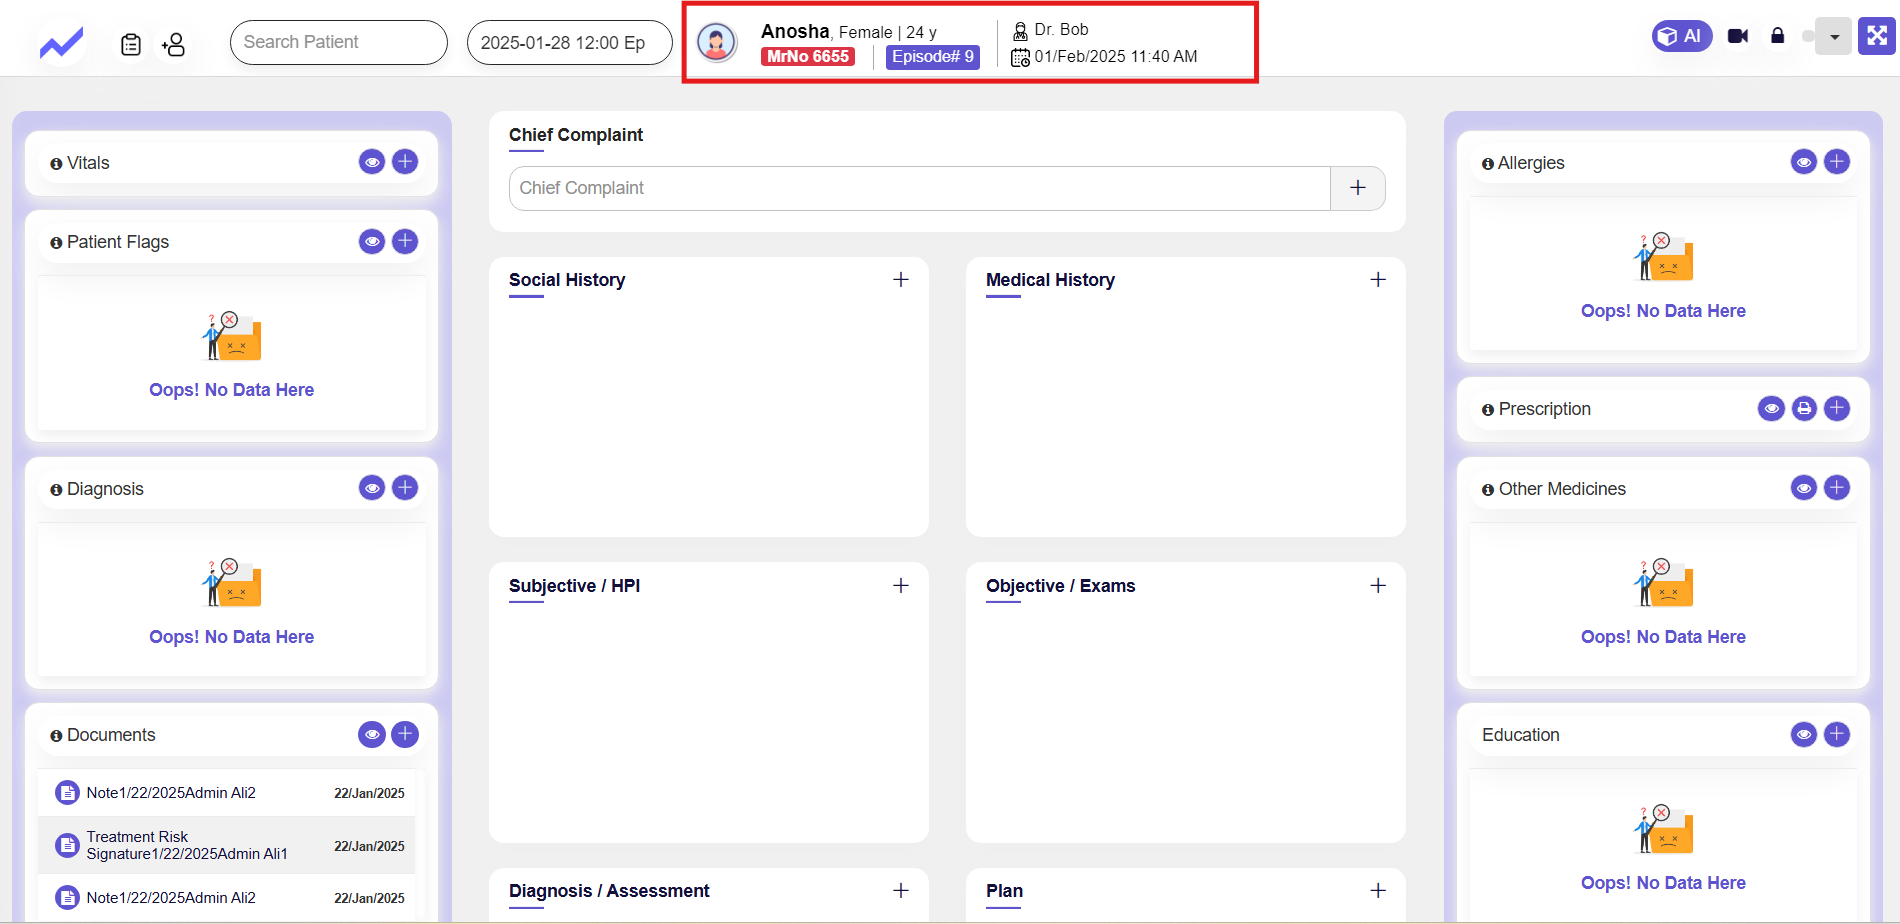
The Baseline screen displays a detailed graphical representation of the patient’s teeth. Users can select teeth, record operations, and add ICD codes. It also includes tabs for treatments, notes, and a timeline for dental history.
The Baseline screen allows the doctor to document the patient’s current dental condition.
- Missing: Mark missing teeth by selecting them.
- Crown: Apply an artificial layer to specific teeth.
- Denture: Apply fully (all teeth missing) or partially (a few teeth missing).
- Veneer: Apply on specific tooth surfaces, with all surfaces indicated.
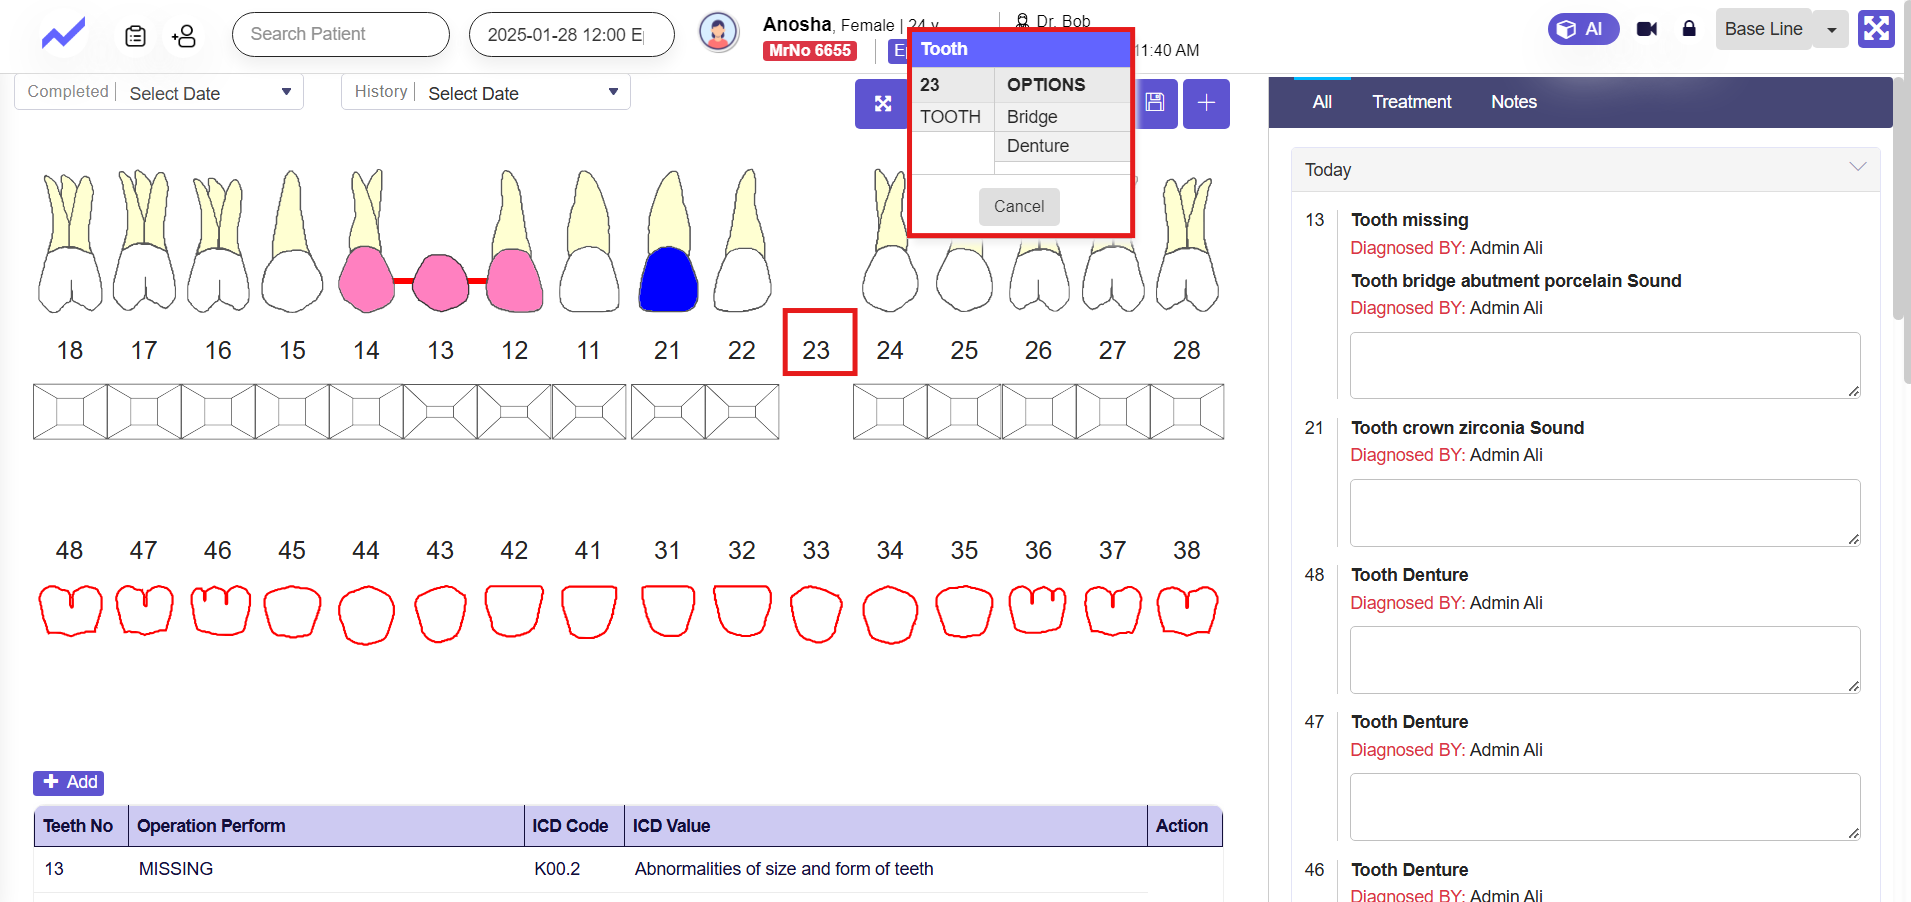
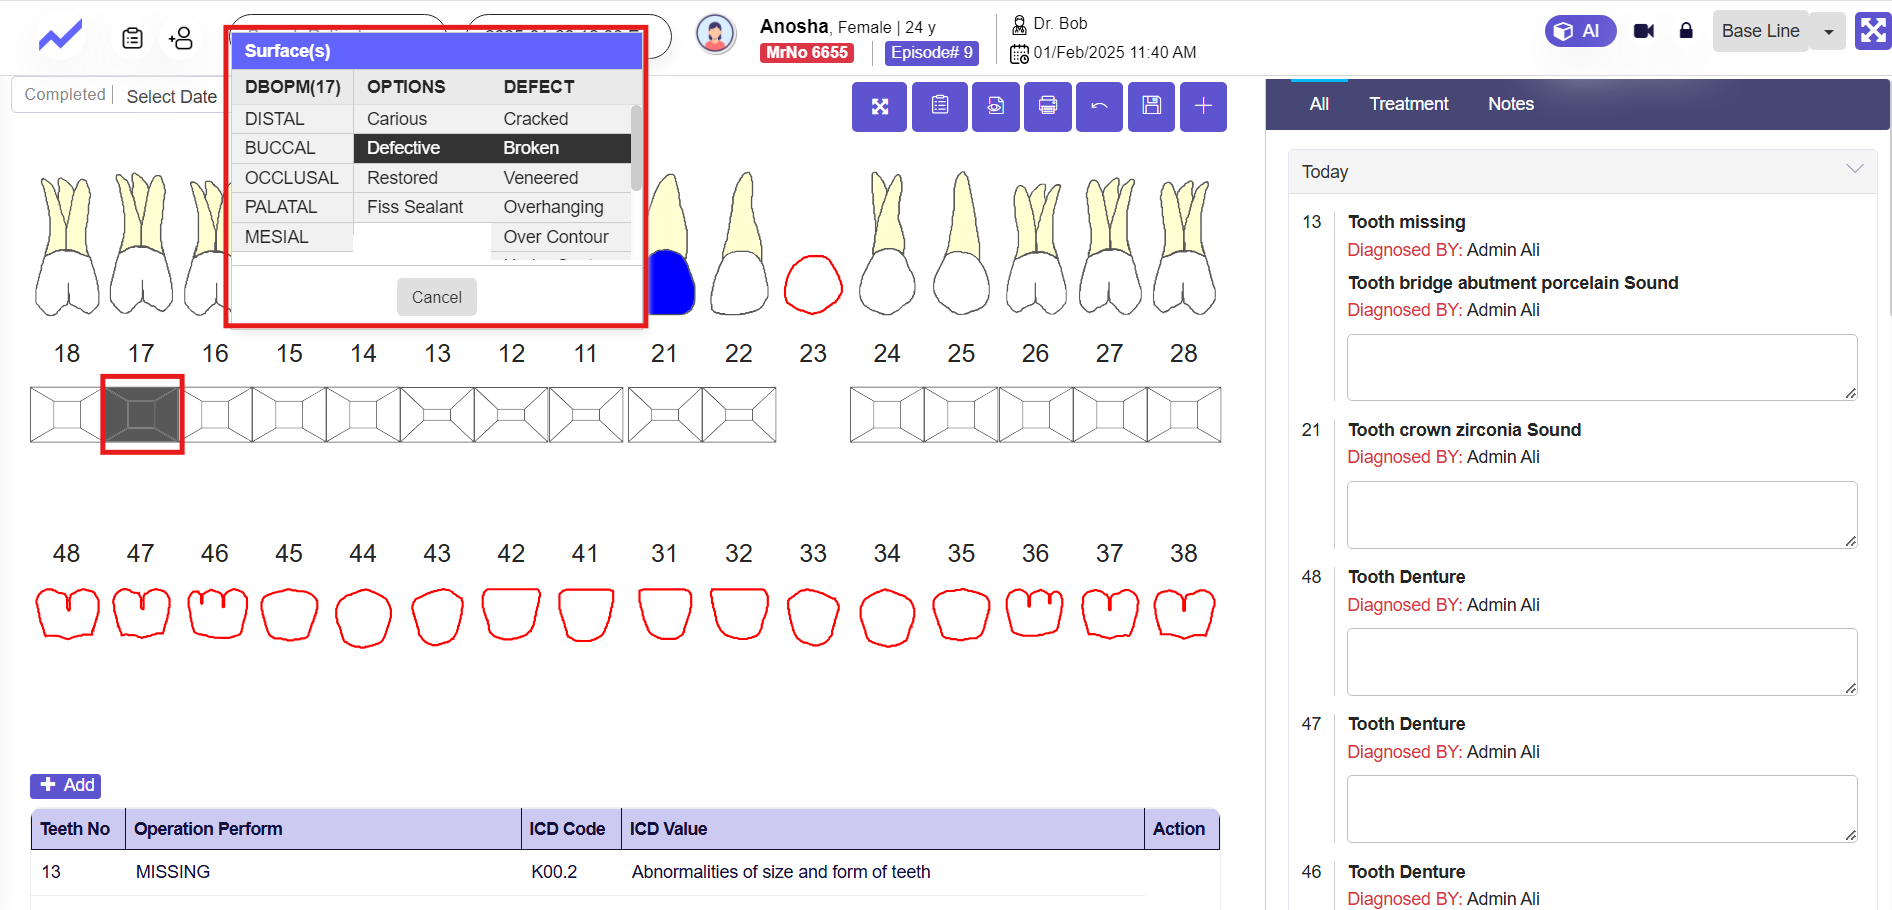
When we click on any teeth the options will appear like.
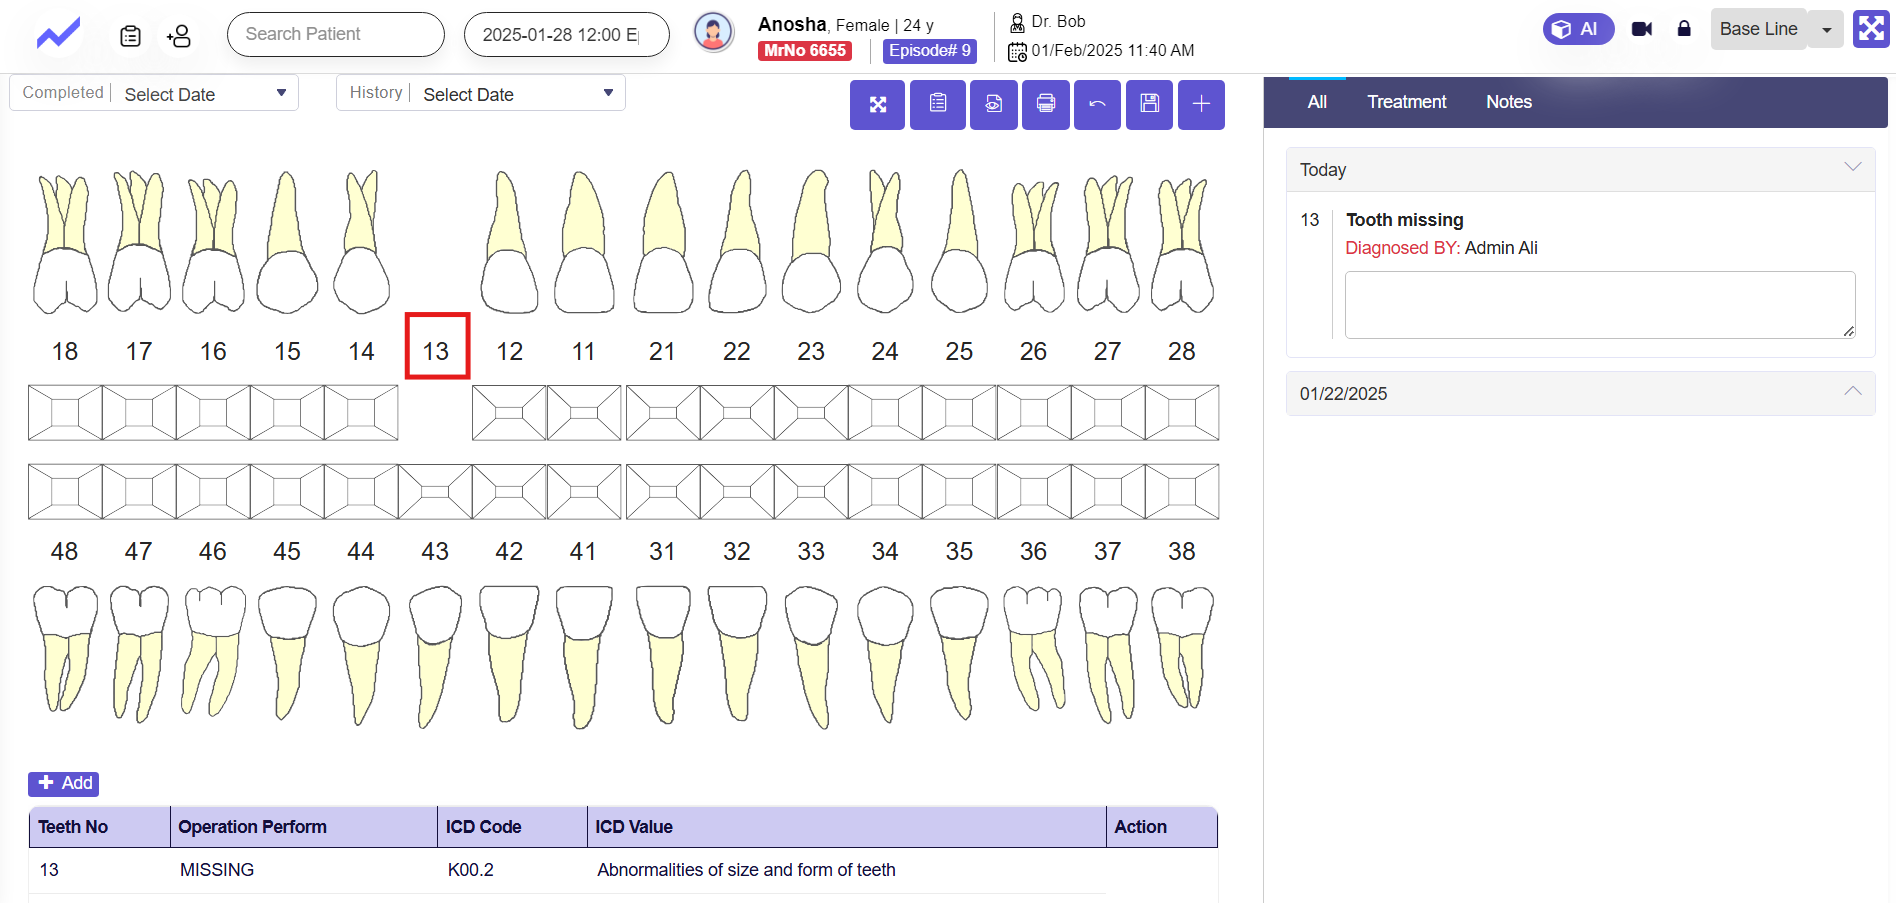
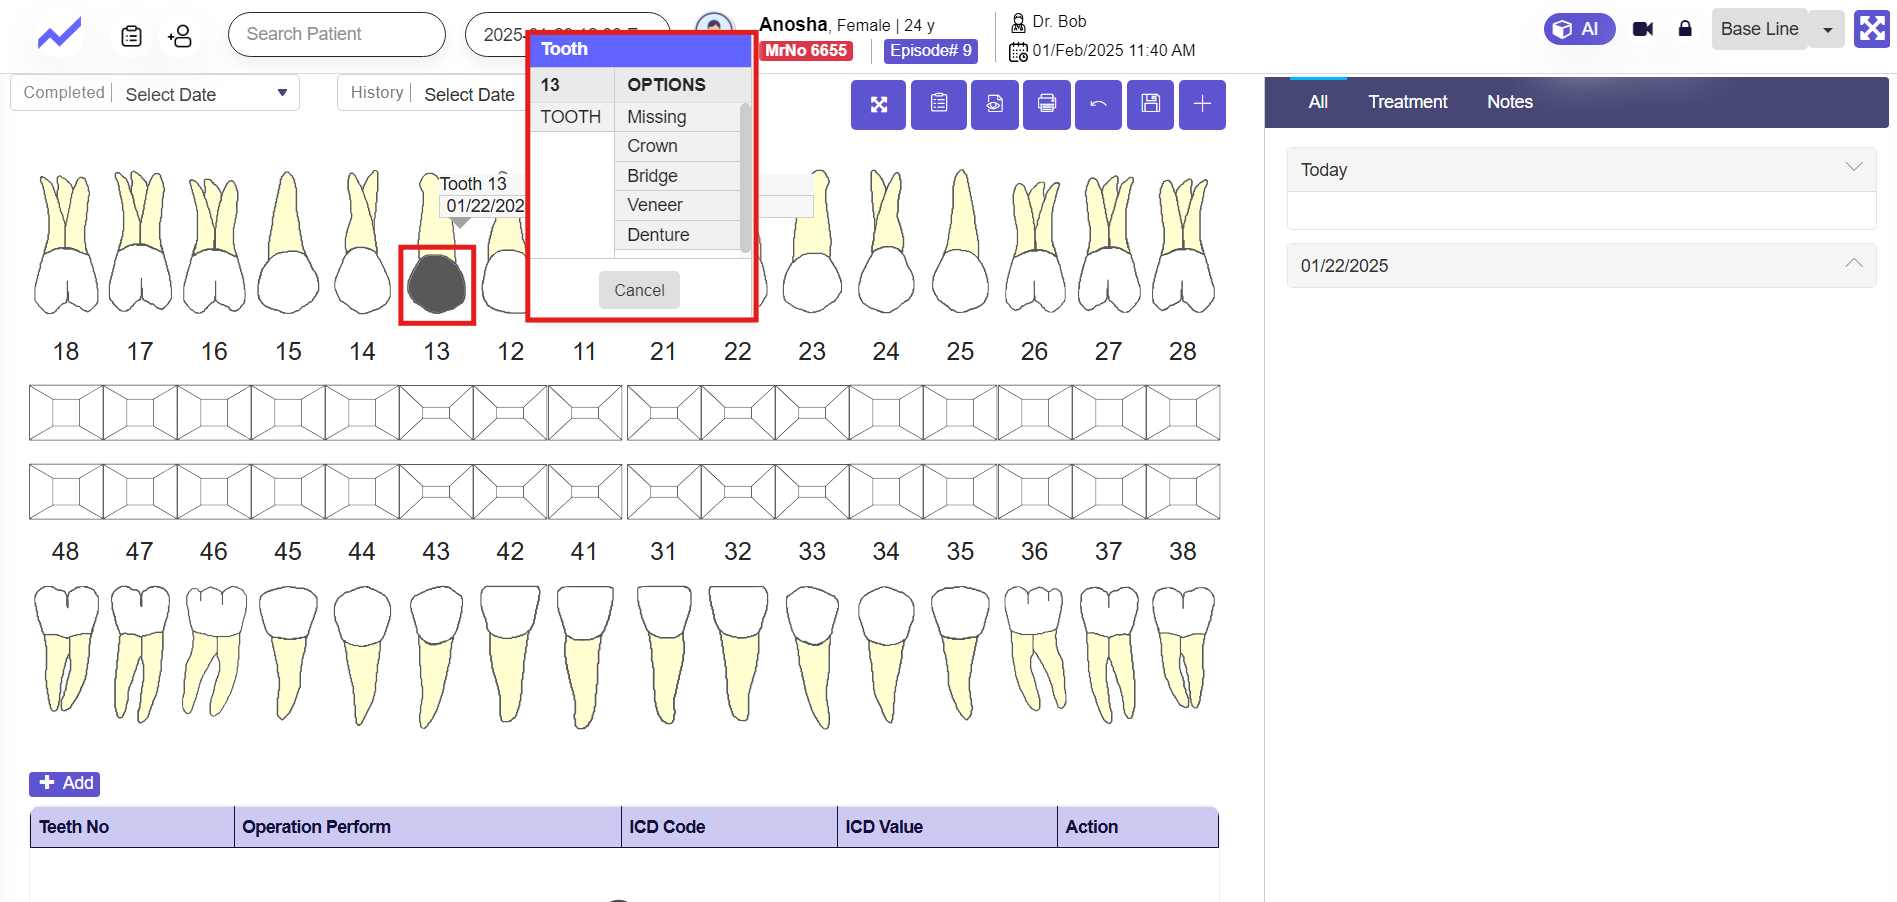 1.3.1 Missing Teeth #
Also, the teeth number is mentioned If the doctor clicks on missing the teeth will disappear.
 On the side panel, the operation performed is recorded for convenience, ensuring easy access and reference for the doctor.
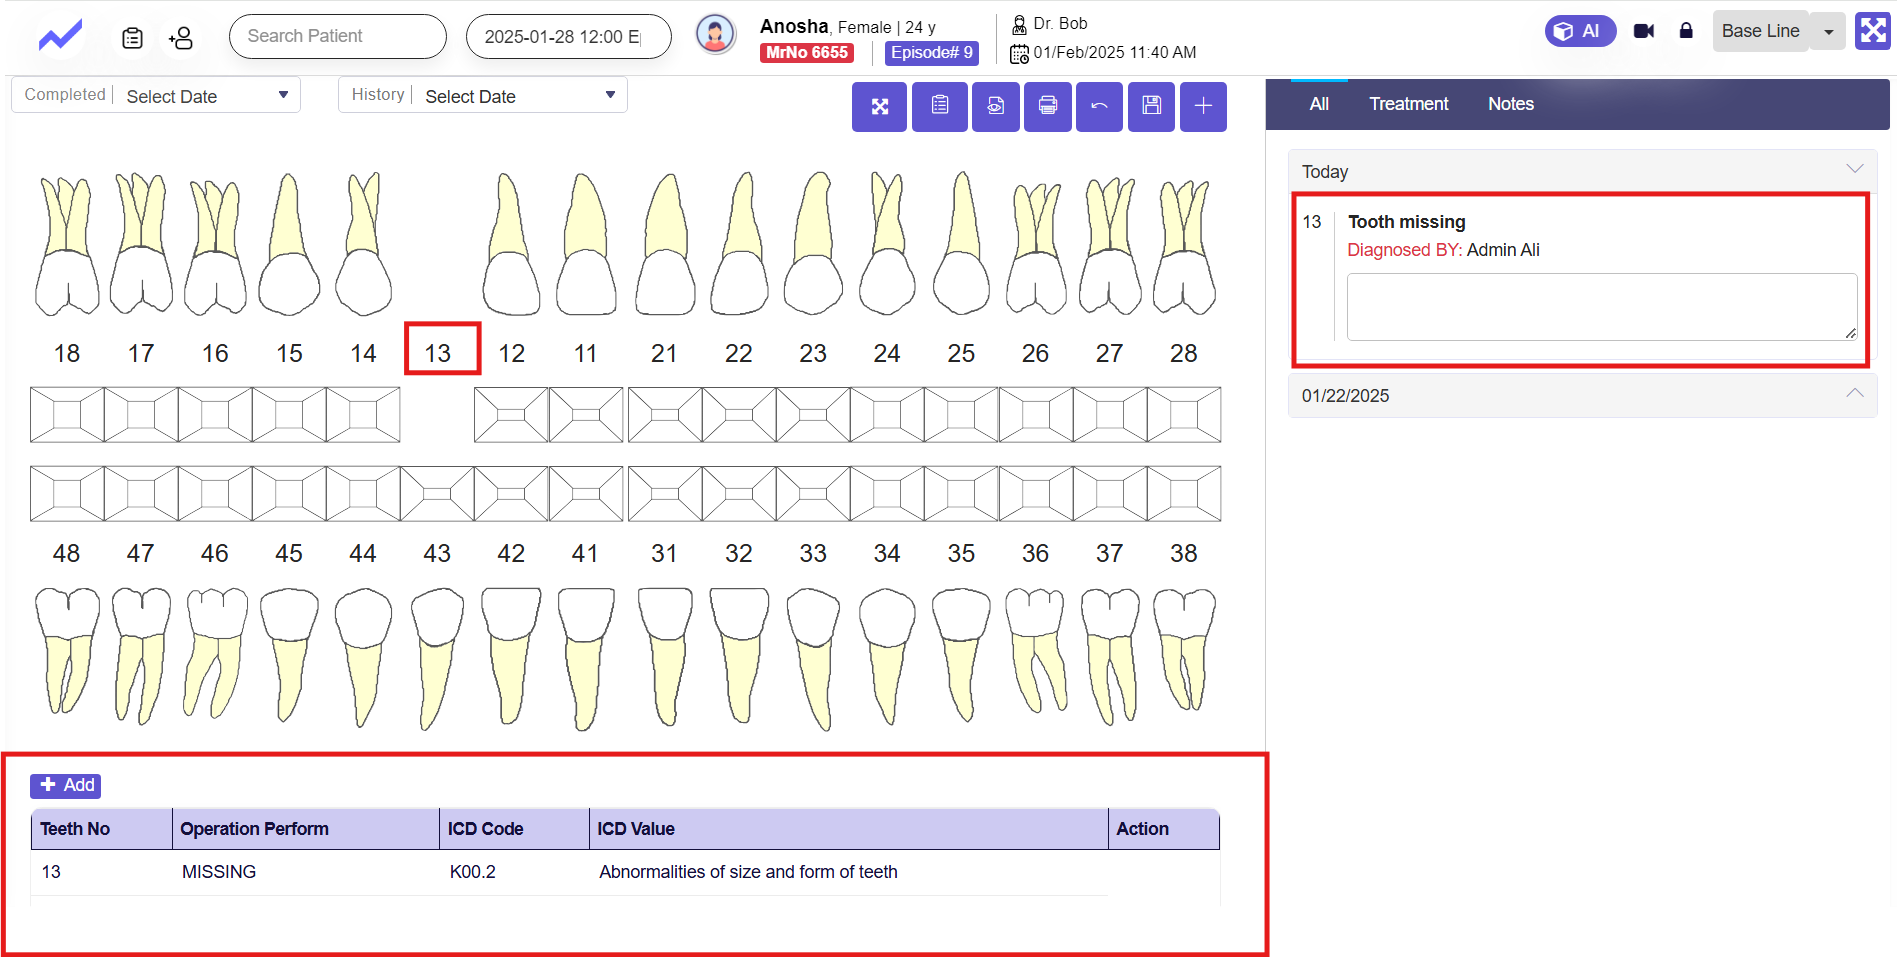
Additionally, as the ICD code is mapped to the operation (e.g., selecting Missing), the corresponding information is automatically added to the table below for accurate record-keeping
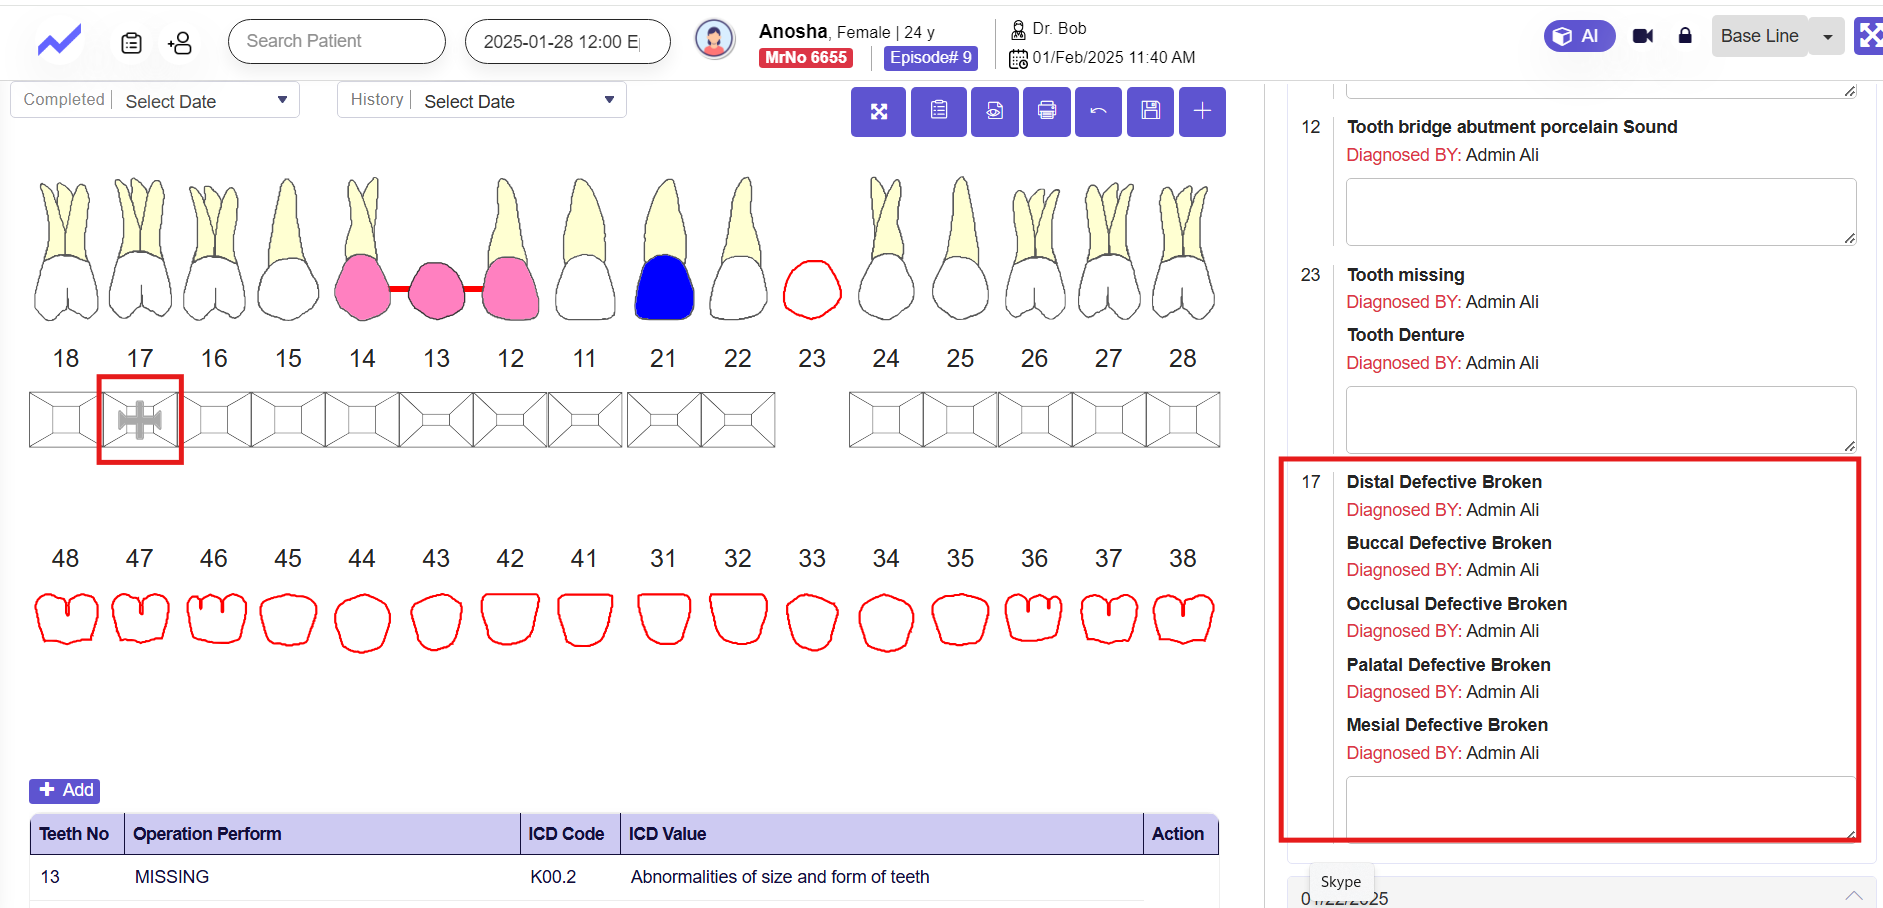
1.3.2 How to apply Bridge on teeth #
The doctor can also set a bridge to address missing teeth between existing teeth.
As teeth number 13 is missing, we can apply a bridge to join teeth 14, 13, and 12 together.
Click on bridge.
The system will ask for the Bridge selection.
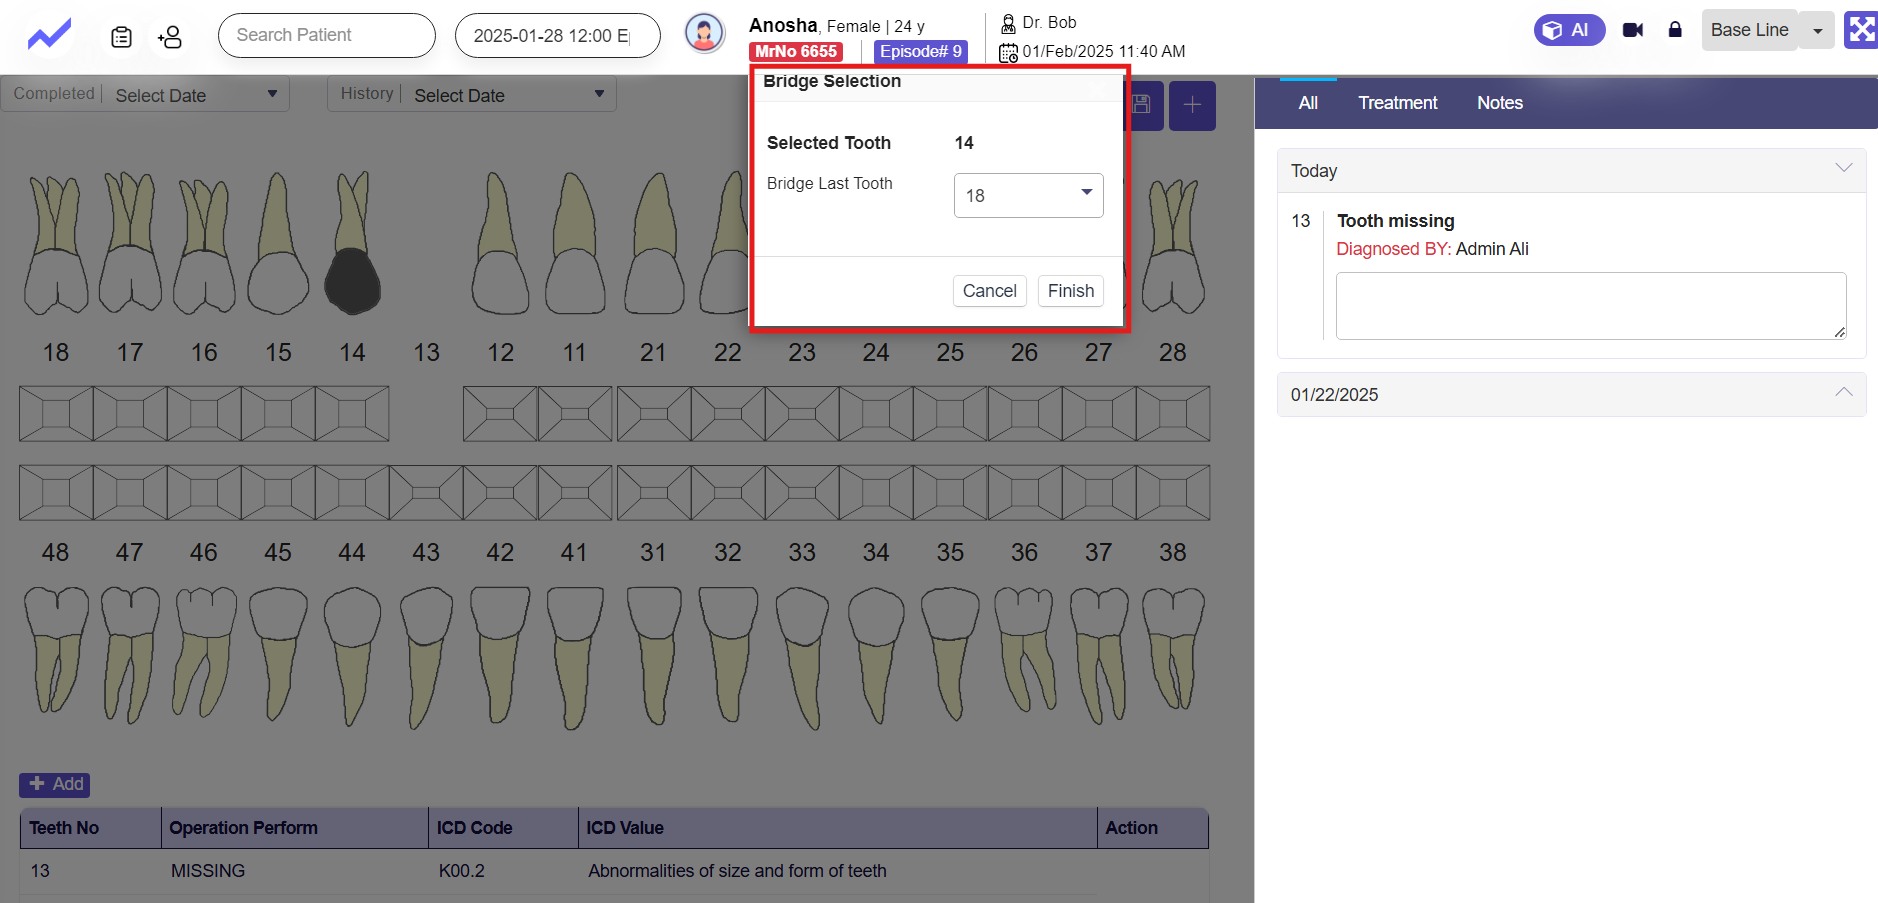
Select the teeth and the bridge will be applied.
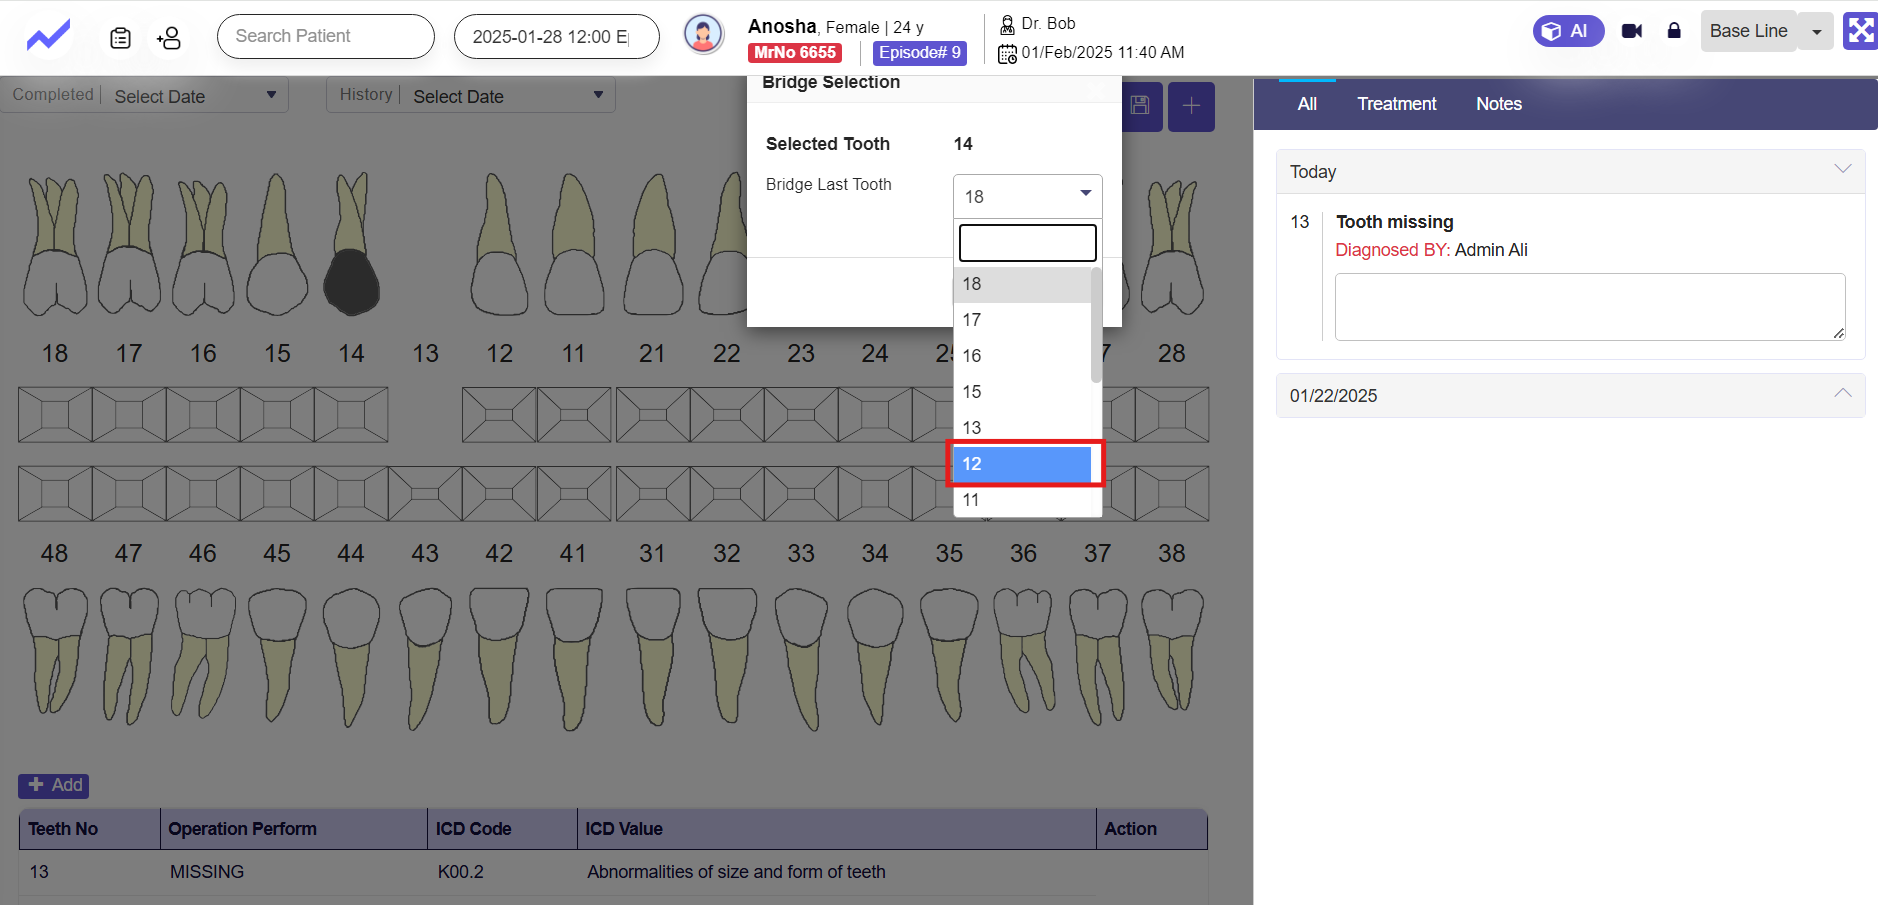
The bridge is applied to join teeth 14, 13, and 12. The system will also prompt you to select the material; simply choose the material you want. On the side screen, the data is also recorded, and you can add any additional information if the doctor wants to include extra notes.

1.3.3 How to apply Crown #
A crown is a dental restoration that fully covers a damaged or weakened tooth, restoring its shape, size, and strength. It can be made from materials like porcelain, ceramic, or metal and improves both functionality and appearance.
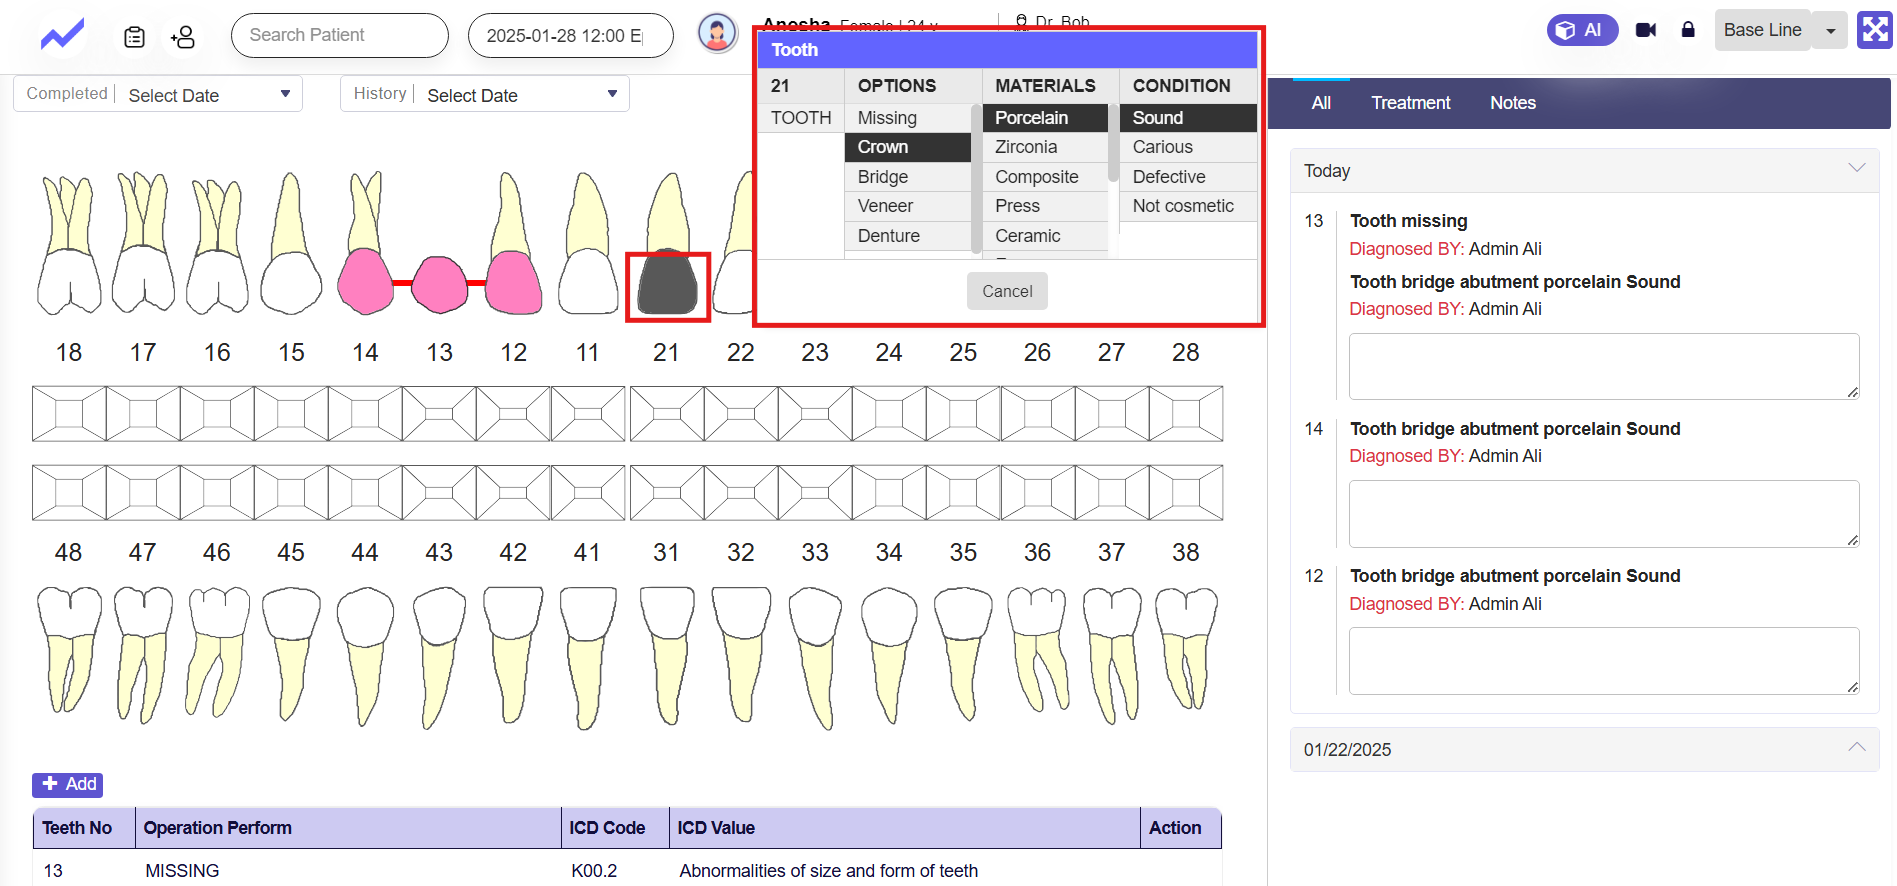
Just click on any tooth and select the crown, along with other options such as the material you want and the condition mentioned. You can choose from the given options.
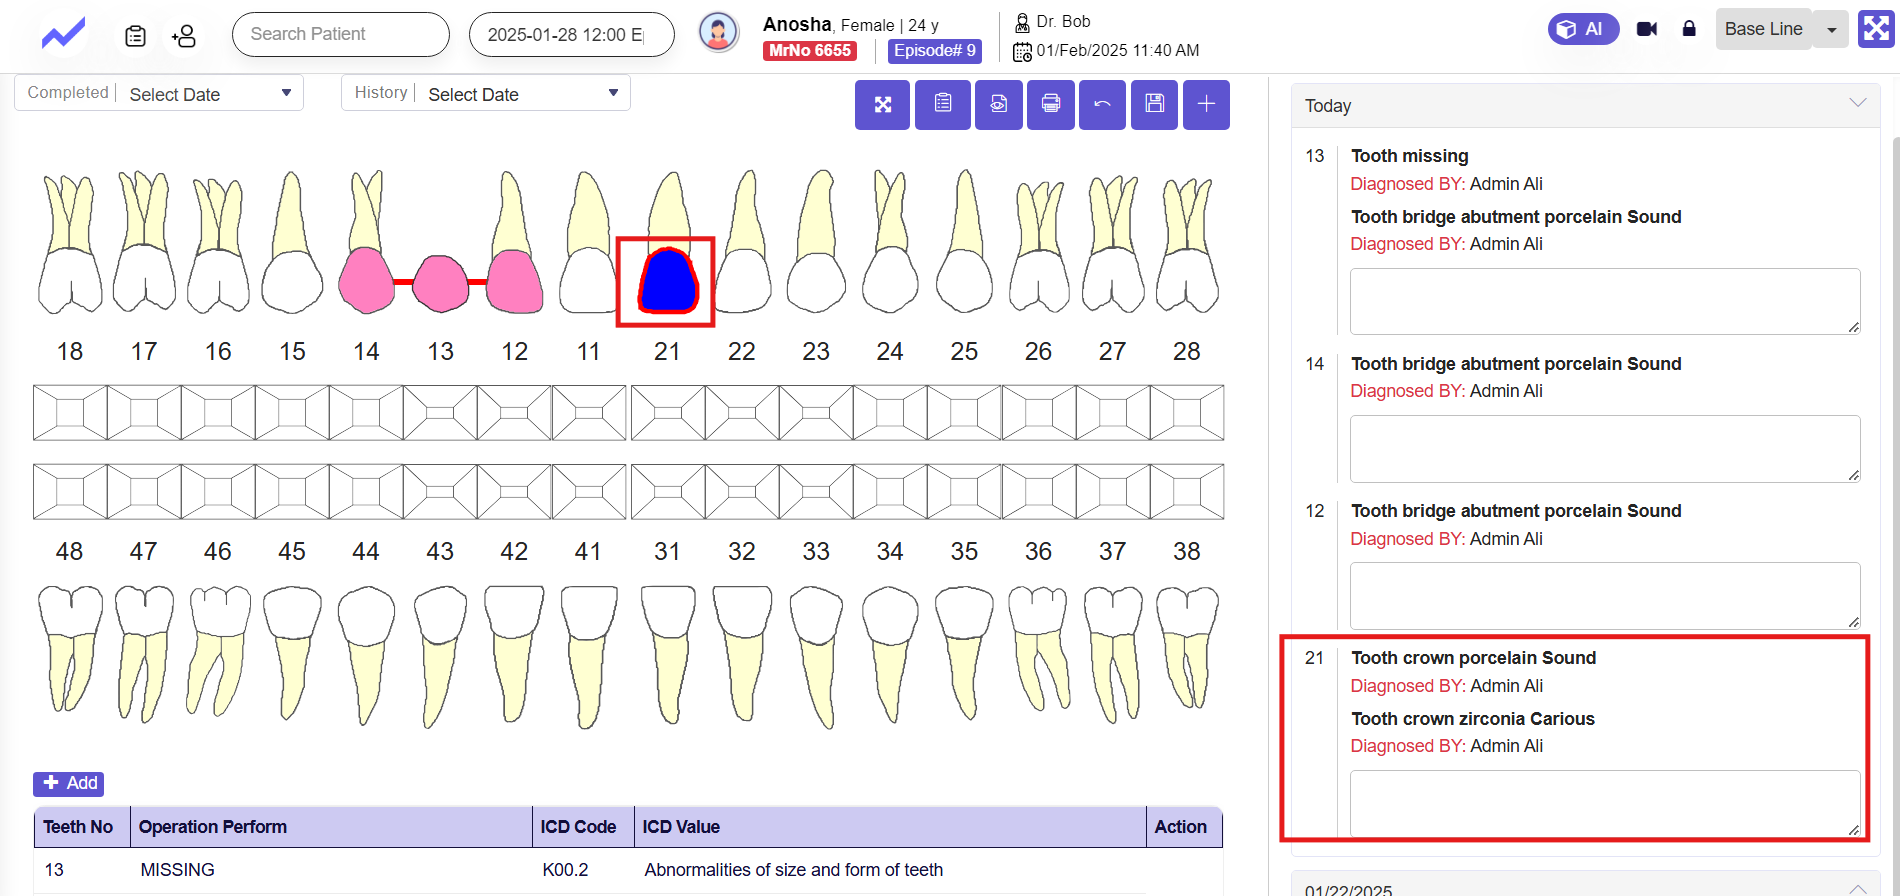
Crown is applied and on the sidebar, the record is also added.
1.3.4 How to apply Denture #
A denture is a removable replacement for missing teeth.
Full Denture:
A full denture replaces all the teeth in the upper or lower jaw.
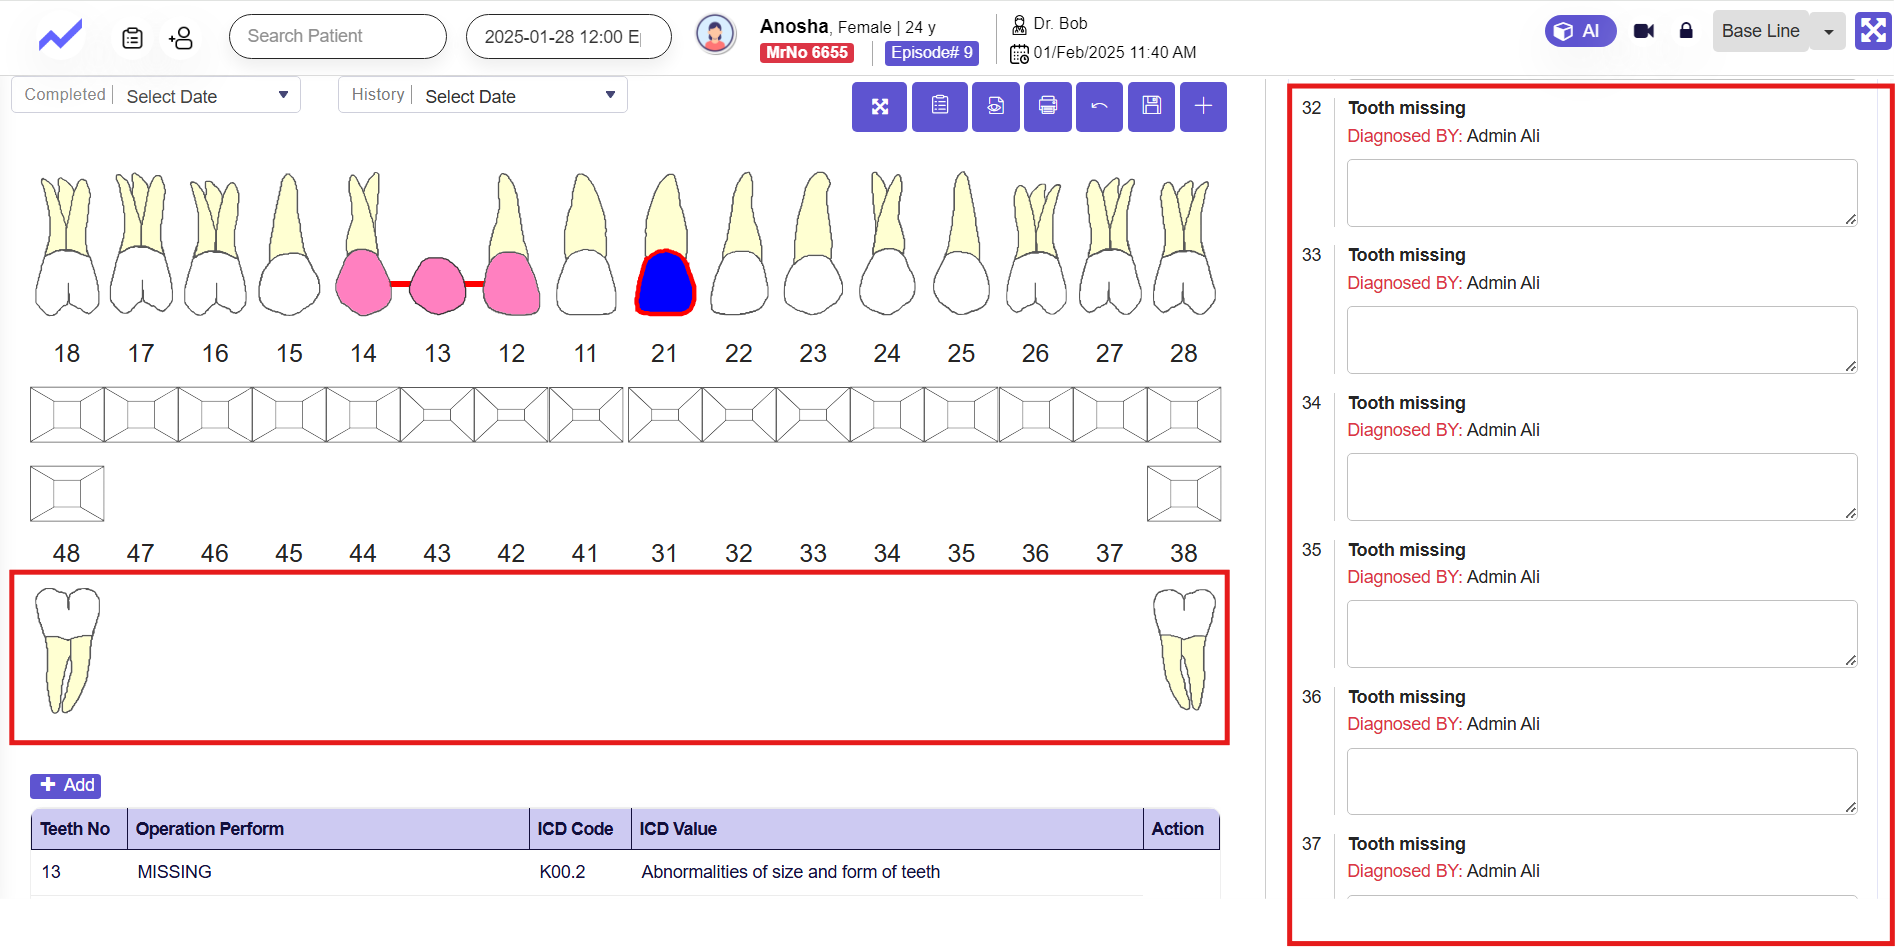
As all the lower teeth are missing we can apply full denture here.
Click on teeth, Click on Full Denture
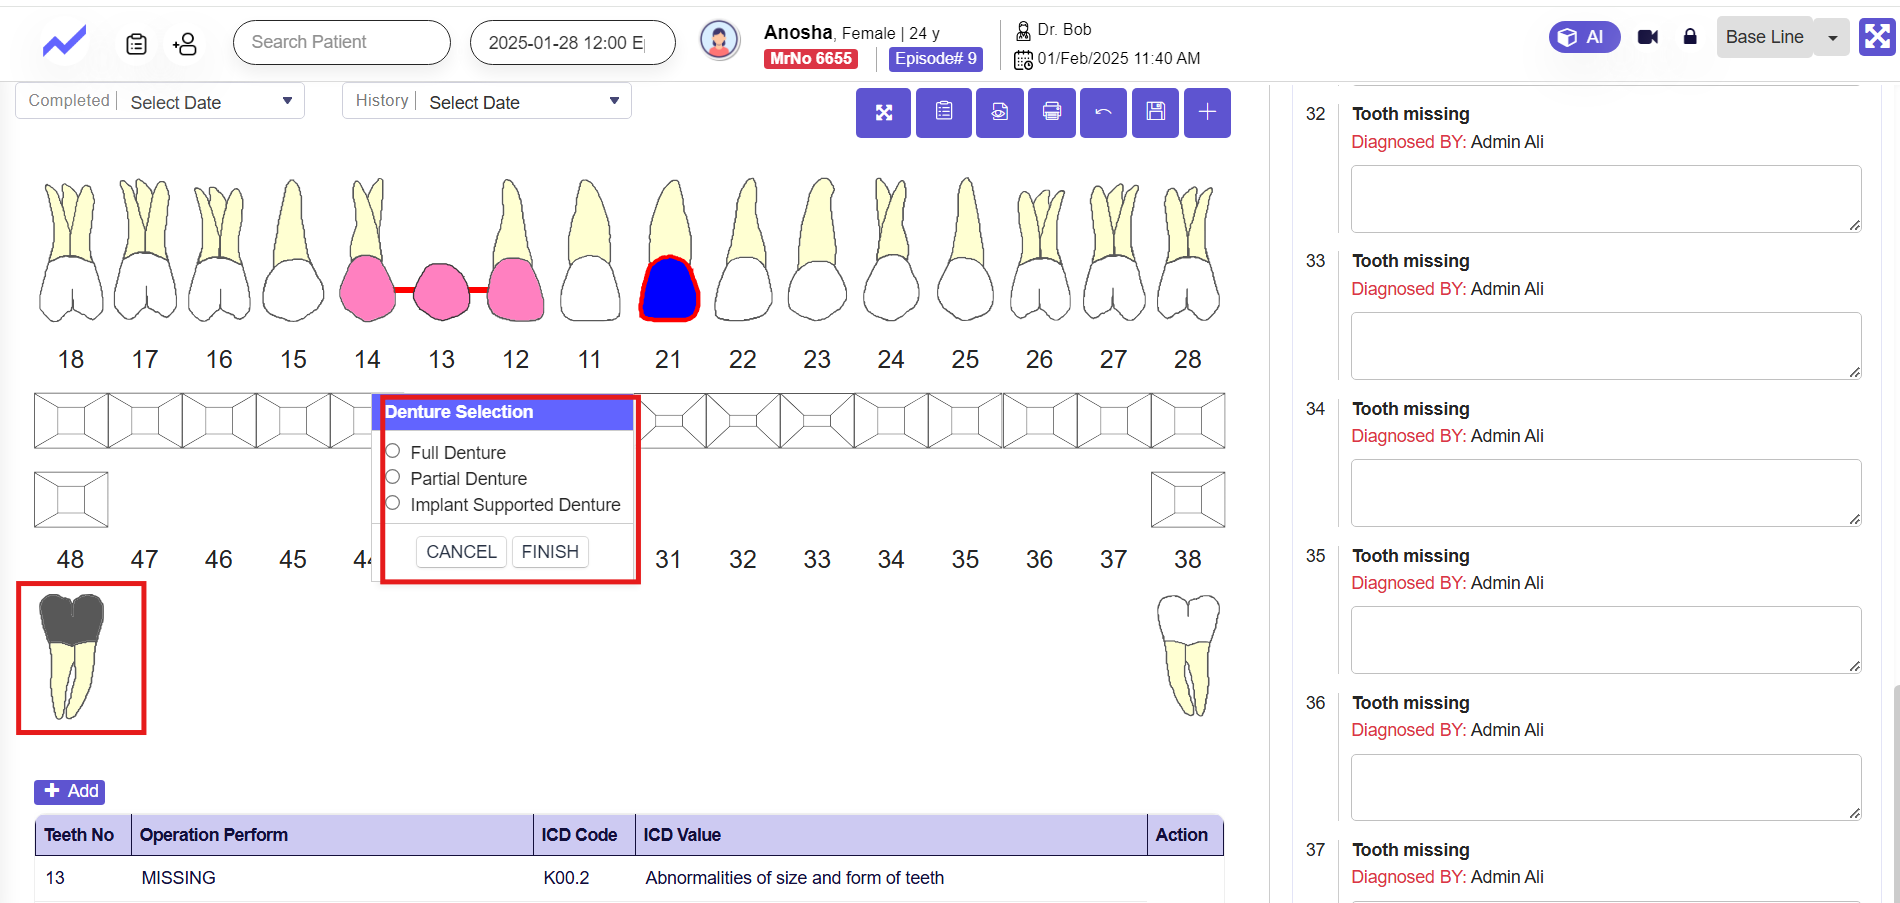
Full Denture (Full artificial support ) on lower teeth is applied.
Partial Denture:
partial denture replaces only some missing teeth. Both are custom-made to fit your mouth and help restore your ability to chew, speak, and smile.
As teeth 23 is missing we can apply partial denture here.
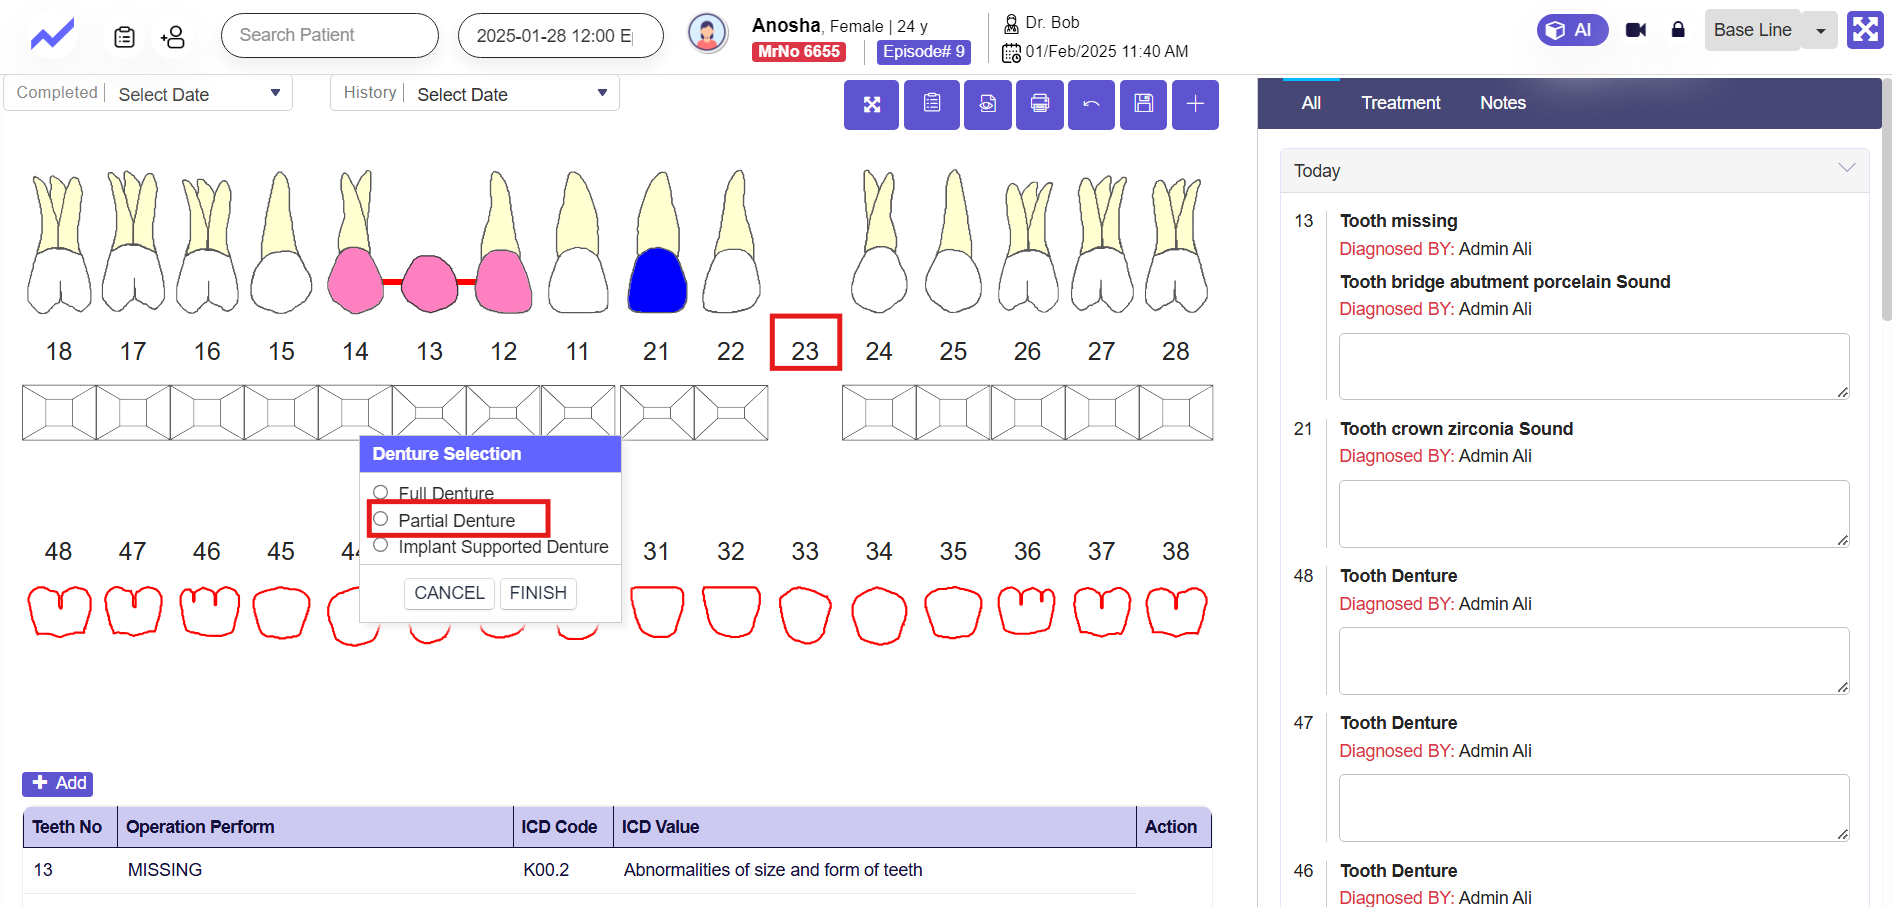
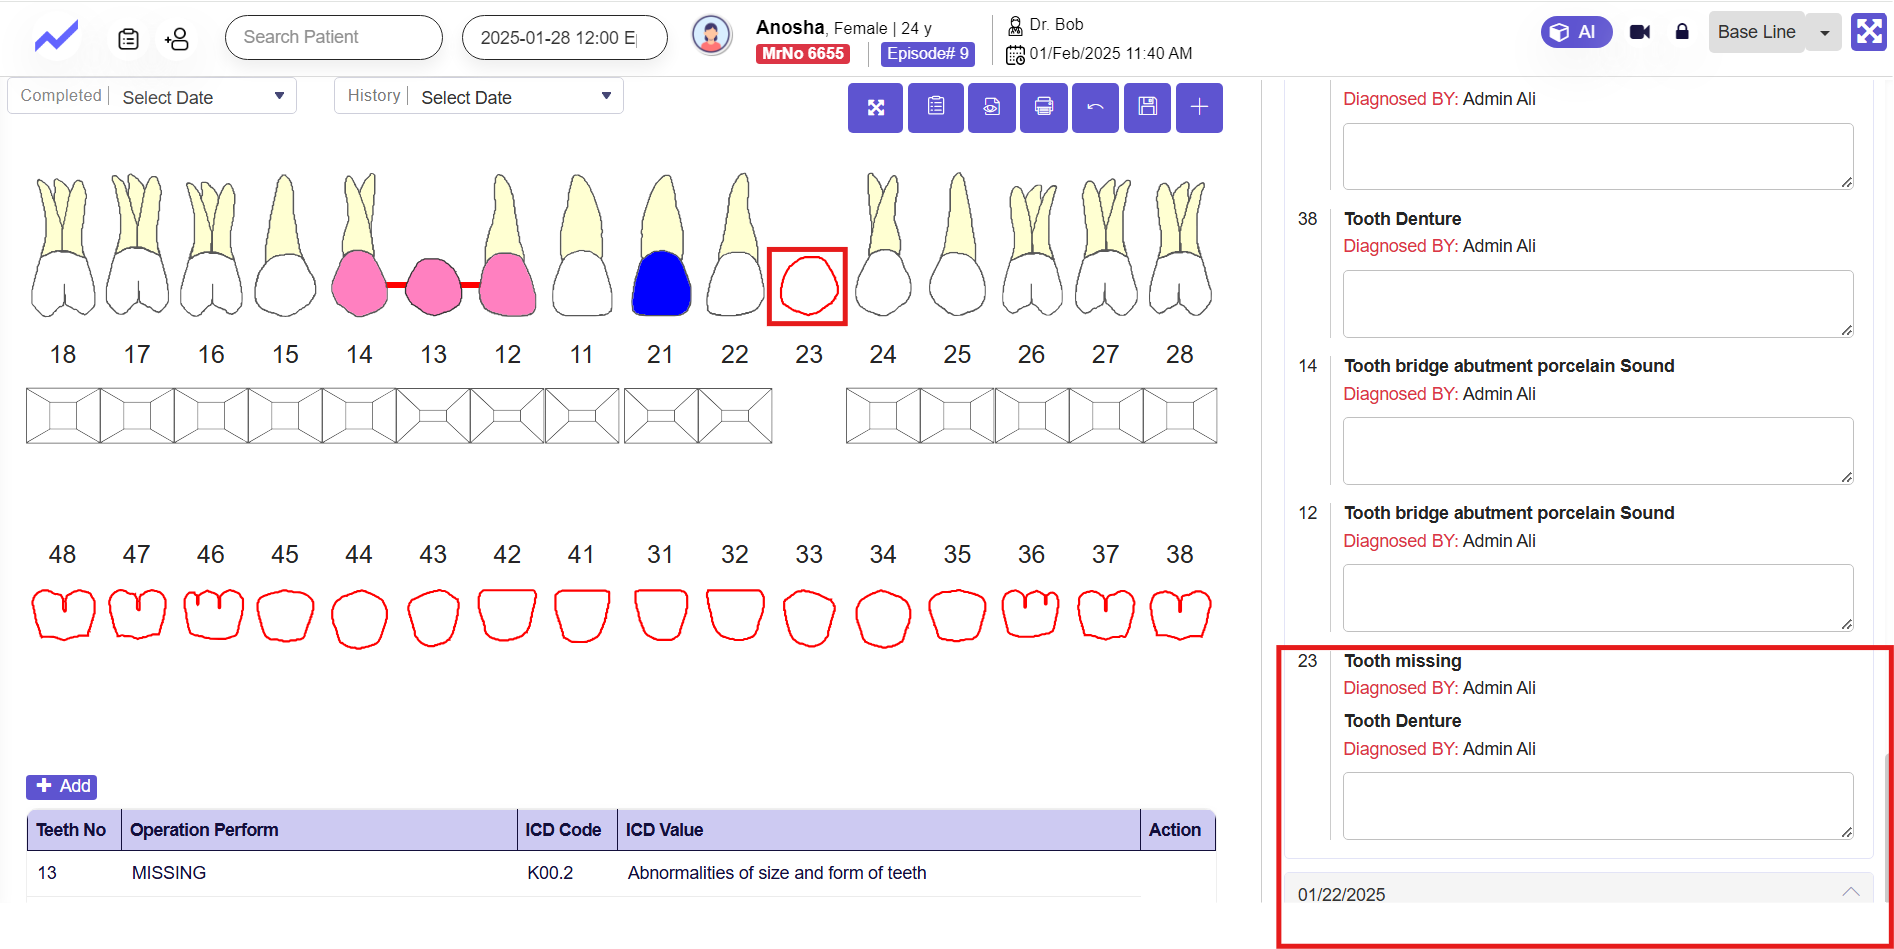
Partial Denture is applied on teeth 23.
1.3.5 How to apply Veneer on surfaces #
A veneer is a thin layer of material, usually porcelain or composite, that is bonded to the front surface of a tooth to improve its appearance. Veneers are often used to correct issues like discoloration, chips, or misalignment, providing a natural-looking, more aesthetically pleasing smile.
Just click on the surface and select the veneer option.
1.3.6 Operations on Roots #
Similarly, you can document the condition of a patient’s tooth roots by simply clicking on the root section.
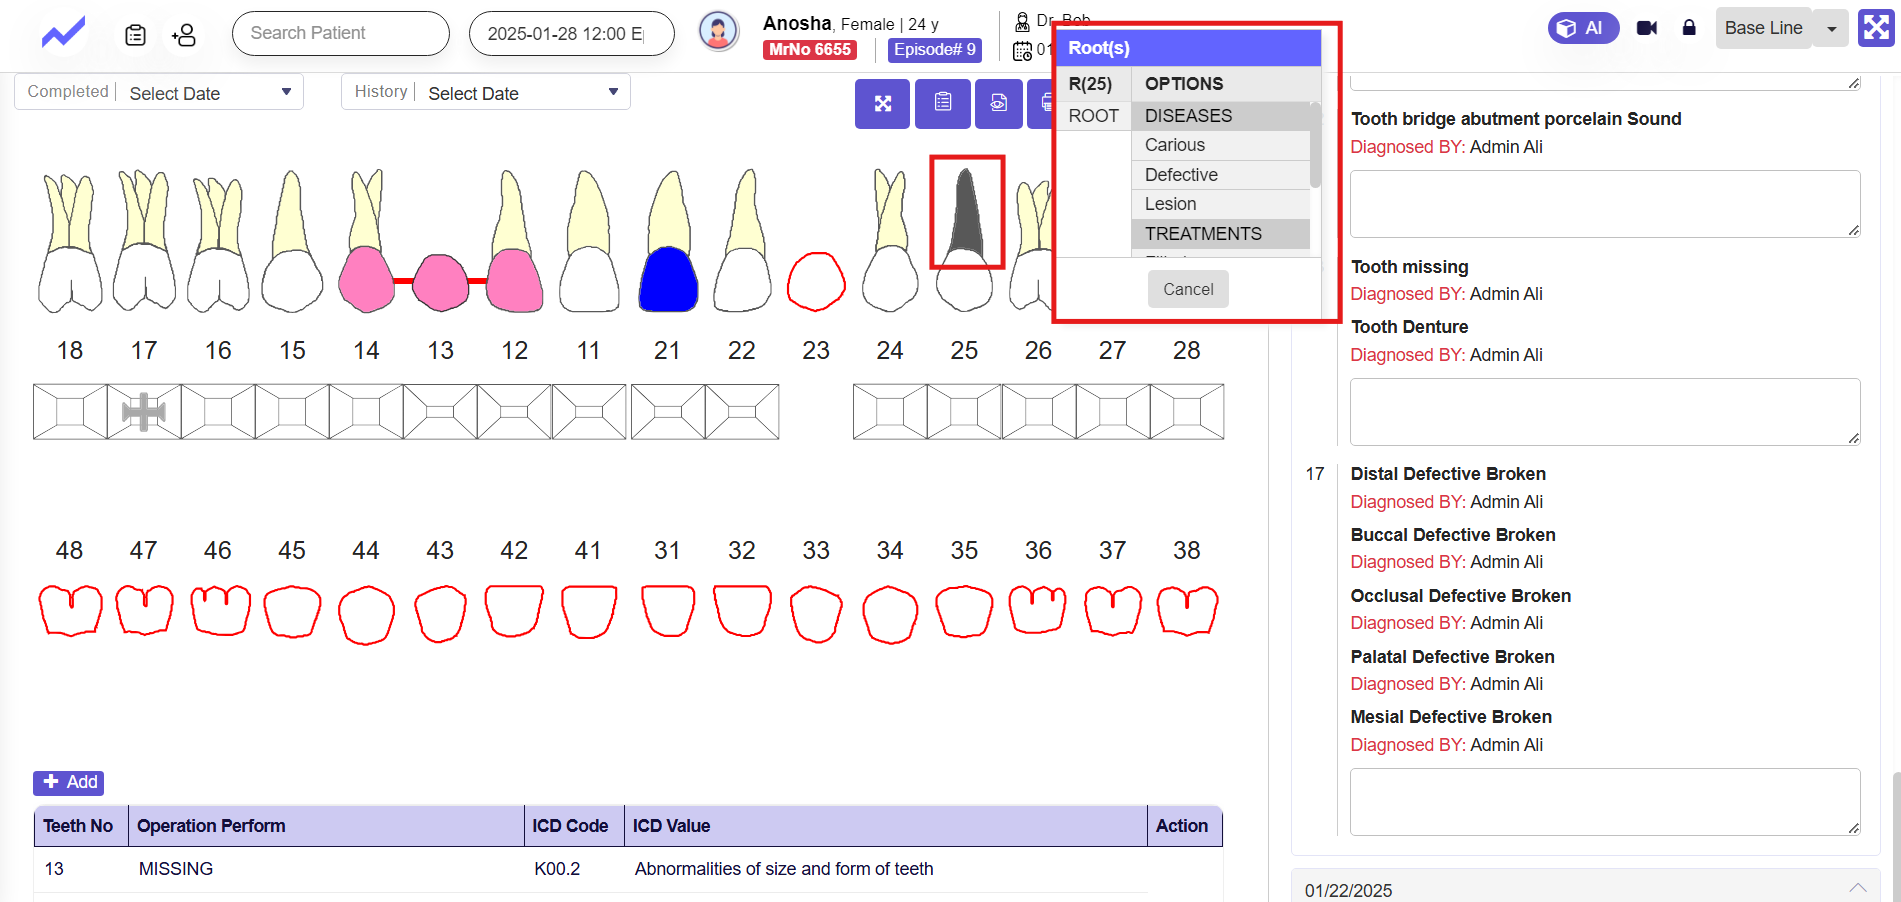
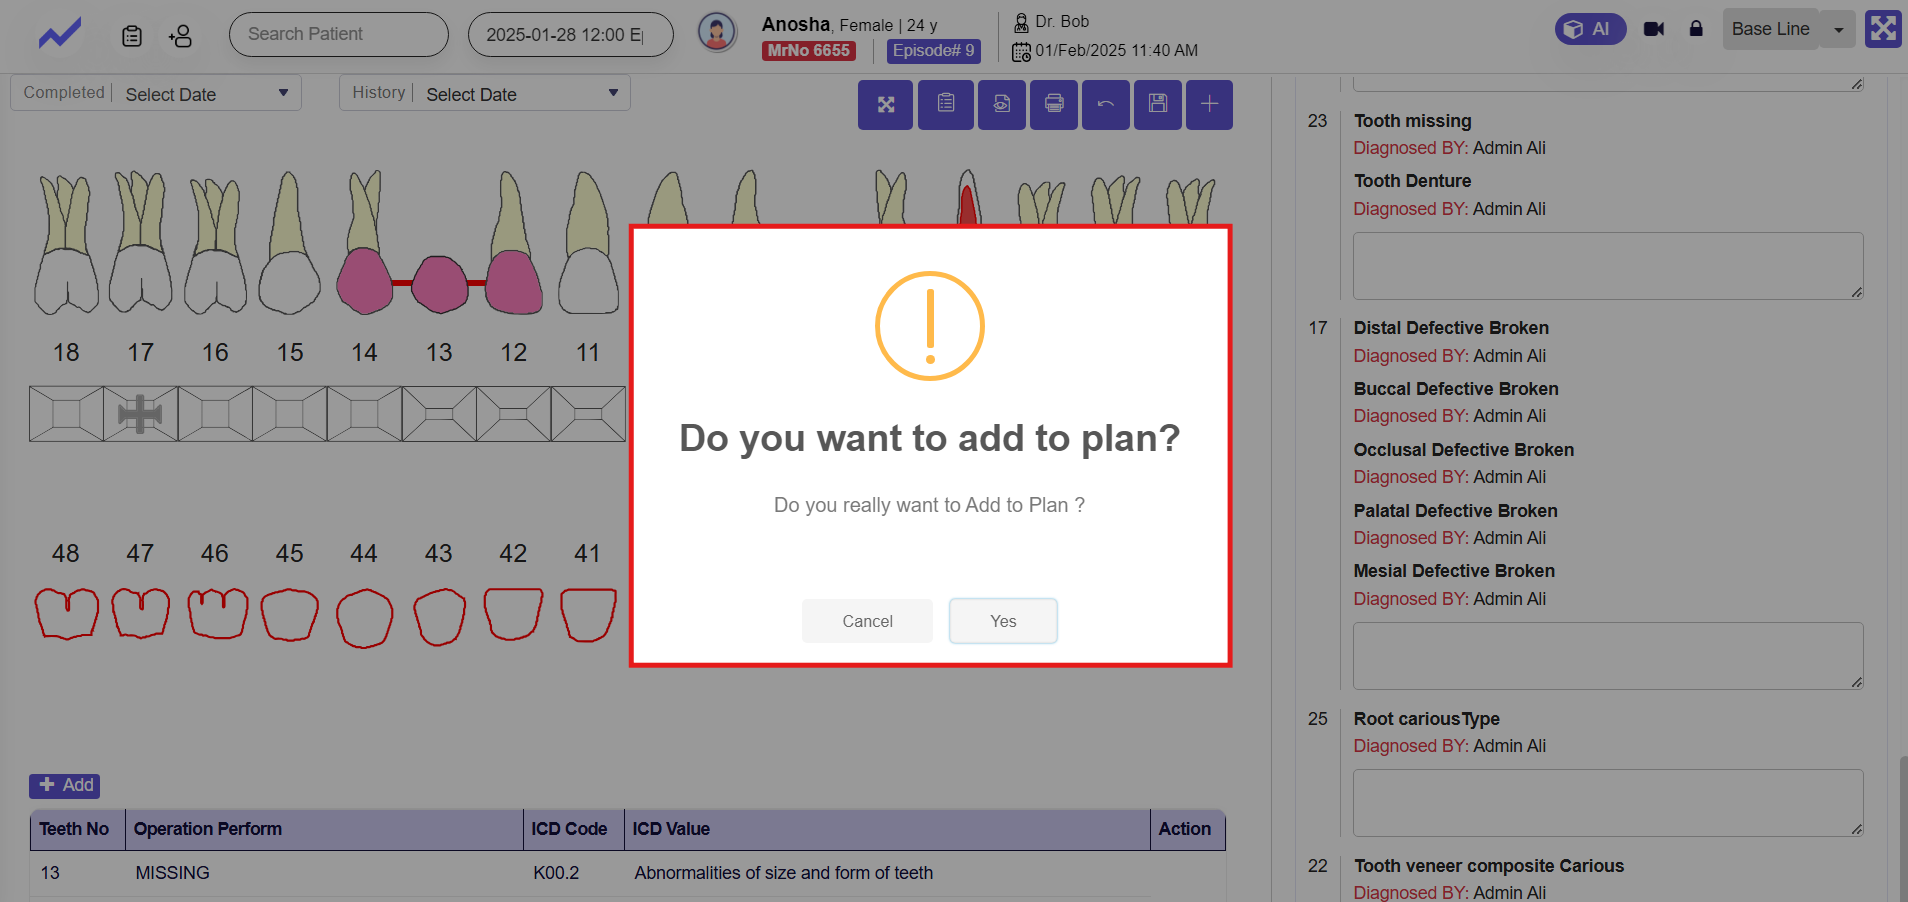
When an operation is performed on any root, the system prompts whether to add this information to the next screen, named Plan. Clicking Yes allows doctors to carry forward the recorded details from the Baseline screen to the Plan screen, streamlining the process for creating a treatment plan.
Root condition is recorded.
You can save all the records by just clicking on the save button.
This is all about operations performed on the Baseline screen.


