To manage inventory effectively, the initial step is to check the current stock of inventory to ensure its availability. Once you’ve confirmed the stock, proceed by clicking on the Toggle button within the schedule screen.
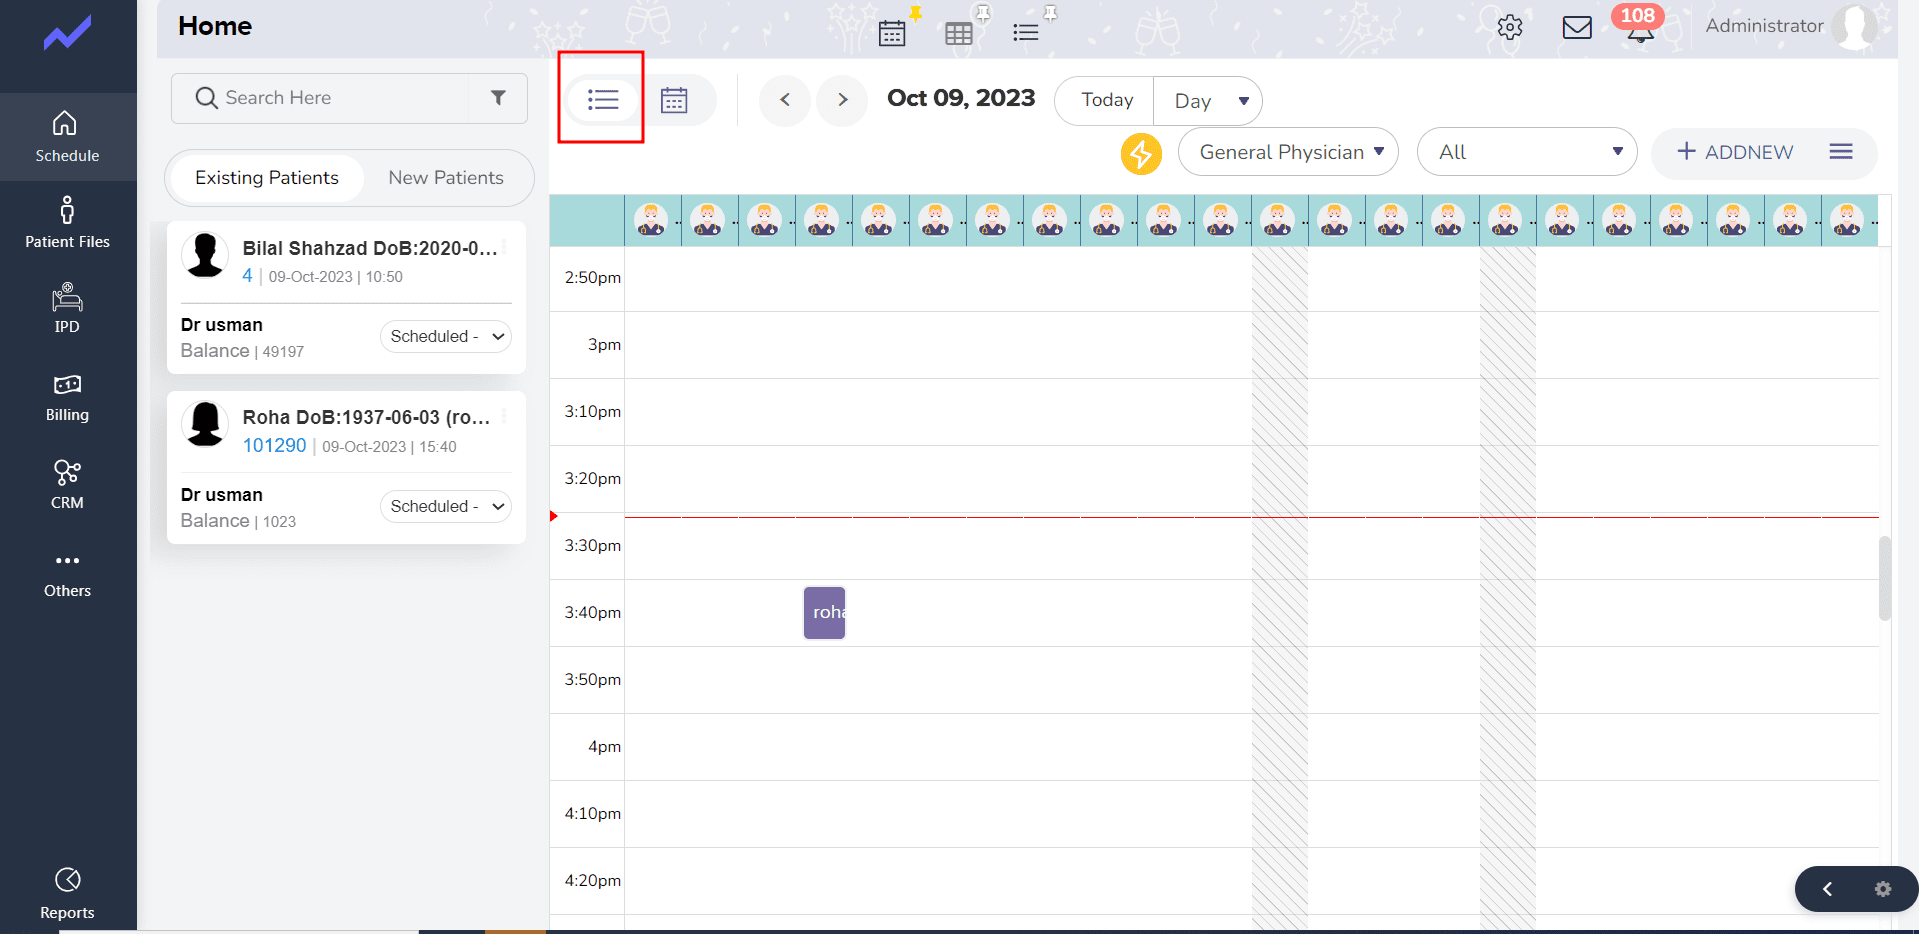
Then, navigate to the patient’s profile by clicking the three dots associated with their name and select “Clinical Note.”

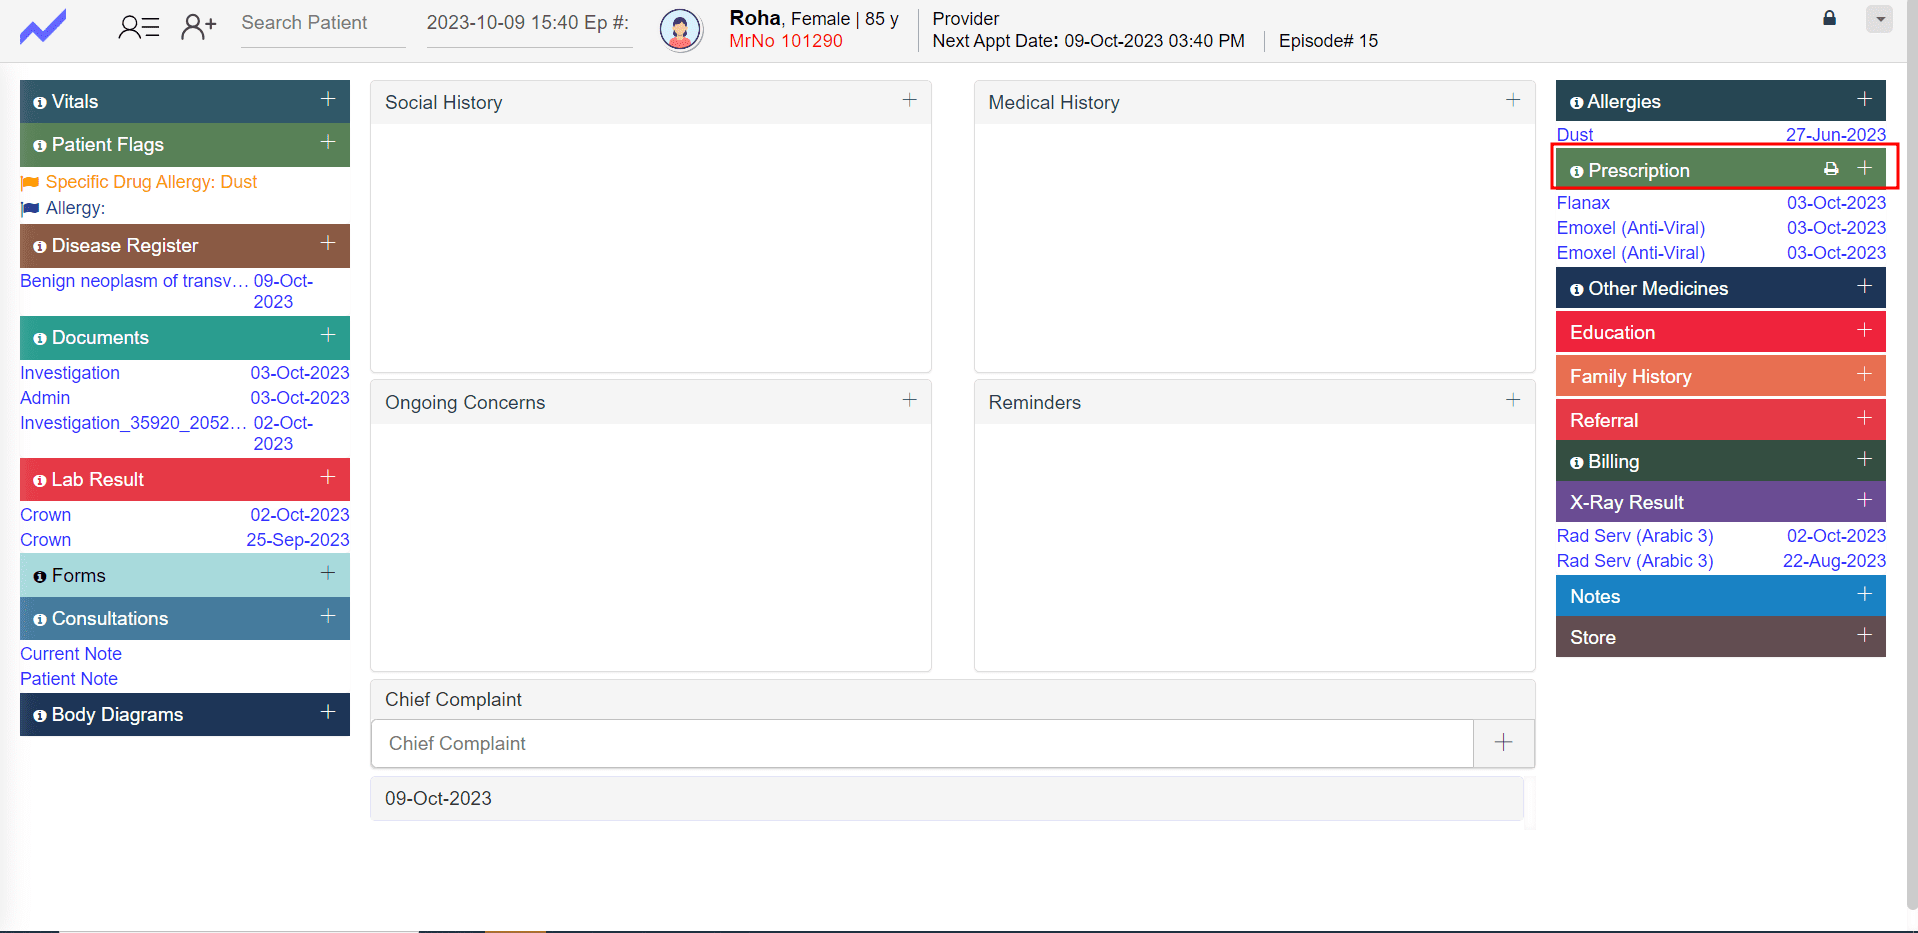
Inside the Clinical Note screen, you’ll find the option to prescribe inventory items. Click on the “Prescription plus add” button to begin the prescription process.

In this prescription screen, it’s crucial to fill out all the required fields accurately. After providing the necessary information, don’t forget to save the prescription.
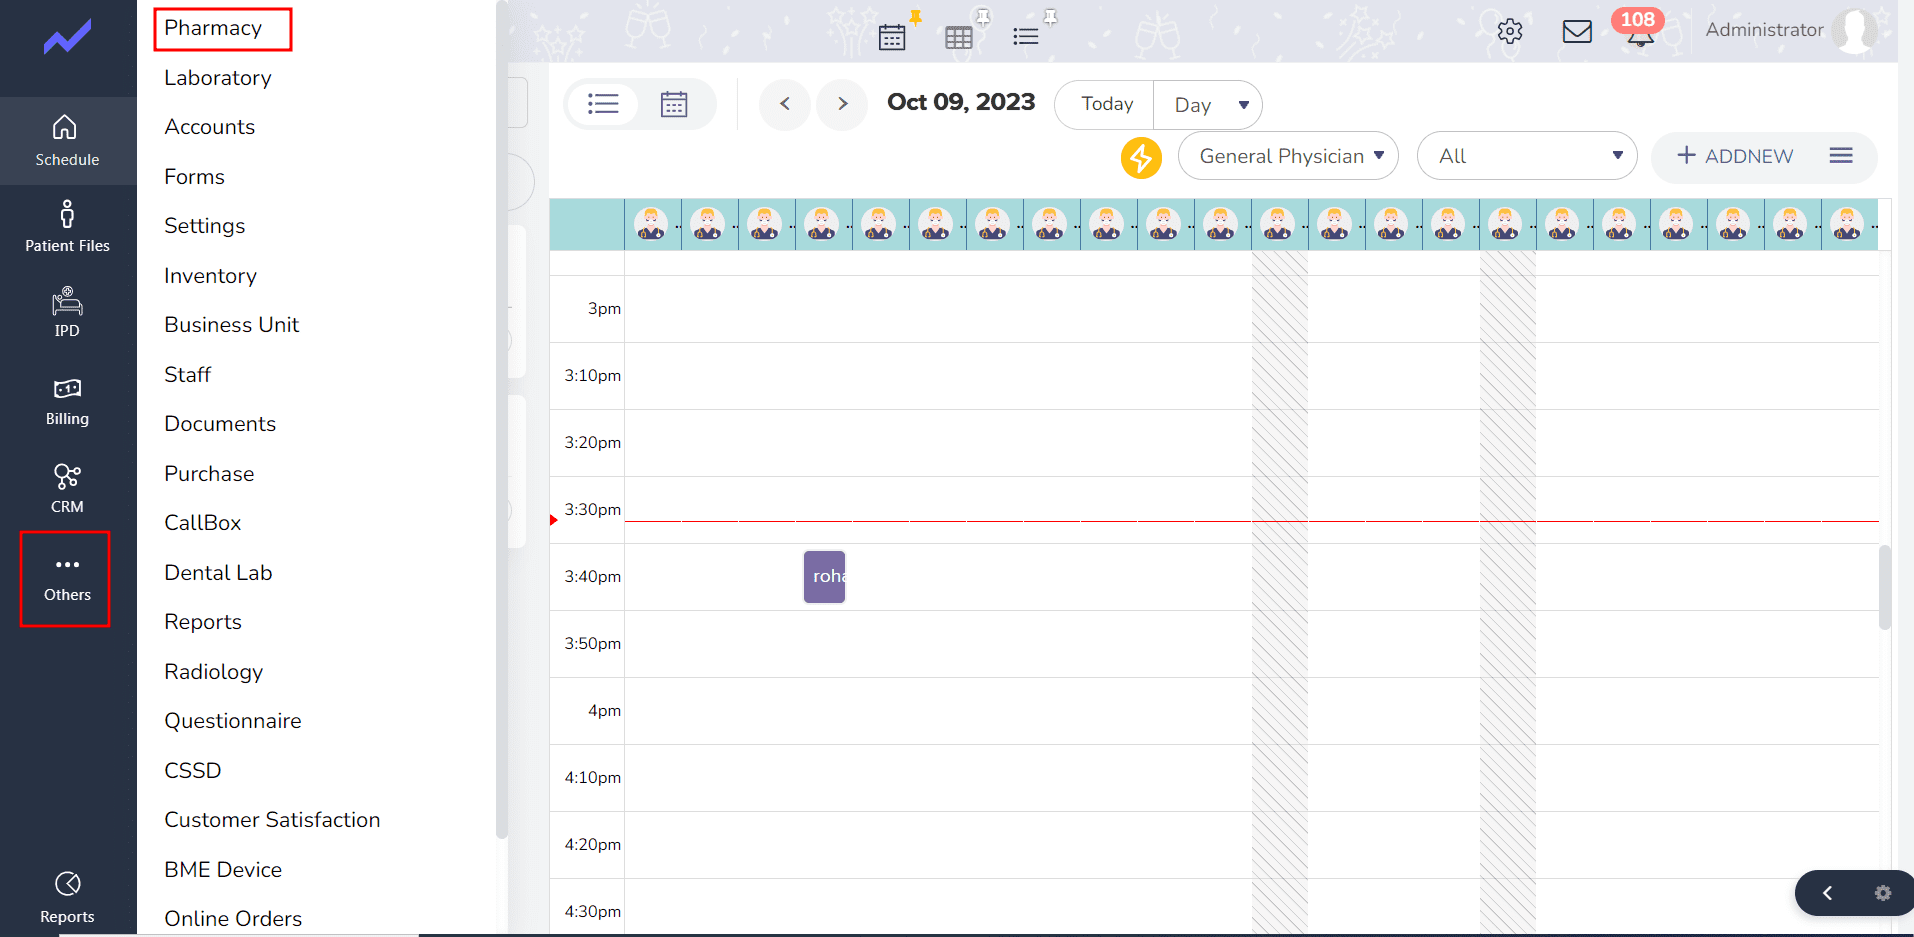
Returning to the schedule screen, click on “Others,” and select the “Pharmacy” option. Here, you can choose the patient for whom you’ve added the prescription and save it accordingly.
To conclude, perform a final check to confirm that the inventory items you intended to dispense based on the prescription have been successfully and accurately dispensed. This process ensures that inventory management related to patient care is efficiently handled.
Fig :Inventory Dispense
- Begin by checking the current stock of inventory.
- Next, click on the toggle button within the schedule screen.
- Locate the three dots associated with a patient and select “Clinical Note.”
- Inside the Clinical Note screen, click on “Prescription plus add” to prescribe the inventory.
- In this Prescription screen, ensure you fill out all the required fields, and then save the prescription.
- Return to the schedule screen and click on “Others.”
- Select “Pharmacy,” and choose the patient for whom you added the prescription, then save it.
- Finally, verify that the inventory items you Dispensed based on the prescription have been successfully dispensed.


