Verifying Set Offer Price on Invoice #
To verify that the offer price you have set is working accurately for service, lab, inventory, and radiology, you need to do the following:
- First, create an appointment for any patient.
- After that, add the service, lab, inventory, and radiology items for the patient.
- Once added, generate an invoice for that patient.
- When you go to the invoice screen, check the prices of the selected items to see if the price is the offer price you set or the actual price of the item.
If the prices are the offer prices, it means the Offer Pricing module in staff is working accurately. After that, you can finalize the invoice.
Create Appointment:
From the Schedule screen, go to the Appointment Detail screen. To create an appointment, use the search bar to find the patient for whom you want to make the appointment.
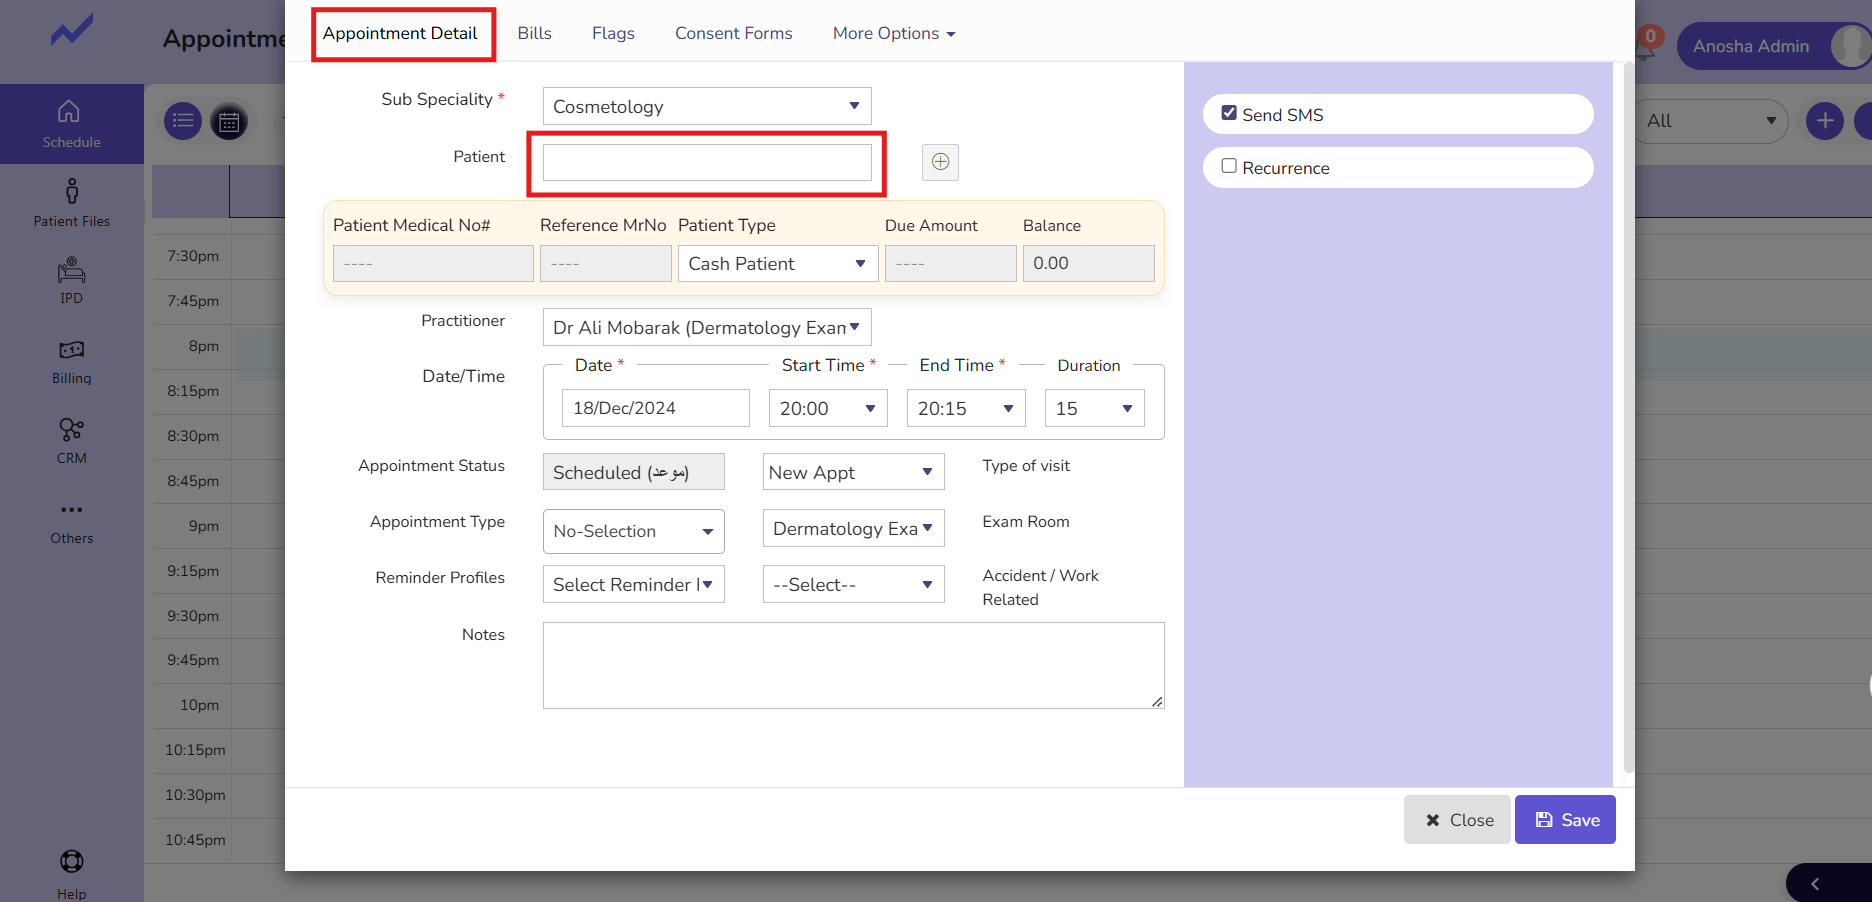
Select the patient.
Create the appointment only for the doctor for whom offer prices are set. Since I have set offer prices for Dr. Ali Mubarak, I am creating the appointment with Dr. Ali Mubarak.
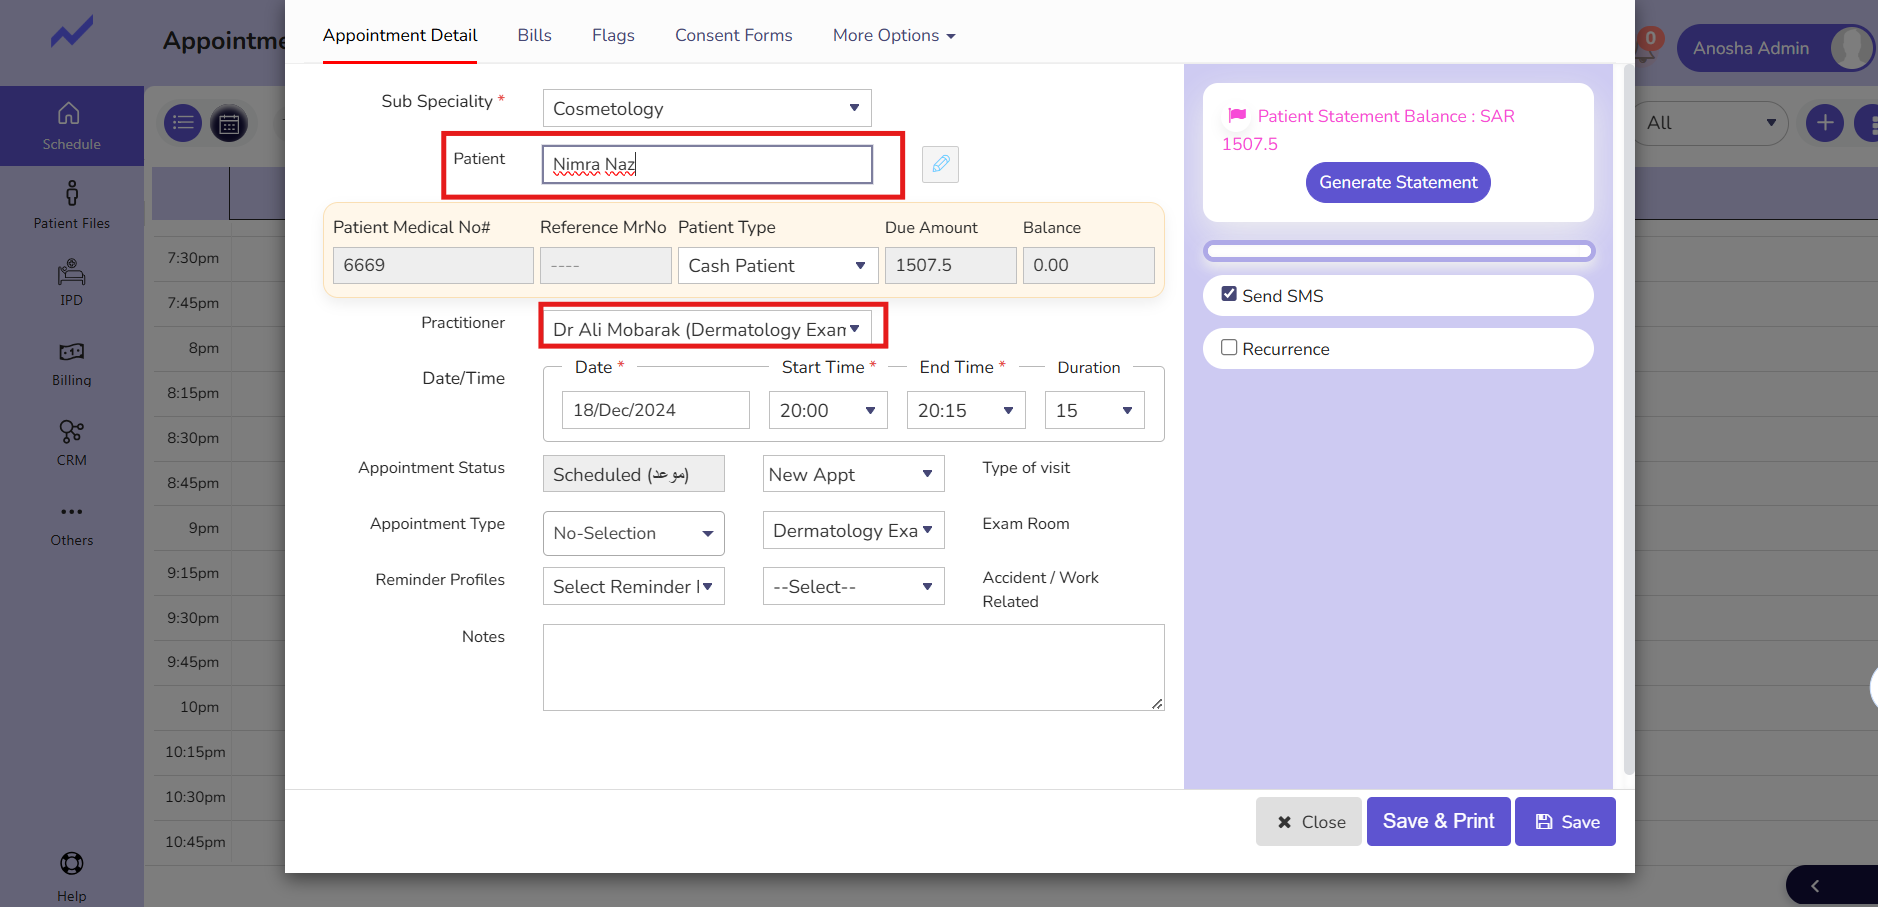
Now click on the save button.

Appointment will created for the selected patient.
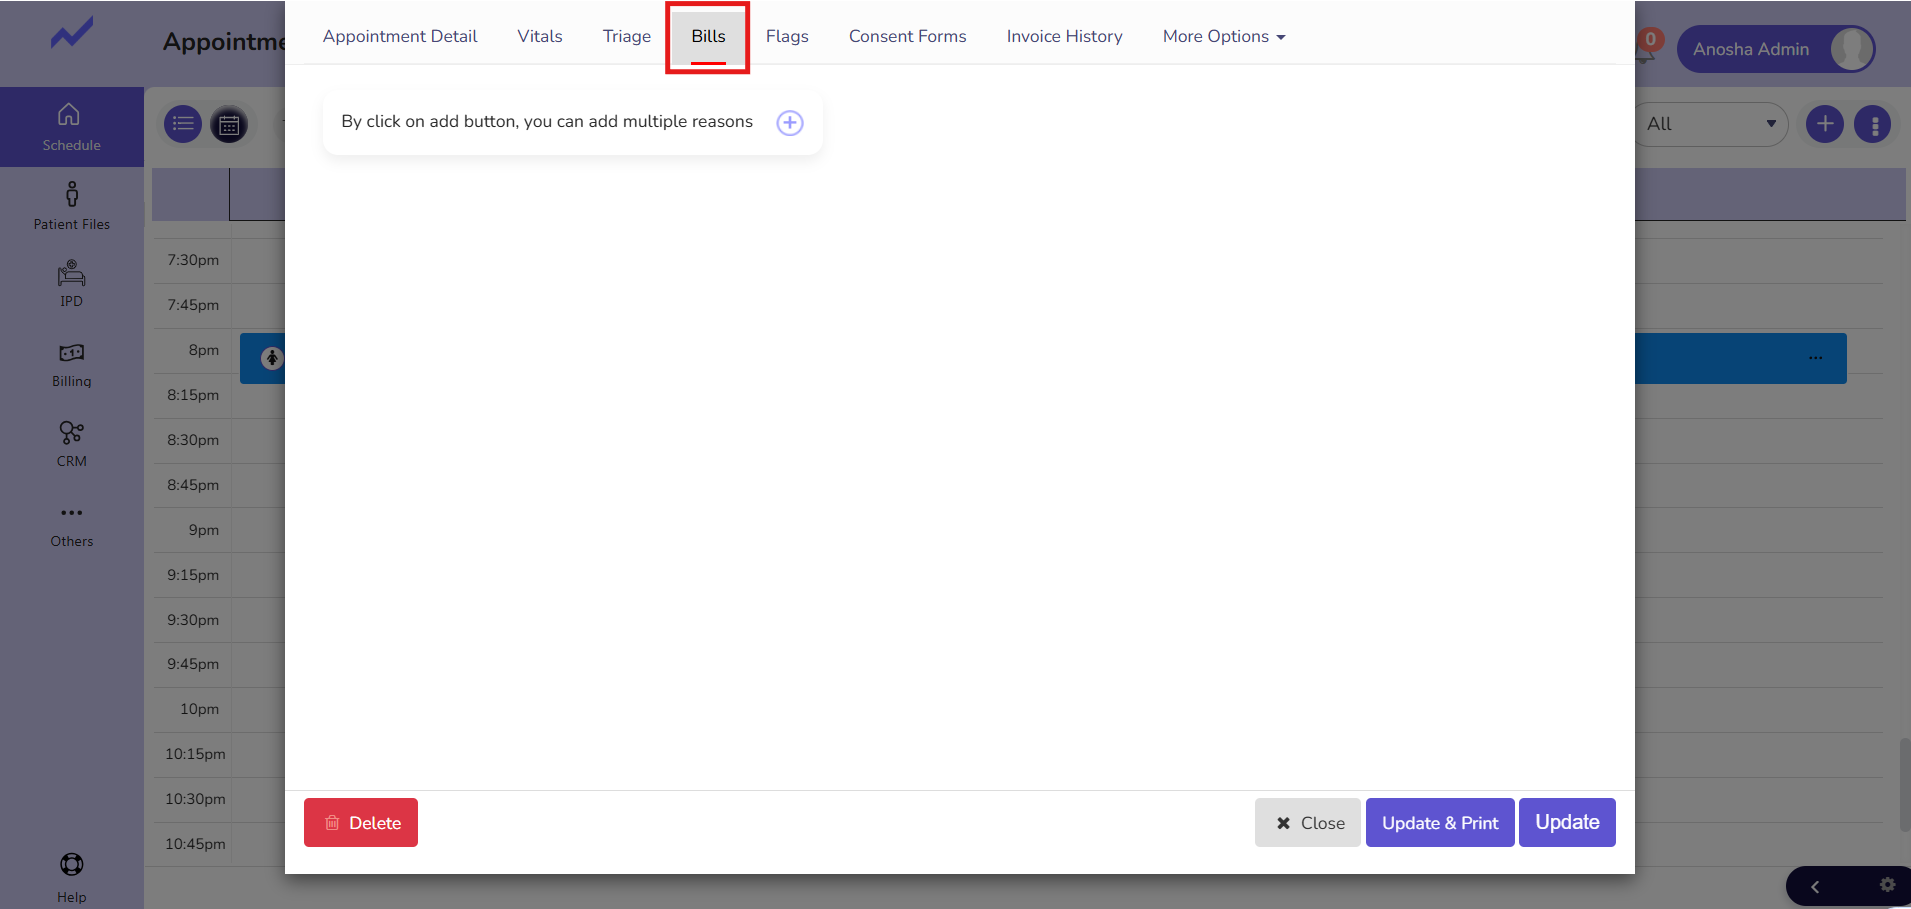
Appointment detail—Bill screen #
Adding Bill Item #
From this screen, only service items can be added.
Now from the appointment detail screen click on the bills tab to add service. When you click on Bills it will lead to the next screen.
Here to add service click on the ADD Icon.
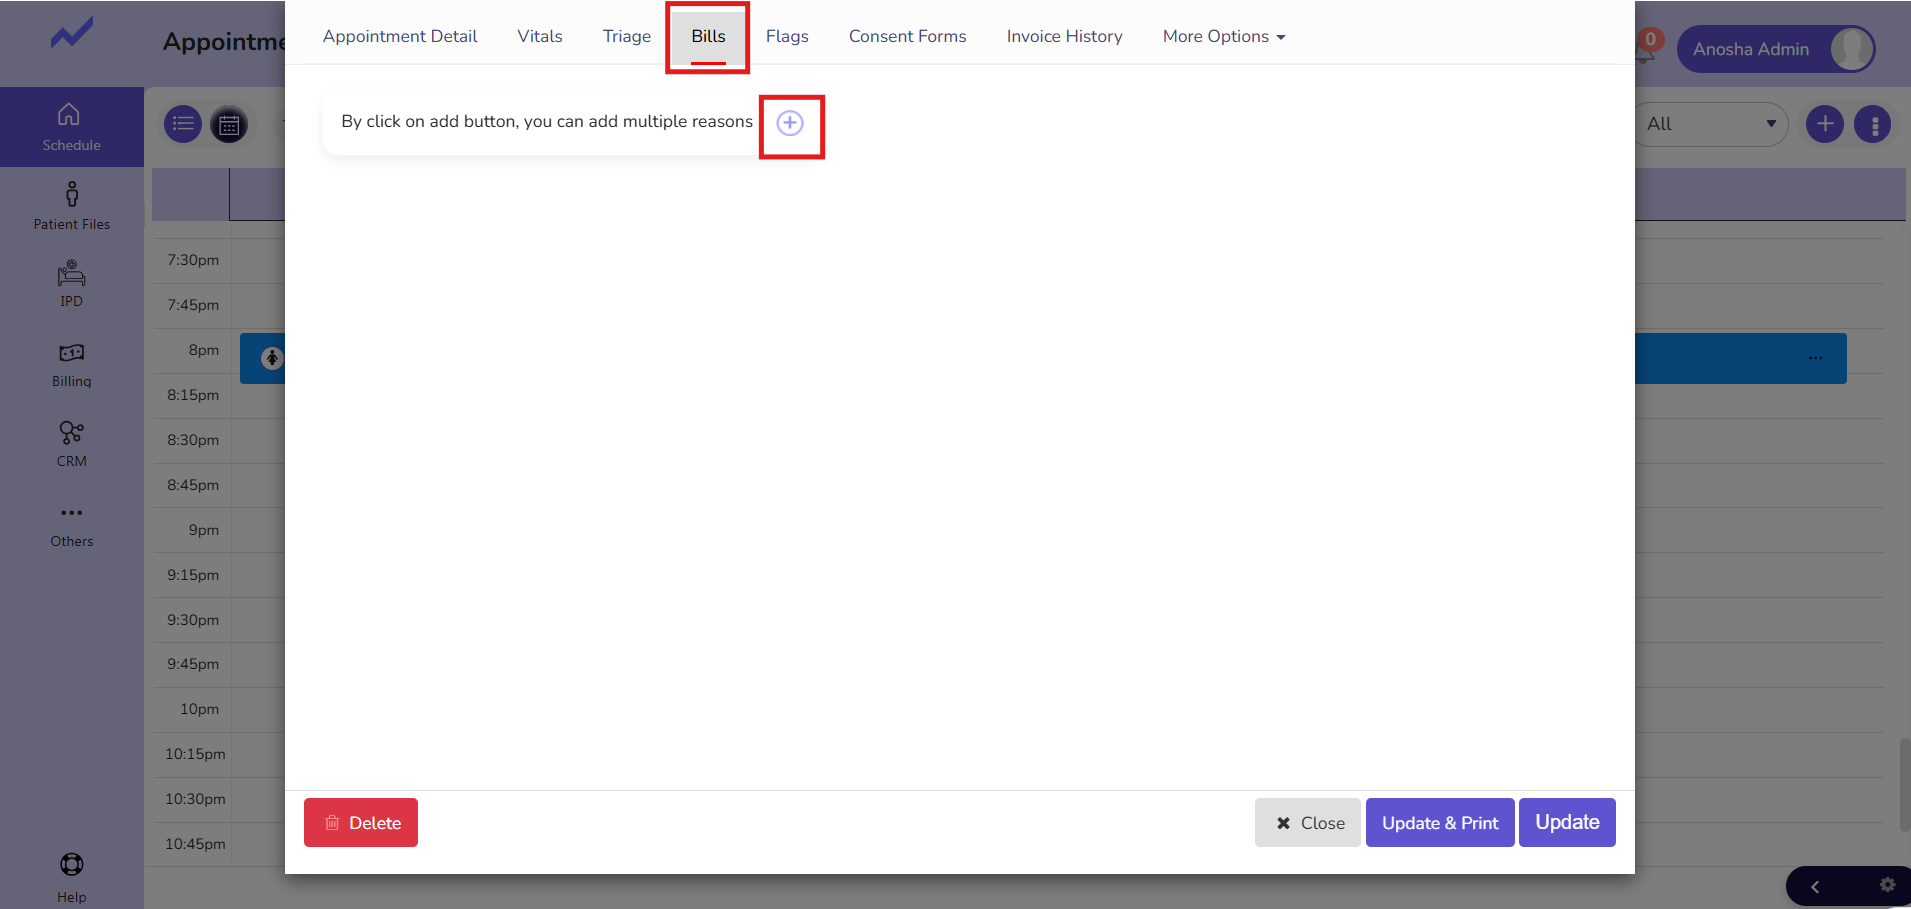
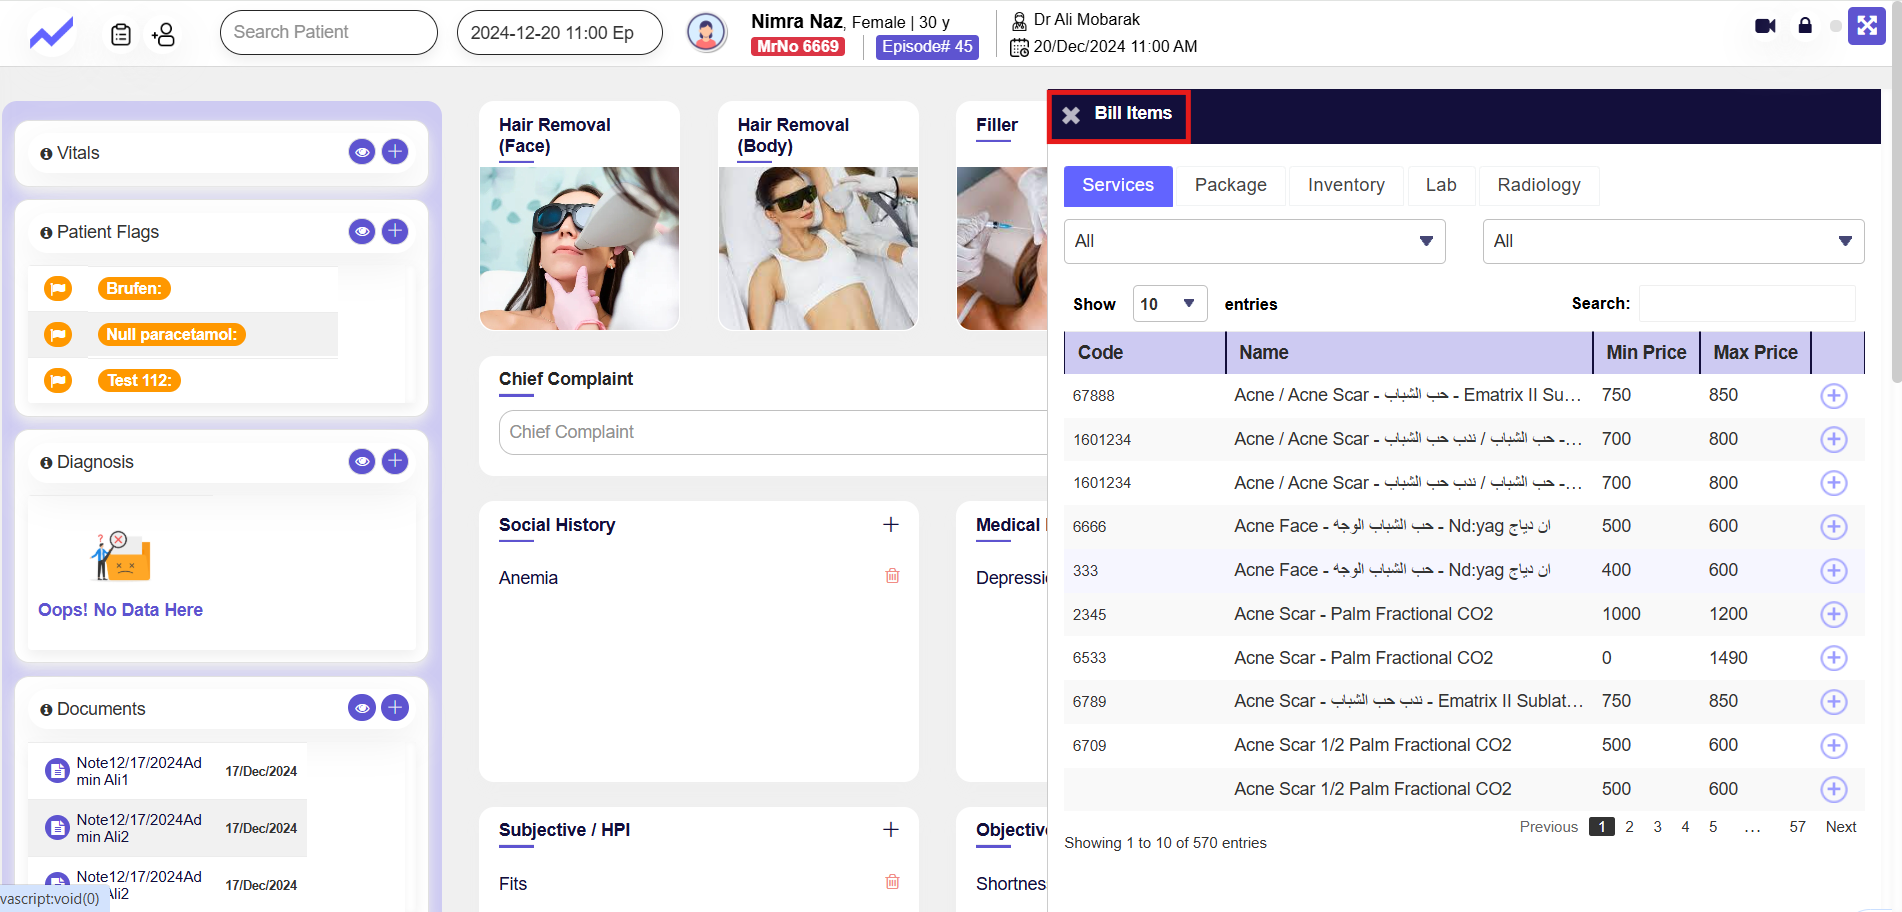
When you click on the ADD Icon it will lead to the Bill Items screen.
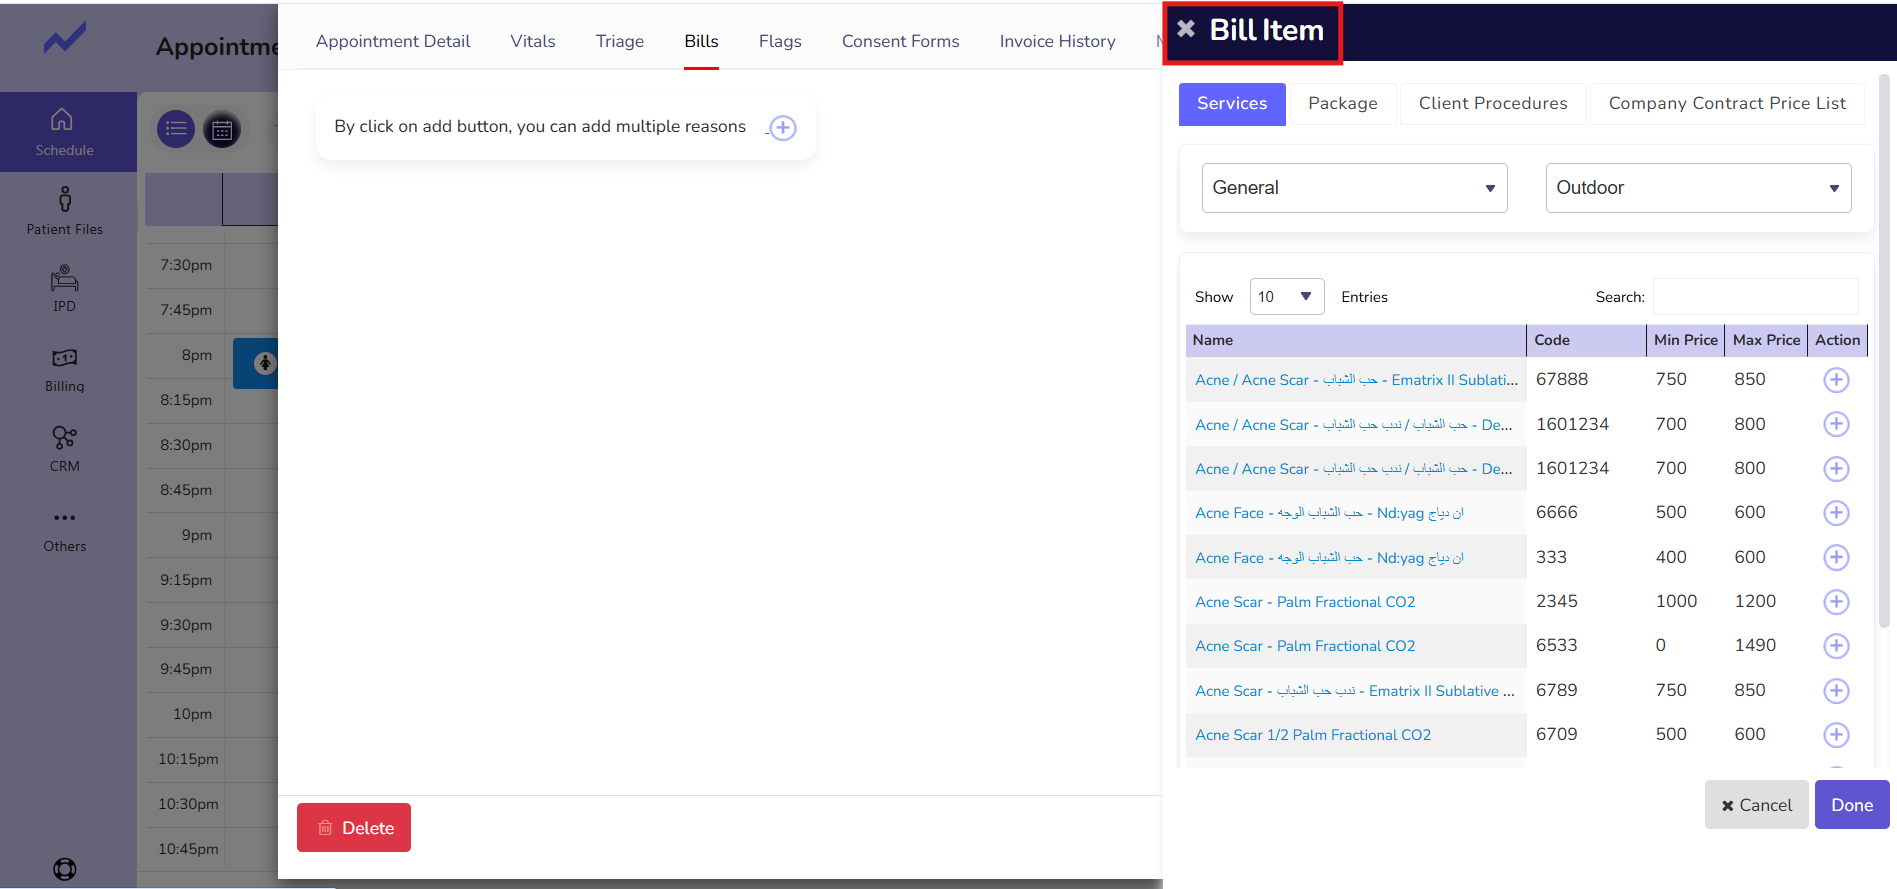
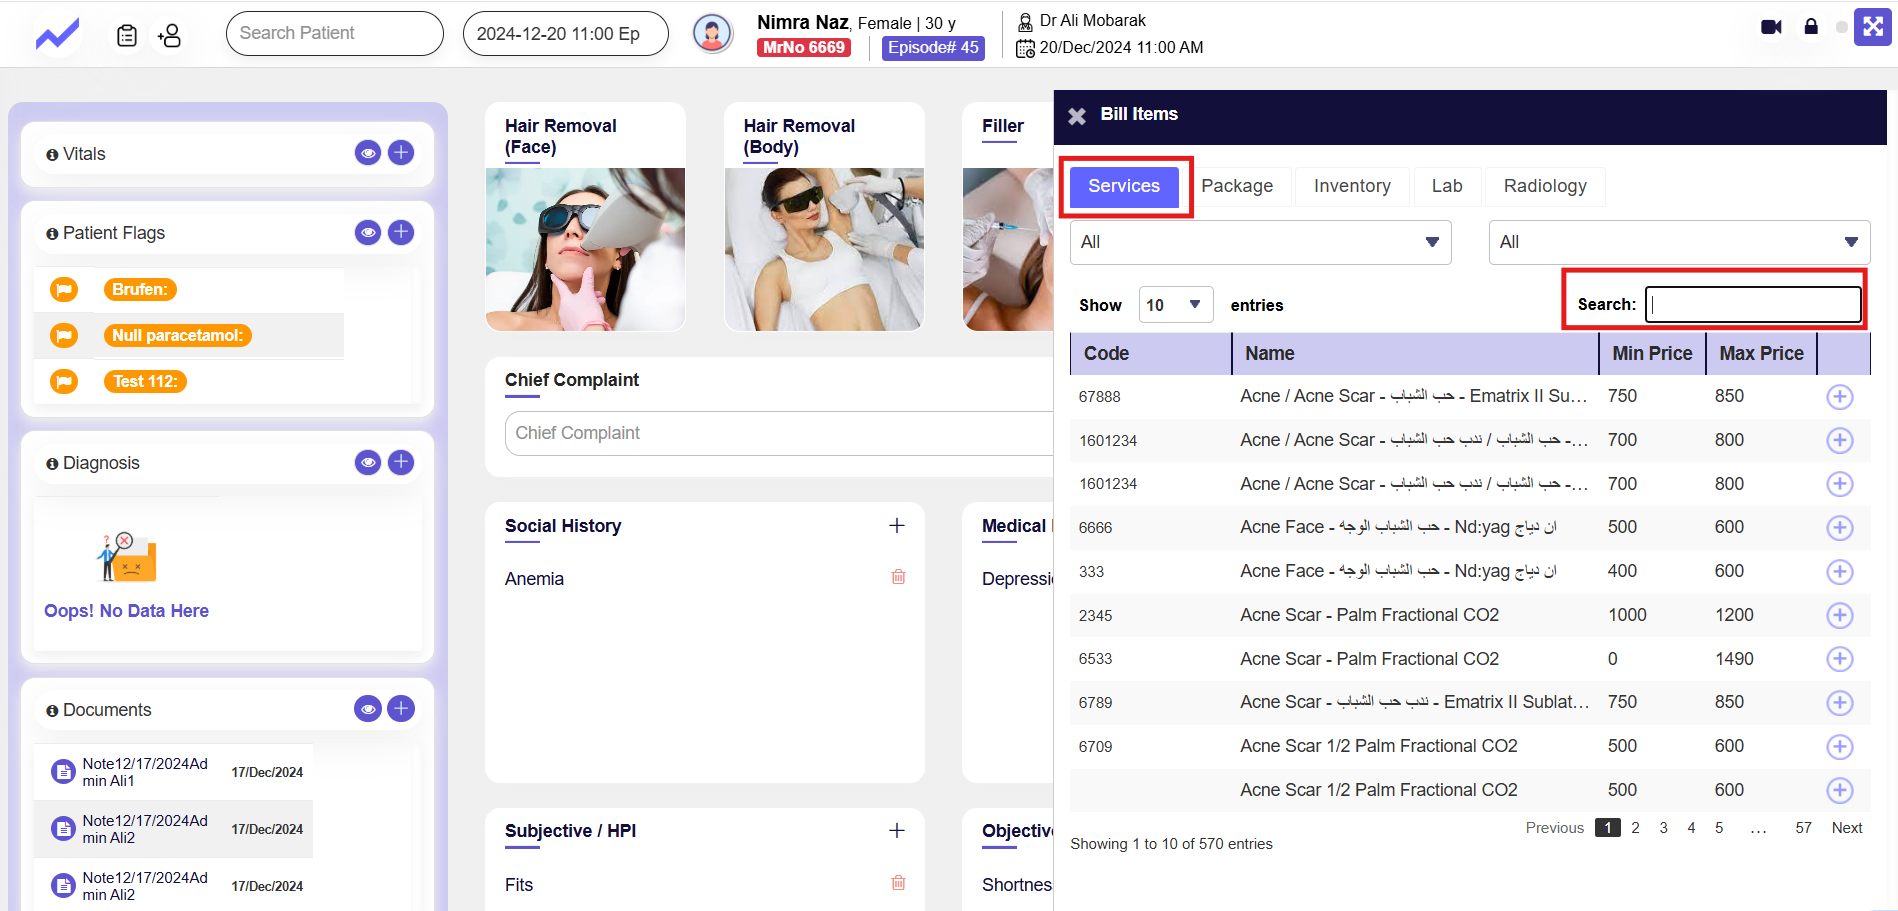
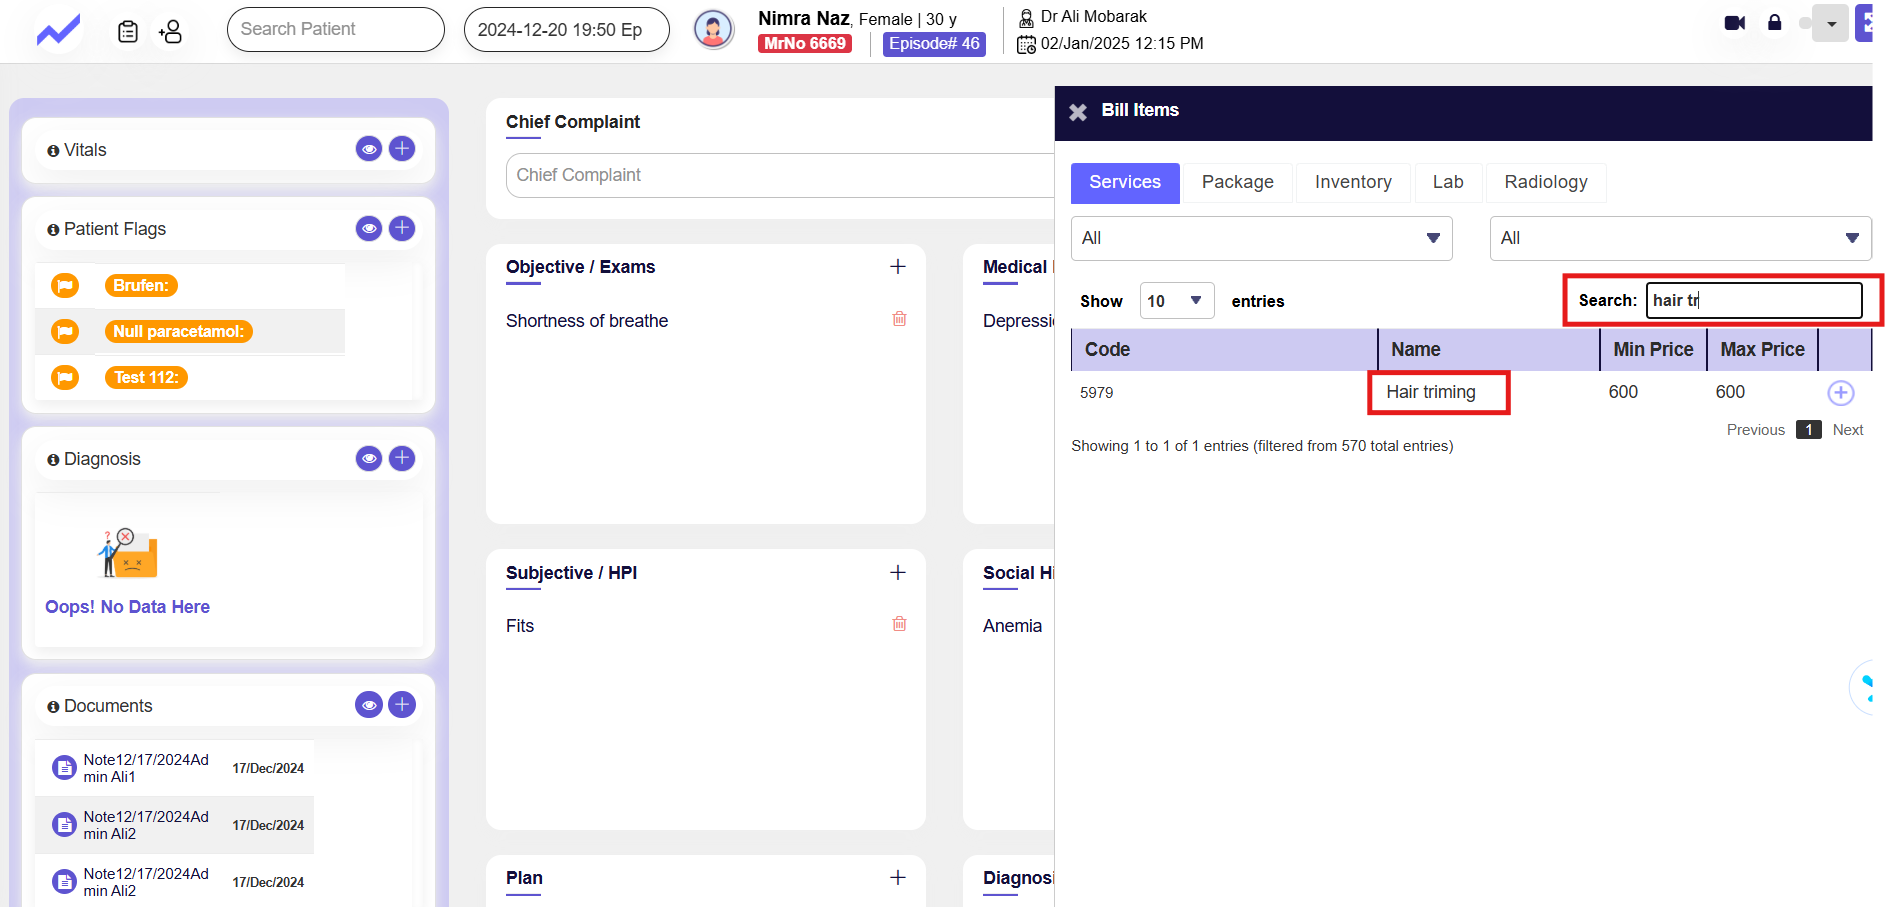
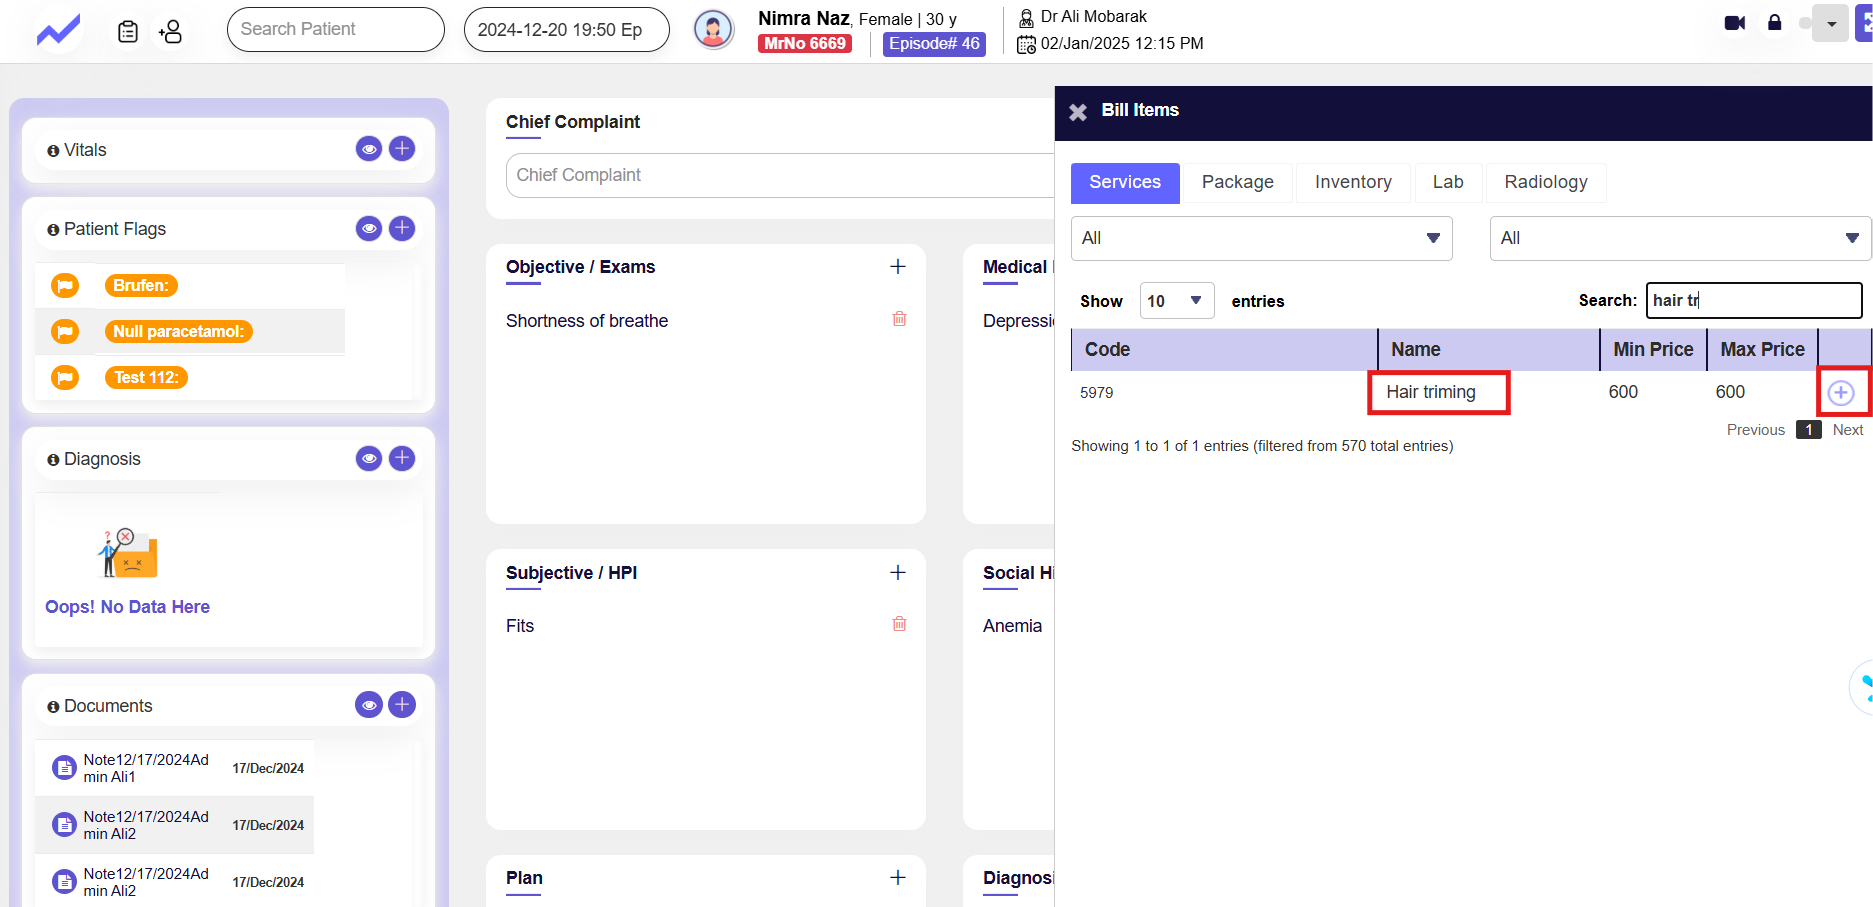
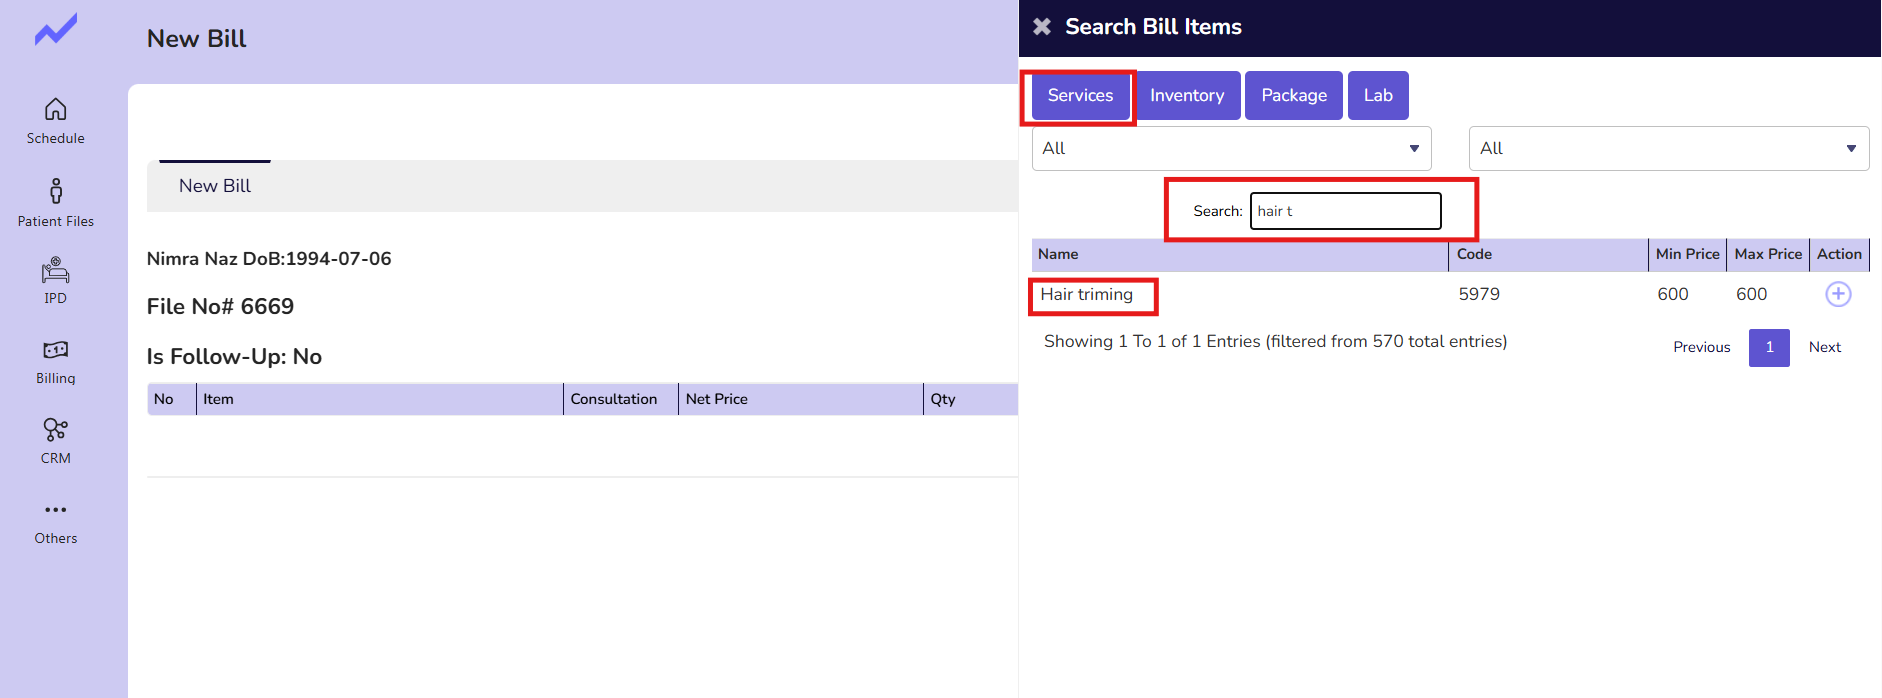
Now, click on the Service tab and use the search bar to find the service for which you have set the offer price.
Since I have set the offer price for the hair trimming service, I will search for that service here.
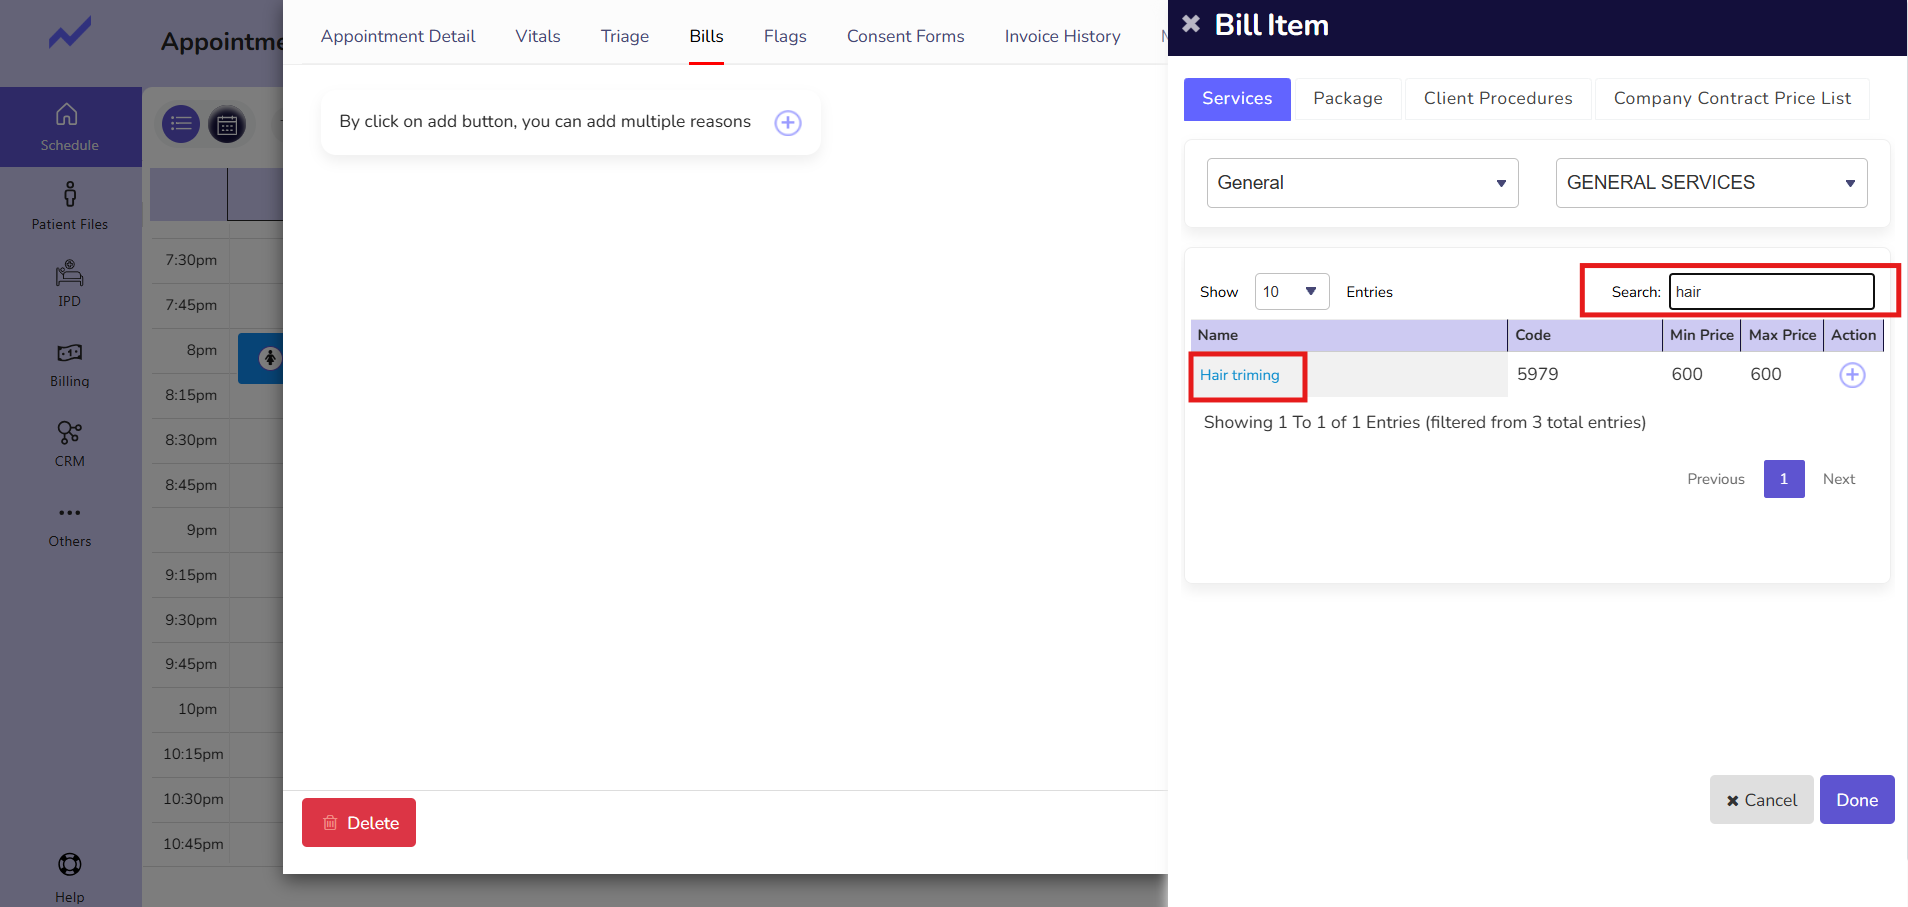
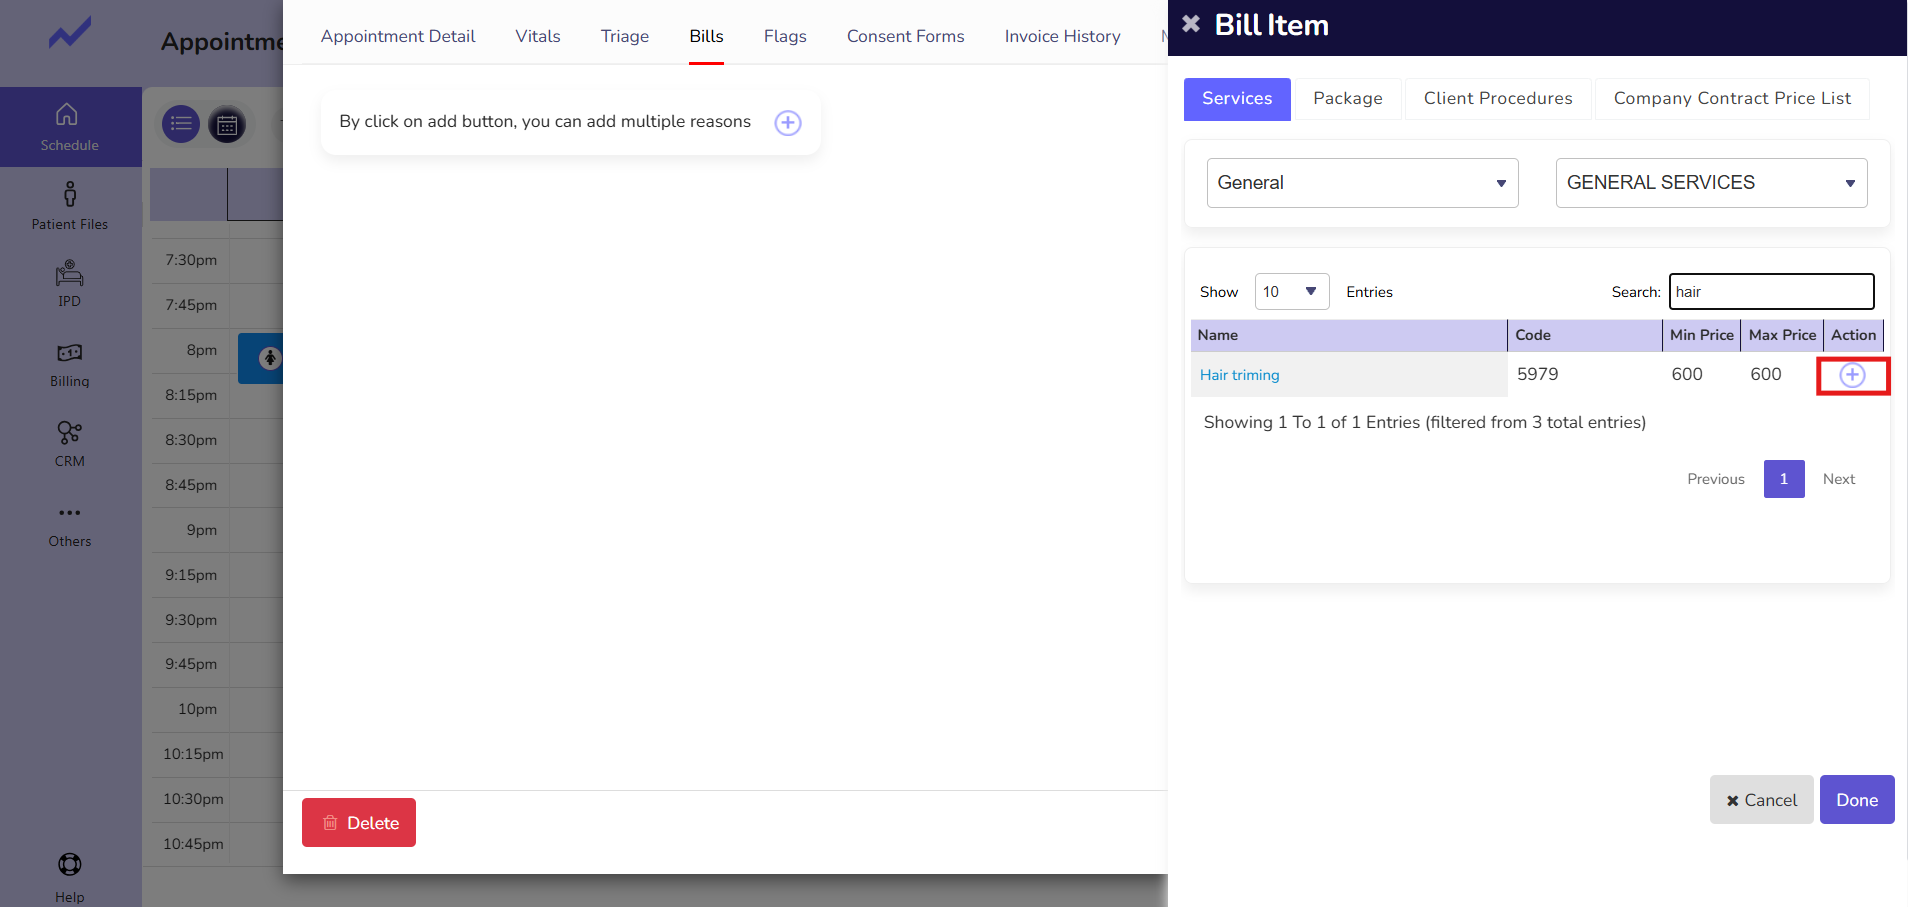
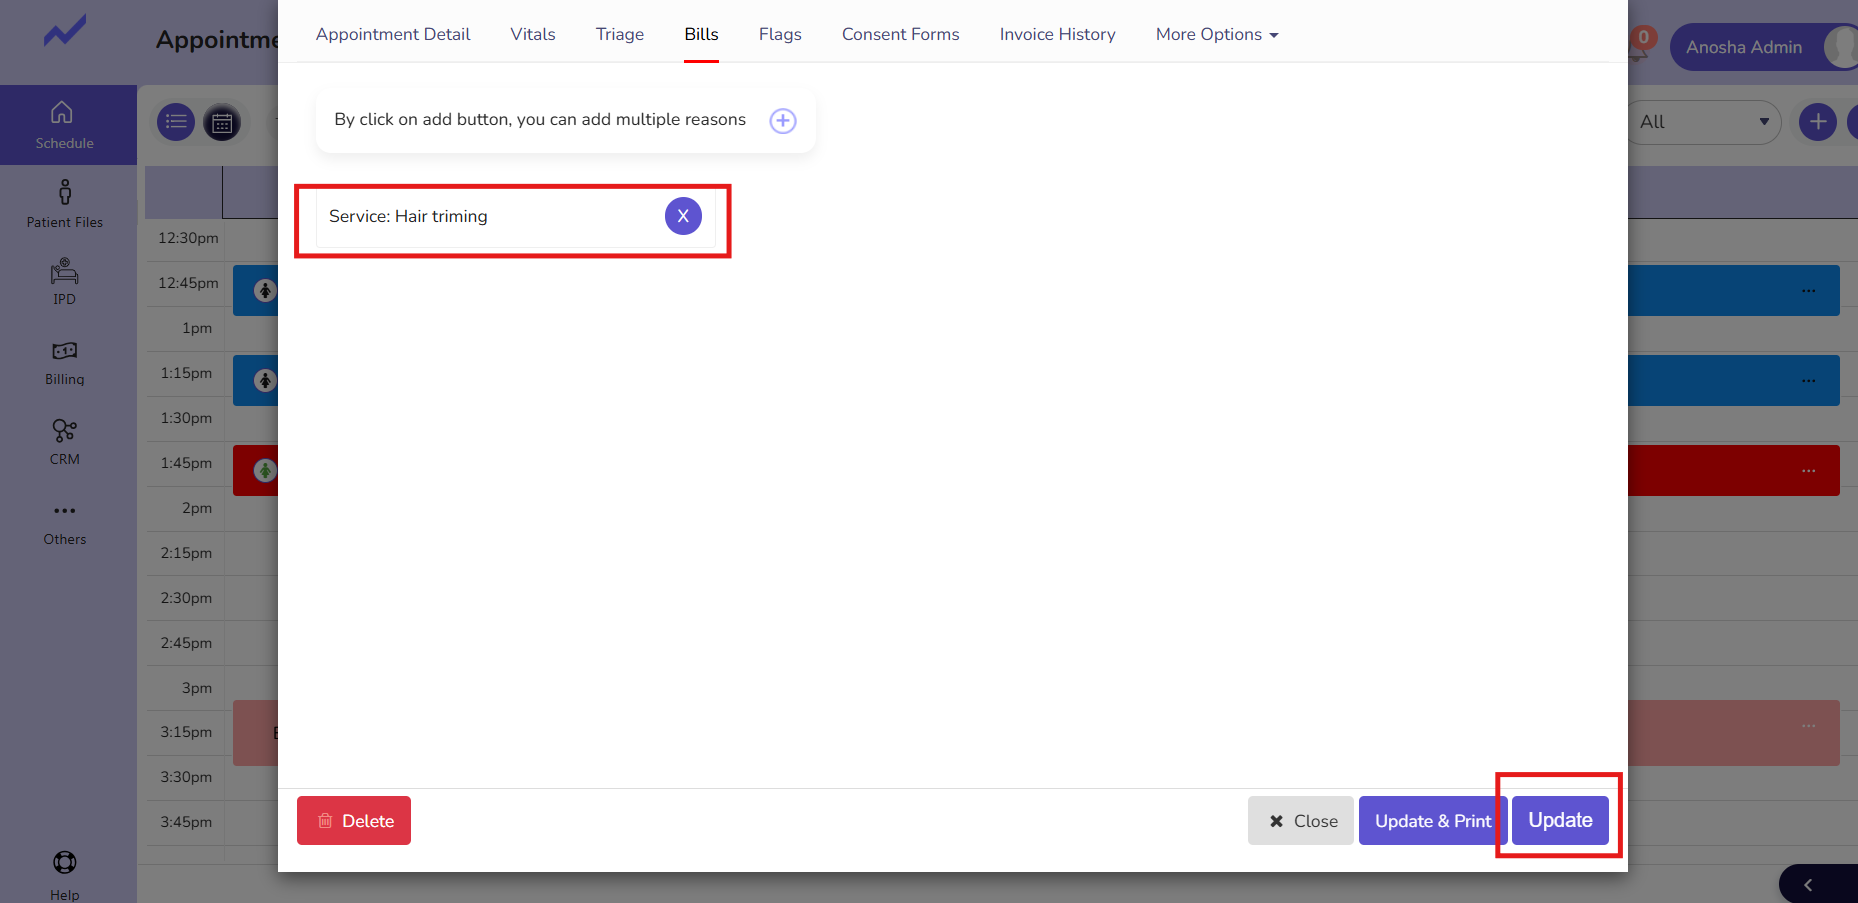
Now, click on the Add icon, and after that click on the DONE button the service will be added successfully.
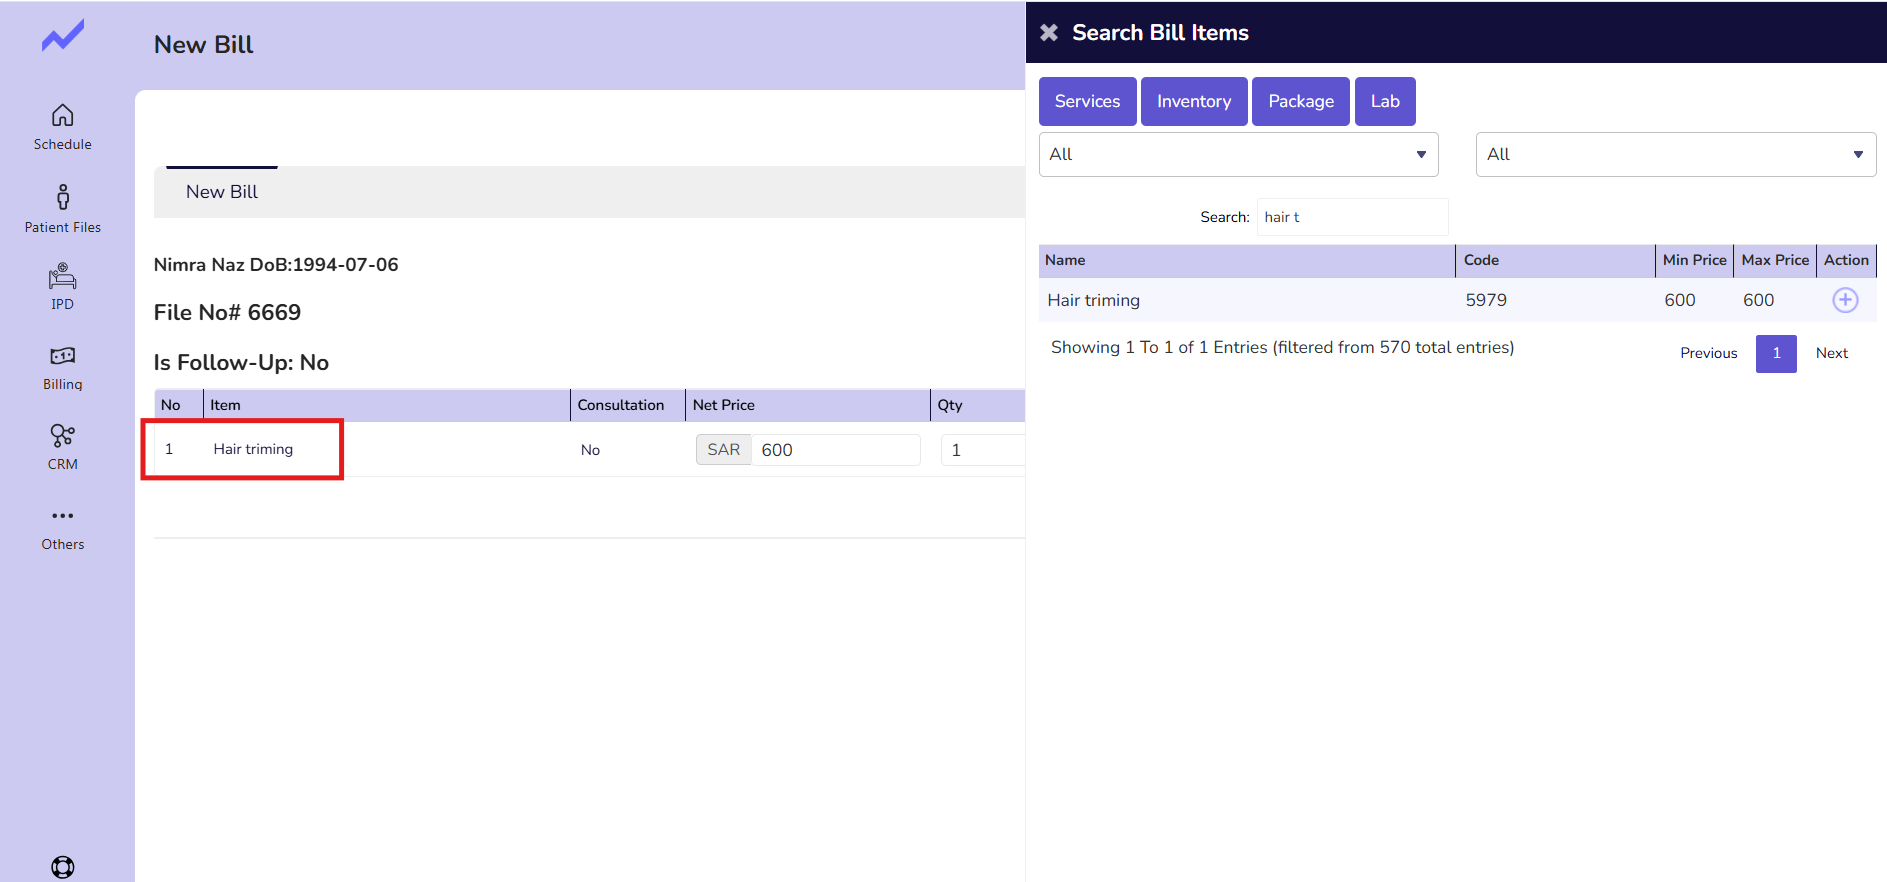
Service is added now click on UPDATE button to save the changes.
Generate Invoice (To verify offer price) #
Now, go to the Appointment Detail screen and click on the Generate Invoice button.
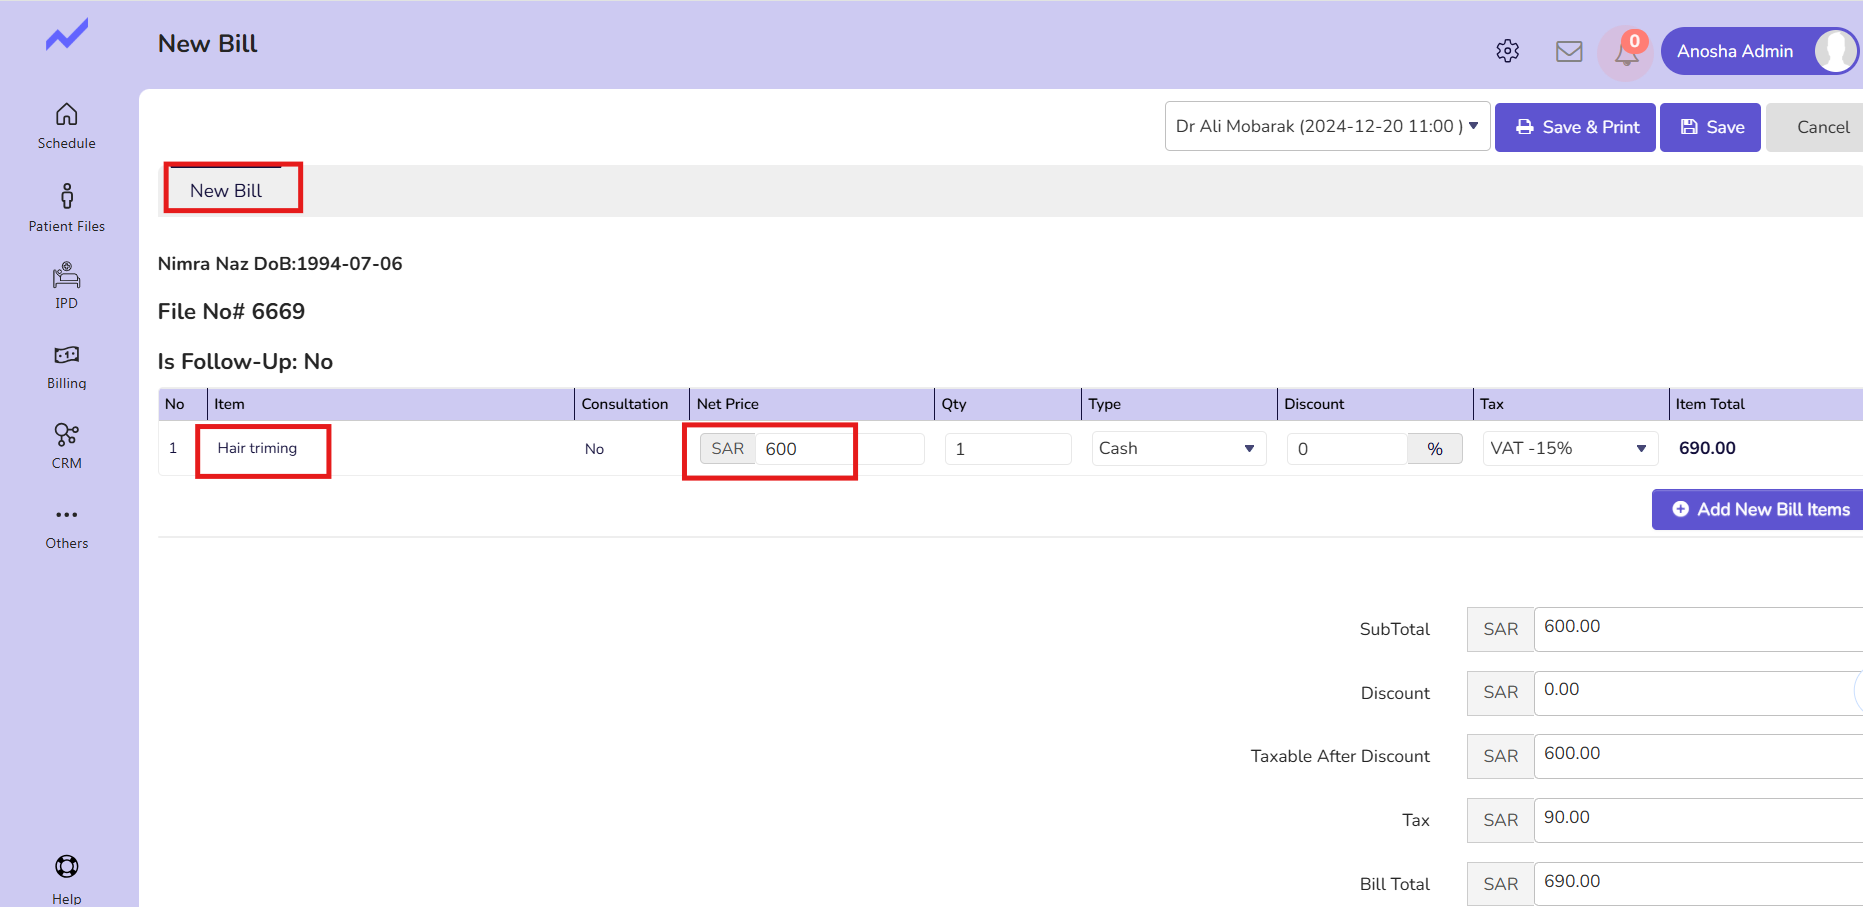
Here you can see the offer price is showing against this service
Actual price == 800 offer price == 600
This means the offer price feature is working accurately for appointment details—bill screen.
Now you can generate the invoice by clicking on the save and print button

Clinical Note Screen #
Adding Bill Item #
Go to to Appointment detail screen and Click on the Clinical Note Button.
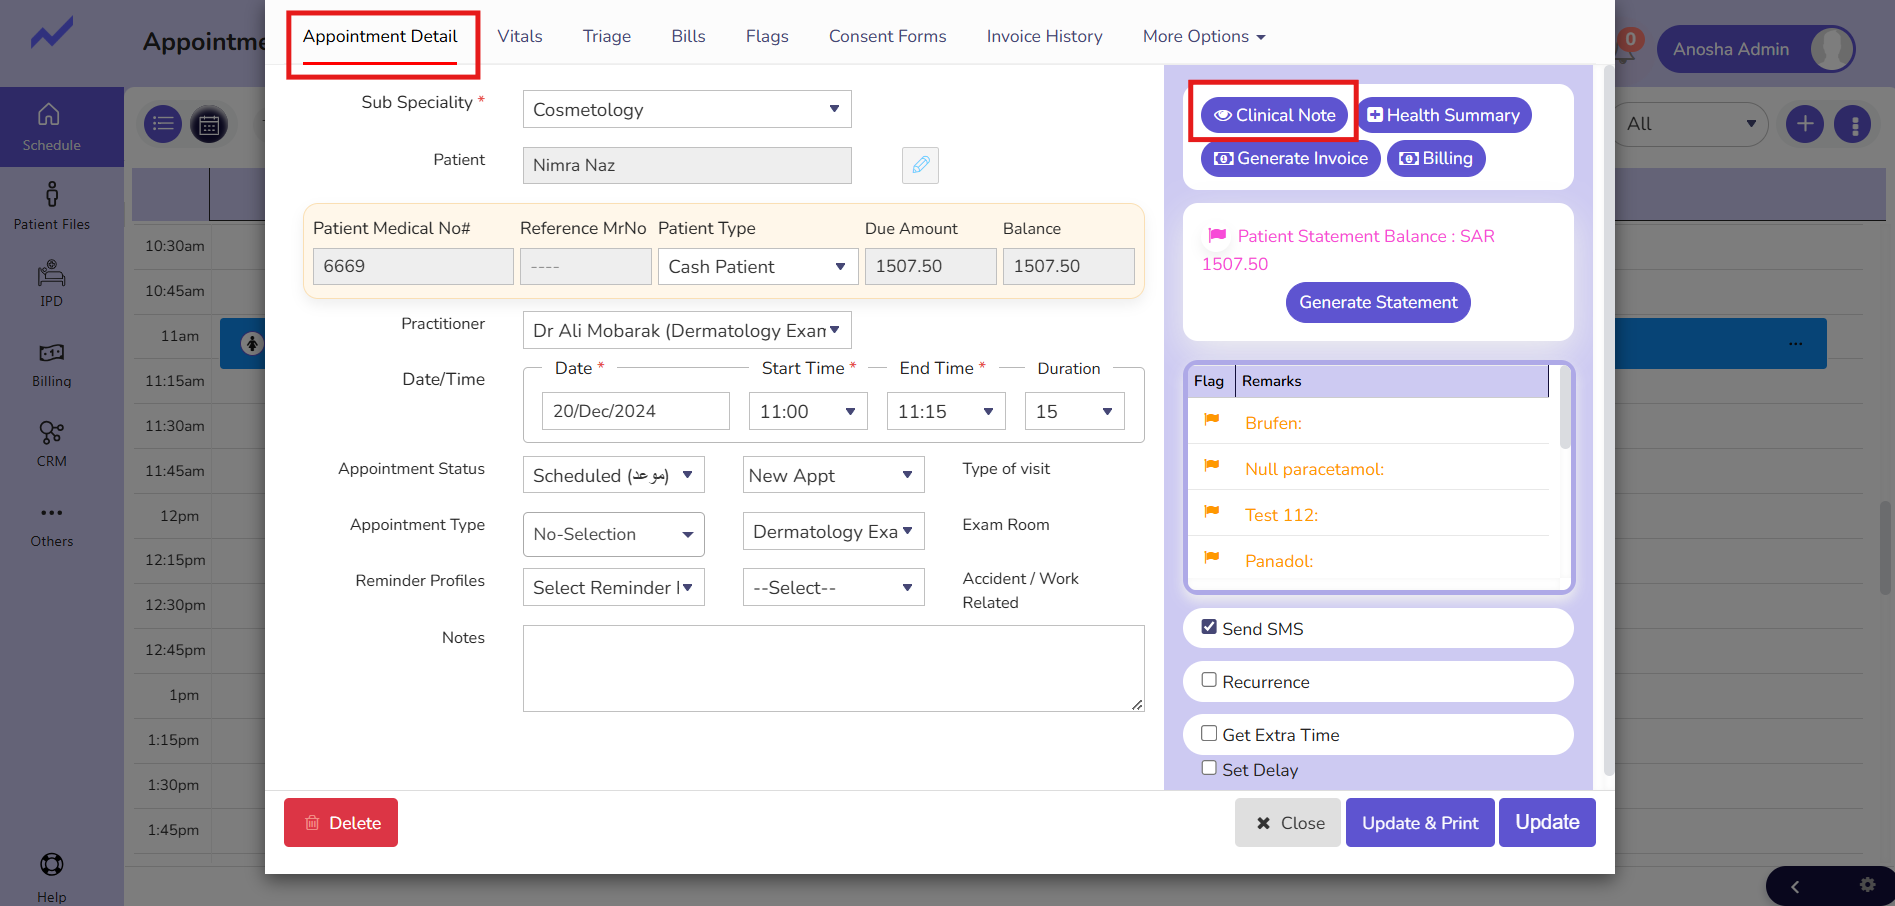
When you click on the Clinical Note button it will lead to the Clinical Note of the Patient.
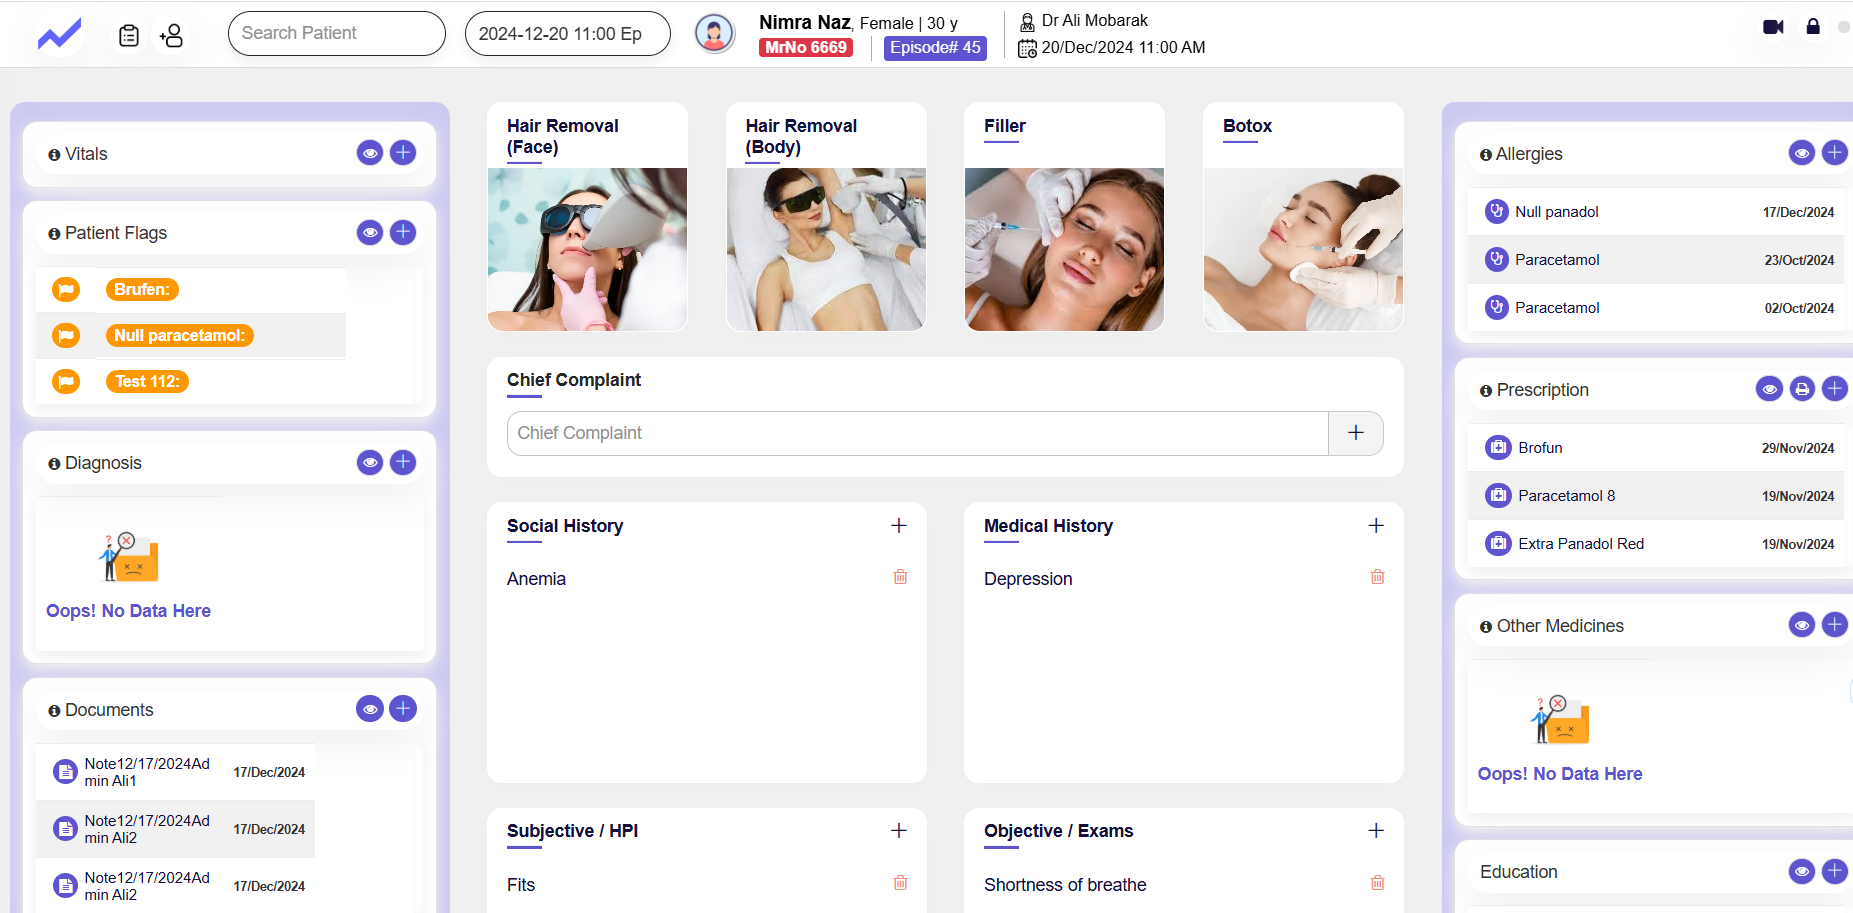
In clinical note go to the Billing tab.
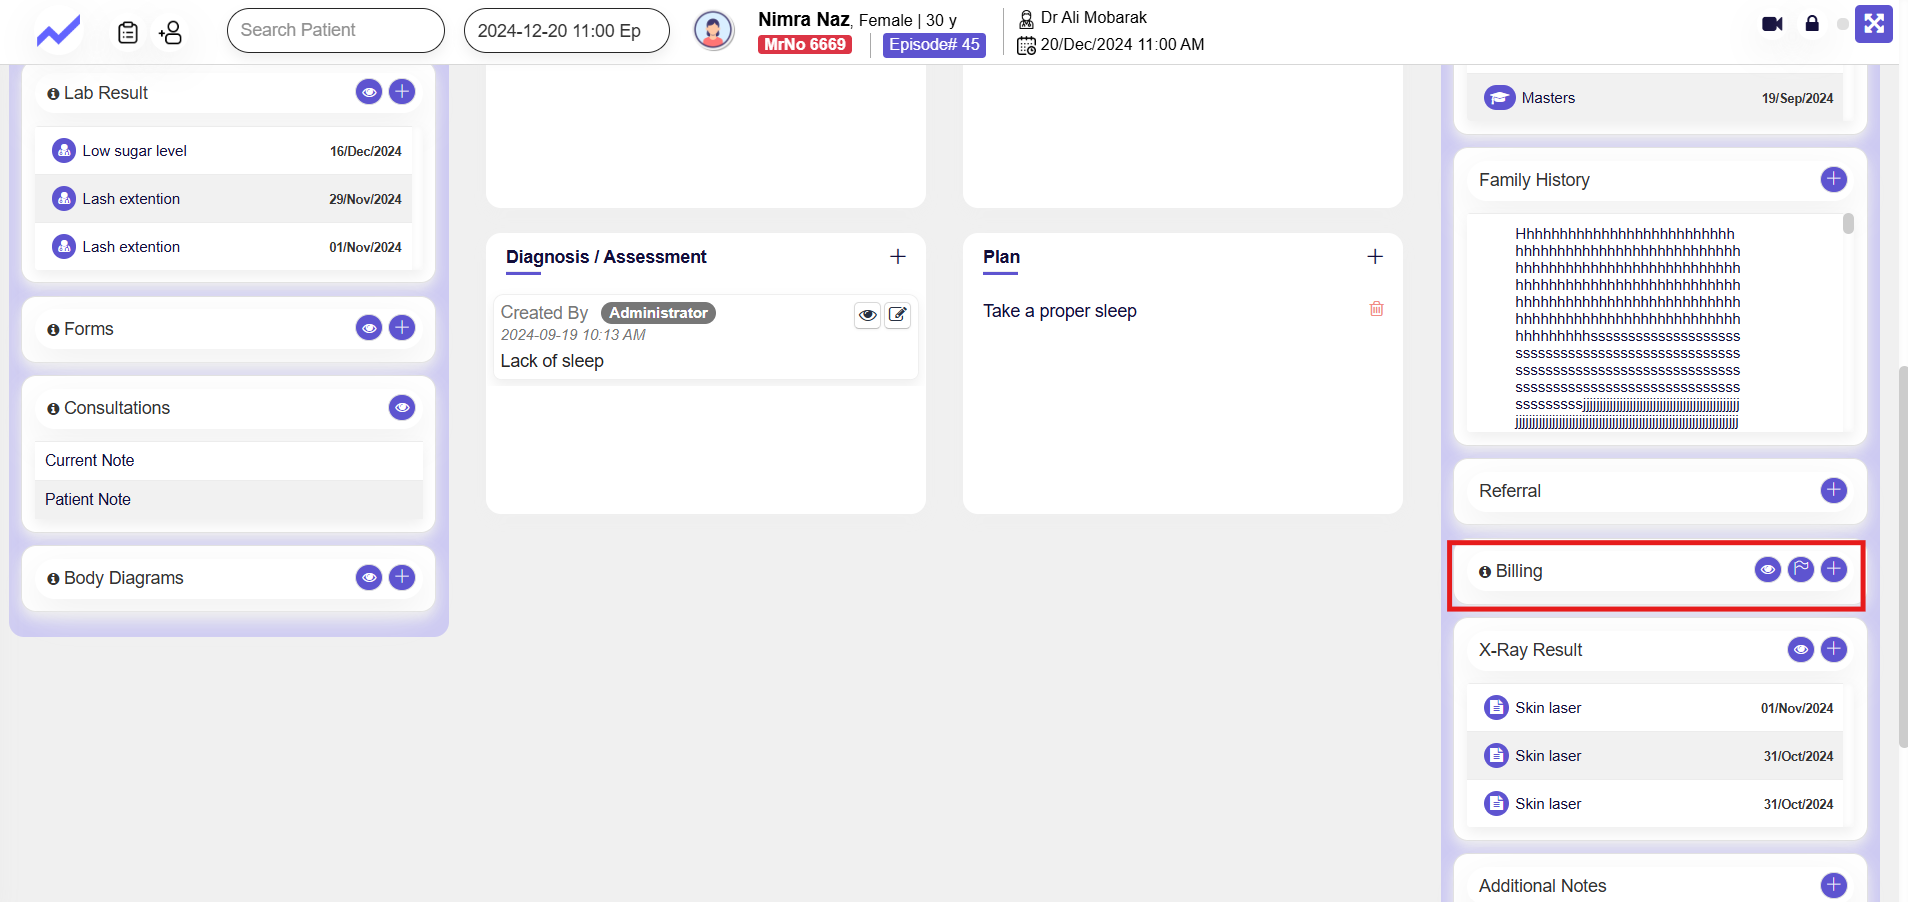
Now Click on the Add icon to add bill items.

Clicking on the add icon will lead to the Bill Item screen.
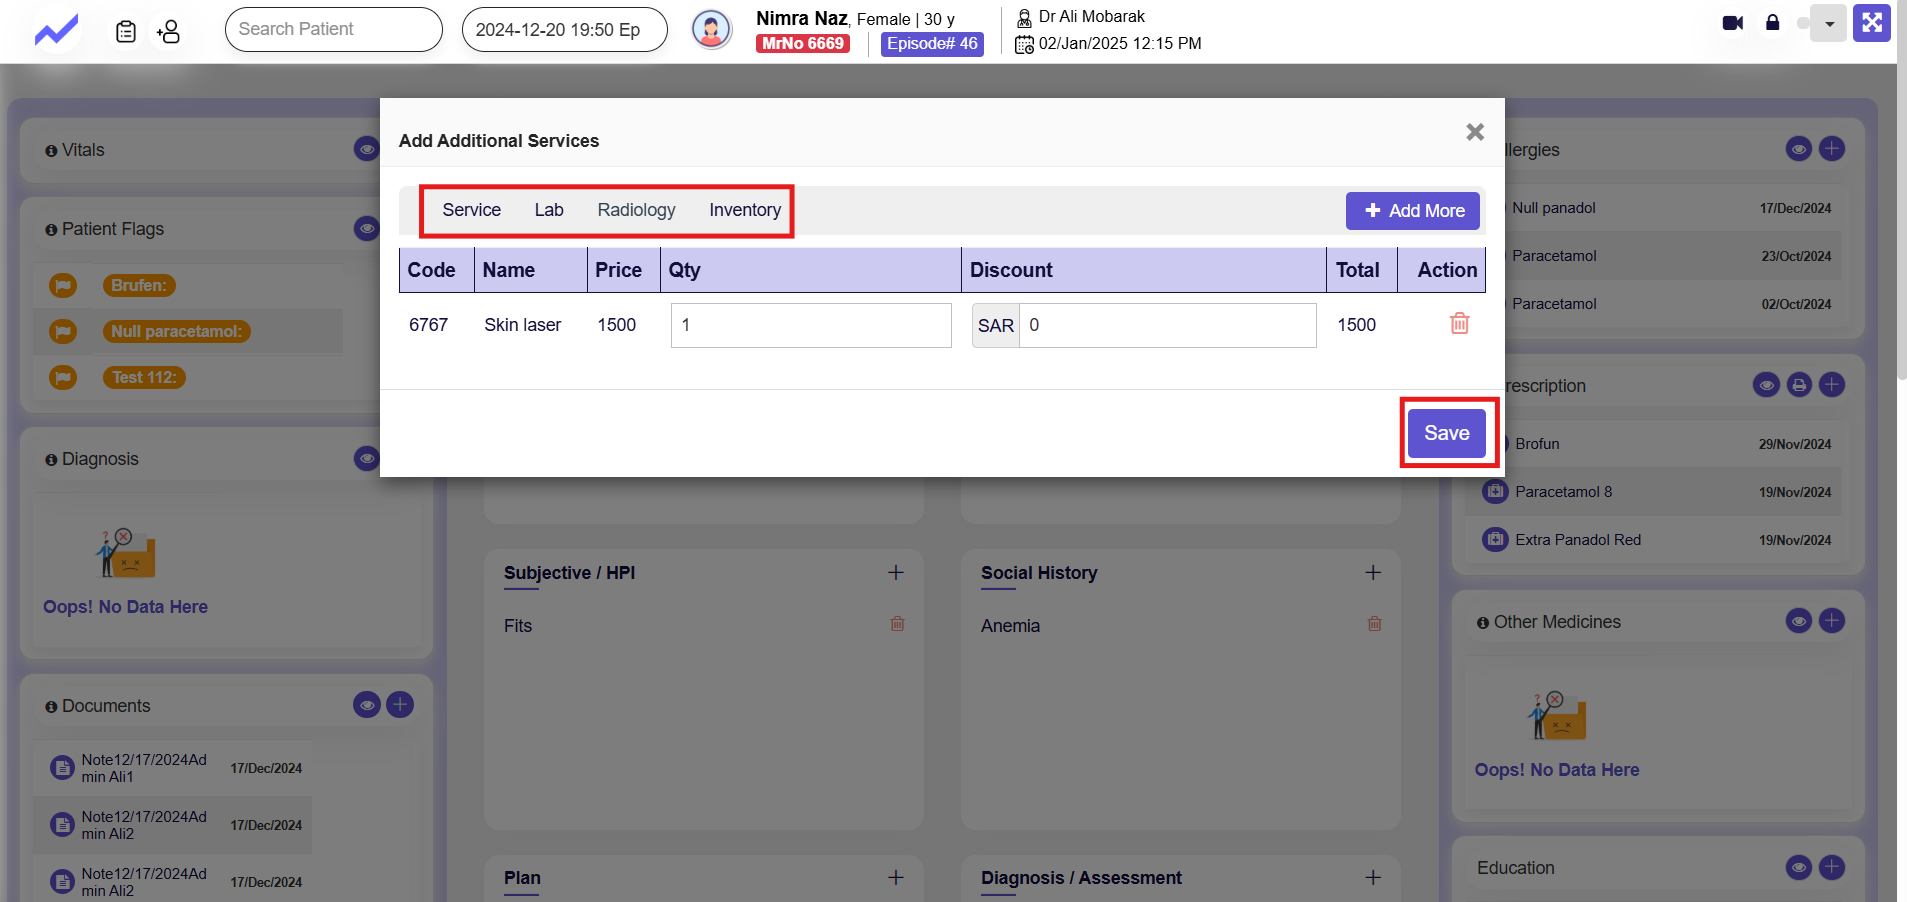
Here tabs are available for adding Lab, Inventory, Radiology, and Services.
Adding Service:
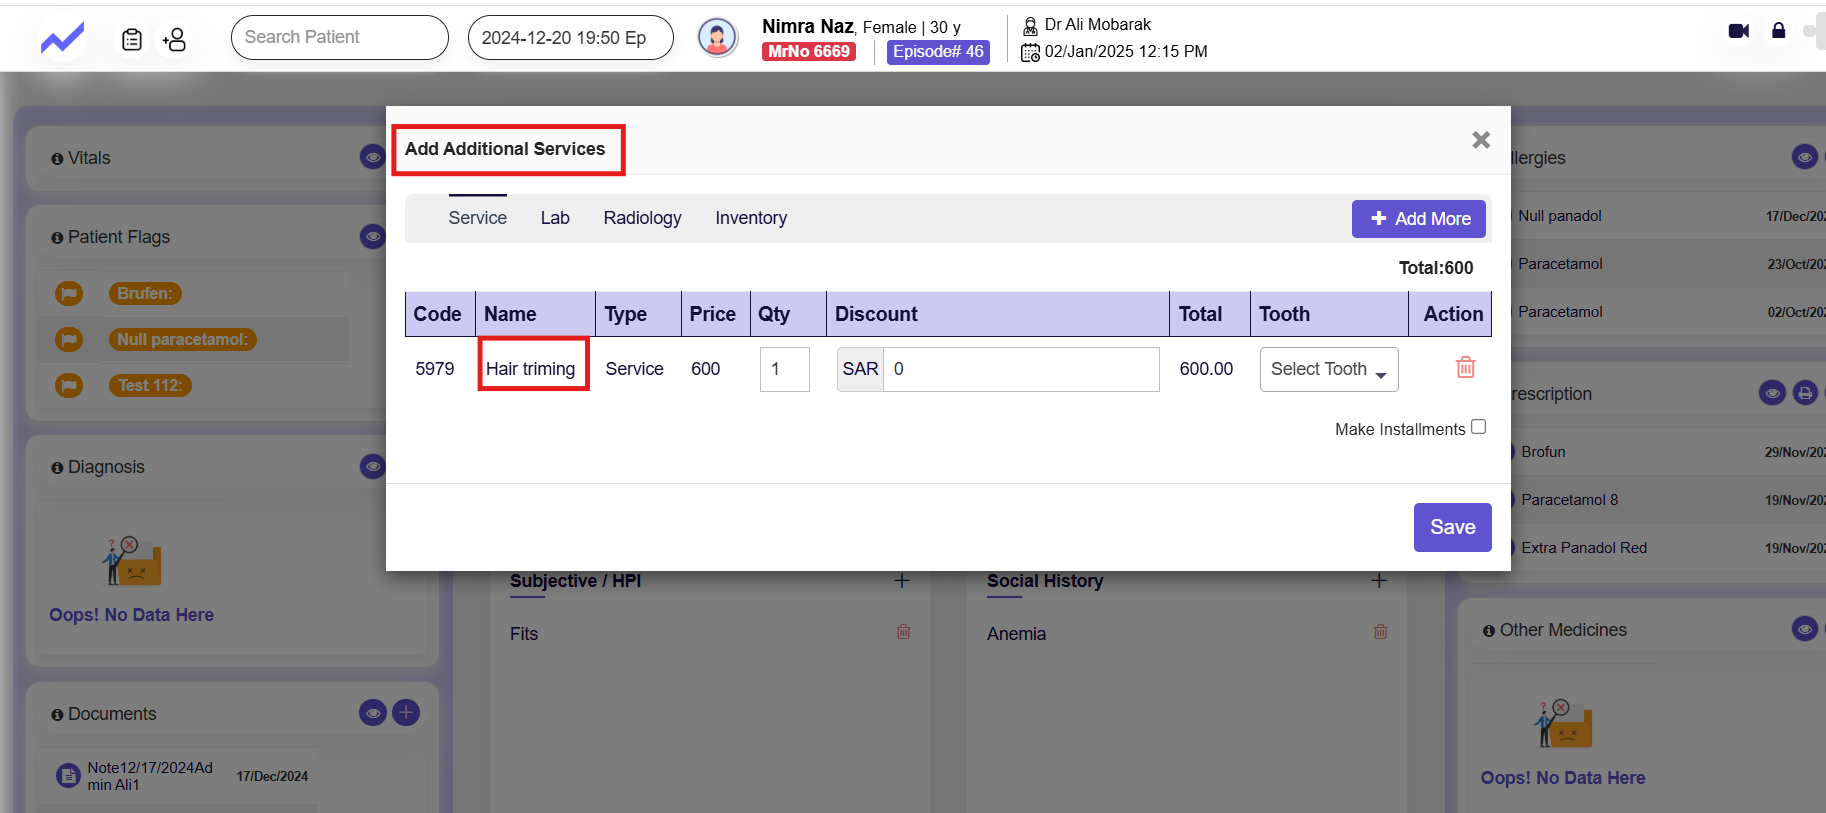
For adding services click on the Service Tab.
Here, you can use the search bar to find the service for which you have added an offer price.
I have added the offer price for hair trimming.
Now click on the add icon.
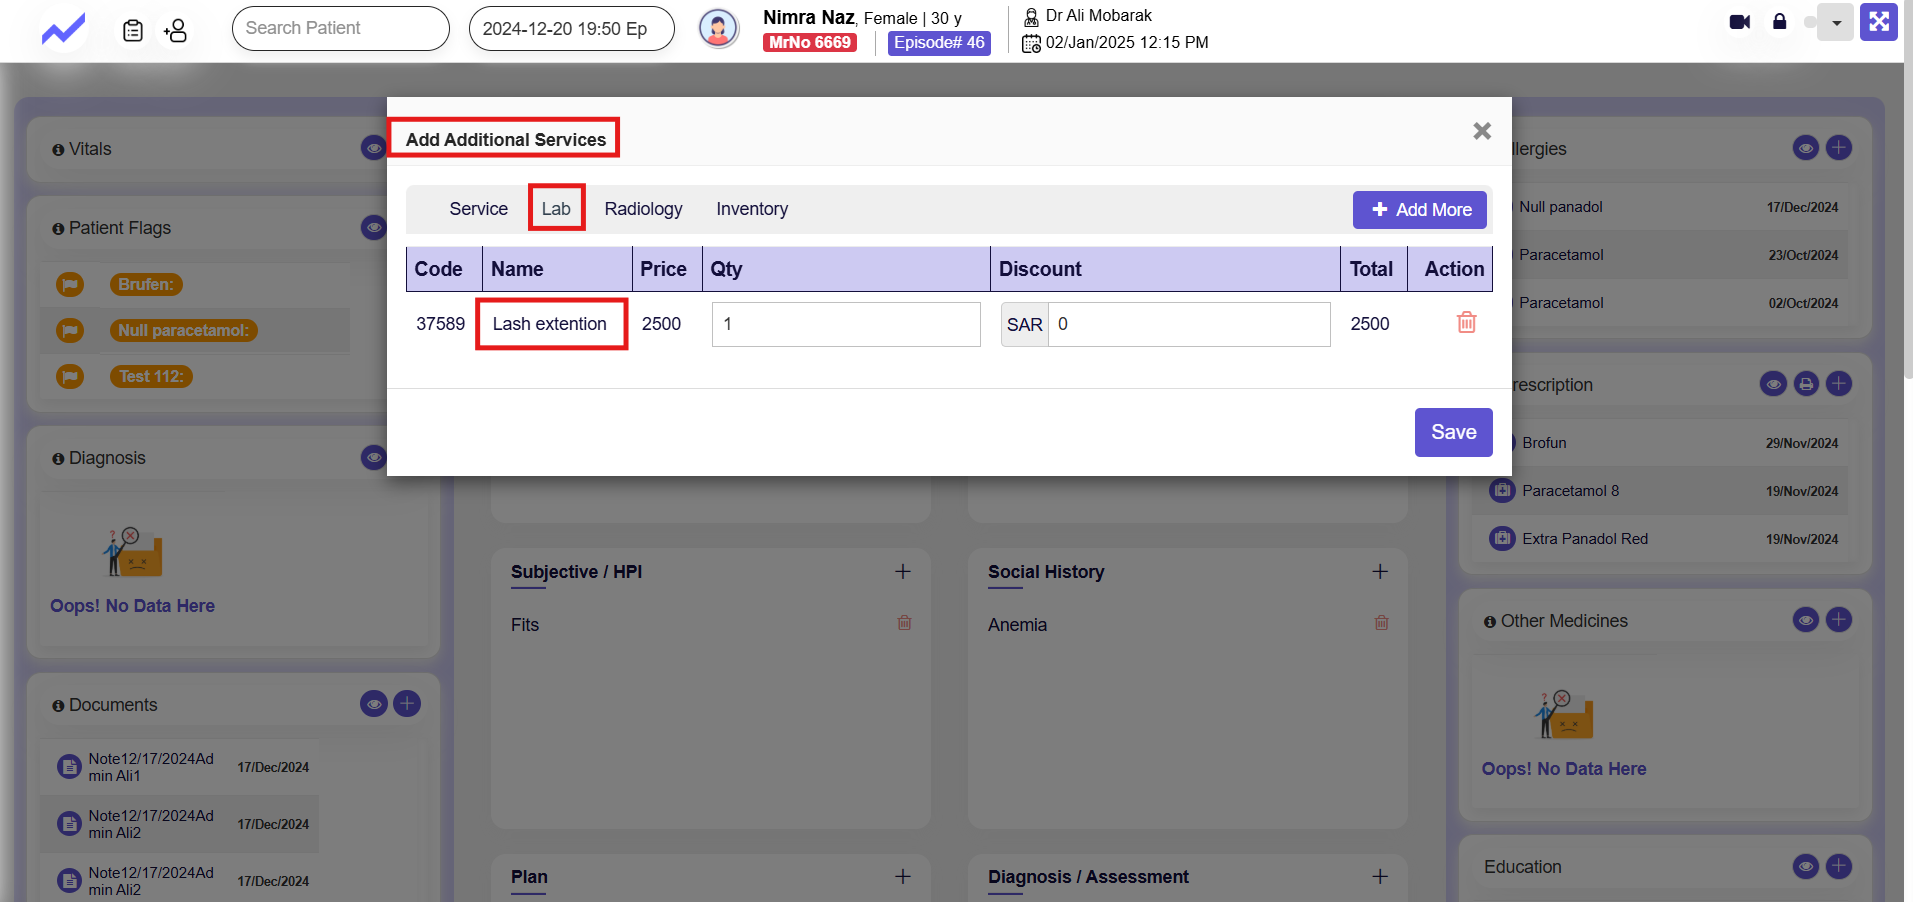
When you click on the Add icon, a new screen named Add Additional Services appears. On this screen, the selected service will be added successfully.
Adding Inventory
For adding Inventory click on the Inventory Tab.
Here, you can use the search bar to find the inventory for which you have added an offer price.
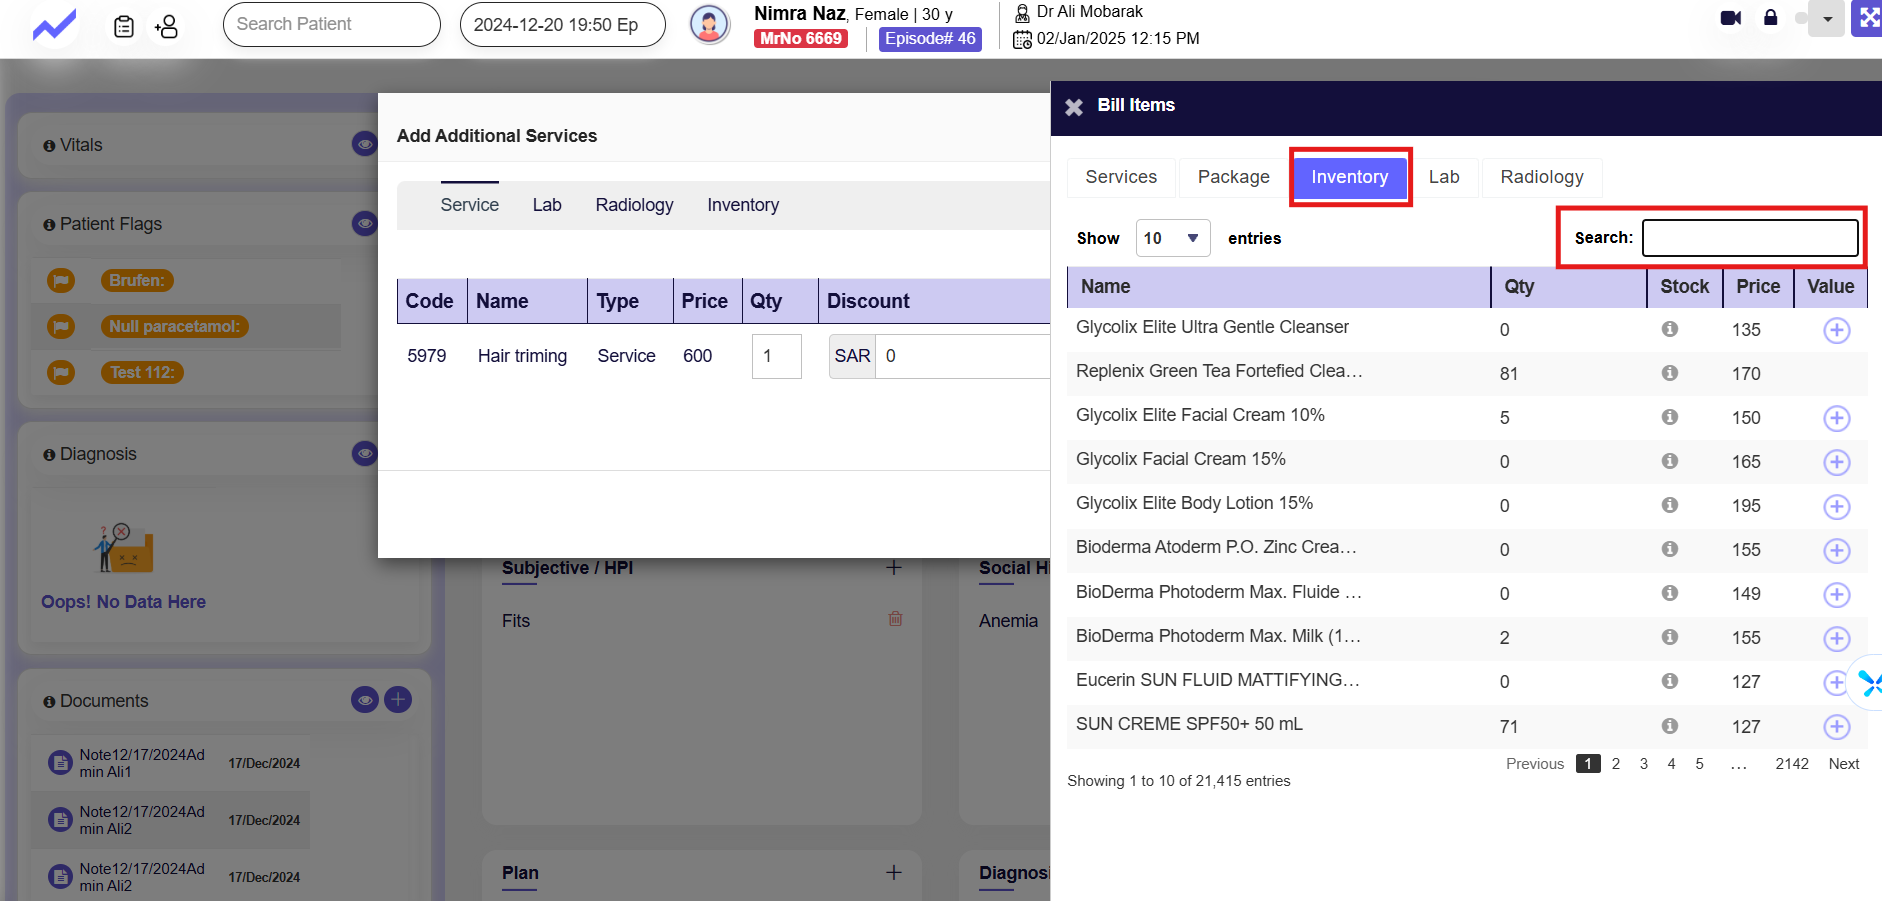
As I have added the offer price for Hand-Care so.
Click on the Add icon.
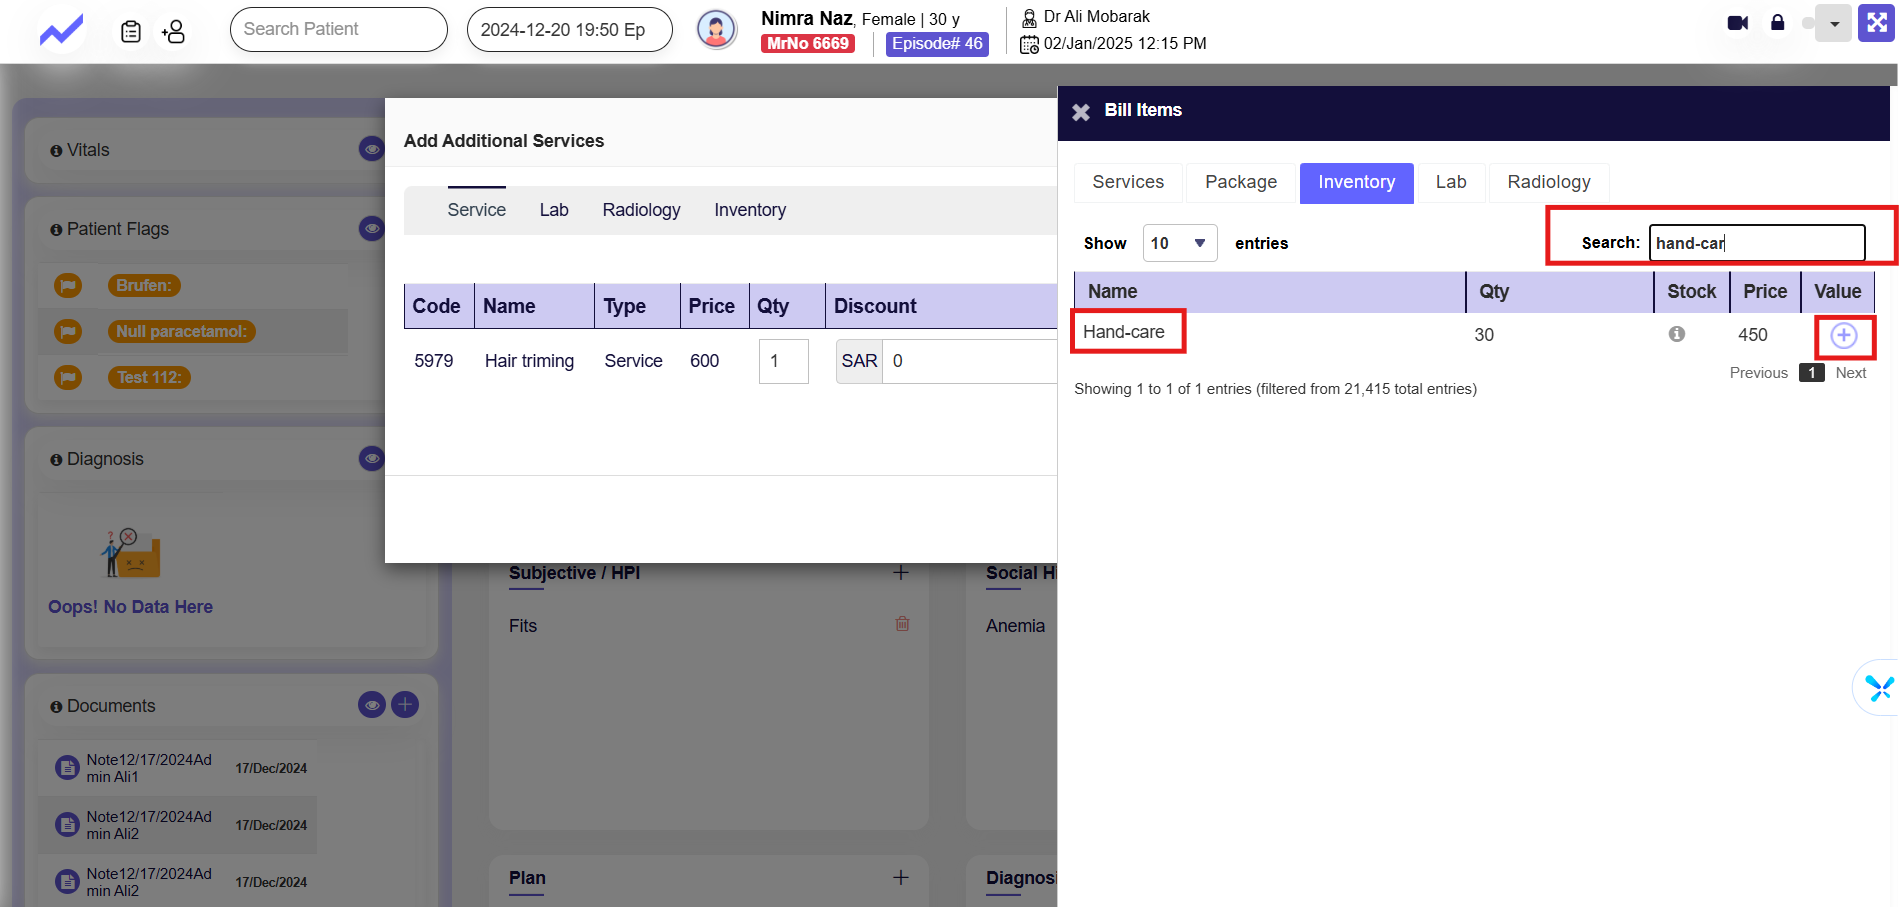
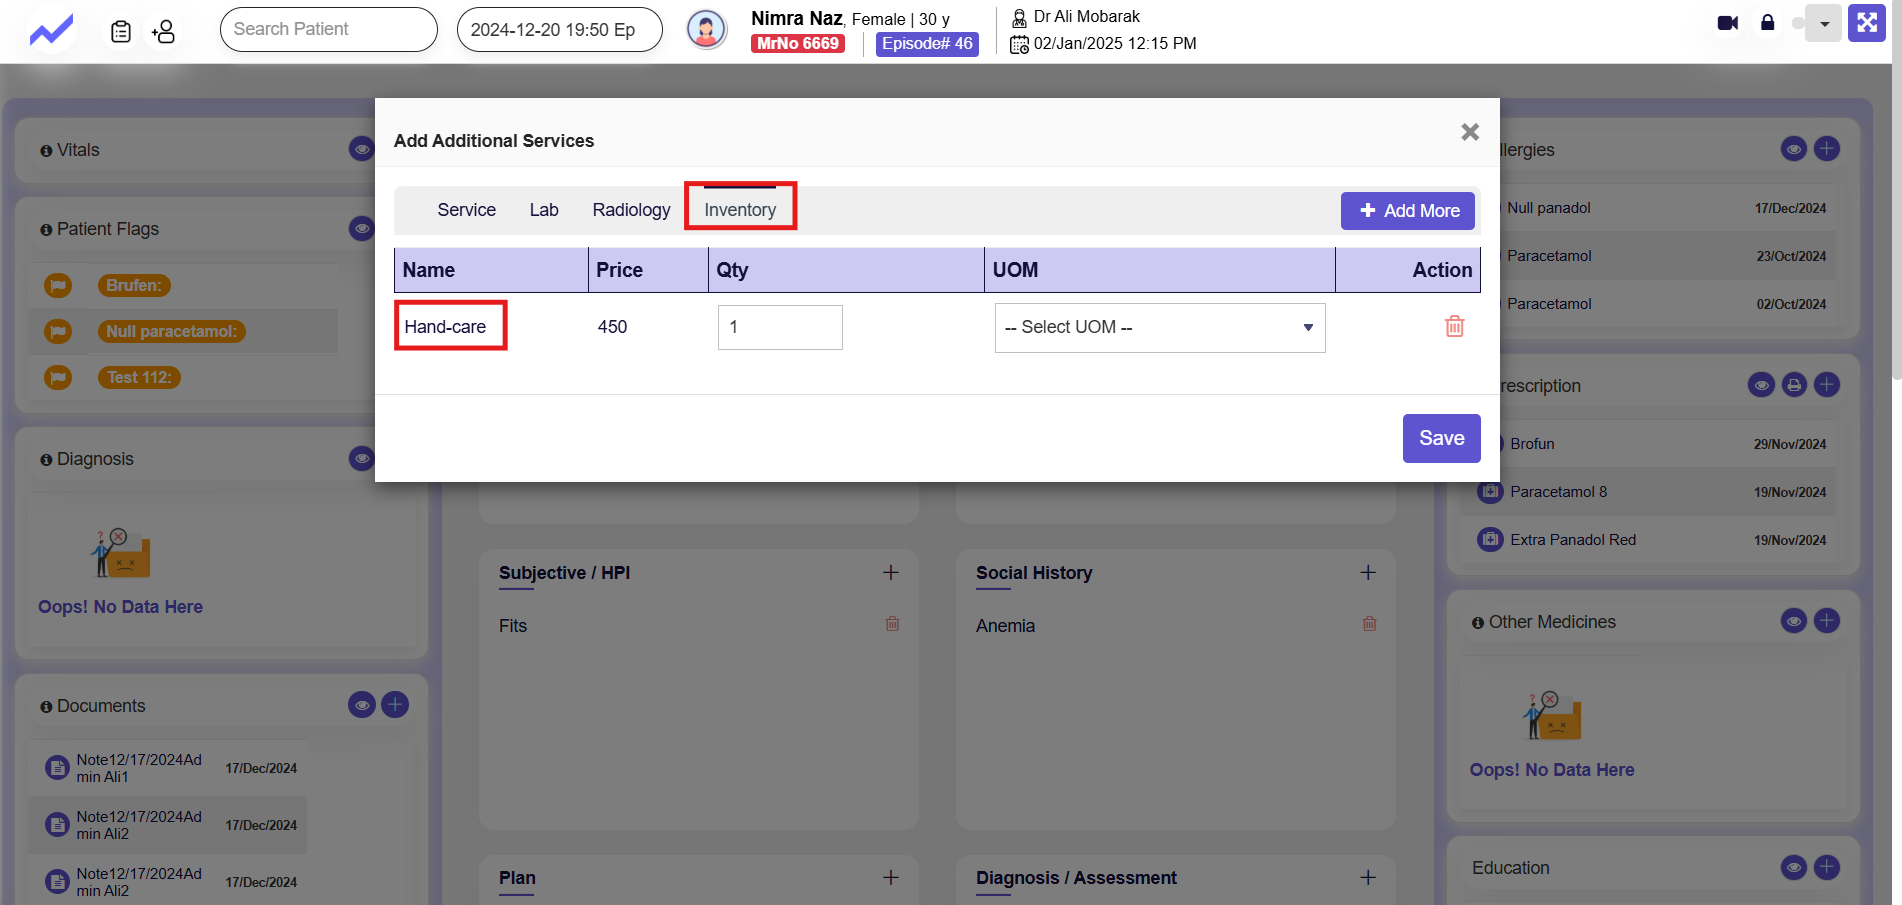
When you click on the Add icon, again the Add Additional Services screen appears. On this screen, the selected Inventory will be added successfully.
Adding Lab
For adding Lab click on the Lab Tab.
Here, you can use the search bar to find the Lab for which you have added an offer price.
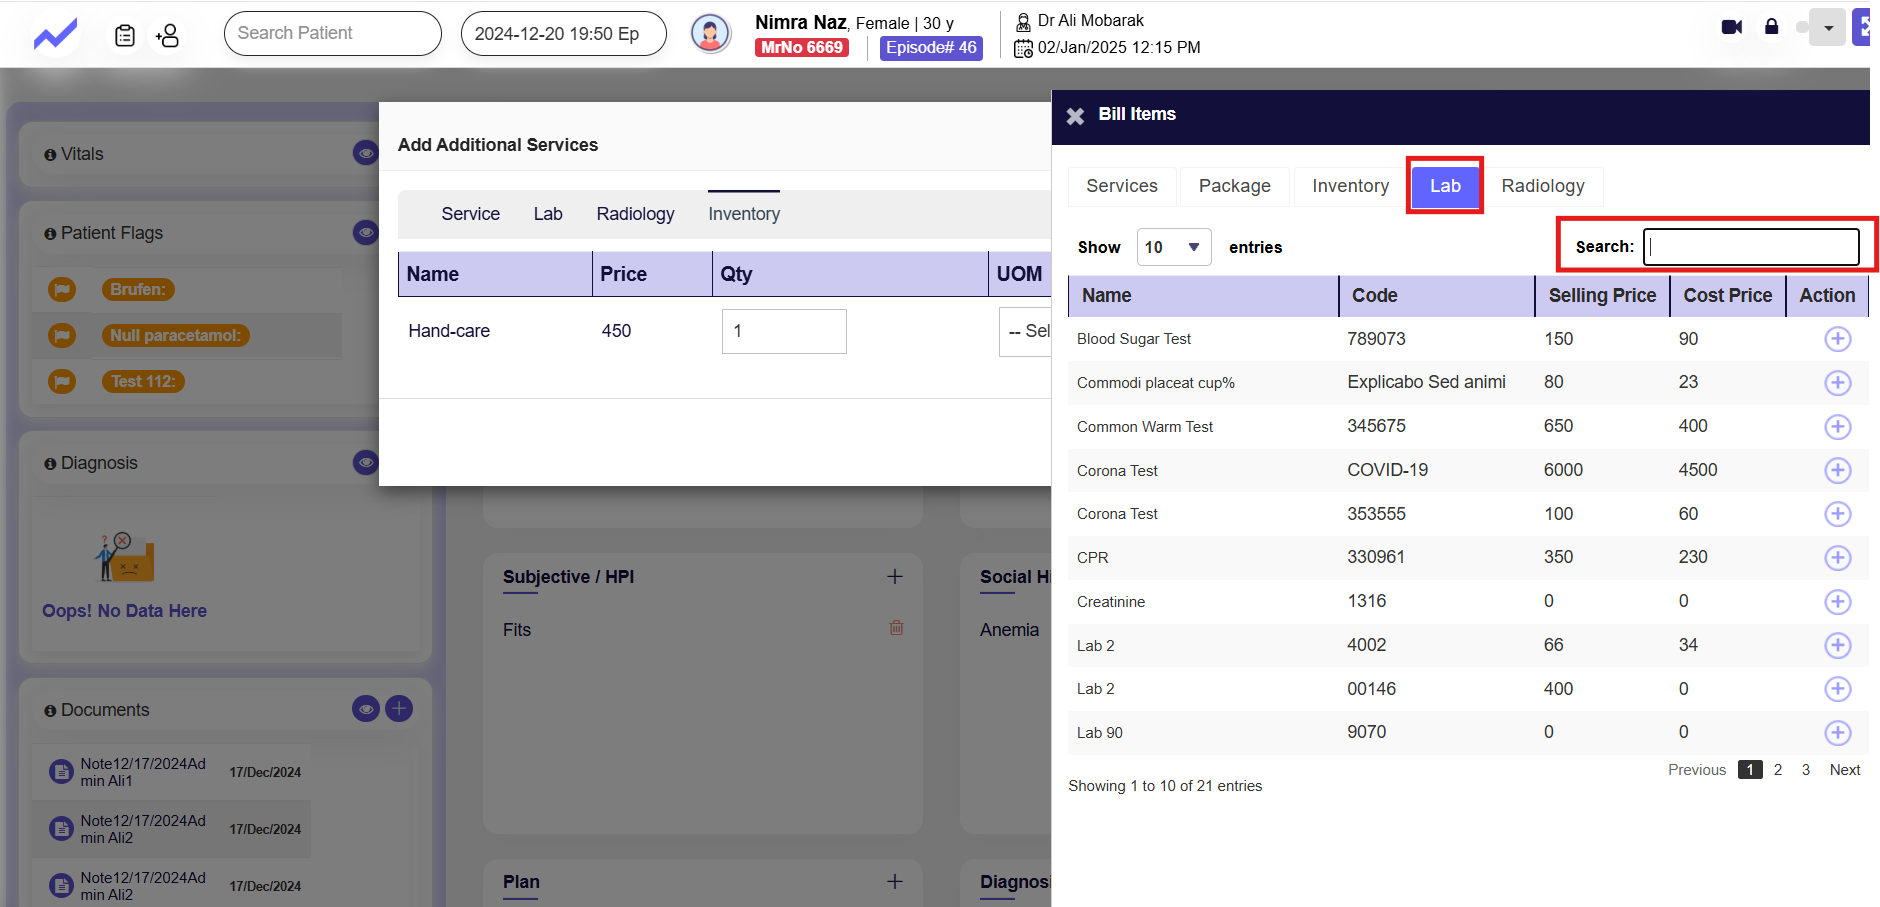
As I have added the offer price for Lash-Extension so.
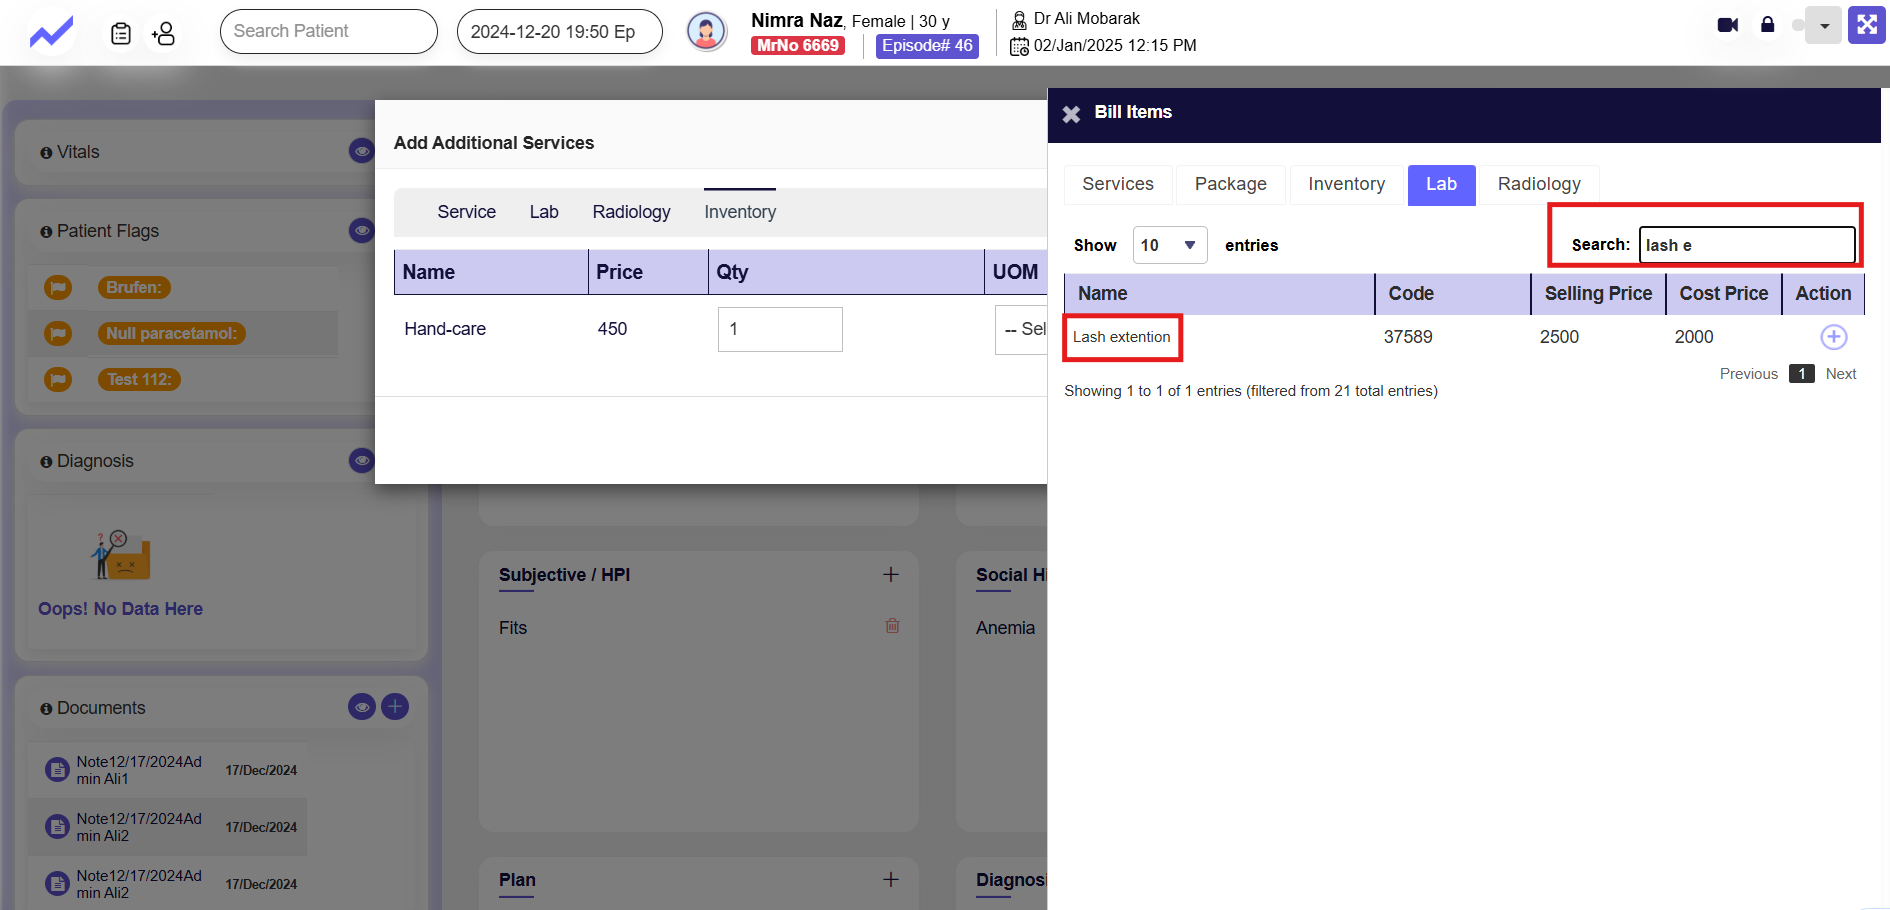
Click on the Add icon.
When you click on the Add icon, again the Add Additional Services screen appears. On this screen, the selected Lab will be added successfully.
Adding Radiology:
For adding Inventory click on the Radiology Tab.
Here, you can use the search bar to find the Radiology for which you have added an offer price.

As I have added the offer price for Skin-Laser so.
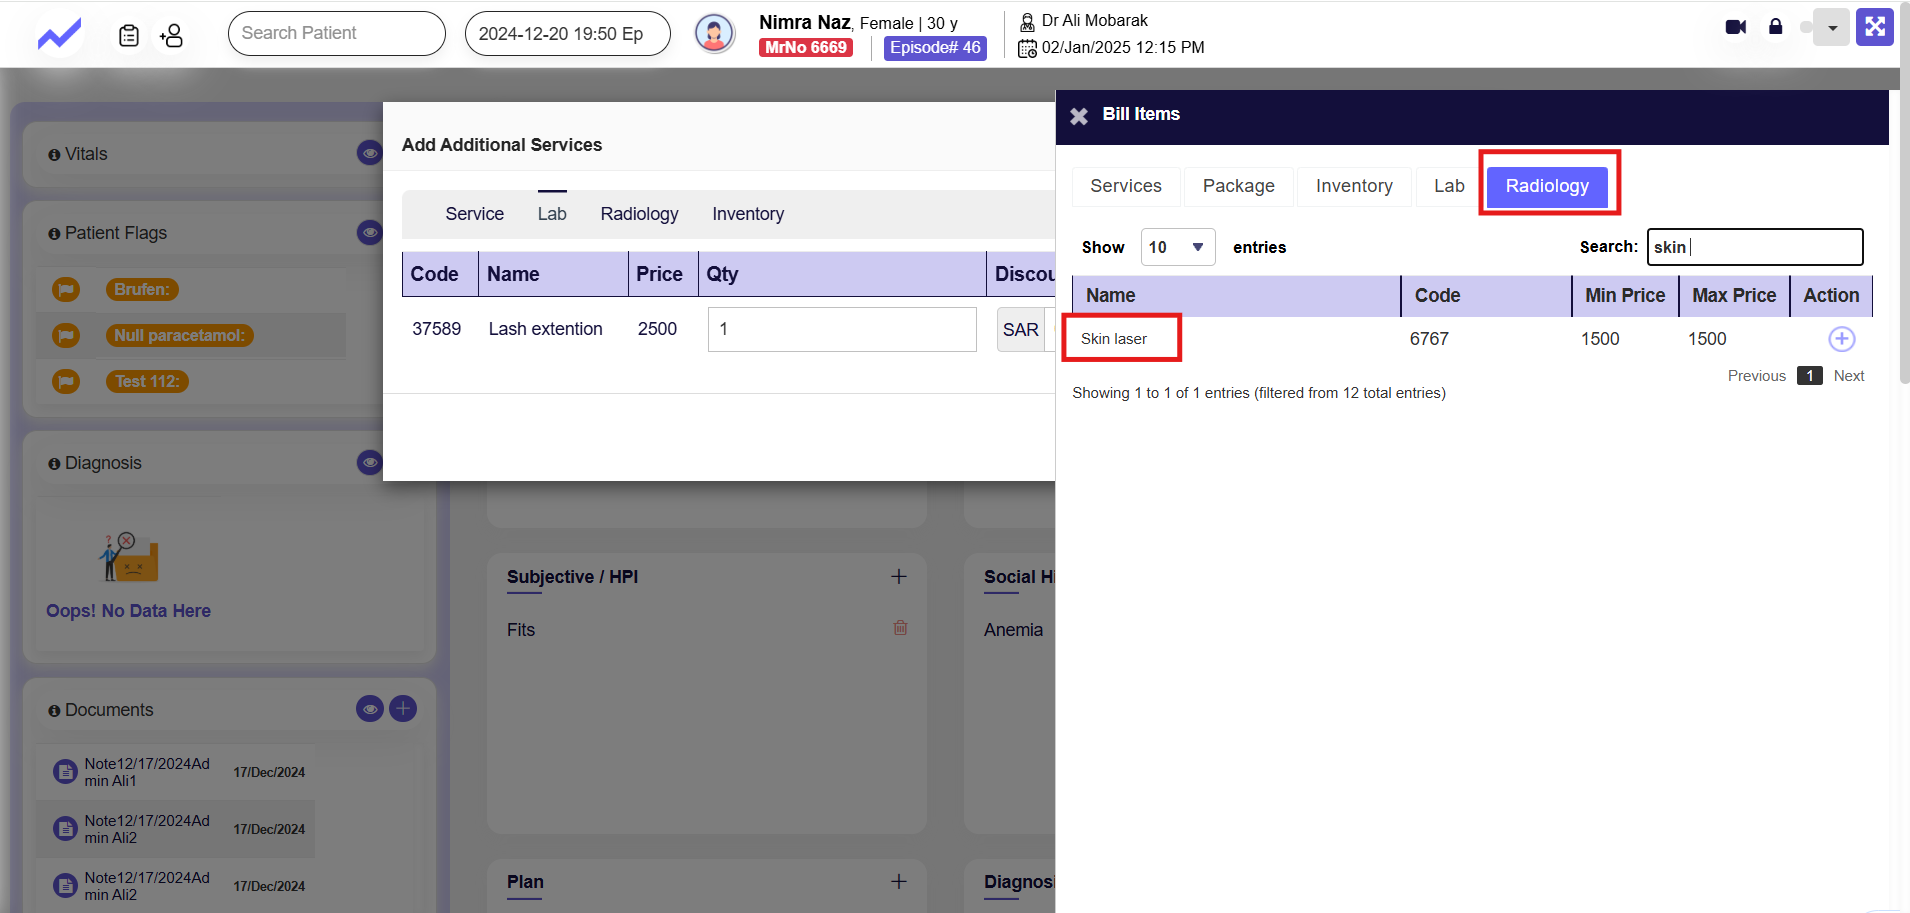
Click on the Add icon.
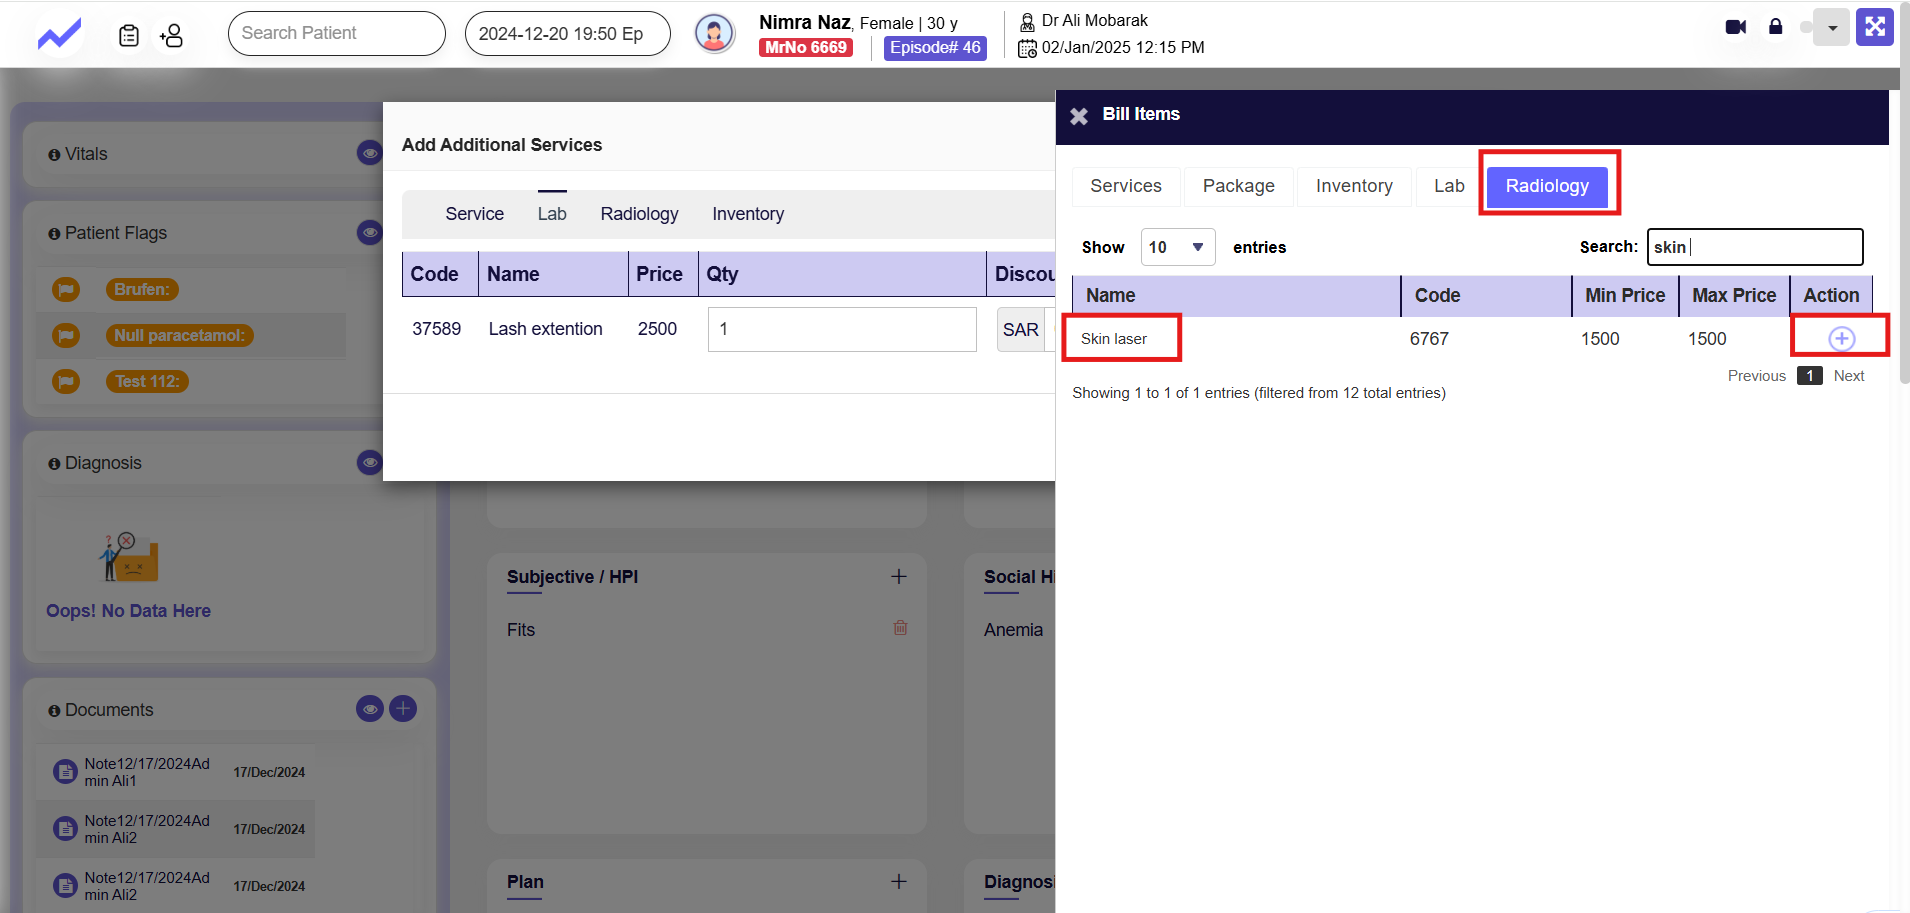
When you click on the Add icon, again the Add Additional Services screen appears. On this screen, the selected Lab will be added successfully.
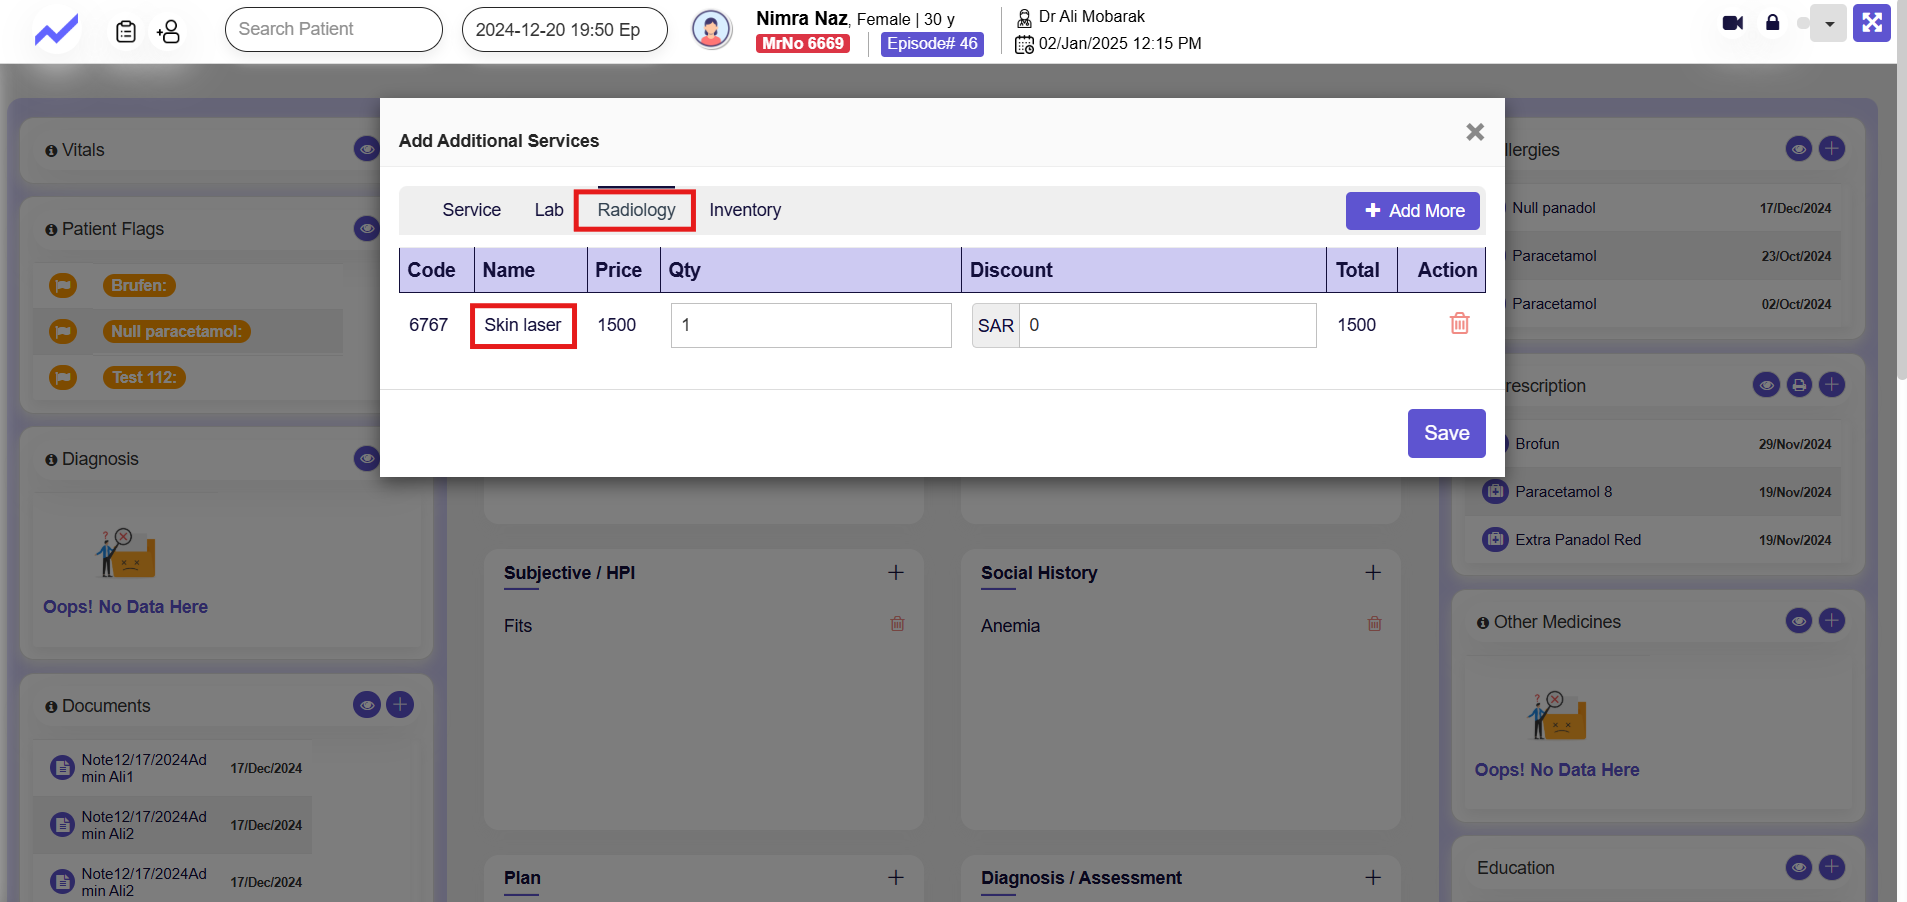
After adding all services, labs, inventory, and radiology items, Click on the Save Button.
The next step is to generate the invoice. In this step, we verify whether the offer pricing is working accurately.
Generate Invoice (To verify Offer Price) #
Now, go to the Appointment Detail screen and click on the Generate Invoice button.
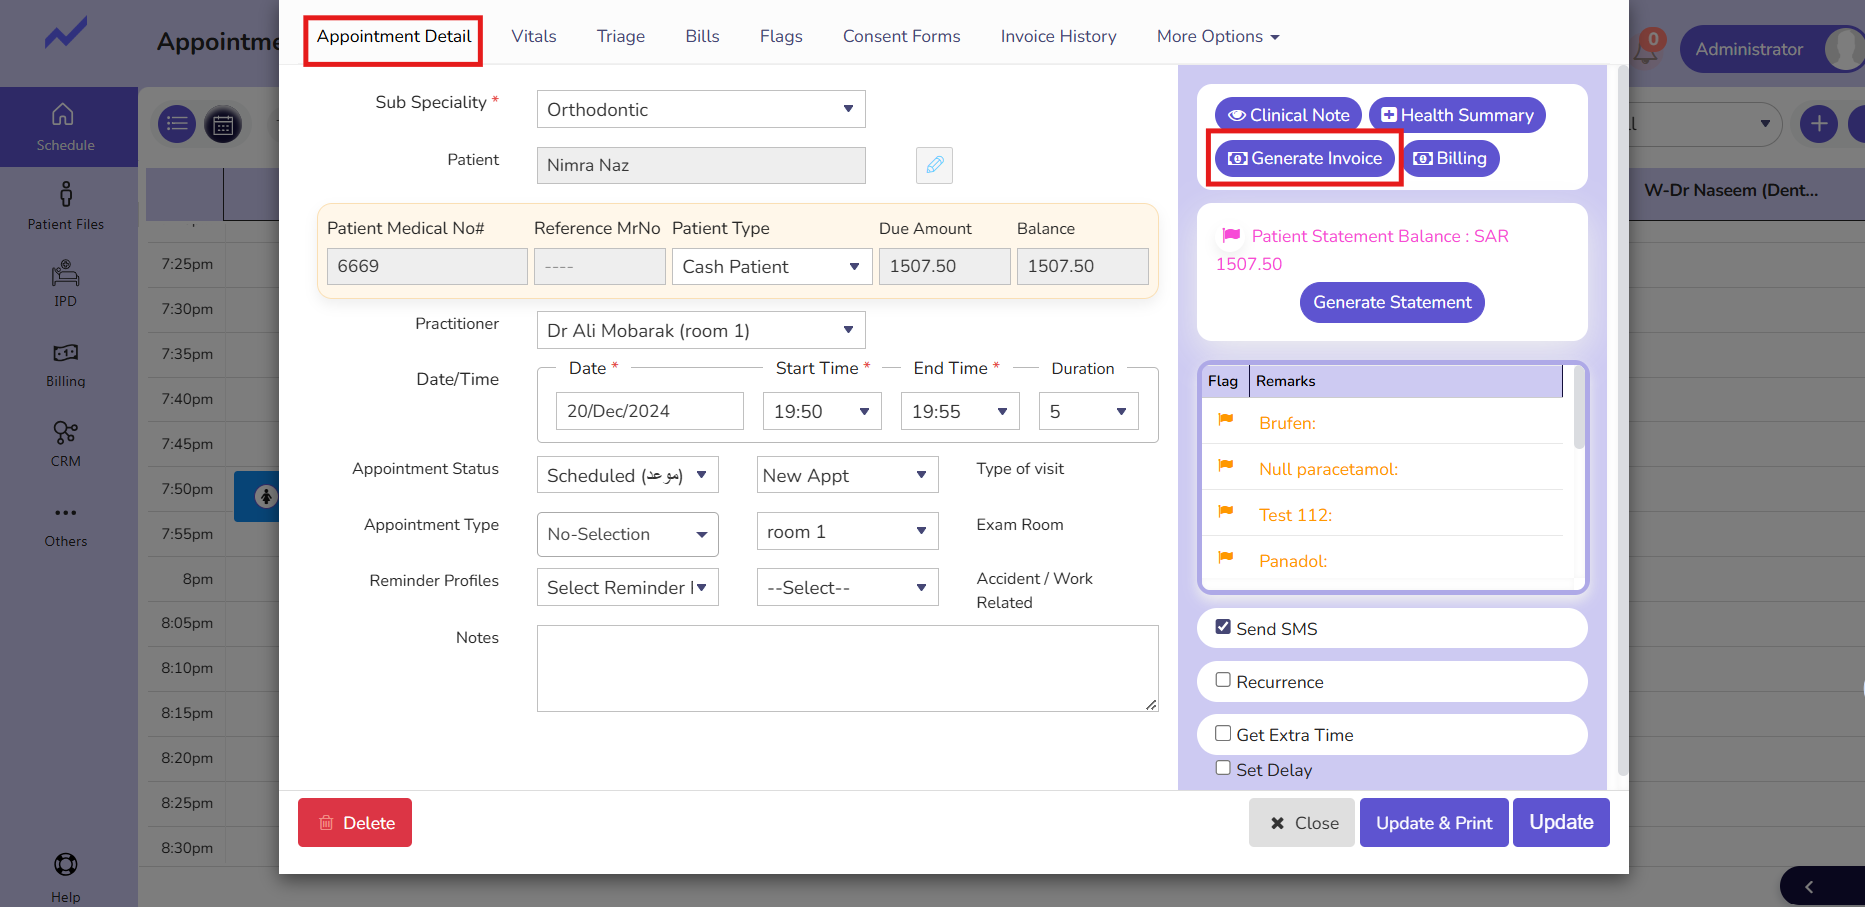
When you click on the Generate Invoice button, it will open the New Bill screen, which includes all the bill items added from the Clinical Note screen.
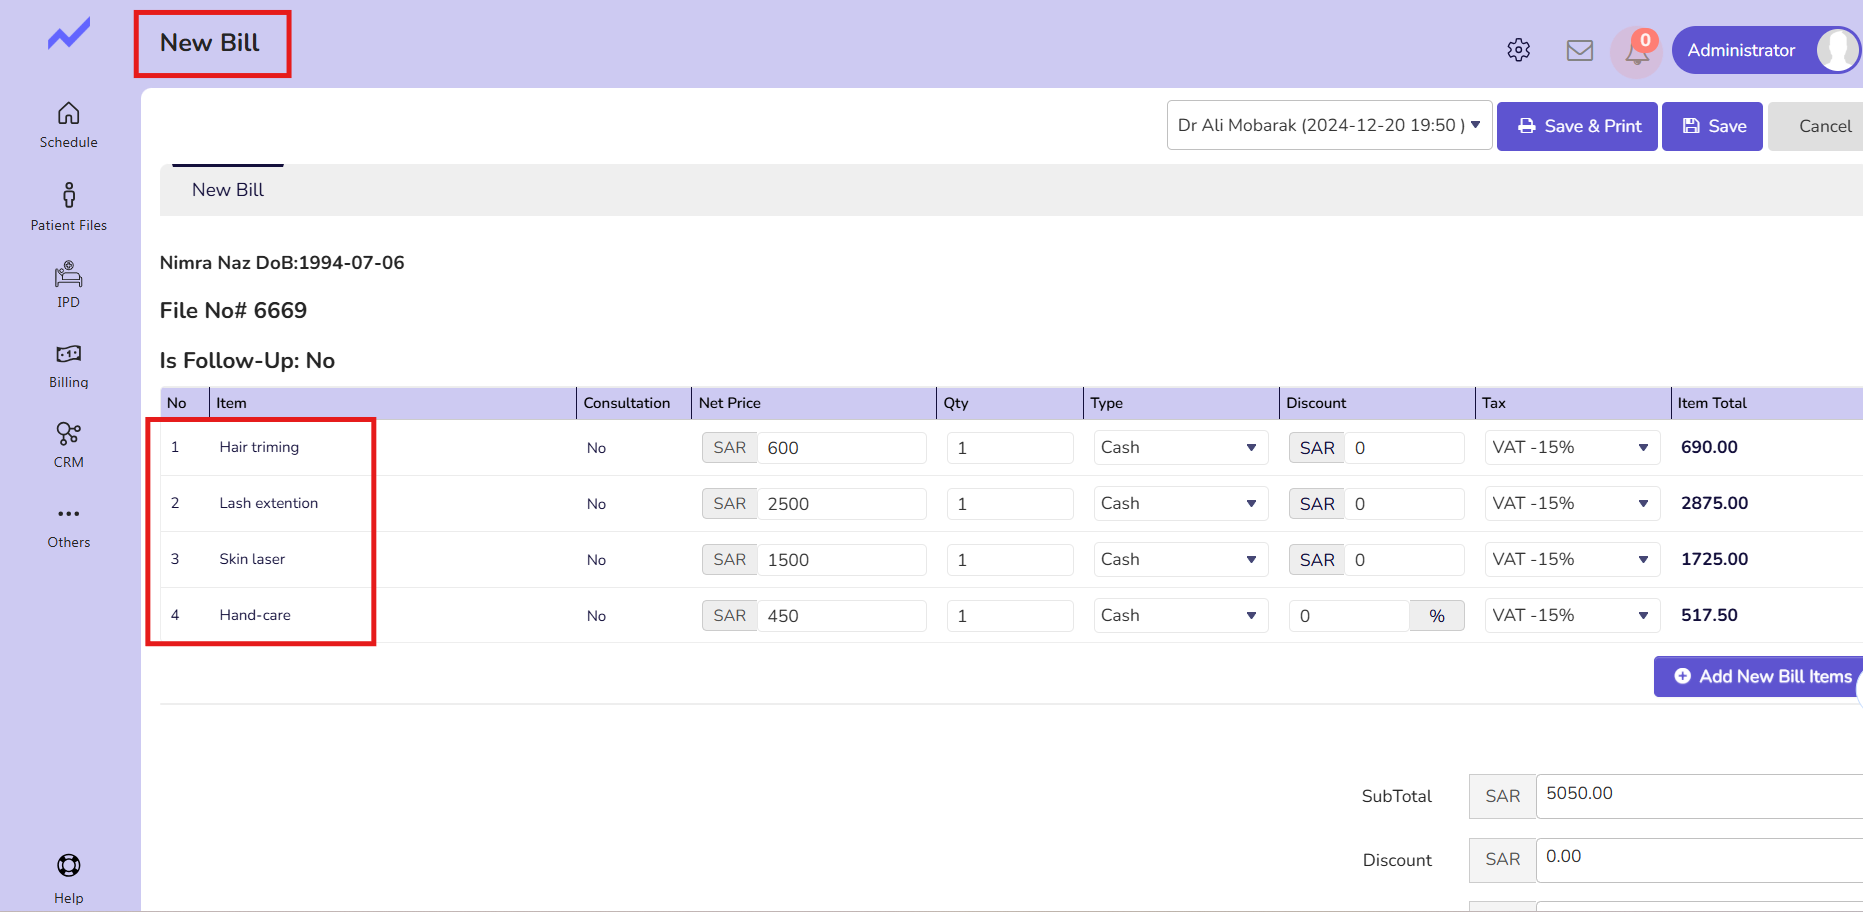
Here you can see the offer price is showing against all the bill items.
Service——-> Hair Triming—-> actual price == 800 offer price == 600
Lab ———–> Lash Extension-> actual price == 2000 offer price == 2500
Radiology—-> skin laser ——–> actual price == 2000 offer price == 1500
Inventory—-> Hand Care——-> actual price == 600 offer price == 450

This means the offer price feature is working accurately for the Clinical Note screen.
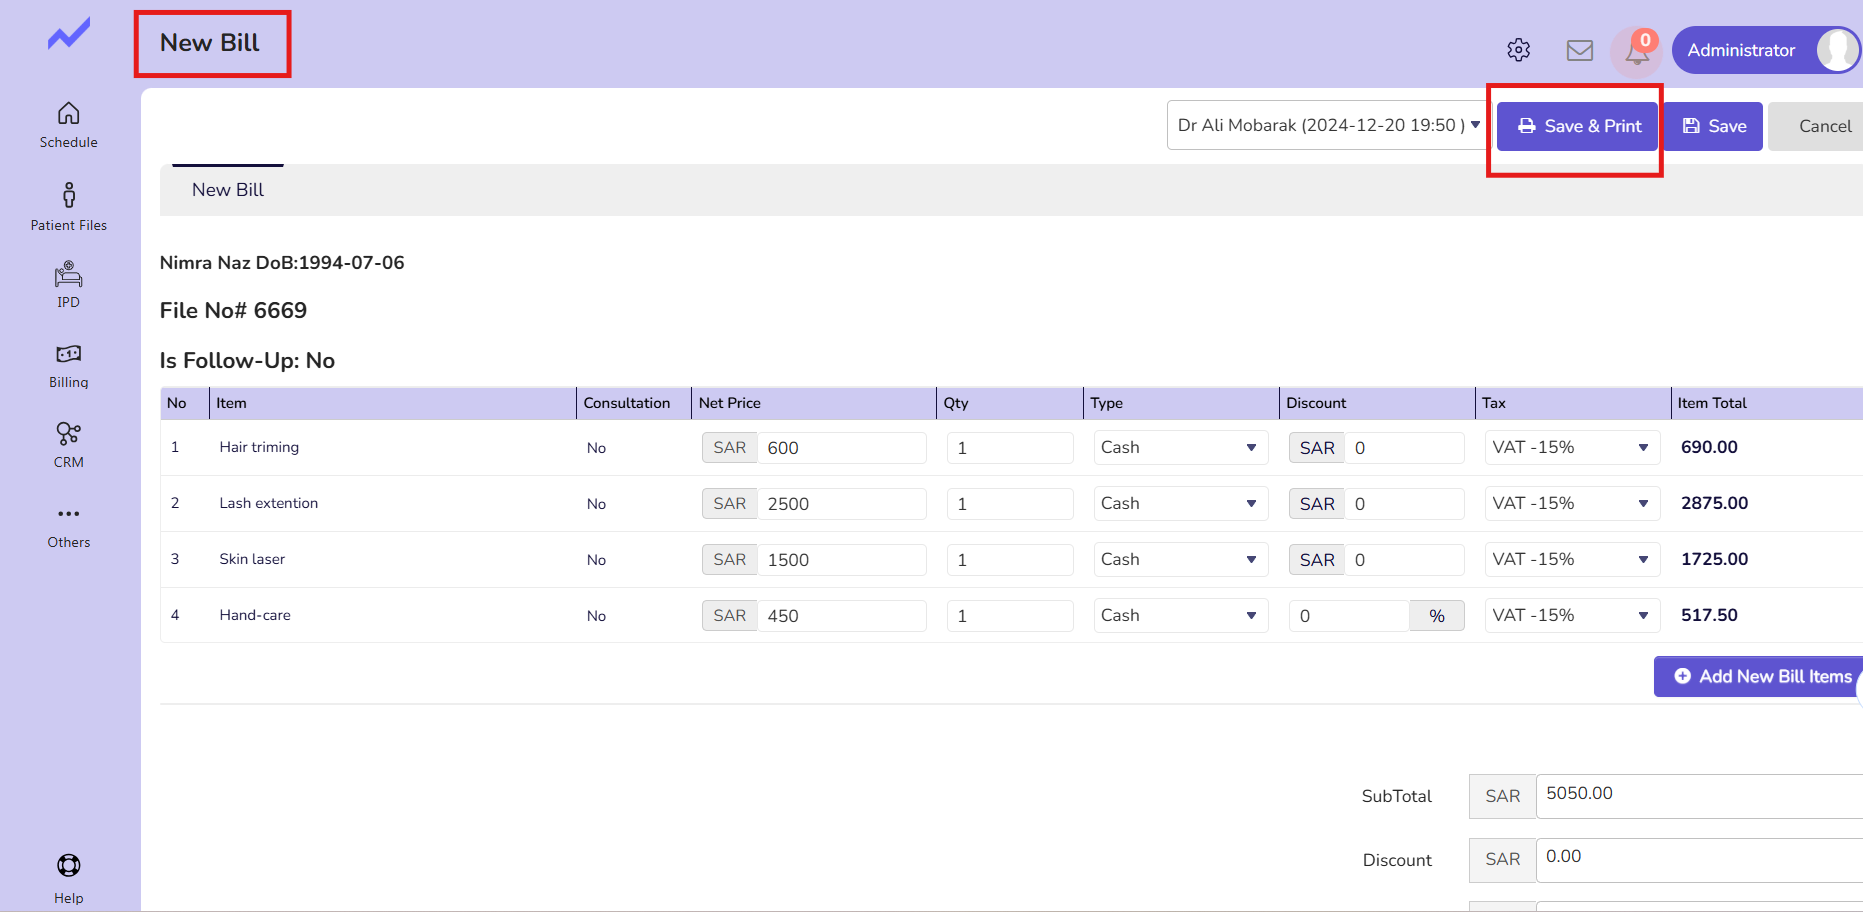
Now you can generate the invoice by clicking on the save and print button.
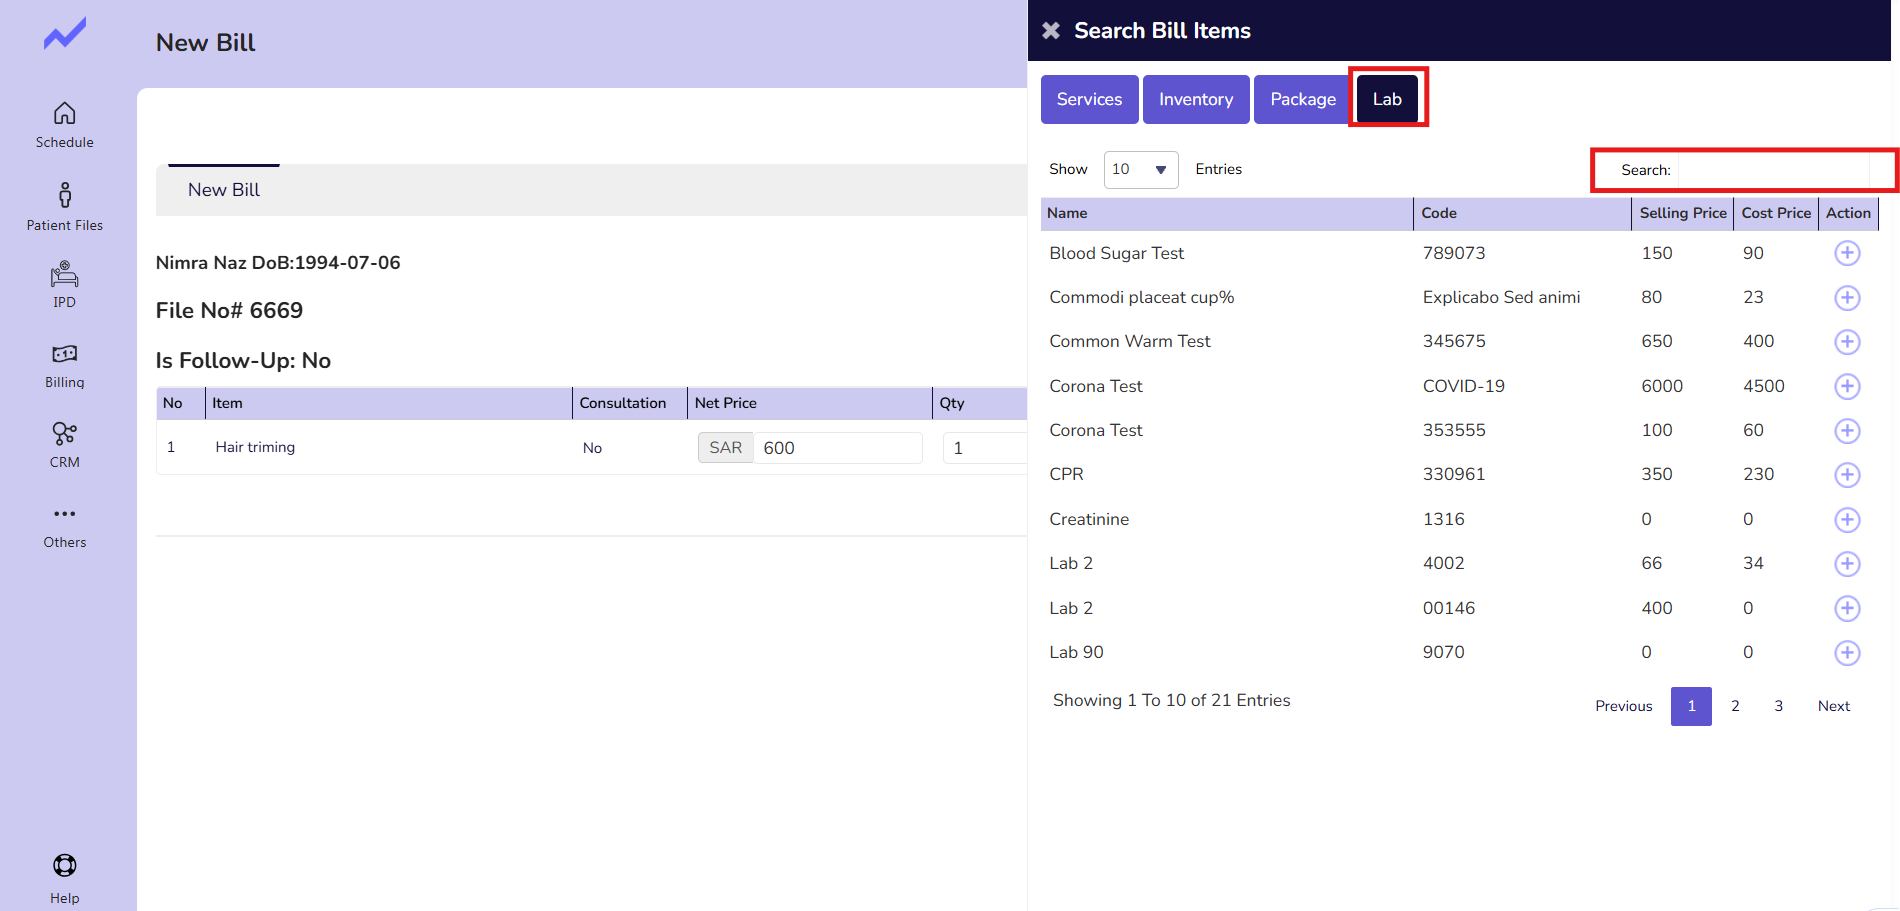
Add New Bill Items Screen #
Adding Bill Item #
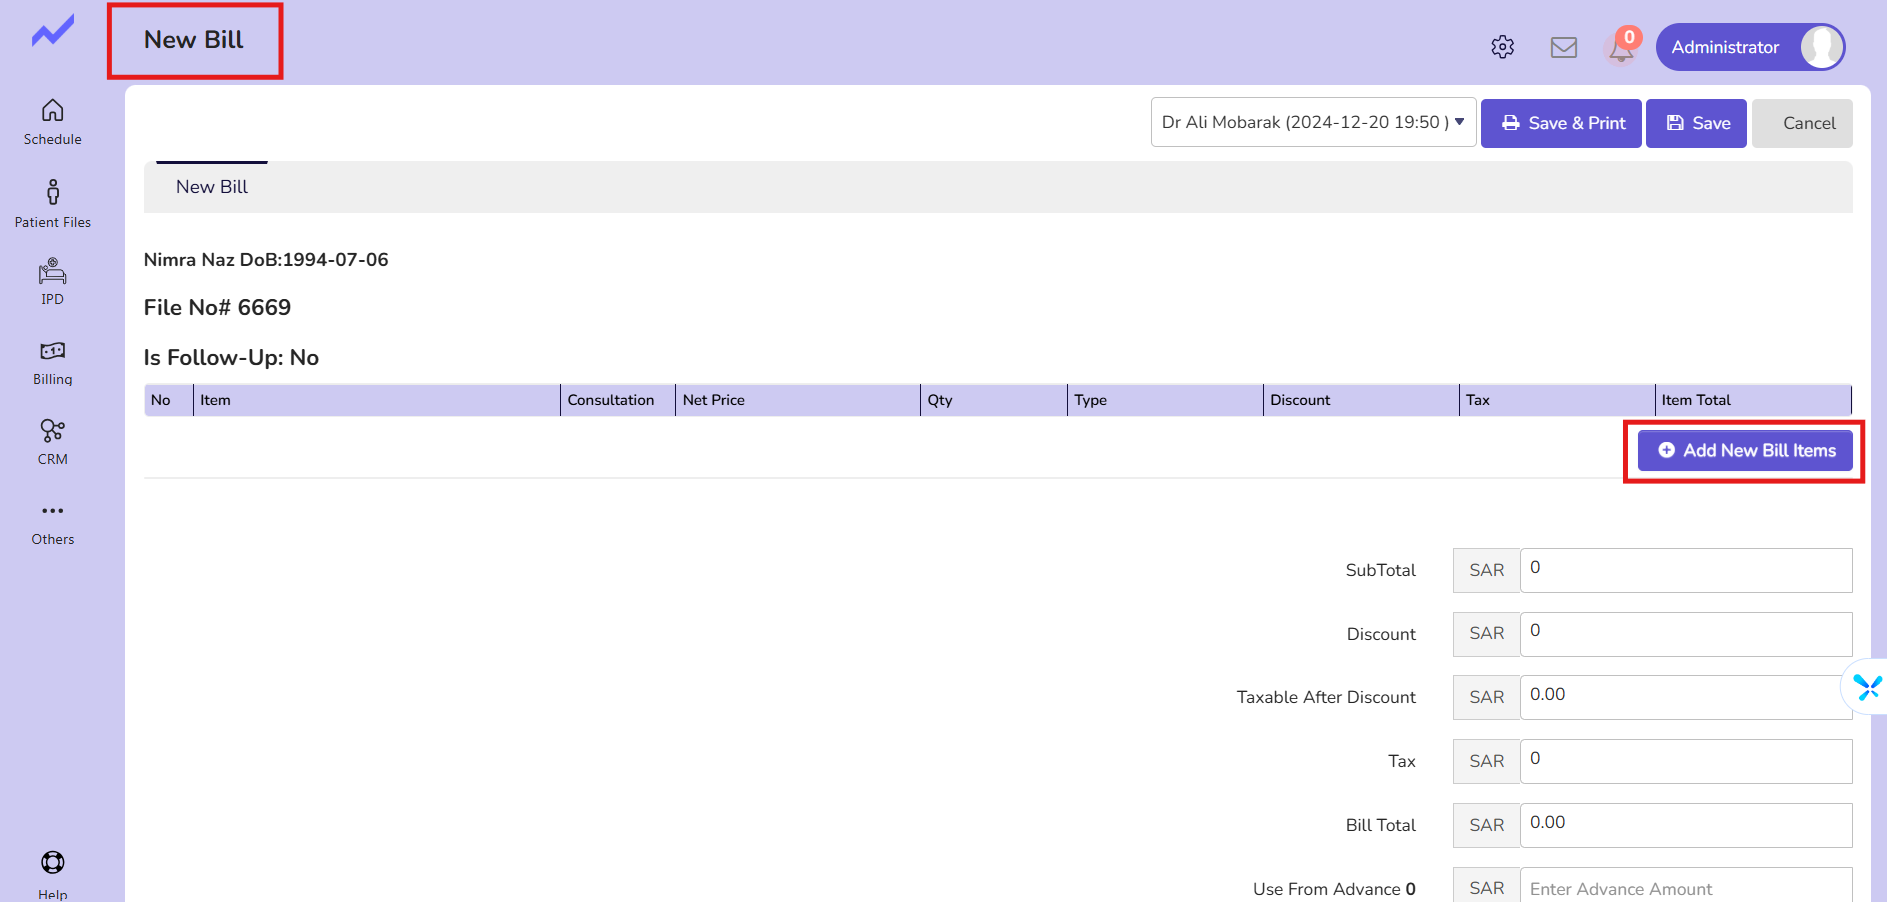
Here, without adding any bill items, you can go to the Generate Invoice screen, where you can add items using the Add New Bill Items option.
Now, go to the Appointment Detail screen and click on the Generate Invoice button.

When you click on the Generate Invoice button it will lead to New Bill Screen.
Here you can add Bill items by clicking on Add New Bill Items.
When you click on the Add New Bill Items it will lead to the Search Bill items screen.
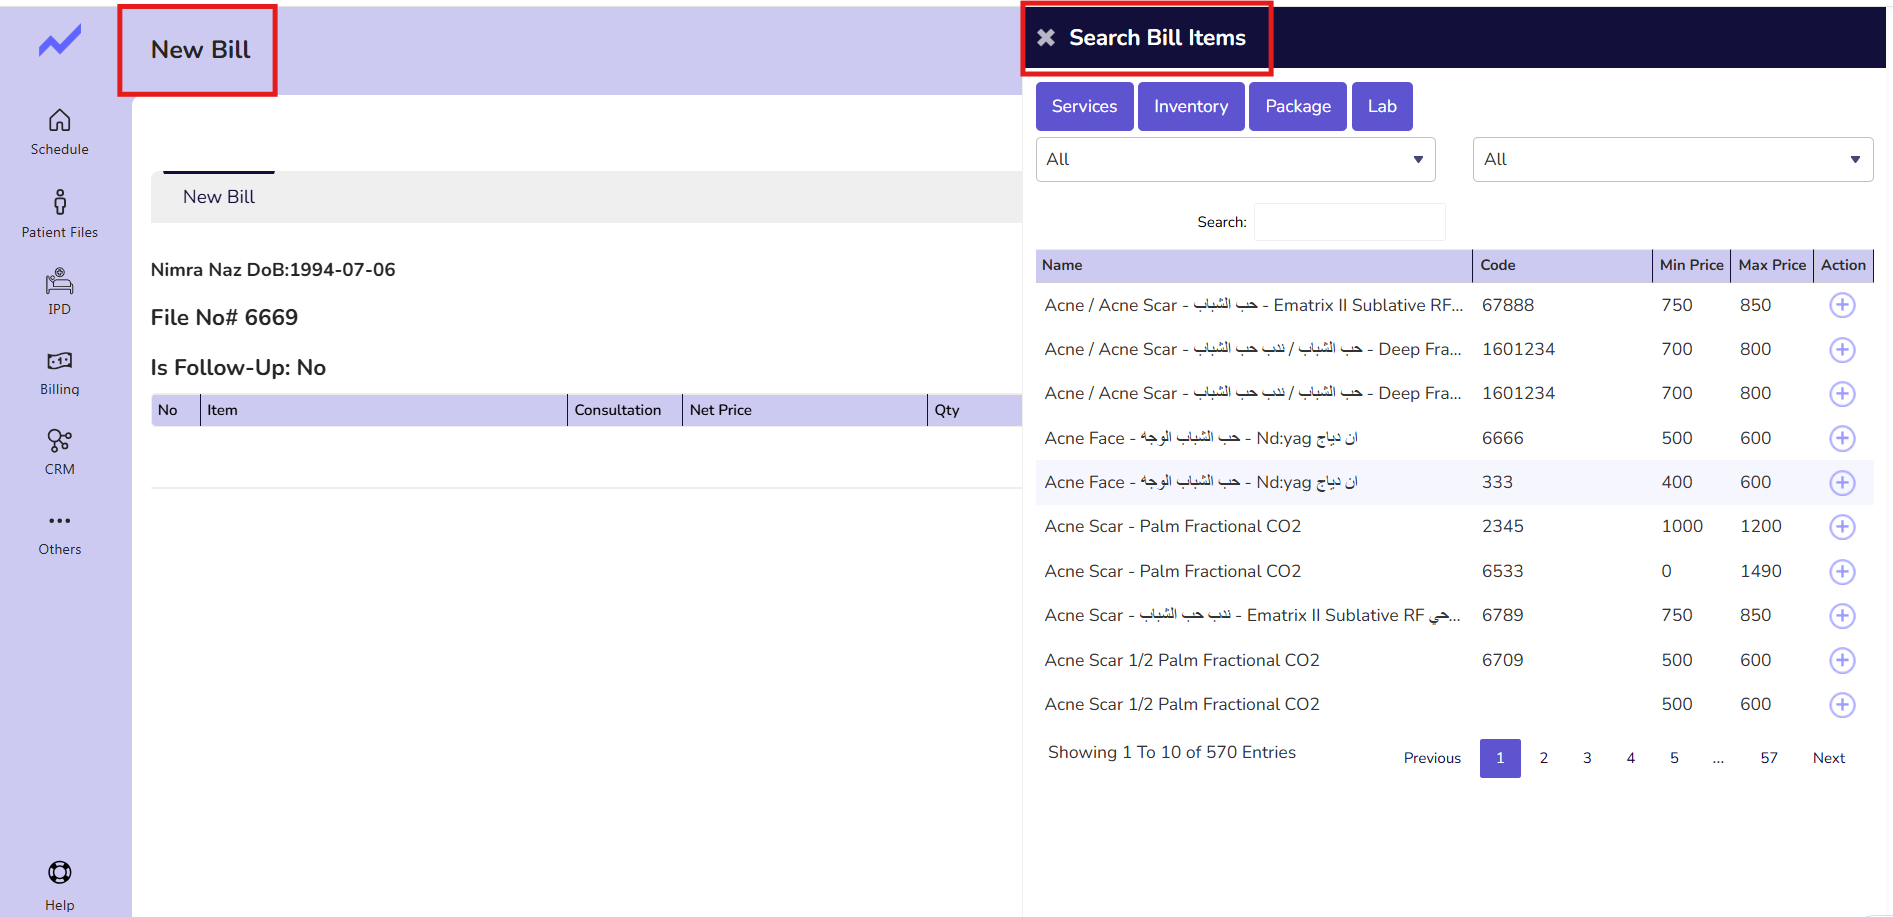
From this screen, you can add Services and Lab.
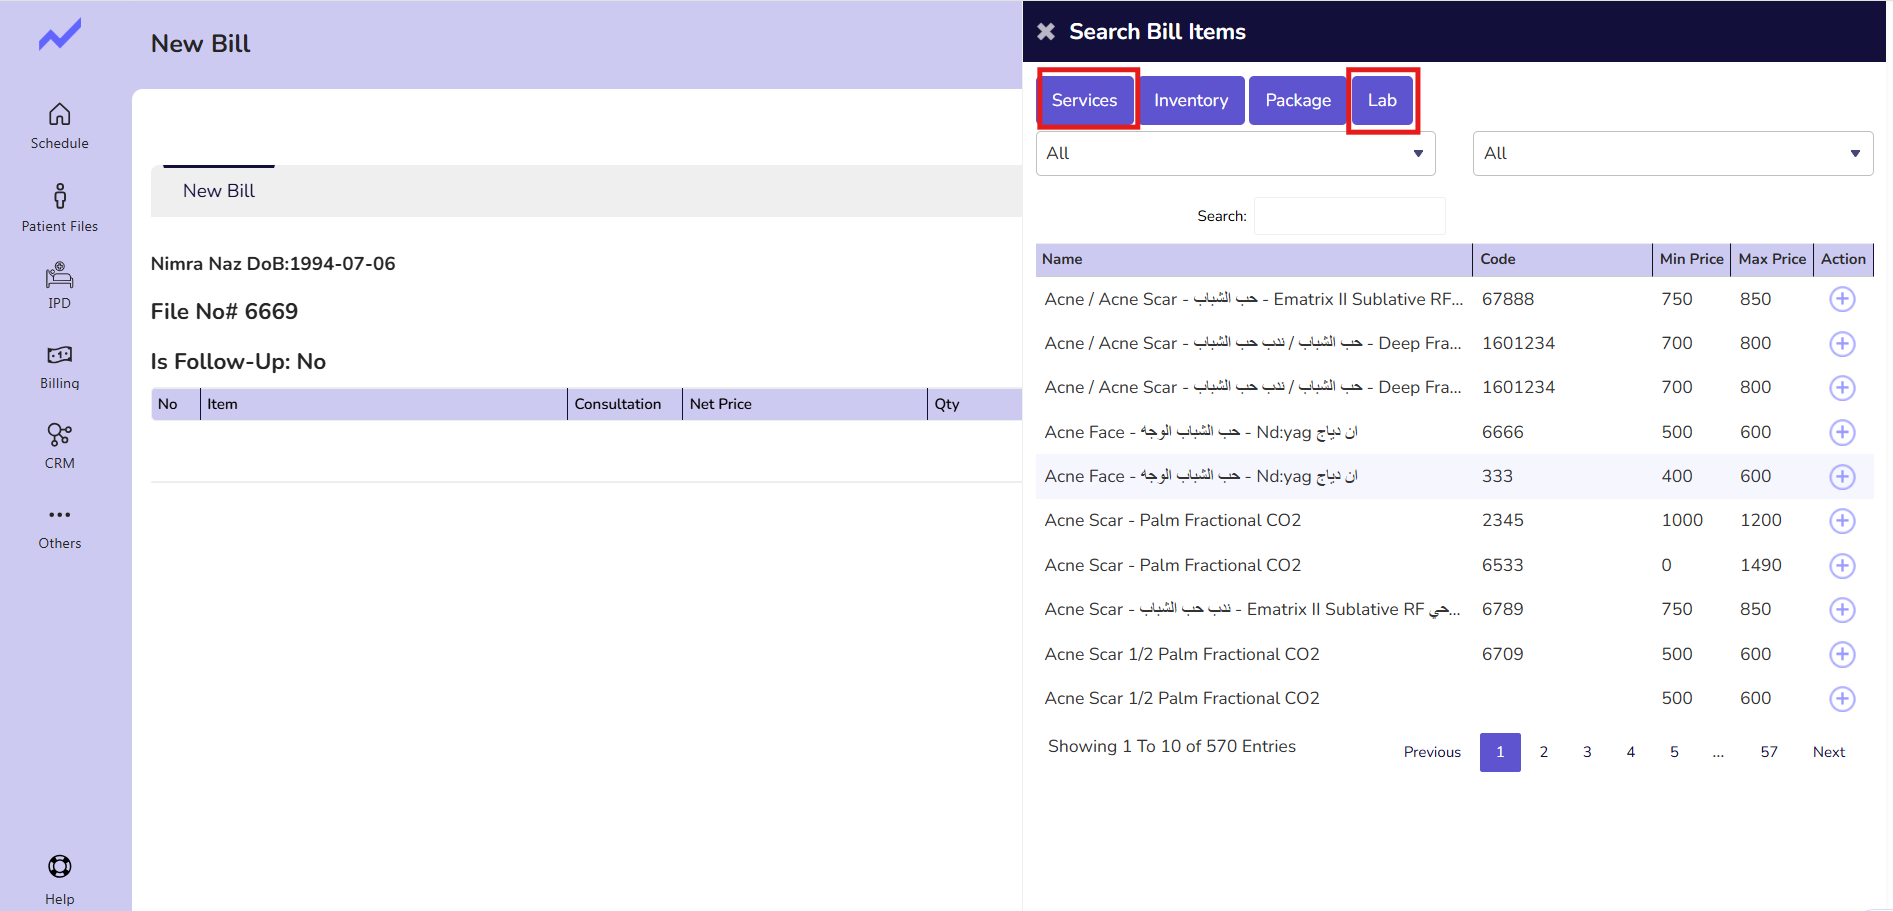
Click on the Service tab, and you can search for the service using the search bar.
Click on the add icon to add a service.
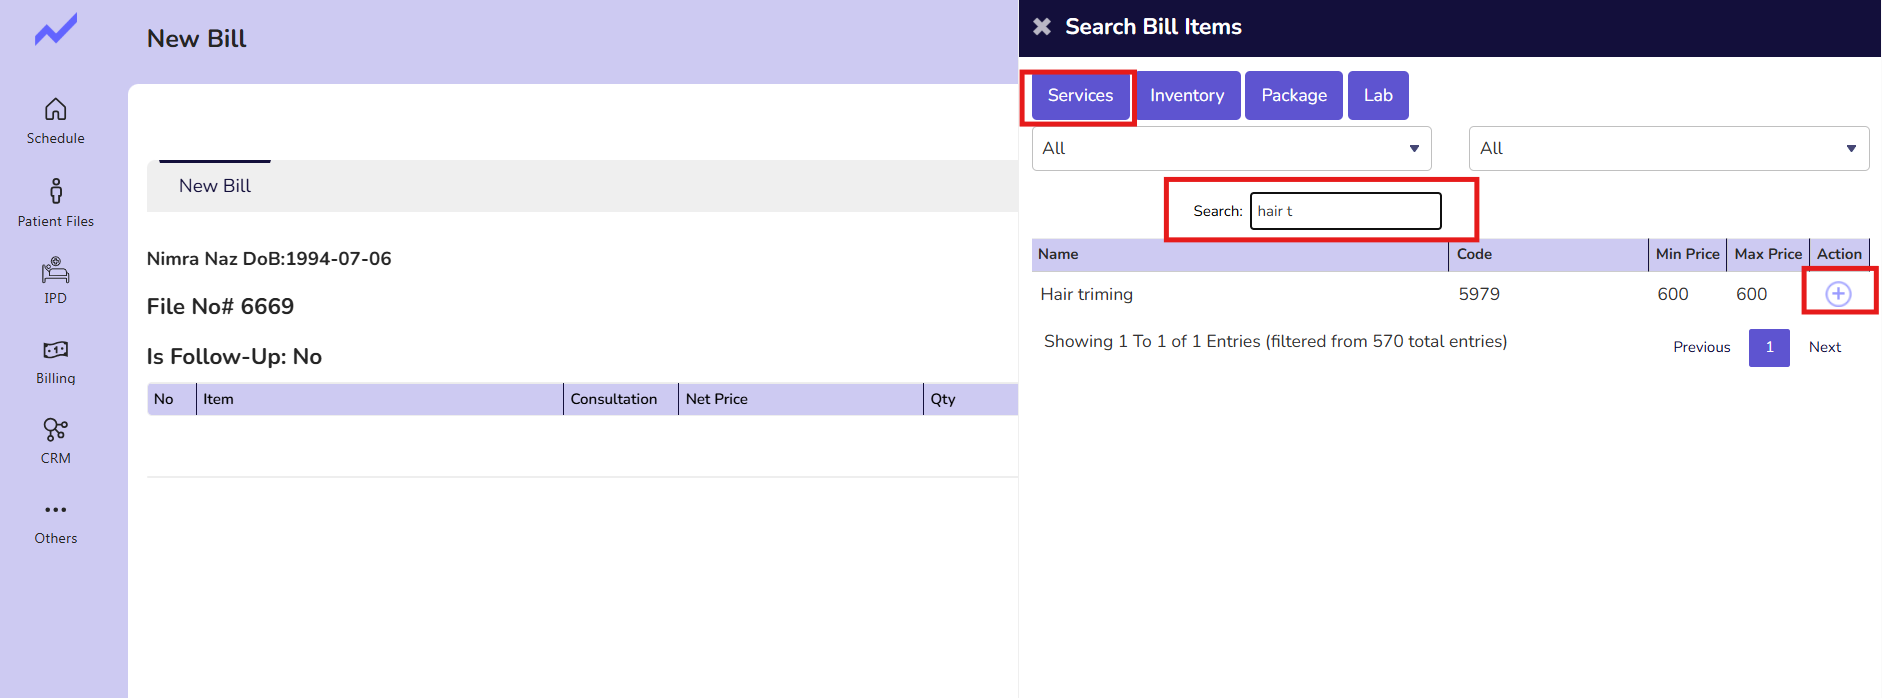
The service will be added successfully.
Now, click on the Lab tab and search for the lab using the search bar.
Click on the add icon to add lab.
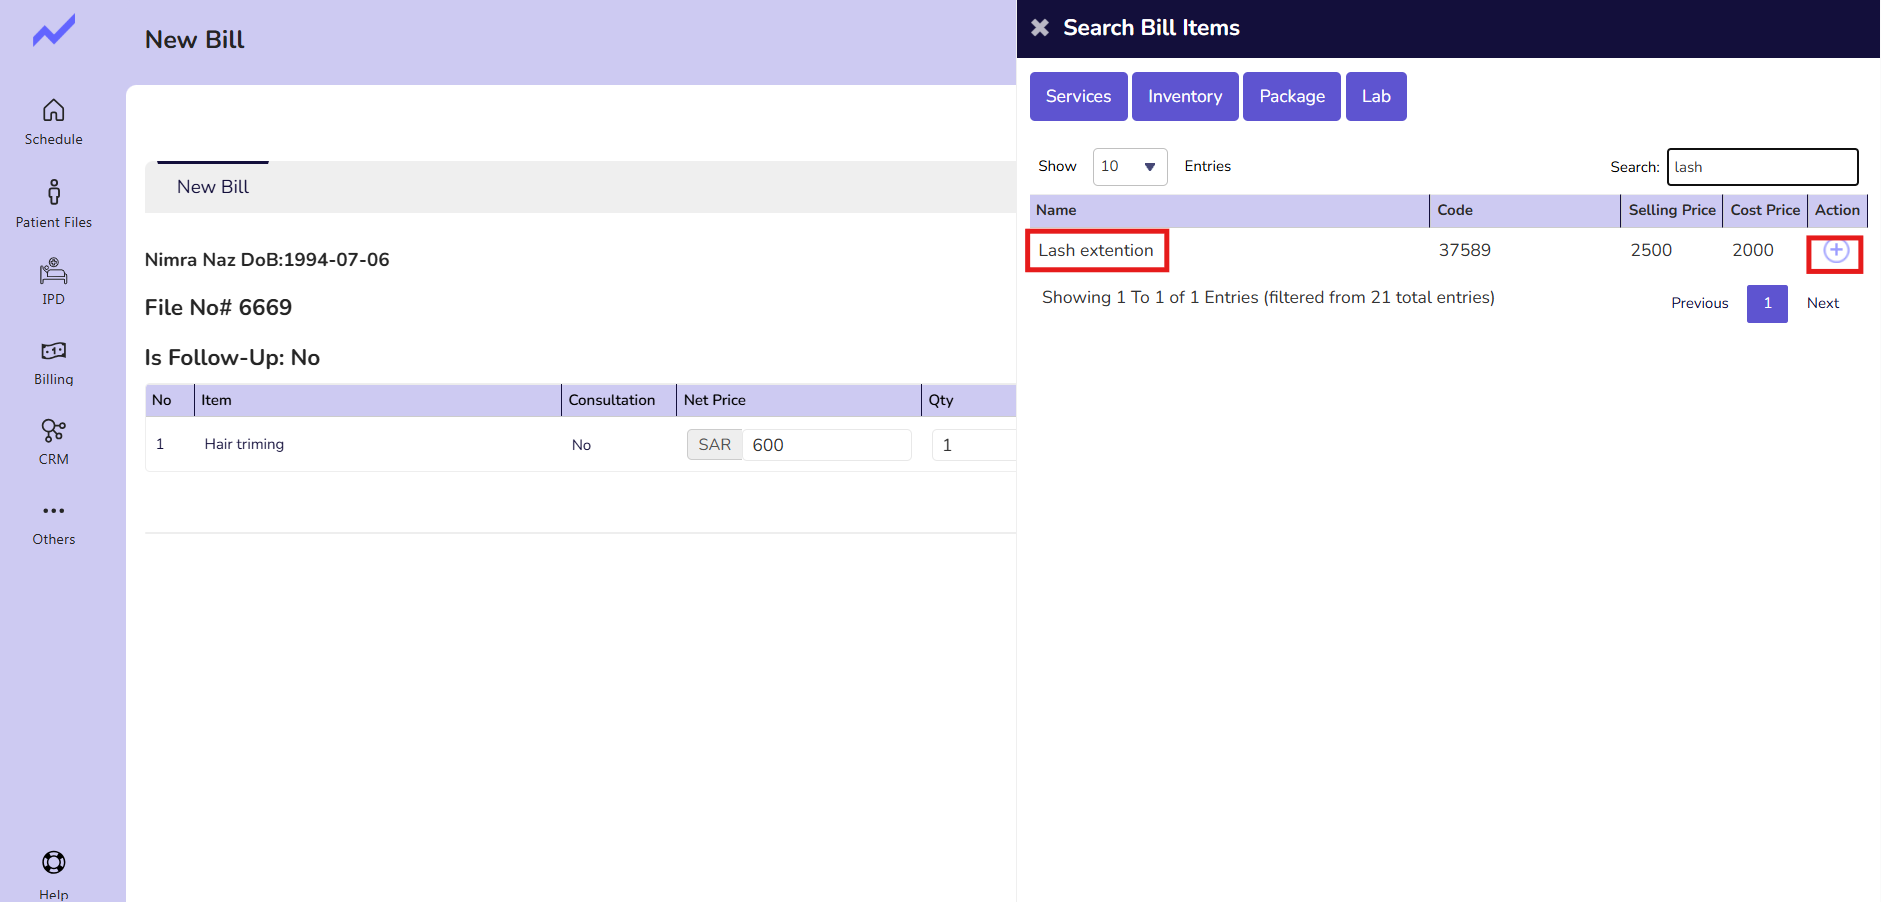
The lab will be added successfully.

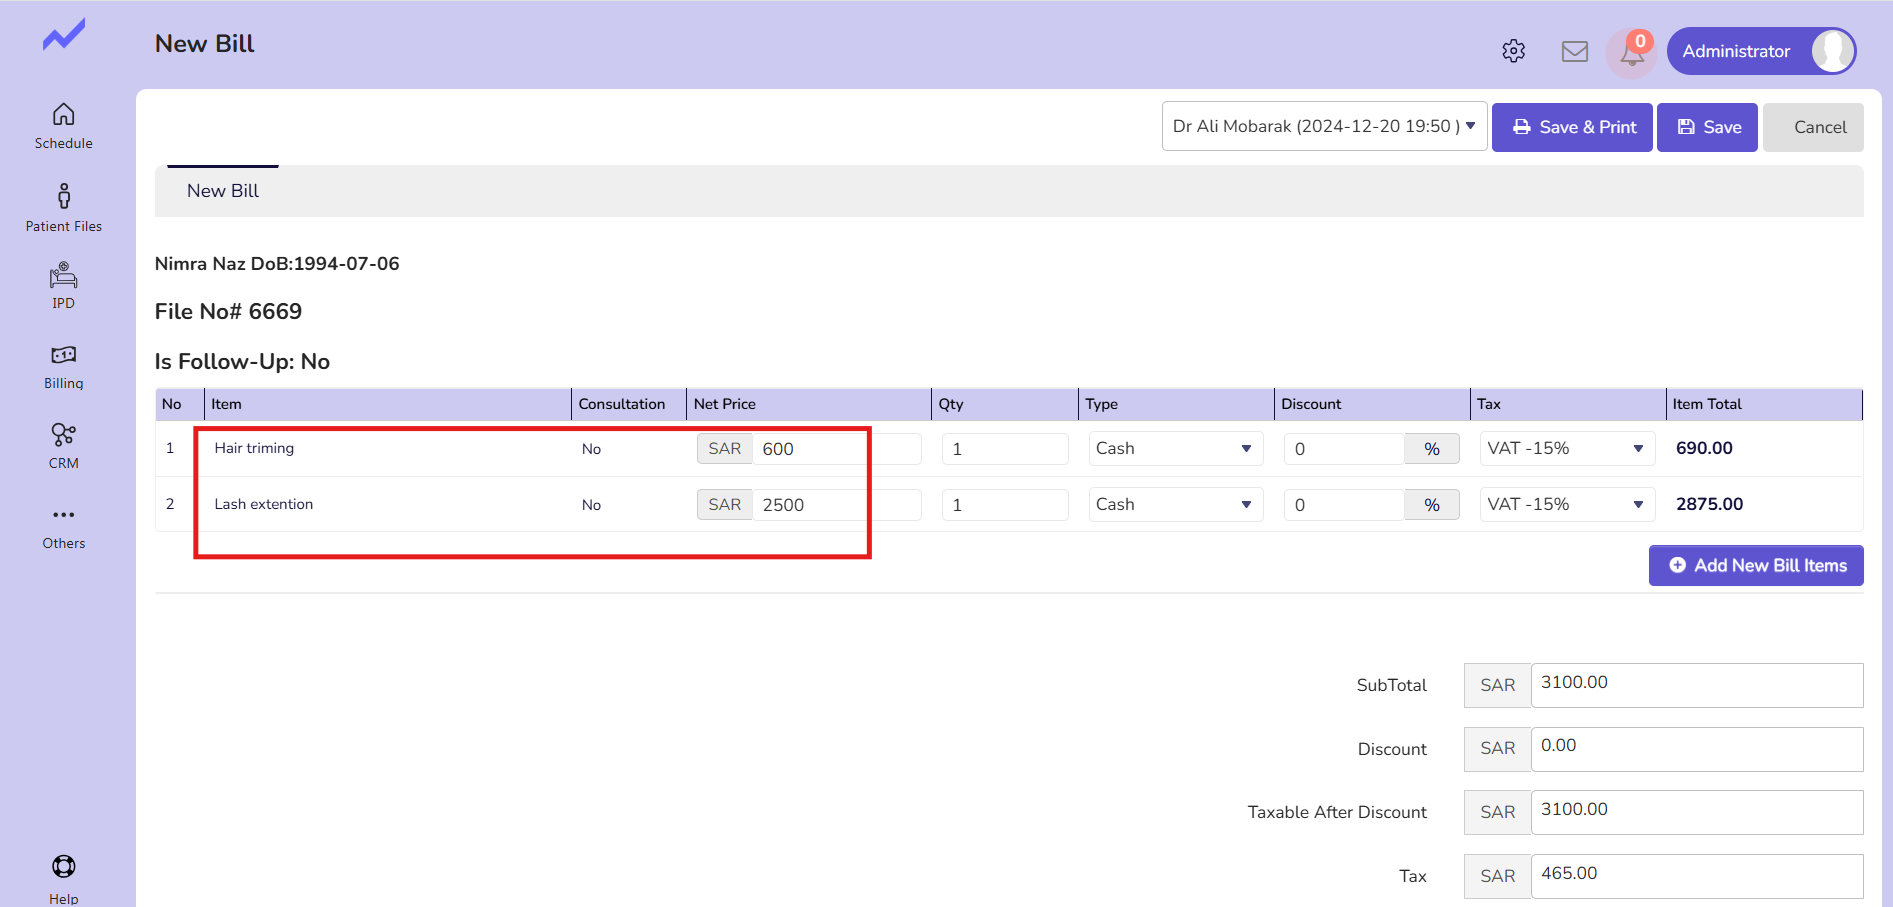
As you can see, both the Lab and Service are added here, and their offer prices are displayed next to them.
Generate Invoice (To verify Offer Price) #
As the offer price is showing against the bill items means the offer price is working accurately for this screen
Service——-> Hair Triming—-> actual price == 800 offer price == 600
Lab ———–> Lash Extension-> actual price == 2000 offer price == 2500
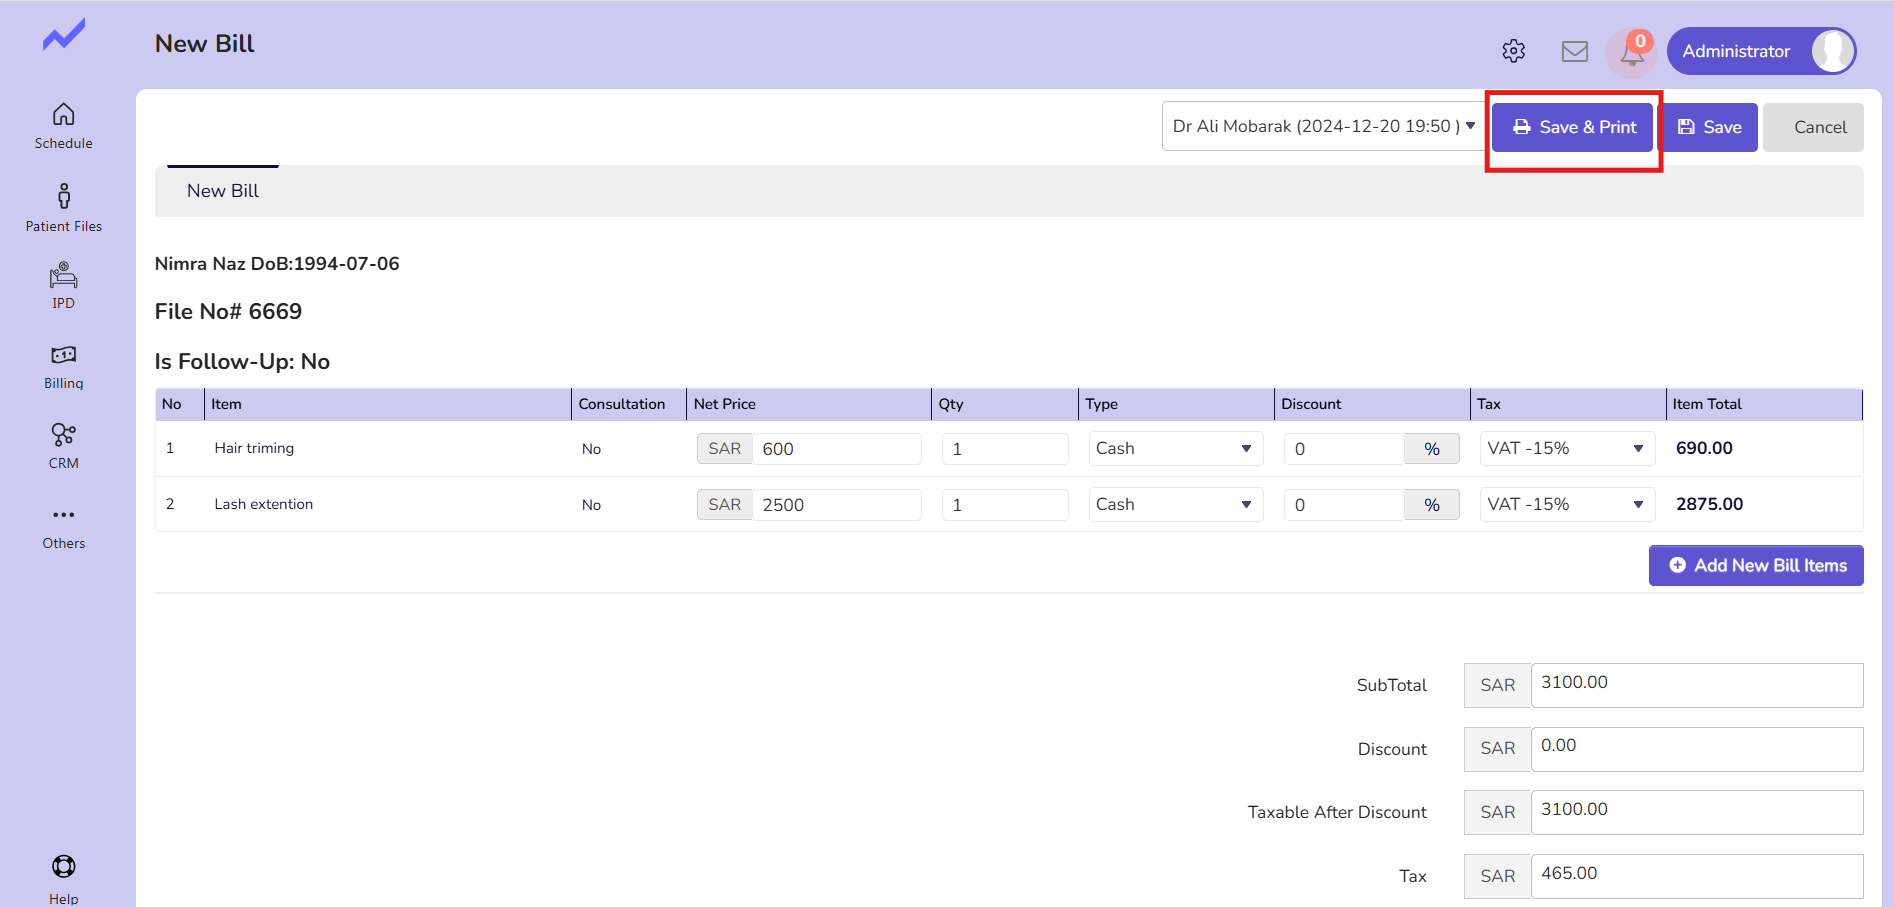
Now you can generate the invoice by clicking on the Save and Print Button.
This is How the Offer price feature for staff works in Cloudpital.


